ZenaMakeup Presents: Operation Brow-tiful! Your 3-in-1 Brow Kit Guide to World Domination (One Brow at a Time!) 🚀
Hello, Brow Bosses and Brow Beginners! 👋 Welcome to ZenaMakeup’s official guide to mastering the art of the perfect brow. I’m [Your Name], your friendly neighborhood Product Manager at ZenaMakeup, and I’m thrilled to introduce you to our game-changing 3-in-1 Brow Kit: Stencil, Powder, and Waterproof Confidence for Your Brows!
Forget everything you thought you knew about brow struggles. We’re about to embark on a journey to brow perfection, armed with wit, wisdom, and a kit that’s simpler than making toast (and arguably more rewarding!).
Why This Kit, You Ask? Because Life’s Too Short for Bad Brows! 🙅♀️
Seriously, think about it. Your brows frame your face, express your emotions, and basically whisper (or shout!) "I woke up like this…flawless!" Even if you didn’t. Our 3-in-1 Brow Kit is designed to take you from "brow-less wonder" to "brow-tiful sensation" in minutes, regardless of your experience level.
What We’ll Cover Today (Get Ready to Take Notes! 📝):
- Section 1: The Brow Basics – Understanding Your Brow-tiful Canvas. (We’ll talk shapes, sizes, and why your brows are as unique as you are!)
- Section 2: Meet the Dream Team – Unboxing the 3-in-1 Brow Kit. (A detailed look at each component and its superpowers.)
- Section 3: Stencil Sensations – Your Guide to Effortless Brow Shaping. (No more guessing! We’ll show you how to use our stencils like a pro.)
- Section 4: Powder Power – Achieving Natural-Looking Definition. (Say goodbye to harsh lines and hello to soft, sculpted brows.)
- Section 5: Waterproof Warrior – Locking in Your Look for All-Day Confidence. (Rain, sweat, tears of joy – your brows will stay put!)
- Section 6: Troubleshooting & Tips – Common Brow Blunders and How to Avoid Them. (Because we’ve all been there, and we’re here to help!)
- Section 7: Beyond the Basics – Level Up Your Brow Game! (Advanced techniques for the true brow aficionados.)
- Section 8: Q&A – Your Brow Questions Answered! (Let’s tackle those burning brow concerns together!)
Let’s get this brow party started! 🎉
Section 1: The Brow Basics – Understanding Your Brow-tiful Canvas 🖼️
Think of your brows as the curtains to the windows of your soul. Dramatic, right? But true! Before we dive into the kit, let’s understand what makes your brows, your brows.
Key Brow Anatomy 101:
- Head (Inner Corner): The start of your brow, closest to your nose. This should align with the inner corner of your eye. (Use a makeup brush held vertically against the side of your nose to find the perfect starting point.)
- Arch: The highest point of your brow. This is what gives your face lift and definition. (To find your arch, hold a brush diagonally from the corner of your nose through the center of your eye. Where the brush intersects your brow is where your arch should be.)
- Tail (Outer Corner): The end of your brow, extending towards your temple. This should end on a diagonal line from the corner of your nose to the outer corner of your eye.
Why is Brow Shape Important? 🤔
Different brow shapes complement different face shapes. Here’s a quick cheat sheet:
| Face Shape | Recommended Brow Shape |
|---|---|
| Round | High-arched brows to add lift and definition, making the face appear longer. |
| Square | Softer, curved brows to soften the angular features. |
| Oval | Versatile! Most brow shapes work well, but a soft, angled brow is a classic choice. |
| Heart | Rounded, softer brows to balance a wider forehead. |
| Long/Oblong | Flat, horizontal brows to make the face appear shorter. |
But Wait, There’s More! Considerations Beyond Face Shape:
- Natural Brow Hair: Consider the natural thickness, color, and growth pattern of your brow hair.
- Personal Preference: Ultimately, the best brow shape is the one that makes you feel confident and beautiful!
Takeaway: Understanding your brow anatomy and face shape is crucial for achieving brow perfection. Our stencils are designed to help you create shapes that flatter your unique features!
Section 2: Meet the Dream Team – Unboxing the 3-in-1 Brow Kit 🎁
Alright, let’s get into the good stuff! What exactly is hiding inside this magical brow box?
(Drumroll please!)
Our 3-in-1 Brow Kit contains:
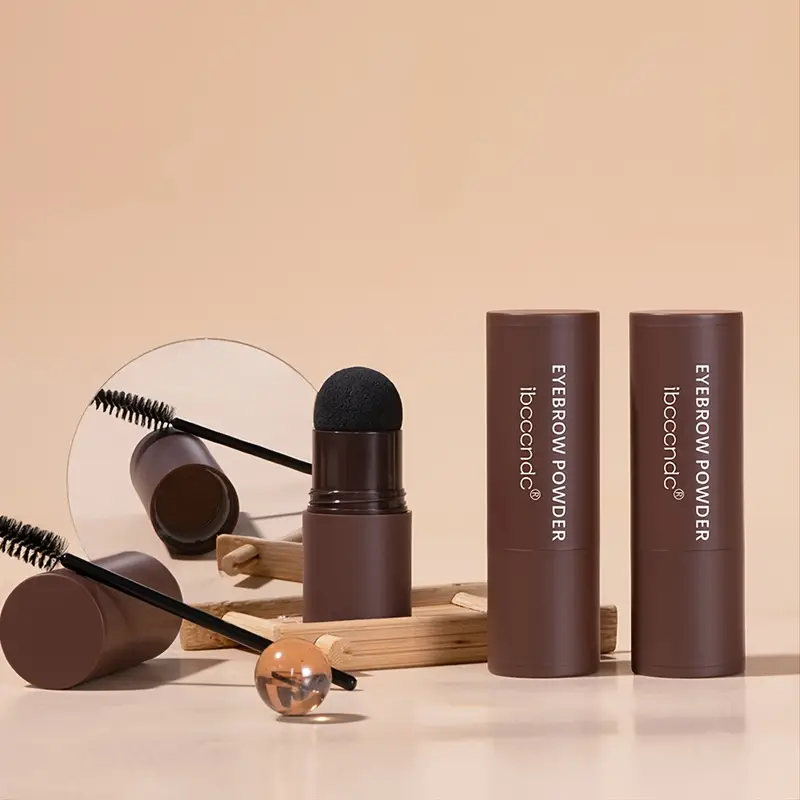
- Reusable Brow Stencils (Variety Pack): 🥳 A collection of stencils in various shapes and sizes, designed to suit different face shapes and brow preferences. These are made from flexible, easy-to-clean material.
- Long-Lasting Brow Powder (Multiple Shades Available): 🤎 A finely milled, buildable powder that fills in sparse areas and adds definition to your brows. Available in a range of shades to match different hair colors.
- Waterproof Brow Sealing Gel: 💧 A clear, lightweight gel that locks in your brow look for all-day wear. This formula is smudge-proof, sweat-proof, and tear-proof (perfect for those emotional movie nights!).
Let’s break down each component:
| Component | Description | Superpower | Benefits |
|---|---|---|---|
| Brow Stencils | Flexible, reusable stencils in various shapes (arched, straight, rounded, etc.) | Provides a foolproof guide for creating symmetrical and flattering brow shapes. | Saves time and effort, eliminates guesswork, ensures consistent results, perfect for beginners. |
| Brow Powder | Finely milled powder in a range of natural-looking shades. | Fills in sparse areas, adds definition, and creates a soft, natural look. | Buildable coverage, blendable formula, long-lasting color, suitable for all skin types. |
| Waterproof Sealing Gel | Clear, lightweight gel formula. | Seals in brow color, prevents smudging and fading, and provides all-day hold. | Extends the wear of your brow makeup, keeps brows in place, waterproof and sweatproof, adds a subtle sheen. |
Key Features of ZenaMakeup’s 3-in-1 Brow Kit:
- Beginner-Friendly: Easy to use, even if you’ve never touched your brows before.
- Customizable: Choose the stencil and powder shade that best suits your needs.
- Long-Lasting: Waterproof formula ensures your brows stay put all day.
- Affordable: Get professional-looking brows without breaking the bank.
- Cruelty-Free: We love animals! 🐾 Our products are never tested on animals.
Ready to unleash the power of this kit? Let’s move on to the stencil sensations!
Section 3: Stencil Sensations – Your Guide to Effortless Brow Shaping 📐
This is where the magic happens! Our stencils are your secret weapon to achieving perfectly shaped brows every time.
Step-by-Step Stencil Application:
- Choose Your Stencil: This is the most important step! Experiment with different shapes to see which one best complements your face shape and natural brow arch. Consider the factors we discussed in Section 1.
-
Align the Stencil: Hold the stencil against your brow, aligning it with the inner corner of your eye and following your natural brow line. The stencil should sit comfortably against your skin.
- Pro Tip: Use a magnifying mirror for precision!
- Secure the Stencil: Use your fingers to hold the stencil firmly in place. You can also use brow gel or a dab of concealer on the back of the stencil to stick it to your skin for extra stability.
- Fill in the Stencil: Using a small, angled brow brush, gently apply the brow powder within the stencil outline. Start with light, feathery strokes and build up the color gradually.
- Remove the Stencil: Carefully lift the stencil away from your brow.
- Repeat on the Other Brow: Repeat steps 2-5 on your other brow, ensuring that the stencils are aligned and symmetrical.
Troubleshooting Stencil Woes:
- Stencil Doesn’t Fit Properly: Try a different stencil shape or trim the stencil slightly to better fit your brow.
- Stencil Keeps Moving: Use brow gel or concealer to secure the stencil to your skin.
- Stencils Aren’t Symmetrical: Take your time and carefully align the stencils before filling in your brows. Use a ruler or brow mapping tool to ensure symmetry.
Stencil Selection Tips:
- For Beginners: Start with a stencil that closely resembles your natural brow shape.
- For Dramatic Brows: Choose a stencil with a higher arch.
- For Soft Brows: Opt for a stencil with a rounded shape.
Remember: Practice makes perfect! Don’t be discouraged if your brows aren’t perfect on your first try. Keep experimenting with different stencils and techniques until you find what works best for you.
Section 4: Powder Power – Achieving Natural-Looking Definition 🎨
Now that you’ve mastered the stencil, it’s time to unleash the power of the brow powder! This is where you add depth, dimension, and that coveted "I woke up like this" vibe.
Powder Application Techniques:
- Choose the Right Shade: Select a brow powder shade that closely matches your natural brow hair color. If you’re unsure, it’s always better to go slightly lighter than darker.
- Use the Right Brush: A small, angled brow brush is essential for precise application.
- Tap Off Excess Powder: Dip your brush into the powder and tap off any excess. This prevents the powder from clumping or looking too heavy.
- Start at the Arch: Begin filling in your brows at the arch, working outwards towards the tail. Use light, feathery strokes to mimic the natural growth pattern of your brow hairs.
- Blend, Blend, Blend: Use a spoolie brush to blend the powder and soften any harsh lines. This creates a more natural and seamless look.
- Fill in Sparse Areas: Focus on filling in any sparse areas or gaps in your brows.
- Lighten the Inner Corner: Use a lighter hand when applying powder to the inner corner of your brows. This creates a softer and more natural look.
Powder Application Tips & Tricks:
- Less is More: Start with a small amount of powder and build up the color gradually. It’s always easier to add more powder than to remove it.
- Follow Your Natural Brow Shape: Don’t try to completely reshape your brows with powder. Instead, focus on enhancing your natural shape.
- Use a Spoolie Brush Regularly: Brushing your brows with a spoolie brush throughout the day helps to blend the powder and keep your brows looking neat and tidy.
Common Powder Application Mistakes (and How to Fix Them!):
- Brows Look Too Harsh: Use a lighter hand when applying the powder and blend thoroughly with a spoolie brush.
- Brows Look Too Dark: Choose a lighter shade of brow powder or use a lighter hand when applying the powder.
- Brows Look Uneven: Take your time and carefully fill in each brow, paying attention to symmetry.
With a little practice, you’ll be a powder pro in no time!
Section 5: Waterproof Warrior – Locking in Your Look for All-Day Confidence 🛡️
Section 5: Waterproof Warrior – Locking in Your Look for All-Day Confidence 🛡️
You’ve shaped, you’ve filled, you’ve blended…now it’s time to seal the deal! Our Waterproof Brow Sealing Gel is the final step in achieving brow perfection that lasts all day long.
Why Waterproof Gel is a Must-Have:
- Long-Lasting Wear: Keeps your brow makeup in place for hours, even through sweat, humidity, and tears.
- Smudge-Proof Protection: Prevents your brow powder from smudging or fading.
- Sets Brow Hairs: Tames unruly brow hairs and keeps them in place.
- Adds a Subtle Sheen: Gives your brows a healthy and polished look.
Gel Application Techniques:
- Apply Sparingly: A little gel goes a long way! Start with a small amount of gel on the applicator brush.
- Brush Upwards: Brush the gel through your brows, using upward strokes to lift and separate the hairs.
- Shape and Define: Use the applicator brush to shape and define your brows.
- Allow to Dry: Allow the gel to dry completely before touching your brows.
Gel Application Tips & Tricks:
- Clean the Applicator Brush Regularly: This prevents the gel from clumping and ensures a smooth application.
- Avoid Over-Application: Too much gel can make your brows look stiff or unnatural.
- Use a Spoolie Brush for Even Distribution: After applying the gel, use a spoolie brush to distribute it evenly throughout your brows.
Common Gel Application Mistakes (and How to Fix Them!):
- Brows Look Stiff: Use a smaller amount of gel and blend thoroughly with a spoolie brush.
- Gel is Flaking: You may be using too much gel or the gel may be old. Try using a smaller amount of fresh gel.
- Brows Still Smudge: Make sure the gel is completely dry before touching your brows.
With our Waterproof Brow Sealing Gel, you can conquer the world with confidence, knowing your brows are on point!
Section 6: Troubleshooting & Tips – Common Brow Blunders and How to Avoid Them 🚑
Let’s face it, even the most experienced brow artists make mistakes. But don’t worry, we’re here to help you navigate the common brow blunders and emerge victorious!
Common Brow Blunders:
- Over-Plucking: Resist the urge to over-pluck your brows! Thin, sparse brows are difficult to fill in and can make you look older.
- Solution: Put down the tweezers! Let your brows grow out and consult with a professional brow artist for shaping.
- Drawing on Brows Too Dark: Dark, harsh brows can look unnatural and aging.
- Solution: Choose a brow powder shade that closely matches your natural brow hair color and use a light hand when applying the powder.
- Creating Brows That Are Too Close Together: Brows that are too close together can make your nose look wider.
- Solution: Use a makeup brush held vertically against the side of your nose to find the perfect starting point for your brows.
- Ignoring Brow Symmetry: Uneven brows can throw off your entire look.
- Solution: Take your time and carefully align the stencils before filling in your brows. Use a ruler or brow mapping tool to ensure symmetry.
- Using the Wrong Brow Products: Using the wrong brow products can lead to a variety of problems, from smudging to unnatural-looking brows.
- Solution: Choose high-quality brow products that are specifically designed for your brow type and color. Our 3-in-1 Brow Kit is a great place to start!
General Brow Tips for Success:
- Invest in Good Lighting: Good lighting is essential for accurate brow shaping and filling.
- Use a Magnifying Mirror: A magnifying mirror can help you see fine details and avoid over-plucking.
- Clean Your Brow Tools Regularly: Cleaning your brow tools regularly prevents the buildup of bacteria and ensures a smooth application.
- Don’t Be Afraid to Experiment: Experiment with different brow shapes and products until you find what works best for you.
- Consult with a Professional: If you’re struggling to achieve your desired brow look, consider consulting with a professional brow artist.
Remember, brow perfection takes time and practice. Be patient with yourself and don’t give up!
Section 7: Beyond the Basics – Level Up Your Brow Game! 🚀
So, you’ve mastered the basics and are ready to take your brow game to the next level? Let’s explore some advanced techniques!
- Brow Mapping: Brow mapping is a technique used to determine the ideal shape and placement of your brows based on your facial features. This involves using a ruler or brow mapping tool to measure key points on your face and create a customized brow shape.
- Ombré Brows: Ombré brows involve creating a gradient effect, with the inner corner of the brow being lighter and the tail being darker. This creates a more natural and dimensional look.
- Brow Lamination: Brow lamination is a semi-permanent treatment that straightens and lifts your brow hairs, creating a fuller and more defined look. This is a great option for those with unruly or sparse brows.
- Microblading/Microshading: Microblading and microshading are semi-permanent tattooing techniques that create the illusion of fuller brows. These techniques involve using a fine blade or needle to deposit pigment into the skin.
- Brow Highlighting: Use a highlighter or concealer to highlight the brow bone and create a lifted and defined look. Apply the highlighter just below the brow arch and blend well.
These advanced techniques can help you achieve even more dramatic and customized brow looks. However, they require skill and practice, so it’s important to do your research and consult with a professional before attempting them.
Section 8: Q&A – Your Brow Questions Answered! 🙋♀️
Alright, Brow Bosses, it’s time for the burning question round! I’m here to address your brow concerns and help you achieve your ultimate brow goals.
(Please note: I’ll answer some general questions here, but for personalized advice, please consult with a professional brow artist.)
Q: My brows are naturally very sparse. Can your kit help me?
A: Absolutely! Our kit is specifically designed to help fill in sparse areas and create the illusion of fuller brows. The stencils will guide you in creating the desired shape, and the brow powder will add depth and definition.
Q: I have oily skin. Will the brow powder smudge?
A: Our brow powder is long-lasting and designed to resist smudging. However, for extra insurance, be sure to use the Waterproof Brow Sealing Gel to lock in your look. You can also use an oil-controlling primer on your brows before applying the powder.
Q: How do I choose the right stencil shape for my face?
A: Refer back to Section 1 for guidance on matching brow shapes to face shapes. Experiment with different stencils to see what looks best on you. Consider your natural brow shape and personal preferences.
Q: My brows are different shapes. How can I make them look symmetrical?
A: This is a common challenge! Our stencils are designed to help you create symmetrical brows. Take your time and carefully align the stencils before filling in your brows. Use a ruler or brow mapping tool to ensure symmetry.
Q: Can I use the brow powder on my eyebrows if I have permanent makeup (microblading)?
A: Yes, you can! Our brow powder can be used to add definition and fill in any gaps in your microbladed brows. Just be sure to choose a shade that matches your existing microblading color.
Q: How often should I pluck my eyebrows?
A: This depends on how quickly your brow hairs grow. As a general rule, pluck only stray hairs that fall outside of your desired brow shape. Avoid over-plucking!
Q: Where can I buy ZenaMakeup’s 3-in-1 Brow Kit?
A: Our 3-in-1 Brow Kit is available online at [Your Website Here] and at select retailers.
Thank you for joining me on this brow-tiful journey! I hope this guide has helped you understand the power of our 3-in-1 Brow Kit and given you the confidence to create the brows of your dreams. Remember, brows are an expression of your unique beauty, so embrace them and have fun experimenting!
Now go forth and conquer the world, one brow at a time! 😉
For detailed product specifications and purchases, please go to :https://zenamakeup.com/products/brow-stamp-kit-waterproof-3-in-1-stencil-powder
Leave a Reply