ZenaMakeup Presents: Brow Bonanza! Mastering the 3-in-1 Waterproof Brow Kit – Your Guide to Brow Perfection! 🏆
(A Lecture in Three Parts – Prepare to be Enlightened!)
Hello, Brow Bosses (and Brow Bosses-in-Training)! 👋 Welcome, welcome, to ZenaMakeup’s Brow Bonanza! I’m your guide, your guru, your brow bestie (okay, maybe I’m getting carried away 😅), and I’m here to unveil our revolutionary 3-in-1 Waterproof Brow Kit: Stencil, Powder, and All-Day Wearability!
Forget those days of uneven arches, sparse patches, and brows that disappear faster than free samples at a food fair. This kit is your secret weapon to effortlessly sculpted, perfectly defined, and dare I say flawless brows that last all day, no matter what life throws at you (rain, sweat, tears of joy from finally mastering the perfect wing… we’ve all been there!).
Ready to ditch the brow struggle and embrace brow brilliance? Let’s dive in!
Part 1: The Anatomy of a Brow-tiful Kit: What’s Inside and Why It Matters
Think of this kit as your complete brow makeover in a compact little package. We’ve carefully curated each element to work in harmony, ensuring even the most brow-challenged individual can achieve professional-looking results. So, let’s break it down:
-
The Stencils: Your Brow Blueprint 📐
- Forget freehand frustration! Our kit comes with a selection of carefully crafted stencils designed to suit a variety of face shapes and brow styles.
- Why Stencils?
- Symmetry is Key: Ensures perfectly symmetrical brows, eliminating the dreaded "uneven brow syndrome."
- Shape Shifter: Allows you to experiment with different brow shapes without the commitment. Want a bold, arched brow for a night out? A soft, natural brow for everyday wear? The stencils have you covered!
- Beginner-Friendly: Perfect for those new to brow shaping, providing a foolproof guide for achieving professional-looking results.
- Stencil Variety: We offer a range of shapes:
- Arched: For a dramatic, defined look.
- Straight: For a modern, youthful appearance.
- Rounded: For a soft, natural feel.
- Angled: For a bold, powerful statement.
- Full: For a thick, luscious brow.
- Material: Made from flexible, durable plastic that conforms comfortably to the brow bone. Easy to clean and reuse!
- How to Choose the Right Stencil: We’ll get to this in Part 2! Stay tuned! 😉
Stencil Type Brow Shape Ideal For Look & Feel Arched High Arch Oval, Round Faces Defined, Dramatic Straight Straight Long, Heart Faces Modern, Youthful Rounded Softly Curved Square Faces Soft, Natural Angled Angled Diamond, Oblong Faces Bold, Powerful Full Thick All Face Shapes Lush, Full -
The Powder: Pigment Perfection 🎨
- Our highly pigmented brow powder is the heart and soul of this kit. Formulated with a blend of finely milled pigments, it delivers rich, buildable color that fills in sparse areas and defines the brow shape.
- Why Powder?
- Natural Look: Creates a soft, natural finish that mimics the look of real brow hairs.
- Buildable Coverage: Allows you to customize the intensity of your brows, from subtle definition to bold drama.
- Blendable Formula: Effortlessly blends into the brow hairs and skin for a seamless, natural look.
- Waterproof & Smudge-Proof: This is where the magic happens! Our formula is designed to withstand water, sweat, and smudging, ensuring your brows stay put all day long. ☔️💪
- Shade Range: We offer a range of shades to match a variety of hair colors:
- Light Brown: For blondes and light brunettes.
- Medium Brown: For medium brunettes.
- Dark Brown: For dark brunettes and black hair.
- Ash Brown: For cool-toned brunettes.
- Black: For black hair (use sparingly!).
- Key Ingredients: Enriched with Vitamin E to nourish and protect the brow hairs.
-
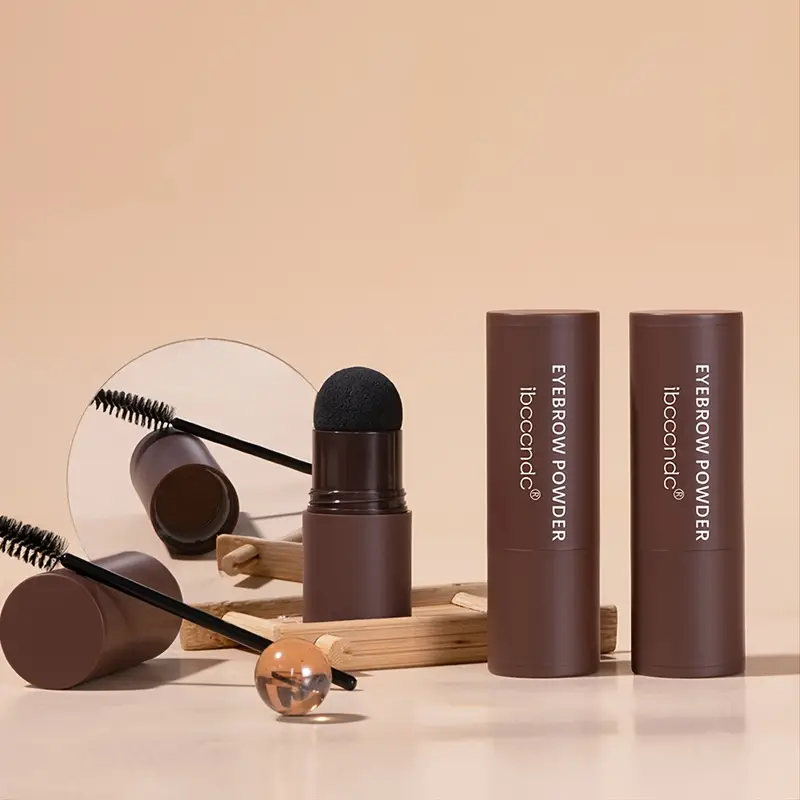
The Applicator: Your Brow Brush BFF 🖌️
- A high-quality applicator is crucial for achieving flawless brows. Our kit includes a dual-ended applicator with:
- Angled Brush: For precise application of the brow powder. The angled shape allows you to easily fill in the brows and create defined lines.
- Spoolie Brush: For blending the powder and grooming the brow hairs. The spoolie brush helps to soften harsh lines and create a natural, feathered look.
- Why This Applicator?
- Precision Application: The angled brush allows for precise control, ensuring you can create the exact brow shape you desire.
- Seamless Blending: The spoolie brush blends the powder seamlessly into the brow hairs, creating a natural, polished look.
- High-Quality Bristles: Made from synthetic fibers that are gentle on the skin and easy to clean.
- A high-quality applicator is crucial for achieving flawless brows. Our kit includes a dual-ended applicator with:
Part 2: Brow Transformation 101: The Step-by-Step Guide to Brow Perfection
Alright, Brow Bosses! You know the players, now let’s learn the game! Here’s a detailed, step-by-step guide to using our 3-in-1 Waterproof Brow Kit to achieve brow perfection:
Step 1: Prep Your Brows (The Foundation for Flawless)
- Cleanse: Start with clean, dry brows. Remove any makeup or skincare products that may interfere with the powder application.
- Groom: Use the spoolie brush to brush your brow hairs upwards and outwards, revealing their natural shape and any sparse areas. Trim any excessively long hairs with brow scissors. (Be careful! We’re going for brow perfection, not brow disaster!)
Step 2: Stencil Selection (Finding Your Brow Soulmate)
- Face Shape Matters: Consider your face shape when choosing a stencil.
- Oval Face: Lucky you! You can rock almost any brow shape. Experiment and find what you love.
- Round Face: Opt for arched brows to add definition and lift to your face.
- Square Face: Choose softly curved or rounded brows to soften your features.
- Long Face: Go for straight or slightly angled brows to make your face appear shorter.
- Heart Face: Try rounded or angled brows to balance your features.
- Brow Hair Growth: Consider the natural shape and direction of your brow hair growth. Choose a stencil that complements your natural brow shape.
- Trial and Error: Don’t be afraid to experiment with different stencils until you find the perfect fit! Hold each stencil up to your brow and see how it looks in the mirror.
Step 3: Stencil Application (The Brow Blueprint)
- Placement is Key: Align the stencil with your natural brow bone, ensuring the inner edge of the stencil lines up with the inner corner of your eye.
- Secure the Stencil: Hold the stencil firmly in place with one hand. You can also use a small piece of tape to secure it for extra stability.
Step 4: Powder Application (Filling in the Blanks)
- Dip and Tap: Dip the angled brush into the brow powder and tap off any excess. This prevents the powder from looking too heavy or cakey.
- Fill in the Stencil: Use light, feathery strokes to fill in the stencil, starting from the inner corner of your brow and working outwards. Focus on filling in any sparse areas.
- Build the Intensity: For a bolder look, apply a second layer of powder. Remember to blend well!
Step 5: Stencil Removal (The Big Reveal!)
- Gently Remove: Carefully peel the stencil away from your brow.
- Assess and Refine: Take a step back and assess your brow shape. Are there any areas that need to be touched up?
Step 6: Blending and Grooming (The Finishing Touches)
- Blend, Blend, Blend!: Use the spoolie brush to blend the powder into your brow hairs, softening any harsh lines and creating a natural, feathered look. Brush upwards and outwards, following the natural direction of your brow hair growth.
- Highlight (Optional): Apply a touch of highlighter just below your brow bone to further define your brows and create a lifted effect.
- Setting Gel (Optional): For extra hold and definition, apply a clear brow gel to keep your brows in place all day long.
Step 7: Repeat on the Other Brow (The Symmetry Challenge!)
- Repeat steps 3-6 on your other brow.
- Mirror, Mirror: Take a step back and look at your brows in the mirror. Are they symmetrical? Do they need any further adjustments? Don’t be afraid to make small tweaks until you’re happy with the results.
Troubleshooting Tips:
- Too Dark? Use a clean spoolie brush to blend out the powder and soften the color.
- Uneven Brows? Use a cotton swab dipped in makeup remover to clean up any mistakes and even out the shape.
- Sparse Areas? Focus on filling in these areas with light, feathery strokes. You can also use a brow pencil to create individual hair-like strokes.
- Struggling with Symmetry? Practice makes perfect! Don’t be discouraged if your brows aren’t perfectly symmetrical at first. Keep practicing and you’ll get there!
Part 3: Beyond the Basics: Pro Tips for Brow Perfection and Maintaining All-Day Wearability
Now that you’ve mastered the basics, let’s take your brow game to the next level with these pro tips:
-
Choosing the Right Shade:
- The Golden Rule: Choose a shade that’s slightly lighter than your natural brow hair color. This will create a more natural and flattering look.
- Consider Your Undertones: If you have cool undertones, opt for an ash brown or cool-toned brown shade. If you have warm undertones, choose a warm brown or auburn shade.
- Don’t Be Afraid to Mix: You can mix two different shades of brow powder to create a custom color that perfectly matches your brow hair.
-
Mastering the Art of the Fade:
- Lighter at the Inner Corner: The inner corner of your brow should be the lightest part. This creates a soft, natural look.
- Darker at the Arch: The arch of your brow should be the darkest and most defined part. This creates a lifted and sculpted look.
- Gradual Transition: Blend the powder seamlessly from the inner corner to the arch, creating a gradual transition in color.
-
Maintaining All-Day Wearability:
- Primer is Your Friend: Apply a brow primer before applying the brow powder. This will help to create a smooth base and enhance the longevity of your brows.
- Setting Spray is Key: Set your brows with a waterproof setting spray to lock in the powder and prevent smudging.
- Avoid Touching Your Brows: Resist the urge to touch your brows throughout the day. This can transfer oils and cause the powder to fade.
-
Extending the Life of Your Kit:
- Clean Your Applicator: Clean your angled brush and spoolie brush regularly with a gentle soap and water. This will prevent the buildup of product and bacteria.
- Store Properly: Store your brow kit in a cool, dry place. Avoid storing it in direct sunlight or in a humid environment.
- Replace Regularly: Replace your brow powder and applicator every 6-12 months to ensure optimal performance.
-
Brow trends: Adapting to the Times
- Microblading Look: Use a very fine angled brush and the powder to create hair-like strokes for a microbladed effect.
- Soap Brows: Use a clear soap or brow wax before applying the powder to create a fluffy, lifted brow look.
Advanced Techniques Table:
| Technique | Description | Benefits | Tools Needed |
|---|---|---|---|
| Microblading Simulation | Creating fine, hair-like strokes with the powder. | More natural look, fills in gaps seamlessly. | Ultra-fine angled brush. |
| Ombre Brows | Fading the color from light to dark for a gradient effect. | Soft, blended look; adds dimension. | Two shades of brow powder, blending brush. |
| Soap Brows with Powder | Using soap or wax to lift and set brows before powder application. | Fluffy, textured brows that stay in place. | Soap or brow wax, spoolie brush, powder kit. |
-
Emergency Situations Situation Solution Tips Smudged Brow Use a makeup wipe, cotton swab, concealer Gently dab the smudged area, use concealer to refine the shape. Faded Brow Reapply a small amount of brow powder Pat the powder onto the faded area, blend gently with a spoolie. Overdrawn Brow Use a spoolie to brush out excess powder. If needed, use a makeup wipe to correct the shape and then reapply.
Conclusion: Your Brow-tiful Future Awaits!
Congratulations, Brow Bosses! You’ve officially graduated from ZenaMakeup’s Brow Bonanza! 🎉 You now possess the knowledge and the tools to create perfectly sculpted, defined, and waterproof brows that will turn heads wherever you go.
Remember, brow perfection is a journey, not a destination. Don’t be afraid to experiment, practice, and have fun! And most importantly, remember that your brows are a reflection of your unique personality and style. So, embrace your individuality and rock those brows with confidence! 💖
Now go forth and conquer the world, one brow at a time! And don’t forget to tag us in your amazing brow transformations using #ZenaMakeupBrows! We can’t wait to see your brow magic! ✨
For detailed product specifications and purchases, please go to :https://zenamakeup.com/products/brow-stamp-kit-waterproof-3-in-1-stencil-powder
Leave a Reply