Lecture: Decoding the Shimmerverse: The Ultimate Guide to Glittering Highlighting & Setting Powder Application
( Sound of a dramatic fanfare plays, followed by uproarious applause )
Alright, alright, settle down beauty enthusiasts! Welcome, welcome, one and all, to Decoding the Shimmerverse! I am your guide, your guru, your… glitter whisperer, if you will. Today, we delve into the sparkly, sensational world of Glittering Shimmer Highlighting & Setting Powder. Forget your troubles, shed your mundane, and prepare to be enlightened!
( ✨ A shimmering graphic of a makeup brush pops up on the screen )
We’re not just talking about slapping on some glitter and hoping for the best here. Oh no, my friends! We’re talking about strategic shimmer placement. We’re talking about transforming from blah to BAM! We’re talking about achieving a glow so radiant, it could power a small city!
So, grab your notebooks, your favorite beverage (mine’s a glitter-infused martini, naturally), and let’s get started!
I. Understanding the Glittering Galaxy: Powder Types & Their Personalities
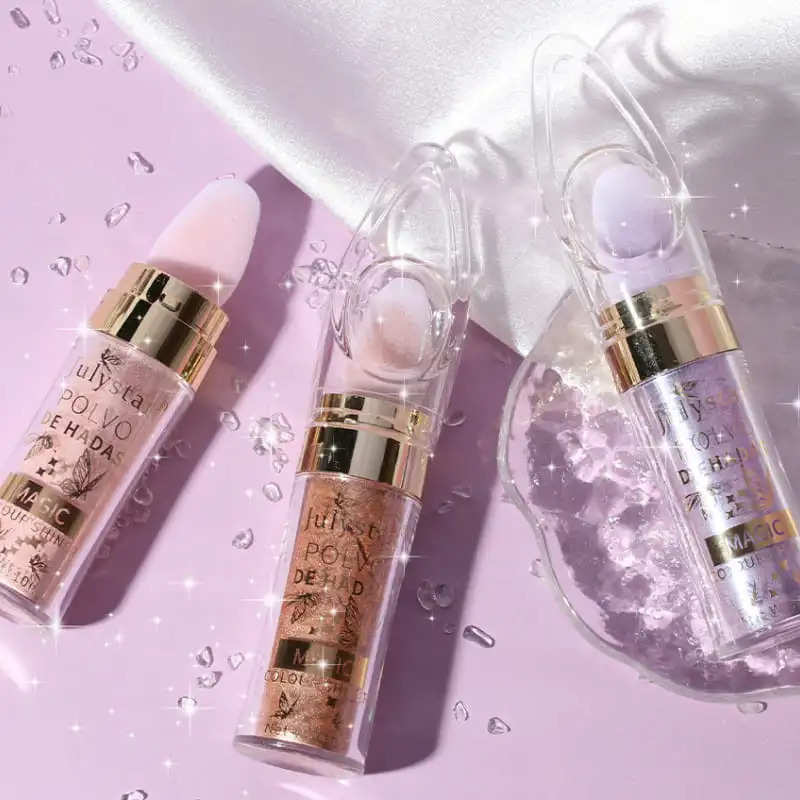
First, let’s lay the groundwork. Not all glittering powders are created equal. Imagine them as stars in the sky – each shines with its own unique luminosity and character. Knowing your powder is crucial to choosing the right application tool.
| Powder Type | Texture | Shimmer Intensity | Best For | Potential Pitfalls |
|---|---|---|---|---|
| Fine Milled Shimmer | Silky, smooth | Subtle, diffused | Everyday glow, subtle highlight, setting | Can disappear easily if not layered carefully. |
| Pressed Glitter Powder | Denser, compacted | Moderate to Intense | Bold highlight, eyeshadow, body shimmer | Can be chunky, prone to fallout if not applied right. |
| Loose Glitter Pigment | Loose, highly pigmented | Extreme, blinding | Special occasions, dramatic looks | Major fallout potential, requires a sticky base. |
| Hybrid (Shimmer/Setting) | Lightweight, blurring | Soft, blurring | Setting makeup, adding a subtle sheen | May not provide enough highlight for some. |
( 😂 An image of a clown with poorly applied glitter appears briefly, then disappears with a "poof!" )
We don’t want to end up looking like that, do we? No! Understanding your powder’s personality is the first step to avoiding a glitter-induced disaster.
II. The Arsenal of Application: Meet the Brush Brigade!
Now for the juicy part: the tools! Think of your brushes as your artistic accomplices. Each brush has a specific purpose, a secret weapon in your quest for radiant perfection.
Here’s a rundown of the key players:
-
A. The Fan Brush (The Whisperer):
( 🌬️ Icon of a gentle breeze )- Description: A wide, flat brush with sparse bristles.
- Best For: Applying a very light dusting of shimmer for a subtle, ethereal glow. Think "barely there" highlight. Perfect for a natural, daytime look.
- Technique: Lightly dip the brush into the powder, tap off the excess, and gently sweep across the high points of your face. Remember, less is more!
- Humorous Analogy: Like a delicate fairy spreading stardust. Don’t be too heavy-handed, or you’ll end up looking like a disco ball!
-
B. The Tapered Highlighting Brush (The Sculptor):
( 📐 Icon of a chisel )- Description: A fluffy, tapered brush with a pointed tip.
- Best For: Precise application of shimmer to specific areas, such as the cheekbones, bridge of the nose, and cupid’s bow. Allows for controlled placement and buildable intensity.
- Technique: Dip the tip of the brush into the powder, tap off the excess, and apply to the desired areas. Use a light hand and blend well for a seamless finish.
- Humorous Analogy: Like a master sculptor chiseling out the perfect highlight. Channel your inner Michelangelo!
-
C. The Small Eyeshadow Brush (The Detail Artist):
( 🖌️ Icon of a tiny paintbrush )- Description: A small, dense brush, either flat or rounded.
- Best For: Applying shimmer to the inner corners of the eyes, brow bone, or any small, specific area. Great for adding a pop of brightness.
- Technique: Gently press the brush into the powder and tap off the excess. Apply to the desired area using short, tapping motions.
- Humorous Analogy: Like a miniature painter adding the finishing touches to a masterpiece. Pay attention to the details!
-
D. The Fluffy Blending Brush (The Softener):
( ☁️ Icon of a cloud )- Description: A large, fluffy brush with soft bristles.
- Best For: Blending out harsh lines and creating a seamless, diffused glow. Essential for a natural-looking highlight.
- Technique: Use the brush in circular motions to blend the edges of your highlight into your skin. This will create a soft, airbrushed effect.
- Humorous Analogy: Like a fluffy cloud smoothing out the edges of a vibrant rainbow. No harsh lines allowed!
-
E. The Damp Sponge (The Intensifier):
( 💧 Icon of a water droplet )- Description: A makeup sponge, dampened with water or setting spray.
- Best For: Intense, high-impact shimmer application. Dampening the sponge helps to grip the powder and deposit more pigment.
- Technique: Lightly dampen the sponge with water or setting spray. Dip the sponge into the powder and gently press onto the desired areas. Avoid dragging the sponge, as this can cause streaks.
- Humorous Analogy: Like a thirsty sponge soaking up all the shimmer and delivering it directly to your face. Prepare for maximum glow!
-
F. The Finger (The OG):
( ☝️ Icon of a pointing finger )- Description: Your very own finger!
- Best For: Precision application, especially for inner corner highlight or dabbing glitter onto the eyelids. The warmth of your finger can help the shimmer adhere to the skin.
- Technique: Gently press your fingertip into the powder and tap onto the desired area. Be mindful of hygiene and wash your hands thoroughly before and after.
- Humorous Analogy: The original makeup applicator! Sometimes, simple is best.
( 🎨 A digital painting of various makeup brushes springs to life, dancing to a funky beat )
III. Techniques of the Trade: Mastering the Shimmer Shuffle
Now that we’ve met the brush brigade, let’s learn how to wield them like a pro! Remember, practice makes perfect. Don’t be afraid to experiment and find what works best for you.
-
A. The "Tap & Swirl" Method:
- Description: The classic technique for picking up powder.
- Steps: Gently dip your brush into the powder. Tap off any excess powder on the side of the container. Swirl the brush in the powder to ensure even distribution.
- Why it Works: Prevents overloading the brush and minimizes fallout.
-
B. The "Layering" Technique:
- Description: Building up the intensity of your highlight gradually.
- Steps: Apply a light layer of shimmer with a fan brush or tapered highlighting brush. Blend well. Apply another layer if desired, focusing on the high points of your face.
- Why it Works: Allows for controlled application and prevents over-shimmering.
-
C. The "Halo" Technique:
- Description: Creating a soft, diffused glow around the perimeter of your face.
- Steps: Use a large, fluffy brush to apply a light dusting of shimmer to the temples, forehead, and jawline. Blend well for a seamless finish.
- Why it Works: Adds dimension and radiance to the face without looking overly highlighted.
-
D. The "Spotlight" Technique:
- Description: Focusing the shimmer on the highest points of your face.
- Steps: Use a tapered highlighting brush to apply shimmer to the cheekbones, bridge of the nose, and cupid’s bow. Blend well for a seamless finish.
- Why it Works: Creates a sculpted, defined look.
-
E. The "Baking" Technique (Use with Caution!):
- Description: Applying a thick layer of setting powder under the eyes to brighten and set your makeup.
- Steps: Apply a generous amount of setting powder under the eyes using a damp sponge. Let it "bake" for 5-10 minutes. Dust away the excess with a fluffy brush.
- Why it Works: Brightens the under-eye area and sets your makeup for long-lasting wear. However, use with caution! Can look cakey on dry skin or with heavy shimmer powders.
( 🎥 A short video plays, demonstrating each technique with close-up shots of the brushwork )
IV. Avoiding the Glitterati Faux Pas: Common Mistakes & How to Fix Them
Even the most seasoned shimmer enthusiasts can fall victim to common mistakes. Fear not! I’m here to guide you back to the path of luminous righteousness.
-
A. Over-Shimmering:
- Mistake: Applying too much shimmer, resulting in a blinding, unnatural look.
- Solution: Start with a light hand and build up the intensity gradually. Use a fan brush for a subtle glow. Blend, blend, blend!
- Humorous Analogy: Don’t try to outshine the sun!
-
B. Patchy Application:
- Mistake: Applying shimmer unevenly, resulting in a patchy, streaky finish.
- Solution: Use a high-quality brush with soft bristles. Blend the shimmer thoroughly into your skin.
- Humorous Analogy: Avoid looking like a cheetah with glitter spots!
-
C. Fallout Frenzy:
- Mistake: Loose glitter particles falling onto your face and clothes.
- Solution: Use a sticky base or setting spray to help the glitter adhere to your skin. Apply glitter before applying foundation.
- Humorous Analogy: Don’t let your glitter stage a rebellion and abandon ship!
-
D. Choosing the Wrong Shade:
- Mistake: Selecting a shimmer shade that doesn’t complement your skin tone.
- Solution: Choose a shimmer shade that is 1-2 shades lighter than your skin tone. Consider your undertones – warm, cool, or neutral.
- Humorous Analogy: Don’t try to wear a dress that doesn’t fit!
-
E. Forgetting to Blend:
- Mistake: Leaving harsh lines between your highlight and your skin.
- Solution: Use a fluffy blending brush to blend the edges of your highlight into your skin. Pay particular attention to the transition between your highlight and your blush.
- Humorous Analogy: Blend, blend, blend like your life depends on it! (Okay, maybe not that dramatically, but you get the point.)
( 🚨 A flashing graphic of a "No-No" symbol appears briefly, then disappears with a playful "Bloop!" )
V. Pro Tips & Tricks: Elevating Your Shimmer Game
Ready to take your shimmer skills to the next level? Here are some insider tips and tricks to help you achieve a truly radiant glow:
-
A. Setting Spray is Your Best Friend:
- Tip: Spritz your brush with setting spray before dipping it into the shimmer powder. This will help the shimmer adhere to your skin and prevent fallout.
- Why it Works: The setting spray creates a slightly tacky surface that grips the glitter particles.
-
B. Layer Different Textures:
- Tip: Layer a cream highlighter underneath your shimmer powder for a multi-dimensional glow.
- Why it Works: The cream highlighter provides a base for the shimmer powder to adhere to, creating a more intense and long-lasting effect.
-
C. Consider Your Lighting:
- Tip: Apply your shimmer in natural light to ensure that you’re not overdoing it.
- Why it Works: Artificial light can be deceiving, making it difficult to gauge the true intensity of your shimmer.
-
D. Don’t Forget the Body Shimmer:
- Tip: Apply shimmer to your shoulders, collarbone, and décolletage for a head-to-toe glow.
- Why it Works: Body shimmer adds a touch of glamour and sophistication to any outfit.
-
E. Clean Your Brushes Regularly:
- Tip: Clean your brushes regularly to prevent bacteria buildup and ensure smooth application.
- Why it Works: Dirty brushes can harbor bacteria, which can lead to breakouts. They can also affect the application of your makeup.
( 🎉 A shower of digital confetti rains down on the screen )
VI. Conclusion: Go Forth and Glow!
And there you have it, my shimmering disciples! You are now equipped with the knowledge and tools to navigate the Glittering Galaxy with confidence and style. Remember, the key is to experiment, have fun, and embrace your inner radiance.
( 🎤 I take a bow as the audience erupts in applause )
Go forth and glow, my friends! And may your shimmer always be blinding!
( ✨ The screen fades to black, leaving behind a lingering sparkle )
For detailed product specifications and purchases, please go to :https://zenamakeup.com/products/glittering-shimmer-highlighting-setting-powder
Leave a Reply