Lecture: Applying Glittering Shimmer Highlighting & Setting Powder to Create a Multi-Dimensional Highlight: From Flat to Fabulous! ✨
Alright, lovelies, settle in! Grab your favorite beverage (mine’s a mimosa, but don’t tell my boss 🤫) because we’re about to dive headfirst into the shimmering, sparkling, and utterly captivating world of multi-dimensional highlighting. Forget that flat, one-dimensional glow – we’re aiming for a highlight that’s so radiant, it could guide ships lost at sea! 🚢 (Okay, maybe not that radiant, unless you’re going for a mermaid look. In that case, go for it!).
This lecture is all about mastering the art of applying glittering shimmer highlighting & setting powder to achieve a multi-dimensional highlight that accentuates your best features and leaves everyone wondering if you’ve been touched by an angel. 😇
Course Outline:
- Understanding the Sparkle: What is Glittering Shimmer Highlighting & Setting Powder? (Spoiler: It’s not just for fairies anymore!)
- Tool Time: Brushes and Other Implements of Highlighting Destruction (But in a Good Way!). 🛠️
- Skin Deep: Preparing Your Canvas for the Masterpiece. 🎨
- The Art of Layering: Building Your Multi-Dimensional Highlight. (It’s like building a house, but with sparkle!) 🏠➡️✨
- Placement Perfection: Where to Shine (and Where to Leave Well Alone). 🗺️
- Blending is Your Friend: Avoiding the Dreaded Stripe of Shame. 🦓
- Setting the Stage: Locking in Your Luminescence. 🔒
- Troubleshooting Twinkles: Common Mistakes and How to Fix Them. 🚨
- Advanced Techniques: Taking Your Highlight to the Next Level. 🚀
- The Grand Finale: Putting It All Together (and Taking a Selfie, Obviously!). 🤳
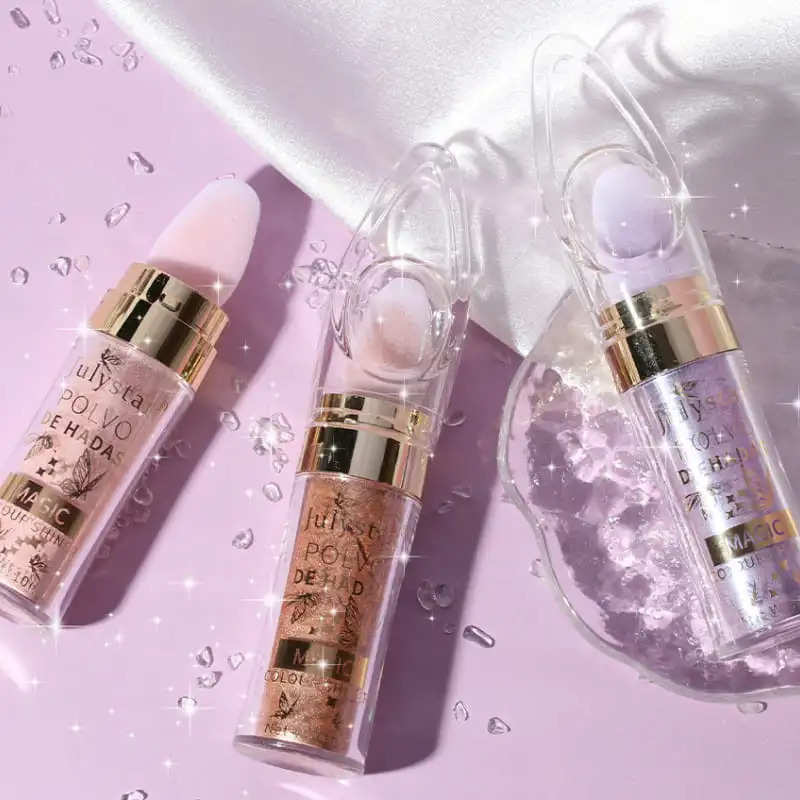
1. Understanding the Sparkle: What is Glittering Shimmer Highlighting & Setting Powder?
Let’s start with the basics. What exactly are we dealing with here? Glittering shimmer highlighting & setting powder is a magical concoction designed to:
- Highlight: Reflect light and bring forward certain areas of your face. Think cheekbones, brow bone, cupid’s bow. We’re talking about sculpting with light! 💡
- Shimmer: Add a subtle (or not-so-subtle, depending on your preference) sparkle and dimension. This is where the "multi-dimensional" part comes in.
- Set: Help set your foundation and concealer, preventing creasing and prolonging the life of your makeup. A two-for-one deal! 🎉
But here’s the real tea: not all highlighting powders are created equal. We need to differentiate between different types of shimmer:
| Type of Shimmer | Description | Best For | Caveats |
|---|---|---|---|
| Fine Shimmer | Very small, almost imperceptible shimmer particles. Creates a soft, diffused glow. | Everyday wear, subtle highlighting, mature skin | Can sometimes look too subtle and disappear in photos |
| Glittery Shimmer | Larger, more noticeable glitter particles. Creates a bold, eye-catching highlight. | Special occasions, photoshoots, creating a dramatic look | Can accentuate texture, not suitable for everyday wear |
| Iridescent Shimmer | Shimmer that shifts colors depending on the light. Creates a unique, ethereal glow. | Creative looks, adding a pop of color to your highlight | Can be overwhelming if not applied carefully |
| Micro-Glitter | Extremely tiny particles that appear more like a sheen than individual glitter specks. | Works for both subtle and bold looks, depending on application | Can sometimes travel and end up on unwanted areas of the face |
Key Takeaway: Choose your shimmer wisely! Consider your skin type, the occasion, and your personal preference. Don’t be afraid to experiment!
2. Tool Time: Brushes and Other Implements of Highlighting Destruction (But in a Good Way!). 🛠️
You can’t build a house with your bare hands (unless you’re a superhero). Similarly, you need the right tools to achieve the perfect highlight. Here’s a rundown of the essential brushes:
- Tapered Highlighting Brush: This is your workhorse. It has a pointed tip that allows for precise application on the cheekbones, brow bone, and cupid’s bow. Think of it as your highlighting scalpel! 🔪
- Fan Brush: This brush is perfect for applying a light dusting of shimmer for a subtle, ethereal glow. It’s also great for sweeping away any fallout. A delicate touch is key! 🦢
- Small Detail Brush: This brush is ideal for highlighting small areas like the inner corner of the eye or the bridge of the nose. Precision is paramount! 🎯
- Fluffy Blending Brush: Absolutely essential for blending your highlight seamlessly into your skin. No harsh lines allowed! 🙅♀️
Beyond Brushes:
- Beauty Sponge (Damp): Can be used to press highlight into the skin for a more intense, long-lasting glow.
- Setting Spray: Crucial for locking in your highlight and preventing it from fading throughout the day. Think of it as hairspray for your face! 💨
Brush Maintenance: Remember to wash your brushes regularly! Dirty brushes can harbor bacteria and lead to breakouts. Plus, clean brushes apply makeup more smoothly. Think of it as a spa day for your tools! 🧖♀️
3. Skin Deep: Preparing Your Canvas for the Masterpiece. 🎨
Before you start slathering on the shimmer, it’s crucial to prep your skin. Think of it as painting a masterpiece – you wouldn’t just start slapping paint on a dirty canvas, would you? 🖼️
- Cleanse: Wash your face with a gentle cleanser to remove any dirt, oil, and makeup.
- Exfoliate: Gently exfoliate your skin 1-2 times a week to remove dead skin cells and create a smooth surface for your highlight.
- Moisturize: Hydrated skin is happy skin! Apply a moisturizer that’s suitable for your skin type.
- Prime: Use a primer to create a smooth, even base for your foundation and help your makeup last longer.
Foundation & Concealer: Apply your foundation and concealer as usual. Make sure everything is blended seamlessly. A flawless base is essential for a flawless highlight! 💯
4. The Art of Layering: Building Your Multi-Dimensional Highlight. (It’s like building a house, but with sparkle!) 🏠➡️✨
This is where the magic happens! The key to a multi-dimensional highlight is layering different products and textures.
- Base Layer: Start with a cream or liquid highlighter that’s slightly lighter than your skin tone. Apply it to the high points of your face. This creates a dewy, lit-from-within glow. Think of it as the foundation of your sparkle house! 🏘️
- Powder Power: Next, apply your glittering shimmer highlighting powder on top of the cream or liquid highlighter. Use a light hand and build up the intensity gradually. This adds dimension and sparkle. Think of it as the walls and roof of your sparkle house! 🧱
- Spot Highlight: For an extra pop of shimmer, use a small detail brush to apply a concentrated amount of highlighting powder to the highest points of your cheekbones. This creates a focal point and adds even more dimension. Think of it as the fancy chandelier in your sparkle house! 💎
Pro Tip: Experiment with different combinations of cream, liquid, and powder highlighters to find what works best for you. Don’t be afraid to mix and match!
5. Placement Perfection: Where to Shine (and Where to Leave Well Alone). 🗺️
Knowing where to apply your highlight is just as important as knowing how to apply it. Here’s a guide to the key highlighting areas:
- Cheekbones: This is the most common area to highlight. Apply the highlighter along the top of your cheekbones, blending it upwards towards your temples. This will make your cheekbones appear higher and more defined. 📈
- Brow Bone: Apply a small amount of highlighter under your brow bone to lift and define your eyebrows. This will also make your eyes appear more open. 👀
- Inner Corner of the Eye: Applying a touch of highlighter to the inner corner of your eye can instantly brighten your complexion and make you look more awake. 😴➡️🤩
- Bridge of the Nose: Apply a thin line of highlighter down the bridge of your nose to make it appear longer and slimmer. Be careful not to apply too much, or you’ll end up looking like Rudolph the Red-Nosed Reindeer! 🦌
- Cupid’s Bow: Applying a small amount of highlighter to your cupid’s bow (the little dip in the center of your upper lip) will make your lips appear fuller and more defined. 💋
- Chin: A tiny dab on the center of your chin can add dimension, but go easy! Too much can make your chin look overly prominent.
Areas to Avoid:
- Forehead: Unless you’re going for a disco ball look, avoid highlighting your forehead. It can make your forehead appear larger and more oily.
- Under-Eye Area: Highlighting your under-eye area can accentuate fine lines and wrinkles. Instead, focus on brightening the inner corner of your eye.
6. Blending is Your Friend: Avoiding the Dreaded Stripe of Shame. 🦓
Blending is absolutely crucial for a natural-looking highlight. You don’t want to end up with a harsh, obvious stripe of shimmer on your face. Think of it as trying to blend in at a fancy party – you don’t want to stick out like a sore thumb! 💃
- Use a Fluffy Blending Brush: This is your blending weapon of choice. Use it to gently buff the edges of your highlight until it seamlessly blends into your skin.
- Blend in Circular Motions: Use small, circular motions to blend the highlighter into your skin.
- Don’t Be Afraid to Go Back and Forth: Sometimes, you need to go back and forth between your highlighter and your blending brush to achieve the perfect blend.
- Check Your Work in Different Lighting: What looks good in your bathroom might not look so good in natural light. Check your highlight in different lighting to make sure it’s blended properly.
7. Setting the Stage: Locking in Your Luminescence. 🔒
Now that you’ve created your masterpiece, it’s time to lock it in place. Setting spray will help your highlight last longer and prevent it from fading throughout the day.
- Choose the Right Setting Spray: There are different types of setting sprays available, so choose one that’s suitable for your skin type. If you have oily skin, look for a matte setting spray. If you have dry skin, look for a hydrating setting spray.
- Hold the Bottle at Arm’s Length: Hold the setting spray bottle about 8-10 inches away from your face.
- Spray in an "X" and "T" Formation: Spray the setting spray in an "X" and "T" formation to ensure even coverage.
- Let It Dry: Allow the setting spray to dry completely before touching your face.
8. Troubleshooting Twinkles: Common Mistakes and How to Fix Them. 🚨
Even the best makeup artists make mistakes. Here are some common highlighting mistakes and how to fix them:
| Mistake | Solution |
|---|---|
| Applying Too Much Highlight | Use a clean blending brush to buff away the excess highlight. |
| Applying Highlight to the Wrong Areas | Use a damp cotton swab to remove the highlight from the unwanted areas. |
| Using the Wrong Shade of Highlight | Choose a highlighter that’s closer to your skin tone. |
| Highlighting Accentuates Texture | Use a fine shimmer highlighter and avoid applying it to areas with visible texture. |
| Highlight Looks Chalky | Use a hydrating setting spray to melt the highlight into your skin. |
9. Advanced Techniques: Taking Your Highlight to the Next Level. 🚀
Ready to level up your highlighting game? Here are some advanced techniques to try:
- Highlighting with Different Colors: Experiment with different colors of highlighter to create a unique and eye-catching look. Think pink, gold, bronze, or even holographic!
- Baking Your Highlight: Apply a generous amount of translucent powder under your eyes and on your cheekbones. Let it sit for 5-10 minutes, then dust it away. This will create a super-bright and long-lasting highlight.
- Using Body Highlighter: Don’t limit your highlight to your face! Apply body highlighter to your collarbones, shoulders, and legs for an all-over glow.
- Ombre Highlight: Layer two different highlighter shades, blending them together for a seamless ombre effect.
10. The Grand Finale: Putting It All Together (and Taking a Selfie, Obviously!). 🤳
Congratulations! You’ve reached the end of our highlighting journey. Now it’s time to put everything you’ve learned into practice.
- Prep your skin.
- Apply your foundation and concealer.
- Apply a cream or liquid highlighter.
- Apply your glittering shimmer highlighting powder.
- Blend, blend, blend!
- Set your highlight with setting spray.
- Admire your radiant glow!
- Take a selfie and share it with the world! 📸
Remember, practice makes perfect. Don’t be afraid to experiment and find what works best for you. Most importantly, have fun! Highlighting should be a creative and enjoyable process. Now go forth and shine, my darlings! ✨🌟💫
For detailed product specifications and purchases, please go to :https://zenamakeup.com/products/glittering-shimmer-highlighting-setting-powder
Leave a Reply