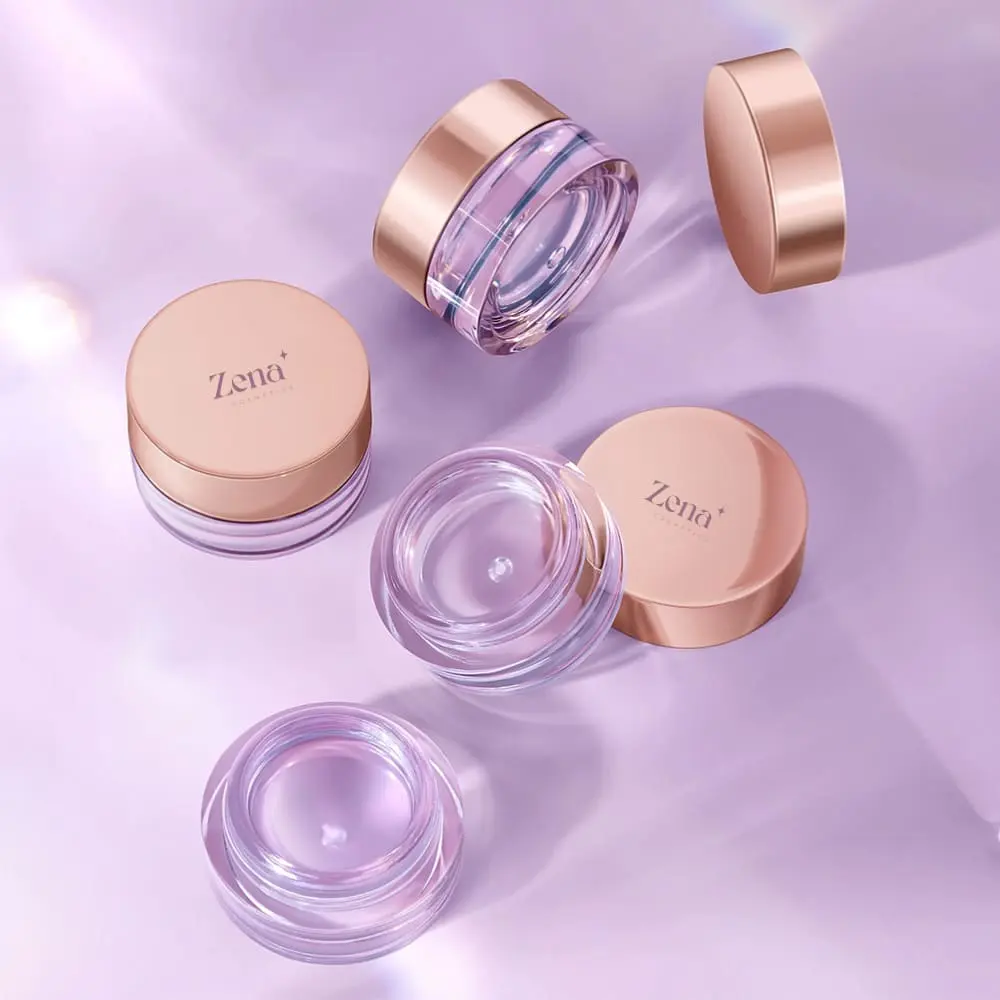
Applying the Crystal Jelly Clear Blush for a Quick Pop of Personalized Color on the Go: A Lecture in Blushology 🎓💖
Welcome, Glamazons and Glaminators, to Blushology 101! Today, we’re diving deep into the fascinating world of color-changing cosmetics, specifically, the Crystal Jelly Clear Blush. Forget everything you think you know about traditional blush, because we’re about to embark on a journey of personalized pigment and on-the-go gorgeousness. Prepare to have your cheeks tickled pink… or peach… or maybe even a surprisingly delightful coral! 😉
Instructor: Professor Sparkle, your resident expert in all things shimmering, shimmering, splendid! 🌟
Course Objectives: By the end of this lecture, you will be able to:
- Understand the science behind color-changing blush.
- Apply Crystal Jelly Clear Blush flawlessly for a natural, personalized flush.
- Troubleshoot common application issues.
- Master the art of blush application on the go.
- Confidently rock your radiant, unique glow! ✨
Required Materials:
- A Crystal Jelly Clear Blush (preferably one that smells vaguely of unicorns and rainbows 🦄🌈)
- A blush brush (fluffy and fabulous, of course!)
- A mirror (for admiring your stunning transformation)
- A sense of adventure (because makeup should be fun!)
Let’s get started!
I. The Magical World of Color-Changing Cosmetics: Decoding the Elixir 🧪
Okay, class, let’s get nerdy for a moment. Forget fairy dust and unicorn tears (though we can all dream, right?), the magic behind Crystal Jelly Clear Blush lies in its clever chemistry!
A. The pH Factor:
The key player here is your skin’s pH level. pH, or potential of Hydrogen, measures the acidity or alkalinity of a substance. It ranges from 0 (very acidic) to 14 (very alkaline), with 7 being neutral. Your skin typically falls somewhere between 4.5 and 6.2, leaning slightly acidic.
B. The Dye Reactants:
The Crystal Jelly Clear Blush contains special dyes that react to changes in pH. These dyes are often clear or slightly tinted in the container. When they come into contact with your skin’s unique pH, they undergo a chemical reaction that unlocks their true color potential. It’s like a secret agent revealing their disguise! 🕵️♀️
C. The Personalization Power:
Because everyone’s skin pH varies slightly, the blush will react differently on each person. This results in a unique, custom shade that perfectly complements your complexion. Think of it as your own personal blush fingerprint! 💖
Think of it like this:
| Skin pH Level | Possible Blush Outcome | Analogy |
|---|---|---|
| More Acidic (lower pH) | Deeper, richer color | A bold, dramatic statement |
| More Alkaline (higher pH) | Lighter, softer color | A delicate whisper of color |
| Neutral (pH around 7) | A balanced, natural hue | The perfect "my-cheeks-but-better" look |
D. What About Temperature and Hydration?
While pH is the primary driver, other factors like skin temperature and hydration levels can also influence the final color. Warmer skin might result in a slightly more vibrant shade, while well-hydrated skin tends to hold color better. It’s all a beautiful, complex dance of chemistry! 💃
II. Application Perfection: Achieving the Flawless Flush 🖌️
Now that we understand the science, let’s get practical! Applying Crystal Jelly Clear Blush is relatively straightforward, but mastering the technique will ensure you achieve the perfect, personalized flush every time.
A. Prep is Key (As Always!)
- Cleanse and Moisturize: Start with a clean, moisturized face. This provides a smooth canvas for the blush to adhere to. Imagine trying to paint on a dusty, cracked wall – not ideal, right?
- Apply Your Base: Apply your foundation, concealer, and any other base makeup you typically use. This creates a unified skin tone and allows the blush to blend seamlessly.
B. The Brush is Your Weapon (of Choice!)
- Choose Wisely: Opt for a fluffy, rounded blush brush with soft bristles. This type of brush will distribute the product evenly and prevent harsh lines. A dense, angled brush might apply too much color, leading to a clown-like effect (unless that’s your vibe, then go for it!). 🤡
- Swirl and Tap: Lightly swirl your brush into the Crystal Jelly Clear Blush. A little goes a long way! Tap off any excess product on the back of your hand or on the edge of the container. We want a subtle flush, not a full-blown explosion of color.
C. Application Techniques: Finding Your Sweet Spot
This is where things get fun! There are several ways to apply blush, depending on your face shape and desired effect.
- The Classic Apple: Smile! The apples of your cheeks are the roundest part when you smile. Apply the blush to this area, blending upwards towards your temples. This creates a youthful, healthy glow. 🍎
- The Sculpted Cheekbone: For a more defined look, apply the blush along your cheekbones, starting at the hairline and blending towards the apples of your cheeks. This technique adds dimension and definition to your face.
- The "C" Shape: Apply the blush in a "C" shape, starting at your temples, sweeping along your cheekbones, and ending just below your eyes. This creates a soft, diffused flush that’s perfect for everyday wear.
- The Sun-Kissed Glow: For a natural, sun-kissed look, apply the blush across the bridge of your nose and cheeks. This mimics the effect of a day spent basking in the sun (without the harmful UV rays, of course!). ☀️
D. Blending is Your Best Friend!
- Blend, Blend, Blend! This is the most crucial step. Use a clean brush or your fingers to blend the blush seamlessly into your skin. There should be no harsh lines or obvious edges. The goal is to create a natural, believable flush.
- Build Gradually: Start with a small amount of product and build up the color gradually. It’s always easier to add more than to remove too much.
- Check in the Mirror: Step back and assess your look in a well-lit mirror. Make sure the blush is evenly distributed and complements your overall makeup.
E. Setting the Stage for Longevity
- Setting Spray: Lock in your blush and prolong its wear with a setting spray. This will help prevent the color from fading or transferring throughout the day.
- Powder Blush (Optional): If you want to add extra depth or dimension, you can layer a powder blush on top of the Crystal Jelly Clear Blush. Choose a shade that complements the underlying color.
Let’s visualize these techniques:
| Technique | Application Area | Effect |
|---|---|---|
| Classic Apple | Apples of the cheeks | Youthful, healthy glow |
| Sculpted Cheekbone | Cheekbones | Defined, dimensional |
| "C" Shape | Temples, cheekbones, under eyes | Soft, diffused flush |
| Sun-Kissed Glow | Bridge of nose, cheeks | Natural, sun-kissed |
III. Troubleshooting: Blush Blunders and How to Fix Them 🚨
Even the most seasoned makeup artists encounter blush blunders from time to time. Here are some common issues and how to resolve them:
A. Too Much Color!
- The Fix: Don’t panic! Use a clean brush or a damp sponge to blend away the excess color. You can also apply a light layer of foundation or concealer over the blush to tone it down. Remember, subtlety is key!
B. Patchy Application
- The Fix: Ensure your skin is properly moisturized and exfoliated. Dry, flaky skin can cause the blush to cling unevenly. Use a gentle exfoliating scrub or a hydrating face mask to smooth your skin’s surface.
C. Uneven Color
- The Fix: Double-check that you’re using the same amount of product on both sides of your face. If one cheek is noticeably more flushed than the other, apply a small amount of blush to the lighter side and blend thoroughly.
D. Blush Disappears Too Quickly
- The Fix: Prep your skin with a primer and set your blush with a setting spray. You can also try layering a powder blush on top of the Crystal Jelly Clear Blush to increase its longevity.
E. The Dreaded "Clown Cheeks"
- The Fix: Start with a very small amount of product and build up the color gradually. Make sure you’re blending thoroughly to avoid harsh lines. If all else fails, use a clean brush or a damp sponge to diffuse the color and create a more natural look.
Remember: Practice makes perfect! Don’t be afraid to experiment with different application techniques and find what works best for your face shape and skin tone.
IV. Blush on the Go: Mastering the Art of the Quick Fix 🏃♀️💨
Life is busy, and sometimes you need to add a touch of color on the fly. Here’s how to apply Crystal Jelly Clear Blush for a quick pop of personalized pigment when you’re short on time:
A. The Minimalist Approach:
- Fingertip Application: In a pinch, you can use your fingertips to apply the blush. Dab a small amount of product onto your fingertips and gently pat it onto the apples of your cheeks. Blend quickly and thoroughly.
- Mirror-Free Zone: If you don’t have access to a mirror, rely on your intuition. Start with a very small amount of product and blend it in circular motions. You can always add more later if needed.
B. The Emergency Kit Essentials:
- Compact Mirror: Keep a compact mirror in your purse or bag for quick touch-ups.
- Mini Blush Brush: Invest in a small, travel-sized blush brush for on-the-go application.
- Blotting Papers: Blotting papers can help absorb excess oil and prevent your blush from fading or transferring.
C. The Power of Multi-Tasking:
- Lip and Cheek Combo: Use your Crystal Jelly Clear Blush as a lip tint and cheek color for a coordinated, effortless look.
- Highlight and Blush: Apply a small amount of the blush to the high points of your cheeks for a subtle highlight and flush of color.
D. Quick Tips for On-the-Go Application:
- Less is More: Start with a very small amount of product and build up the color gradually.
- Blend, Blend, Blend! Use your fingertips or a brush to blend the blush seamlessly into your skin.
- Don’t Overthink It: The goal is to add a touch of color and radiance, not to create a masterpiece.
V. Beyond the Basics: Experimenting with Crystal Jelly Clear Blush 🧪🎨
Now that you’ve mastered the fundamentals, let’s explore some creative ways to use Crystal Jelly Clear Blush:
A. Custom Color Creation:
- Mix and Match: Experiment with layering different shades of Crystal Jelly Clear Blush to create your own custom color.
- Combine with Other Products: Mix a small amount of the blush with your favorite moisturizer or foundation for a sheer, tinted base.
B. Unusual Application Areas:
- Eyelids: Apply a small amount of the blush to your eyelids for a subtle wash of color.
- Décolletage: Dust a light layer of the blush across your décolletage for a radiant, sun-kissed glow.
C. Themed Looks:
- Romantic Flush: Apply the blush to the apples of your cheeks and blend upwards towards your temples for a soft, romantic look.
- Edgy Glow: Apply the blush along your cheekbones and blend towards your ears for a more defined, edgy look.
D. Pro Tips:
- Use a light hand: Crystal Jelly Clear Blush can be surprisingly pigmented, so start with a small amount of product and build up the color gradually.
- Blend thoroughly: This is key to achieving a natural, seamless look.
- Experiment and have fun! Makeup is all about self-expression, so don’t be afraid to try new things.
VI. Conclusion: Embrace Your Unique Glow! ✨
Congratulations, class! You’ve successfully completed Blushology 101! You are now equipped with the knowledge and skills to confidently apply Crystal Jelly Clear Blush for a quick pop of personalized color on the go. Remember, the key is to experiment, have fun, and embrace your unique glow!
Final Thoughts:
The beauty of Crystal Jelly Clear Blush lies in its ability to adapt to your individual skin chemistry, creating a custom shade that perfectly complements your complexion. It’s a versatile product that can be used in a variety of ways, from a subtle everyday flush to a bold, dramatic statement. So go forth and conquer the world, one radiant cheek at a time! 💖
Now go out there and sparkle, Glamazons! Class dismissed! 💖🎓
For detailed product specifications and purchases, please go to :https://zenamakeup.com/products/crystal-jelly-clear-blush
Leave a Reply