Lecture: Decoding the Crystal Jelly Clear Blush: A Masterclass in Application and Blending (Because We’re Not All Born Makeup Artists, Are We?)
(Professor Whiskerbottom adjusts her spectacles, a twinkle in her eye. A single, rogue jelly blush glistens mischievously on her cheek. She clears her throat dramatically.)
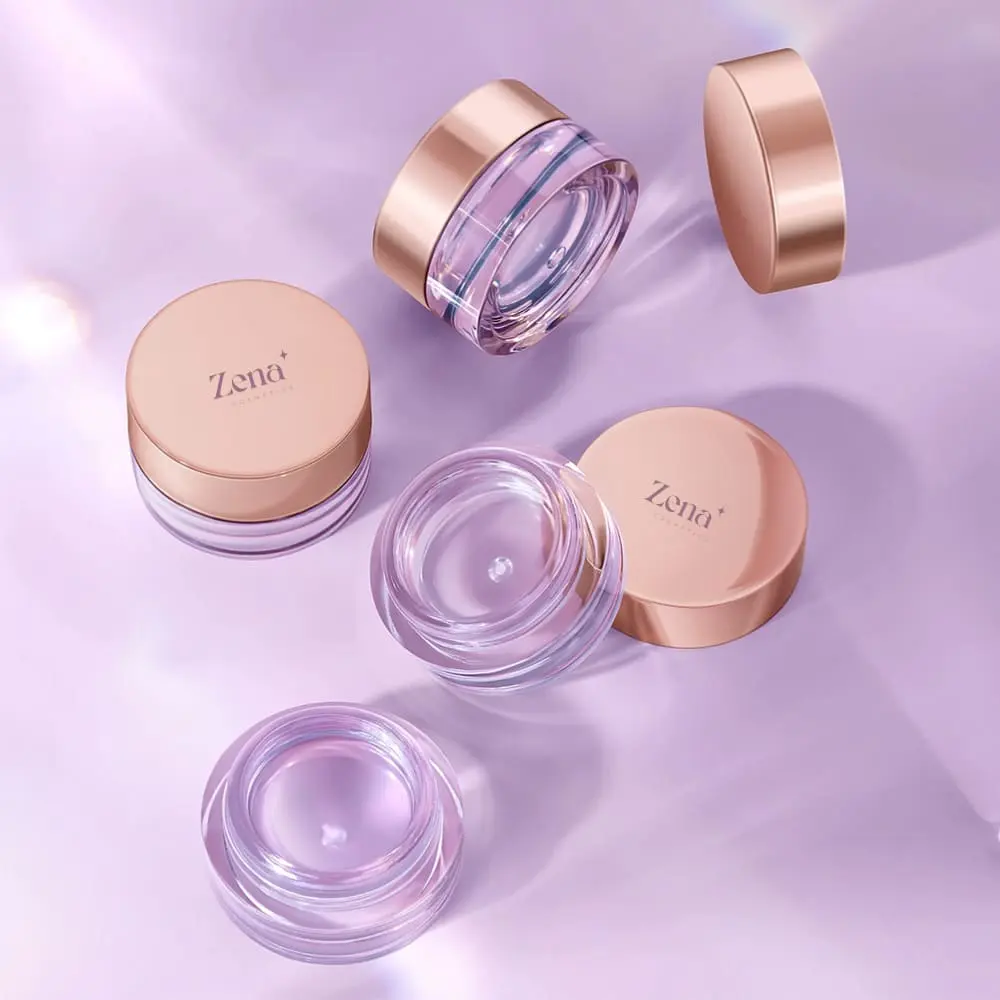
Alright, settle down, settle down! Welcome, my dears, to Blush Alchemy 101! Today, we’re diving headfirst into the mesmerizing, slightly terrifying, and utterly captivating world of Crystal Jelly Clear Blush. 🧪✨
Yes, you heard right. Clear blush. The stuff of dreams and potential makeup nightmares. But fear not! I, Professor Whiskerbottom, am here to guide you through the treacherous terrain of this translucent wonder. We’ll decipher the secrets to application and blending, ensuring you emerge victorious with a natural, dewy flush, and not looking like you’ve just wrestled a particularly aggressive jellyfish. 🪼🥊
I. Introduction: The Enigmatic Appeal of Crystal Jelly Clear Blush
Why, you ask, would anyone want a blush that appears… nonexistent? Ah, that’s the magic, my friends! Crystal Jelly Clear Blush offers a revolutionary approach to achieving a natural, "lit-from-within" glow. It’s not about packing on pigment; it’s about enhancing your own skin’s natural radiance.
Think of it like this: traditional powder blush sits on top of your skin, creating a layer of color. Crystal Jelly Clear Blush, on the other hand, melts into your skin, working with your natural oils and undertones to create a personalized, dewy flush. It’s like your skin, but better. (And who doesn’t want that?!)
Pros of embracing the Jelly Side:
- Natural, dewy finish: Forget that powdery, cakey look. This is all about healthy, hydrated radiance.
- Customizable color: The color payoff depends on your skin’s natural pH and undertones, meaning the blush will look slightly different on everyone. Talk about bespoke beauty!
- Long-lasting: Jelly blushes tend to have excellent staying power, clinging to the skin like a lovesick octopus. 🐙💕
- Buildable: You can layer the product for a more intense color, giving you complete control.
Cons of venturing into Jelly Land:
- Application learning curve: It can be tricky to master, especially for beginners. Patience, young Padawans!
- Can emphasize texture: If you have very textured skin, the dewy finish can sometimes accentuate it. Proper priming is key!
- Potential for stickiness: Some formulas can feel a bit tacky, so look for a non-sticky option.
- Sheer coverage: If you prefer a bold, highly pigmented blush, this might not be your jam (or jelly, rather).
II. The Tool Arsenal: Choosing Your Weapon of Choice
Now, let’s talk tools! Applying Crystal Jelly Clear Blush is not a one-size-fits-all situation. The right tool can make all the difference between a radiant glow and a sticky, uneven mess.
(Professor Whiskerbottom dramatically unveils a table filled with brushes, sponges, and… fingers?)
Here’s a breakdown of your options, complete with my highly subjective (but always insightful) commentary:
| Tool | Pros | Cons | Best For | Professor Whiskerbottom’s Verdict |
|---|---|---|---|---|
| Fingers |
|
|
Precise application, natural finish, targeted placement. | My personal favorite! The warmth of your fingers helps the jelly blend seamlessly. Plus, who doesn’t love a little tactile interaction with their makeup? Just remember to wash your hands first, you filthy animals! 🧼 |
| Stippling Brush |
|
|
Achieving a natural, diffused flush, blending over foundation. | A solid option for those who prefer brushes. Just remember to use a light hand and stipple the product onto the skin, rather than dragging it. Think of it like gently tickling your cheeks with a feather. 🪶 (A very expensive, blush-covered feather). |
| Damp Beauty Sponge |
|
|
Blending for a flawless finish, applying over foundation. | A good choice if you want a super smooth, diffused look. Just make sure your sponge is damp, not soaking wet, or you’ll end up diluting the blush and getting minimal color payoff. Think of it like a thirsty little cloud, gently patting your cheeks. ☁️ |
| Dense Synthetic Brush |
|
|
Building up color, creating a sculpted look. | Use with caution! This is for the experienced blush artist only. If you’re not careful, you’ll end up looking like a clown. 🤡 (And not the cute kind). |
III. The Application Technique: A Step-by-Step Guide to Jelly Bliss
Okay, you’ve chosen your weapon. Now, let’s get down to the nitty-gritty of application. This is where things can get a little… interesting.
Okay, you’ve chosen your weapon. Now, let’s get down to the nitty-gritty of application. This is where things can get a little… interesting.
(Professor Whiskerbottom pulls out a mannequin head and a jar of Crystal Jelly Clear Blush, preparing for a demonstration.)
A. Preparation is Key:
- Skin Prep: Start with a clean, moisturized face. Exfoliate regularly to ensure a smooth canvas.
- Primer (Optional): If you have oily skin or large pores, a primer can help create a smooth base and prevent the blush from settling into pores.
- Foundation (Optional): You can apply Crystal Jelly Clear Blush over foundation, but keep in mind that it will sheer out the coverage. If you want a more intense color, apply it directly to bare skin.
B. The Application Process (Choose Your Tool):
- Fingers:
- Scoop a Tiny Amount: Less is more! Use your finger to scoop a tiny amount of the jelly blush. Seriously, smaller than you think. We’re talking pea-sized, people! 🫛
- Dot and Blend: Dot the blush onto the apples of your cheeks, blending outwards towards your temples. Use gentle tapping motions to melt the product into your skin.
- Build as Needed: Add more layers for a more intense color. Remember, you can always add more, but it’s much harder to take away!
- Stippling Brush:
- Dab and Stipple: Dab the brush into the jelly blush, picking up a small amount of product.
- Stipple onto Cheeks: Use a stippling motion to apply the blush to the apples of your cheeks, blending outwards.
- Blend, Blend, Blend: Blend the edges with light, circular motions.
- Damp Beauty Sponge:
- Dab and Bounce: Dab the sponge into the jelly blush, picking up a small amount of product.
- Bounce onto Cheeks: Use a bouncing motion to apply the blush to the apples of your cheeks, blending outwards.
- Smooth and Diffuse: Use the sponge to smooth out any harsh lines and create a seamless finish.
- Dense Synthetic Brush (Proceed with Extreme Caution):
- Tap and Swirl: Tap the brush lightly into the jelly blush, picking up a very small amount of product.
- Swirl onto Cheeks: Use a swirling motion to apply the blush to the apples of your cheeks, blending outwards.
- Blend Like Your Life Depends On It: Blend, blend, blend! Use a clean brush or sponge to soften the edges.
C. Pro-Tips for Jelly Blush Mastery:
- Start Small: It’s always better to start with a small amount of product and build up the color gradually.
- Focus on the Apples of Your Cheeks: This is where blush looks most natural and flattering.
- Blend, Blend, Blend! Blending is key to achieving a seamless, natural finish.
- Don’t Be Afraid to Experiment: Try different application techniques and tools to find what works best for you.
- Embrace the Dew: Crystal Jelly Clear Blush is all about that dewy, radiant glow. Don’t try to mattify it!
- Highlight (Optional): For an extra boost of radiance, add a touch of highlighter to the high points of your cheekbones.
- Set with a Spray (Optional): If you have oily skin, you can set your makeup with a light setting spray to help it last longer.
IV. Troubleshooting: Conquering Common Jelly Blush Challenges
Even with the best techniques, things can sometimes go awry. Here are some common challenges and how to overcome them:
| Problem | Solution | Professor Whiskerbottom’s Words of Wisdom |
|---|---|---|
| Blush looks patchy or uneven. | Use a damp beauty sponge to blend out the edges and create a seamless finish. | "Ah, the dreaded patchiness! This usually means you haven’t blended enough. Keep blending, my friend! And remember, a damp beauty sponge is your best friend in this situation. Think of it as your personal eraser for makeup mishaps." |
| Blush looks too intense. | Use a clean brush or sponge to blend out the color. You can also apply a light layer of translucent powder to tone down the intensity. | "Oops! Too much blush? Don’t panic! Grab a clean brush or sponge and blend, blend, blend! You can also try dabbing on a bit of foundation to dilute the color. And remember, it’s better to err on the side of caution when applying blush." |
| Blush feels sticky. | Choose a non-sticky formula. You can also apply a light layer of translucent powder to set the blush and reduce stickiness. | "Sticky blush is no fun! Make sure you’re using a non-sticky formula. If your blush still feels tacky, try applying a light dusting of translucent powder. Think of it like a tiny veil, gently calming the stickiness." |
| Blush fades quickly. | Apply the blush over a primer. You can also set your makeup with a setting spray to help it last longer. | "Fading blush is a common problem, especially for those with oily skin. Applying a primer before your foundation can help create a smooth base for your blush and prevent it from fading. A setting spray can also help lock in your makeup and keep it looking fresh all day long." |
| Blush emphasizes texture. | Exfoliate regularly and use a hydrating moisturizer. Apply a pore-filling primer to smooth out the skin’s surface. | "Textured skin and dewy finishes can be a tricky combination. Exfoliating regularly and using a hydrating moisturizer can help smooth out your skin’s surface. A pore-filling primer can also help minimize the appearance of pores and texture. Remember, makeup should enhance, not highlight, imperfections." |
| The clear blush doesn’t show up at all. | This could be due to your skin tone. Clear blushes react with your natural pH. Try layering it or using a slightly more pigmented jelly blush. | "Sometimes, the magic just doesn’t happen! If the clear blush isn’t showing up, it could be due to your unique skin chemistry. Try layering it or exploring tinted jelly blush options. Don’t give up on the jelly dream just yet!" |
V. Conclusion: Embrace the Jelly Journey!
(Professor Whiskerbottom beams, her jelly-blushed cheeks glowing.)
And there you have it, my dears! The complete guide to conquering Crystal Jelly Clear Blush. Remember, practice makes perfect. Don’t be discouraged if your first attempt isn’t flawless. Embrace the learning process, experiment with different techniques, and most importantly, have fun!
Crystal Jelly Clear Blush is a unique and exciting product that can add a touch of radiance and dewiness to your complexion. With a little patience and practice, you’ll be rocking that natural, "lit-from-within" glow in no time.
Now go forth and jelly-fy the world! ✨💖
(Professor Whiskerbottom winks and dismisses the class, leaving a faint scent of fruity jelly and a lingering sense of blush-induced confidence.)
For detailed product specifications and purchases, please go to :https://zenamakeup.com/products/crystal-jelly-clear-blush
Leave a Reply