Lecture: Unleash Your Inner Siren: A Smoky Eye Masterclass with Glided-On Waterproof Kajal
Professor: (Adjusts oversized glasses perched precariously on nose, brandishing a Glided-On Waterproof Kajal Eyeliner like a conductor’s baton) Alright, students! Settle down, settle down! Today, we’re diving into the dark, mysterious, and utterly captivating world of the smoky eye. And we’re not just dabbling – we’re crafting a smoky eye so intense, so alluring, it’ll last longer than your ex’s excuses. 😈
Forget those flimsy, powdery eyeshadows that fade faster than your New Year’s resolutions. We’re going hardcore. We’re wielding the Glided-On Waterproof Kajal Eyeliner, our trusty weapon of choice for creating a smoky eye that can withstand sweat, tears (of joy, of course!), and even the occasional dance-floor mishap. 💃
(Lecture Hall Door slams open. A student, BRENDA, bursts in, looking disheveled.)
Brenda: Professor! I’m so sorry I’m late! My last smoky eye attempt… well, let’s just say it ended up looking less "sultry siren" and more "raccoon who lost a fight with a chimney." 🦝
Professor: (Chuckles) Ah, Brenda, you’ve come to the right place! Fear not! Today, we’ll transform you from a smoky-eye-disaster zone into a smoky-eye-con. We’ll unravel the secrets of this versatile tool and unlock the power to create a mesmerizing gaze that’ll have everyone saying, "Whoa, Brenda looks fierce!" 🔥
So, grab your Glided-On Kajal, and let’s get started!
I. The Kajal Crusader: Understanding Your Weapon
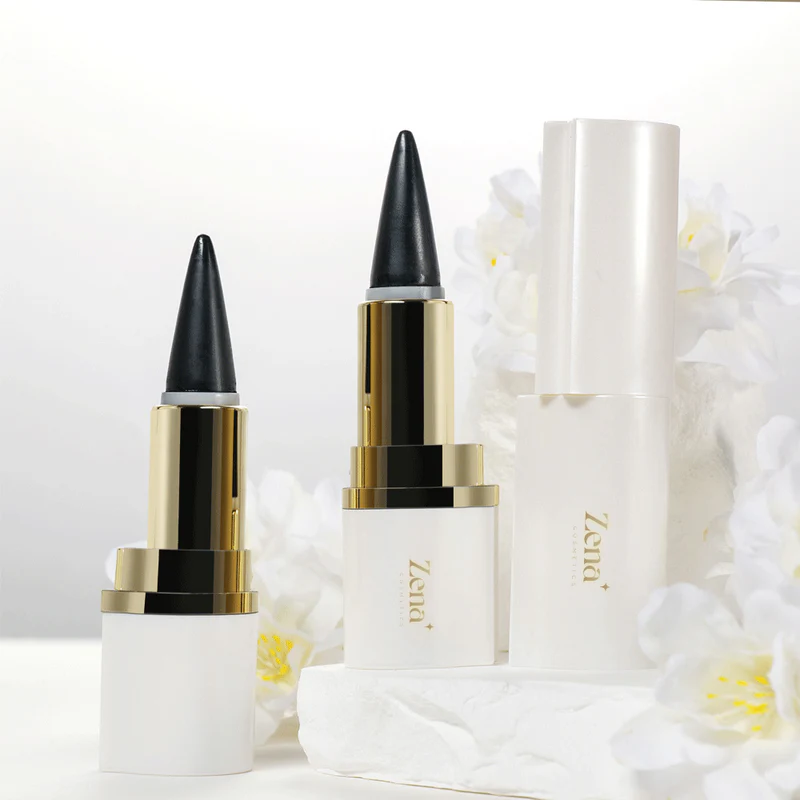
Before we storm the smoky eye battlefield, let’s familiarize ourselves with our trusty weapon: the Glided-On Waterproof Kajal Eyeliner.
(Professor holds up the kajal, examining it with theatrical flair.)
This isn’t just any eyeliner, my friends. This is a Kajal. It’s richer, creamier, and often more pigmented than your average pencil. It’s designed to be smudged, blended, and built upon. Think of it as the artist’s charcoal of the makeup world. ✍️
Why a Waterproof Kajal for a Long-Lasting Smoky Eye?
- Longevity: Waterproof formulas are designed to resist water, sweat, and oil, ensuring your smoky eye stays put for hours. No more raccoon eyes by midnight! 🙅♀️
- Smudge-Proof (Eventually!): While we want it to smudge initially for blending, a good waterproof formula will set and become transfer-resistant once it dries. This prevents accidental smearing throughout the night.
- Intense Pigment: Kajals are known for their rich, deep color payoff. A single swipe delivers a dramatic punch, perfect for creating a smoky effect. 🖤
Key Features of a Good Glided-On Waterproof Kajal:
| Feature | Importance | Why It Matters |
|---|---|---|
| Creamy Texture | High | Allows for smooth application and effortless blending. A dry, scratchy kajal will tug at the delicate skin around your eyes and make blending a nightmare. |
| Intense Pigment | High | Delivers a dramatic, smoky effect with minimal effort. You don’t want to have to layer the product 50 times to achieve the desired intensity. |
| Waterproof Formula | High | Crucial for long-lasting wear and preventing smudging. Look for keywords like "waterproof," "smudge-proof," or "long-wearing." |
| Built-in Sharpener | Optional, but convenient | Ensures you always have a precise tip for detailed work, like lining the waterline. |
| Skin-Friendly Ingredients | Consider if you have sensitive skin | Look for hypoallergenic, fragrance-free, and ophthalmologist-tested formulas to minimize irritation. |
Brenda: Okay, Professor, I’m with you! But I’ve tried waterproof eyeliners before, and they sometimes feel…dry and draggy on my eyelid. Is there a secret to applying them smoothly?
Professor: Excellent question, Brenda! There is indeed!
II. The Application Alchemist: Techniques for Flawless Smoky Eyes
Here’s where the magic happens! Let’s break down the application process step-by-step.
A. Priming is Paramount:
Just like painting, a good base is essential. Apply an eyeshadow primer to your eyelids to create a smooth, even surface and prevent creasing. This will also help the kajal adhere better and last longer. Think of it as the foundation for your masterpiece! 🎨
(Professor mimes applying primer with dramatic flourish.)
B. Lining the Lid – The Foundation of the Smoke:
- Upper Lash Line: Start by lining your upper lash line with the Glided-On Kajal. Don’t worry about being too precise – we’re going to smudge it out anyway. The goal is to create a thick, even base of color. Think of it as the blueprint for your smoky eye. 📐
- Lower Lash Line: Repeat on your lower lash line. Again, don’t stress about perfection.
- Waterline (Optional): For extra intensity, line your waterline (the inner rim of your eye) with the kajal. This will instantly make your eyes look more dramatic and sultry. 🔥 Be sure your kajal is safe for waterline use!
(Professor demonstrates the lining technique on a volunteer – a very willing mannequin named "Smokey.")
C. The Art of the Smudge – Blending Like a Boss:
- Immediate Action is Key: The key to a successful smoky eye with kajal is to smudge IMMEDIATELY after applying. Waterproof formulas set quickly, so you don’t have much time to work.
- Tools of the Trade: Use a small, dense eyeshadow brush or a cotton swab to gently smudge the kajal along your lash lines. Focus on blending upwards and outwards, creating a soft, diffused edge. Don’t drag the product down – you want to lift and blend. Think of it as erasing the harsh lines and creating a gradient effect. 🌈
- Layering for Intensity: If you want a more intense smoky eye, apply another layer of kajal and smudge again. You can build up the color until you achieve your desired level of drama.
(Professor demonstrates different smudging techniques, using various brushes and cotton swabs.)
D. Eyeshadow Enhancement – Adding Depth and Dimension:
D. Eyeshadow Enhancement – Adding Depth and Dimension:
While the kajal is the star of the show, eyeshadow can add depth and dimension to your smoky eye.
- Choose Your Shades: Opt for shades that complement the kajal. For a classic smoky eye, use matte blacks, grays, and browns. For a more colorful look, experiment with jewel tones like emerald green, sapphire blue, or amethyst purple. 💎
- Placement is Everything: Apply a matte eyeshadow that is a shade or two lighter than the kajal to your crease and blend upwards. This will create a seamless transition between the kajal and your skin.
- Highlight the Brow Bone: Add a touch of shimmer to your brow bone to highlight your eyes and make them appear larger. ✨
(Professor demonstrates eyeshadow application techniques, using a range of colors and brushes.)
E. Setting the Stage – Locking in the Look:
To ensure your smoky eye lasts all night, set it with a translucent powder. This will help absorb excess oil and prevent creasing.
- Gentle Application: Use a fluffy brush to gently dust the powder over your eyelids.
- Focus on the Crease: Pay extra attention to the crease, as this is where creasing is most likely to occur.
(Professor demonstrates setting techniques, emphasizing the importance of a light touch.)
Brenda: Professor, this is amazing! But what if I accidentally smudge too much? Am I doomed to raccoon-eye status forever?
Professor: Never fear, Brenda! We all make mistakes. That’s where the trusty cotton swab comes in!
III. Rescue Remedies: Fixing Smoky Eye Faux Pas
Even the best makeup artists make mistakes. Here are a few tips for correcting common smoky eye errors:
| Problem | Solution |
|---|---|
| Too Much Smudging | Use a clean cotton swab dipped in makeup remover to carefully clean up any smudges that extend too far beyond your lash line. |
| Uneven Blending | Use a clean blending brush to continue blending the eyeshadow until the edges are smooth and seamless. |
| Too Dark | Use a clean brush to blend out the eyeshadow and apply a lighter shade to soften the look. |
| Creasing | Gently pat the creased eyeshadow with your finger or a sponge to smooth it out. Then, set the area with a translucent powder. |
| Product Transfer to Upper Lid | Look up and use a clean cotton swab dipped in makeup remover to carefully remove the transferred product. Set the area with translucent powder. Consider using an eyeshadow primer on your lower lash line to prevent future transfer. |
(Professor demonstrates each rescue remedy, showing how to correct common smoky eye mistakes.)
IV. Smoky Eye Style Guide: Tailoring the Look to Your Eye Shape
Not all smoky eyes are created equal! Here’s how to adapt the technique to suit your unique eye shape:
| Eye Shape | Tips & Tricks |
|---|---|
| Hooded Eyes | Extend the eyeshadow above your crease so it’s visible when your eyes are open. Focus the darkest color on the outer corner of your eye and blend upwards and outwards. Avoid applying too much product to the inner corner, as this can make your eyes look smaller. |
| Almond Eyes | You’re lucky! Almost any smoky eye style will work for you. Experiment with different colors and intensities to find your perfect look. |
| Round Eyes | Elongate your eyes by focusing the darkest color on the outer corner and blending outwards towards your temples. Avoid applying too much eyeshadow to the center of your lid, as this can make your eyes look even rounder. |
| Close-Set Eyes | Focus the darkest color on the outer corner of your eye and blend outwards. Use lighter shades on the inner corner to brighten your eyes and create the illusion of more space between them. |
| Wide-Set Eyes | Focus the darkest color on the inner corner of your eye and blend inwards towards your nose. Use darker shades along the entire lash line to bring your eyes closer together. |
(Professor demonstrates how to tailor the smoky eye technique to different eye shapes, using visual aids and diagrams.)
V. Beyond the Black: Exploring Smoky Eye Color Palettes
While black is the classic smoky eye color, don’t be afraid to experiment with other shades!
- Brown Smoky Eye: A softer, more natural option for daytime wear.
- Gray Smoky Eye: A sophisticated and modern choice.
- Green Smoky Eye: Perfect for highlighting green eyes.
- Purple Smoky Eye: A romantic and alluring option.
- Blue Smoky Eye: A bold and dramatic statement.
(Professor showcases different smoky eye color palettes, demonstrating how to create a variety of looks.)
VI. Finishing Touches: Completing the Look
No smoky eye is complete without the right finishing touches:
- Mascara: Apply several coats of mascara to your upper and lower lashes to add volume and length.
- Eyelash Curler: Curl your lashes before applying mascara to open up your eyes.
- Brows: Groom your brows and fill them in with a brow pencil or powder to frame your face.
- Concealer: Apply concealer under your eyes to brighten the area and conceal any dark circles.
(Professor demonstrates the finishing touches, emphasizing the importance of balance and harmony.)
VII. The Grand Finale: Embrace Your Inner Siren!
(Professor strikes a dramatic pose, showcasing a flawlessly executed smoky eye.)
And there you have it, my dear students! You are now armed with the knowledge and skills to create a stunning, long-lasting smoky eye using the Glided-On Waterproof Kajal Eyeliner.
Remember: Practice makes perfect! Don’t be afraid to experiment and have fun. The most important thing is to embrace your inner siren and rock that smoky eye with confidence! 💪
Brenda: (Eyes sparkling with newfound confidence) Thank you, Professor! I finally feel like I can conquer the smoky eye! No more raccoon eyes for me!
Professor: (Beaming) That’s the spirit, Brenda! Now go forth and mesmerize! And remember, the key to a truly unforgettable smoky eye is not just the technique, but the attitude! Wear it with confidence, and you’ll be unstoppable! 💋
(Class ends. Students rush to practice their newfound skills. Professor winks at the audience and exits, leaving a lingering trail of mystery and allure.)
For detailed product specifications and purchases, please go to :https://zenamakeup.com/products/glided-on-waterproof-kajal-eyeliner
Leave a Reply