Lecture: Glided-on Kajal Eyeliner: Defining and Enhancing Your Eyes with Ease (and Maybe a Little Magic ✨)
Welcome, beauty enthusiasts, eyeliner aficionados, and those of you who just want to stop looking perpetually sleepy! 😴 Today, we embark on a journey into the enchanting world of kajal eyeliner, specifically the "Glided-on" variety. Forget harsh lines, shaky hands, and the existential dread of uneven wings – we’re diving deep into a realm of effortless definition, enhanced eye shapes, and the potential to become a smoldering goddess (or god… equality, people!).
Think of this lecture as a masterclass in eye wizardry. I’ll be your Professor of Precision, your Guru of Glide, your… well, you get the idea. Let’s grab our imaginary magic wands (a.k.a. Glided-on Kajal Eyeliner) and conjure up some captivating eyes!
I. What is This "Glided-on" Business Anyway? 🤔
Okay, let’s start with the basics. What distinguishes a "Glided-on" kajal eyeliner from your garden-variety pencil? The secret, my friends, lies in the formulation.
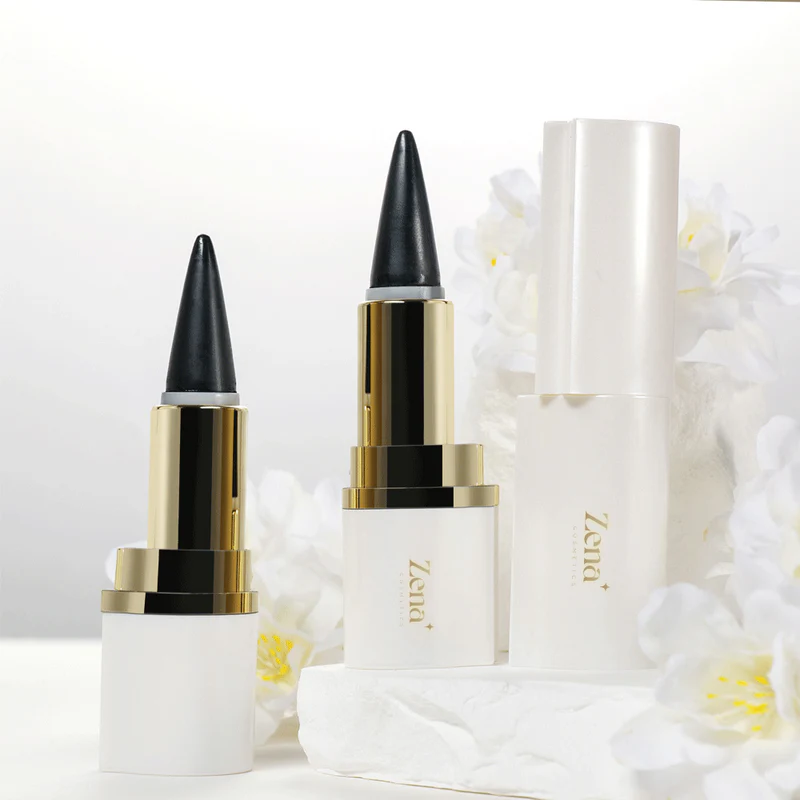
- The Texture Tango: A truly "Glided-on" kajal is characterized by an exceptionally smooth, creamy texture. Think of it as the cashmere sweater of eyeliners. It applies effortlessly, without tugging, pulling, or causing you to develop a twitch trying to get a solid line. 🙅♀️
- Pigment Powerhouse: The pigment is intense, rich, and deeply saturated. We’re talking a single swipe of dramatic color, not multiple layers of frustration. You want a color that pops, not whispers. 🗣️
- Long-Lasting Love: While creamy and smooth, a good "Glided-on" kajal also boasts impressive staying power. We don’t want it migrating south and transforming you into a raccoon by lunchtime. 🦝 (Unless that’s your thing, no judgment!)
- Blendability Brilliance: The beauty of a creamy formula is its blendability. Whether you want a sharp, defined line or a smoky, sultry haze, the "Glided-on" kajal is your versatile weapon of choice. ⚔️
Why is this important? Because the easier it is to apply, the more likely you are to experiment, perfect your technique, and actually enjoy the process. We’re not here to suffer for beauty, people! We’re here to conquer it with creamy, pigmented ease.
II. Anatomy of an Eye: A Quick Refresher Course 👁️
Before we unleash our inner artists, let’s revisit the basics. Understanding the anatomy of your eye is crucial for knowing where to apply the kajal to achieve your desired effect.
| Feature | Description | Why it Matters |
|---|---|---|
| Lash Line | The base of your eyelashes, where the hairs emerge. | This is the primary location for applying kajal. Closer to the lash line means more definition and a fuller lash look. |
| Waterline | The inner rim of your eyelid, where it meets the eye. | Applying kajal to the waterline can create a dramatic, intense look, but it’s crucial to use a kajal specifically formulated for waterline use to avoid irritation. (More on that later!) |
| Inner Corner | The area where your upper and lower eyelids meet near your nose. | Lightly highlighting the inner corner can brighten the eyes and make you look more awake. Conversely, applying dark kajal can create a more dramatic, sultry effect. |
| Outer Corner | The area where your upper and lower eyelids meet near your temples. | This is where you create winged eyeliner or extend your kajal line for a more elongated eye shape. |
| Crease | The fold of skin above your eyelid. | While we won’t be directly applying kajal to the crease, understanding its shape is important for creating balanced and harmonious eye makeup looks. |
| Brow Bone | The bone directly beneath your eyebrow. | Highlighting the brow bone can lift the eyes and create a more defined look. |
III. The Tools of the Trade (Beyond the Kajal) 🛠️
While the "Glided-on" kajal is the star of the show, a few supporting actors can make the application process even smoother.
- Sharpener: Keep your kajal point sharp for precise application. A dull pencil is the enemy of a clean line. 🔪
- Cotton Swabs (Q-tips): Your best friends for cleaning up mistakes and blending out harsh lines. 🤝
- Angled Brush: Perfect for smudging kajal into a smoky eye or creating a soft, diffused line. 🖌️
- Makeup Remover: Because even the best of us make mistakes. Don’t be afraid to start over! 🔁
- Mirror (with good lighting!): Crucial for seeing what you’re doing. Natural light is your best bet, but a well-lit vanity mirror will do the trick. 💡
IV. Application Techniques: From Basic to Bold! 🚀
Now, for the fun part! Let’s explore various techniques for applying "Glided-on" kajal to define and enhance your eye shape.
A. The Classic Lash Line Definition:
- Prepare your eyelids: Ensure your eyelids are clean and dry. A light dusting of translucent powder can help absorb excess oil and prevent smudging.
- Start at the inner corner: Gently pull your upper eyelid taut (but not too much!) and begin applying the kajal as close to the lash line as possible.
- Small, short strokes: Use small, short strokes to connect the line across your entire upper lash line. This prevents skipping and ensures a smooth, even application.
- Connect the dots: If you find it difficult to draw a continuous line, try creating small dots along the lash line and then connecting them.
- Repeat on the lower lash line: Repeat the process on your lower lash line, starting at the outer corner and working your way inwards.
- Smudge (optional): For a softer, more natural look, gently smudge the kajal line with a cotton swab or an angled brush.
B. Waterline Application: The Drama Queen (or King) Look:
Important Note: Not all kajal eyeliners are created equal. Always check the product description to ensure it’s safe for waterline use. Using a regular eyeliner on the waterline can cause irritation and even infection. Look for kajals specifically formulated with gentle, hypoallergenic ingredients.
- Dry the waterline: Gently pat your waterline dry with a cotton swab. This will help the kajal adhere better.
- Apply to the upper waterline: Gently lift your upper eyelid and apply the kajal to the waterline.
- Apply to the lower waterline: Gently pull down your lower eyelid and apply the kajal to the waterline.
- Blink: Blink a few times to distribute the kajal evenly.
- Check for smudging: Use a cotton swab to clean up any smudging.
C. Winged Eyeliner: The Ultimate Eye Enhancement:
This is where things get a little more advanced, but with practice and a "Glided-on" kajal, even winged eyeliner can be achievable!
This is where things get a little more advanced, but with practice and a "Glided-on" kajal, even winged eyeliner can be achievable!
- Start with the lash line: Apply kajal to your upper lash line as described above.
- Extend the line: Extend the line slightly beyond the outer corner of your eye, following the natural upward curve of your lower lash line. This will create a subtle, natural-looking wing.
- Create the wing: Determine the desired length and angle of your wing. Use small, light strokes to connect the end of the extended line to the outer corner of your upper lash line.
- Fill in the wing: Fill in the triangle you’ve created with kajal.
- Clean up the edges: Use a cotton swab dipped in makeup remover to sharpen the edges of the wing and correct any mistakes.
- Repeat on the other eye: This is the tricky part. Take your time and focus on creating a symmetrical wing on the other eye. You can use a piece of tape as a guide if needed.
D. Smoky Eye: The Sultry Siren:
The "Glided-on" kajal is your secret weapon for creating a smoldering smoky eye.
- Apply kajal to the upper lash line: Apply a thick line of kajal to your upper lash line. Don’t worry about being too precise.
- Smudge it out: Immediately smudge the kajal line upwards towards your crease using an angled brush or your fingertip.
- Apply kajal to the lower lash line: Apply kajal to your lower lash line.
- Smudge it out: Smudge the kajal line downwards.
- Add eyeshadow (optional): Apply a dark eyeshadow to the lid and blend it into the smudged kajal. This will add depth and dimension to the smoky eye.
- Blend, blend, blend!: The key to a successful smoky eye is seamless blending. Use a clean blending brush to soften any harsh lines.
V. Tailoring Kajal to Your Eye Shape: A Guide for Every Eye Type 🤩
Not all eyes are created equal, and what works for one eye shape might not work for another. Here’s a quick guide to tailoring your kajal application to your specific eye type:
| Eye Shape | Application Tips |
|---|---|
| Almond Eyes | Lucky you! Almond eyes can rock pretty much any kajal look. Experiment with different thicknesses, wings, and smoky eye variations. |
| Round Eyes | To elongate round eyes, focus on extending the kajal line outwards towards the temples. Avoid applying thick kajal to the entire lower lash line, as this can make the eyes appear even rounder. Try a winged eyeliner to add definition. |
| Hooded Eyes | Winged eyeliner can be tricky with hooded eyes, as the hood can cover the wing. Try creating a thicker wing that extends further beyond the hood. Alternatively, focus on defining the lash line and creating a smoky eye look. Avoid applying kajal to the waterline, as this can make the eyes appear smaller. |
| Upturned Eyes | To balance upturned eyes, apply kajal to the entire lower lash line. You can also create a slightly downturned wing to soften the upward angle. |
| Downturned Eyes | Focus on lifting the eyes by creating an upturned wing. Avoid applying heavy kajal to the lower lash line, as this can accentuate the downturned shape. |
| Close-Set Eyes | To create the illusion of wider-set eyes, focus on applying kajal to the outer corners of the eyes. Avoid applying dark kajal to the inner corners, as this can make the eyes appear even closer together. Highlight the inner corners with a light, shimmery eyeshadow. |
| Wide-Set Eyes | To bring the eyes closer together, apply kajal to the entire upper and lower lash lines, including the inner corners. |
VI. Kajal and Contact Lenses: A Word of Caution 👀
If you wear contact lenses, there are a few things to keep in mind when applying kajal:
- Wash your hands: Always wash your hands thoroughly before applying any makeup, especially if you’re wearing contacts.
- Apply lenses first: Insert your contact lenses before applying your makeup.
- Use a gentle formula: Choose a "Glided-on" kajal specifically formulated for sensitive eyes and contact lens wearers. Avoid products with harsh chemicals or fragrances.
- Avoid the waterline (if possible): Applying kajal to the waterline can increase the risk of irritation and infection, especially if you wear contacts. If you do apply kajal to the waterline, be extra careful to choose a product that’s safe for waterline use and avoid getting any product in your eye.
- Remove makeup carefully: Remove your makeup thoroughly at the end of the day using a gentle, oil-free makeup remover.
VII. Troubleshooting: Common Kajal Catastrophes (and How to Fix Them!) 🚑
Even with the most "Glided-on" kajal, things can sometimes go awry. Here are some common kajal catastrophes and how to fix them:
| Problem | Solution |
|---|---|
| Smudging | Use a waterproof or long-lasting formula. Set the kajal with a translucent powder. * Apply an eyeshadow primer to your eyelids before applying kajal. |
| Uneven Lines | Use small, short strokes. Connect the dots. * Clean up the edges with a cotton swab dipped in makeup remover. |
| Winged Eyeliner Woes | Practice makes perfect! Use a piece of tape as a guide. * Don’t be afraid to start over. |
| Irritation | Stop using the kajal immediately. Consult an eye doctor if the irritation persists. * Switch to a hypoallergenic formula. |
VIII. Choosing the Right "Glided-on" Kajal: A Buyer’s Guide 🛍️
With so many kajal eyeliners on the market, how do you choose the right one? Here are some factors to consider:
- Ingredients: Look for kajals with gentle, hypoallergenic ingredients, especially if you have sensitive eyes or wear contact lenses.
- Texture: The texture should be creamy and smooth, not dry or waxy.
- Pigmentation: The pigment should be intense and long-lasting.
- Waterproof/Smudge-proof: If you’re prone to smudging, choose a waterproof or smudge-proof formula.
- Price: Kajal eyeliners range in price from drugstore to high-end. Consider your budget and choose a product that offers good value for the money.
- Reviews: Read online reviews to see what other people have to say about a particular product.
IX. Conclusion: Go Forth and Glam! 💃
And there you have it! Your comprehensive guide to using "Glided-on" kajal eyeliner to define and enhance your eyes with ease. Remember, practice makes perfect, so don’t be afraid to experiment and find what works best for you.
So go forth, my beauty warriors, and conquer the world with your perfectly defined, captivating eyes! May your wings always be even, your smudging always intentional, and your kajal always glided-on.
Class dismissed! 🎓
For detailed product specifications and purchases, please go to :https://zenamakeup.com/products/glided-on-waterproof-kajal-eyeliner
Leave a Reply