Lecture Hall: Unleash Your Inner Sparkle! Mastering Eyeliner & Inner Corner Highlights with 5-Piece Stick Magic
(Professor Sparkle, adorned in a sequined lab coat and oversized glitter glasses, strides confidently to the podium. The room is filled with eager students, all clutching their 5-piece stick sets. A disco ball hangs precariously from the ceiling.)
Professor Sparkle: Alright, sparkle enthusiasts! Welcome, welcome! Today, we’re diving headfirst into a world of shimmering possibilities! Forget your textbooks, forget your responsibilities (temporarily, of course!), and prepare to transform your eye game from drab to dazzling!
(She gestures dramatically towards the screen behind her, which displays a close-up of a flawlessly highlighted inner corner.)
Professor Sparkle: Yes, my pretties, we’re conquering the art of creating mesmerizing eyeliner and inner corner highlights using… wait for it… the unassuming, yet secretly powerful, 5-Piece Stick Set!
(A collective gasp fills the room. Some students clutch their sticks tighter, while others look skeptical.)
Professor Sparkle: I see some doubt flickering in those beautiful eyes! Fear not! We’re going to demystify the process, break down the techniques, and unleash the inner sparkle goddess (or god!) within each and every one of you! Think of this as your express ticket to "Look-at-Me-Land!"
(She winks, causing a small shower of glitter to fall from her glasses.)
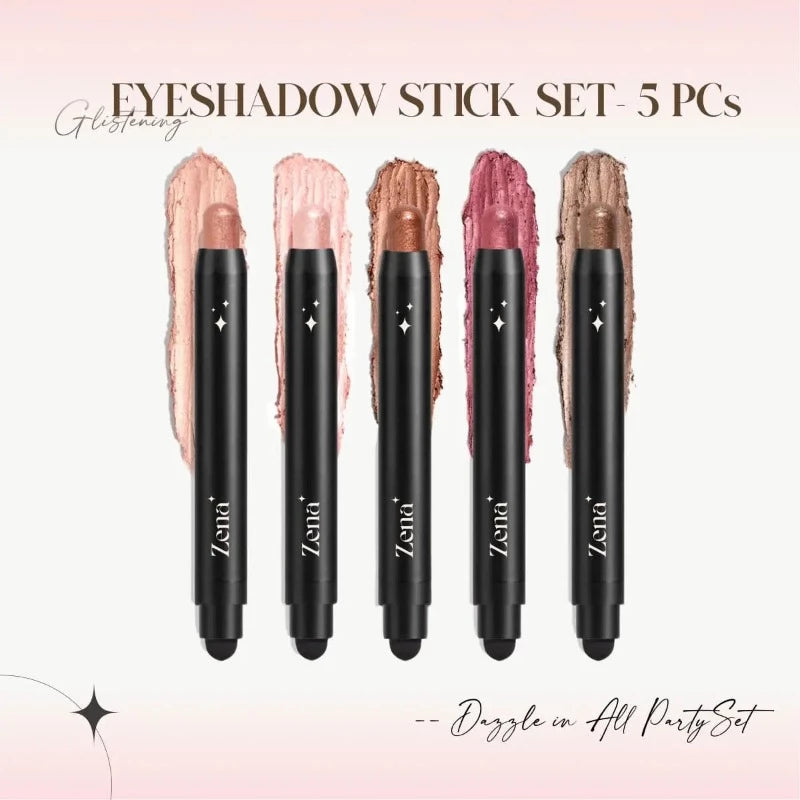
I. The 5-Piece Stick Set: Your Arsenal of Sparkle!
(The screen displays a colorful infographic showcasing the typical 5-piece stick set.)
Professor Sparkle: Let’s start with the basics, shall we? What is this magical 5-piece stick set we speak of? Typically, it comprises:
| Stick Type | Description | Potential Uses for Eyeliner & Highlight |
|---|---|---|
| Cream Eyeshadow Stick 🎨 | Usually soft, blendable, and pigmented. Often available in matte, shimmer, and metallic finishes. Think of it as your foundation for sparkle! | Base for shimmer, creating a color wash, subtle eyeliner, blending out harsh lines. The matte shades can create a beautiful, soft definition. Think of it as your canvas! |
| Shimmer/Glitter Stick ✨ | Chock-full of finely milled shimmer or larger glitter particles. Designed to add a pop of sparkle and dimension. Handle with care, glitter is like the rogue toddler of the makeup world! | Obvious choice for shimmer eyeliner and inner corner highlights! Can be layered over cream shadows for extra intensity. Apply with a light hand to avoid glitter fallout! |
| Metallic Eyeshadow Stick 🔩 | Highly reflective and intensely pigmented. Offers a bold, metallic sheen. Think of it as liquid metal in stick form! | Creating a dramatic eyeliner look, adding a metallic pop to the inner corner. These are your statement makers! Just a touch can transform your look. |
| Highlight Stick 💡 | Designed to illuminate and add radiance to the high points of the face. Often contains light-reflecting particles. | Can be used as an inner corner highlight for a more subtle, natural glow. Choose a shade slightly lighter than your skin tone. This is your secret weapon for a "lit-from-within" radiance! |
| Concealer Stick 🤫 | Used to conceal imperfections and brighten the under-eye area. | Cleaning up eyeliner mistakes, creating a sharp wing, highlighting the brow bone for added lift. It’s your eraser and your sculptor all in one! |
(Professor Sparkle taps the table with a dramatically painted nail.)
Professor Sparkle: Now, remember, not all sticks are created equal! Quality matters, darling! Look for sticks that are:
- Creamy and Blendable: We want a smooth application, not a streaky mess! Think butter, not sandpaper!
- Highly Pigmented: A little goes a long way! No need to layer on ten coats!
- Long-lasting: We want our sparkle to stay put, not migrate to our cheeks!
- Cruelty-Free (Optional, but Highly Recommended!): Because bunnies don’t need eyeliner, but we do!
II. Eyeliner Alchemy: Transforming Sticks into Stunning Lines!
(The screen changes to show a variety of eyeliner styles, all created with sticks.)
Professor Sparkle: Alright, aspiring eyeliner artists! Let’s get down to business! Creating eyeliner with sticks might seem intimidating, but with a little practice (and a whole lot of patience!), you’ll be rocking winged masterpieces in no time!
A. Essential Tools (Besides the Sticks, Duh!):
- Angled Eyeliner Brush: A MUST-HAVE! This will be your best friend for creating precise lines and sharp wings.
- Small Detail Brush: Perfect for smudging, blending, and creating softer looks.
- Cotton Swabs (Q-tips): For cleaning up mistakes and perfecting your lines. Think of them as your tiny erasers!
- Makeup Remover: Because mistakes happen! (And that’s okay!)
- Mirror: Preferably one with magnification! You need to see what you’re doing, people!
- Steady Hand (and Maybe a Cup of Coffee!): Precision is key!
B. Techniques for Eyeliner Application:
-
The Classic Line:
- Step 1: Prime Your Lids! This will help your eyeliner last longer and prevent creasing. Use an eyeshadow primer or a touch of concealer.
- Step 2: Choose Your Stick! For a classic line, a cream eyeshadow stick or a metallic eyeshadow stick works best. Choose a color that complements your eye color and skin tone. Black, brown, bronze, and navy are always good choices.
- Step 3: Apply the Stick to Your Brush! Don’t apply the stick directly to your eyelid! Instead, swipe the stick onto the back of your hand and pick up the product with your angled eyeliner brush. This gives you more control.
- Step 4: Start Small! Begin by drawing a thin line along your lash line, starting from the inner corner and working your way outwards. You can always add more product, but it’s harder to take it away!
- Step 5: Build the Line! Gradually thicken the line until you achieve your desired thickness.
- Step 6: Perfect the Line! Use a cotton swab dipped in makeup remover to clean up any mistakes and sharpen the line.
- Step 7: Set the Line! (Optional) For extra staying power, set your eyeliner with a matching eyeshadow powder.
-
The Winged Liner:
- Step 1: Follow Steps 1-3 from the Classic Line.
- Step 2: Create the Wing! This is where things get tricky! There are several ways to create a wing, but here’s a foolproof method:
- Method 1 (Tape Method): Place a piece of tape at a 45-degree angle from the outer corner of your eye towards the end of your eyebrow. This will serve as a guide for your wing.
- Method 2 (Dot Method): Place a small dot where you want the end of your wing to be.
- Method 3 (Freehand Method): If you’re feeling adventurous, go for it! But be prepared for some trial and error!
- Step 3: Connect the Line to the Wing! Draw a line from the end of your eyeliner line to the end of your wing, creating a triangle shape.
- Step 4: Fill in the Wing! Fill in the triangle shape with your eyeliner.
- Step 5: Remove the Tape (if used)! Gently peel off the tape.
- Step 6: Perfect the Wing! Use a cotton swab dipped in makeup remover to sharpen the wing and correct any mistakes.
- Step 7: Set the Wing! (Optional) For extra staying power, set your eyeliner with a matching eyeshadow powder.
-
The Smudged Liner:
- Step 1: Choose Your Stick! A cream eyeshadow stick or a shimmer stick works best for a smudged liner look. Choose a color that is slightly darker than your skin tone.
- Step 2: Apply the Stick to Your Lash Line! Apply the stick directly to your lash line, focusing on the outer corner.
- Step 3: Smudge the Line! Use a small detail brush to smudge the line, creating a soft, smoky effect.
- Step 4: Blend the Line! Blend the line upwards towards your crease.
- Step 5: Add More Product! Add more product to the outer corner for a more intense smoky effect.
- Step 6: Set the Liner! Set the liner with a matching eyeshadow powder to prevent creasing.
C. Tips and Tricks for Eyeliner Success:
- Practice Makes Perfect! Don’t get discouraged if your first few attempts are less than perfect. Keep practicing, and you’ll get there!
- Start with a Light Hand! It’s easier to add more product than to take it away!
- Use a Mirror! Make sure you can see what you’re doing!
- Take Your Time! Don’t rush the process!
- Don’t Be Afraid to Experiment! Try different colors, styles, and techniques to find what works best for you!
- Embrace Your Mistakes! Mistakes happen! Just clean them up and move on!
- Have Fun! Makeup should be fun! Don’t take it too seriously!
(Professor Sparkle pauses for a dramatic sip of water from a glitter-encrusted water bottle.)
Professor Sparkle: Now, before we move on, let’s address the elephant in the room… glitter fallout! 😩 Glitter is beautiful, but it can be a pain to clean up! Here are a few tips to minimize glitter fallout:
- Use a Glitter Glue! This will help the glitter adhere to your skin and prevent it from falling out.
- Apply Glitter in Layers! Apply a thin layer of glitter, then wait for it to dry before applying another layer.
- Use a Dense Brush! A dense brush will help to pack the glitter onto your skin.
- Tap Off Excess Glitter! Before applying the glitter, tap off any excess glitter from your brush.
- Clean Up Fallout Immediately! Use a piece of tape or a lint roller to clean up any glitter fallout.
III. Inner Corner Illumination: Unleashing Your Inner Halo!
(The screen transitions to show various inner corner highlight looks, ranging from subtle to blinding.)
Professor Sparkle: Ah, the inner corner highlight! The secret weapon for instantly brightening your eyes and making you look more awake! It’s like a mini-facial in a single swipe! ✨
A. Choosing the Right Highlight Stick:
- Shimmer Stick: Perfect for adding a pop of sparkle and dimension. Choose a shade that complements your skin tone.
- Metallic Eyeshadow Stick: Creates a bold, metallic sheen. Choose a shade that is slightly lighter than your skin tone.
- Highlight Stick: Designed to illuminate and add radiance. Choose a shade that is slightly lighter than your skin tone.
B. Techniques for Inner Corner Highlight Application:
-
The Subtle Glow:
- Step 1: Choose a Highlight Stick! A highlight stick or a shimmer stick with a subtle sheen works best for a natural glow.
- Step 2: Apply the Stick to Your Inner Corner! Apply the stick directly to your inner corner, focusing on the tear duct area.
- Step 3: Blend the Highlight! Use your finger or a small detail brush to blend the highlight into your eyeshadow.
- Step 4: Set the Highlight! (Optional) For extra staying power, set the highlight with a translucent powder.
-
The Pop of Sparkle:
- Step 1: Choose a Shimmer Stick! A shimmer stick with a noticeable sparkle works best for adding a pop of sparkle.
- Step 2: Apply the Stick to Your Inner Corner! Apply the stick directly to your inner corner, focusing on the tear duct area.
- Step 3: Blend the Highlight! Use your finger or a small detail brush to blend the highlight into your eyeshadow.
- Step 4: Set the Highlight! (Optional) For extra staying power, set the highlight with a translucent powder.
-
The Blinding Highlight:
- Step 1: Choose a Metallic Eyeshadow Stick! A metallic eyeshadow stick with a high-shine finish works best for creating a blinding highlight.
- Step 2: Apply the Stick to Your Inner Corner! Apply the stick directly to your inner corner, focusing on the tear duct area.
- Step 3: Blend the Highlight! Use your finger or a small detail brush to blend the highlight into your eyeshadow.
- Step 4: Set the Highlight! (Optional) For extra staying power, set the highlight with a translucent powder.
C. Tips and Tricks for Inner Corner Highlight Success:
- Use a Light Hand! A little goes a long way!
- Blend, Blend, Blend! Make sure the highlight is seamlessly blended into your eyeshadow.
- Choose the Right Shade! Choose a shade that complements your skin tone and eyeshadow.
- Experiment with Different Finishes! Try different finishes, such as shimmer, metallic, and matte, to find what works best for you.
- Don’t Be Afraid to Stack! Layer different highlight shades for a more complex and dimensional look.
(Professor Sparkle beams at the class.)
Professor Sparkle: And there you have it, my dazzling students! The secrets to mastering eyeliner and inner corner highlights with the humble, yet mighty, 5-Piece Stick Set! Now go forth, experiment, and unleash your inner sparkle!
(She throws a handful of glitter into the air, causing a collective cheer from the class. The disco ball spins faster, casting shimmering light across the room.)
Professor Sparkle: Remember, practice makes perfect! And even if you mess up, just remember… glitter hides everything! 😉 Class dismissed!
(The students eagerly gather their 5-piece stick sets and head out, ready to conquer the world, one shimmering eye look at a time.)
For detailed product specifications and purchases, please go to :https://zenamakeup.com/products/glimmer-glow-5-piece-glitter-cream-eyeshadow-stick-set
Leave a Reply