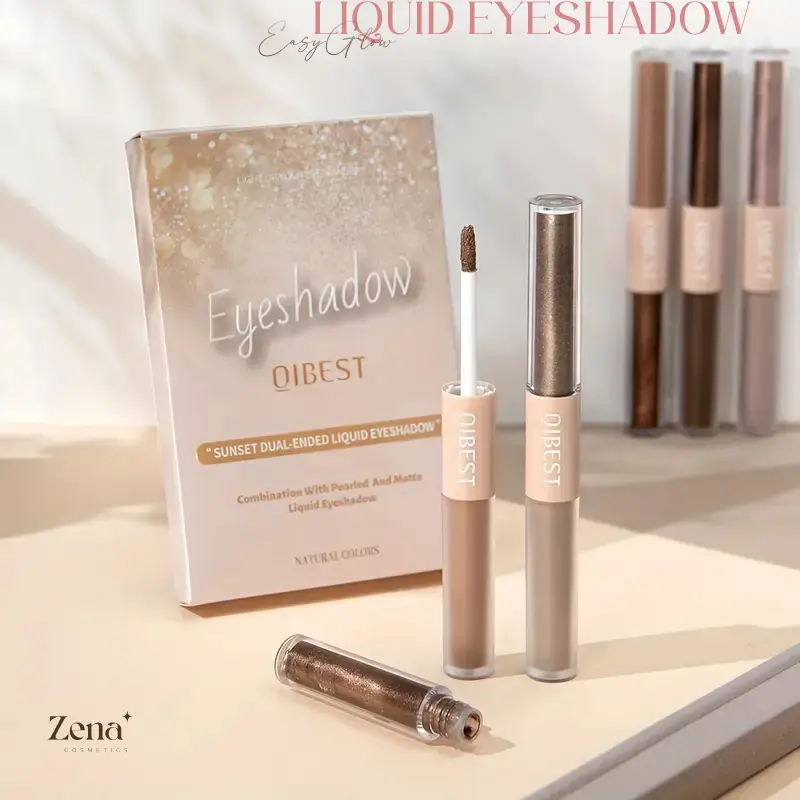
Liquid Dual-end EasyGlow Eyeshadow Set: A Deep Dive into Formula, Application, and Radiant Finish (aka, Eyeshadow for Mortals)
(Lecture Hall doors swing open with a flourish. Professor Sparkle, in a lab coat bedazzled with tiny rhinestones, strides confidently to the podium. A single spotlight shines on a shimmering eyeshadow palette.)
Good morning, class! Or good afternoon, or good evening, depending on when you decided to join the eyeshadow enlightenment. I am Professor Sparkle, and today we embark on a journey – a shimmering, radiant journey – into the world of liquid dual-end eyeshadows. Specifically, the Liquid Dual-end EasyGlow Eyeshadow Set. Buckle up, because we’re about to dissect this beauty beast!
(Professor Sparkle taps a tablet, and a title slide appears on the screen: “Liquid Dual-end EasyGlow Eyeshadow: Deconstructed.”)
Now, I know what you’re thinking. "Liquid eyeshadow? Sounds intimidating! Professor, I can barely draw a straight line with eyeliner after three cups of coffee!" Fear not, my pretties! This isn’t your grandmother’s cakey powder shadows that require a PhD in blending. This is the EasyGlow set, designed for the makeup maven and the perpetually-late novice alike.
(Professor Sparkle winks. An image of a stressed-out person frantically applying makeup in a rearview mirror flashes on the screen.)
We’ll be focusing on three key aspects:
- The Formula: The Alchemical Magic Inside ✨ (What makes this stuff actually work?)
- Application: From Tube to Total Transformation 🖌️ (Tips, tricks, and techniques for eyeshadow glory.)
- The Radiant Finish: Shine Bright Like a Diamond (Without Looking Like a Disco Ball) 💎 (Achieving that perfect glow without blinding innocent bystanders.)
So, let’s dive in!
Part 1: The Formula – The Alchemical Magic Inside ✨
(Professor Sparkle pulls out a vial filled with shimmering liquid. She holds it up to the light dramatically.)
The heart of any good eyeshadow, liquid or otherwise, lies in its formula. This is where the magic happens – or doesn’t. Let’s break down what makes the EasyGlow formula tick.
1.1 Base Ingredients: The Foundation of Flawlessness
Think of the base as the canvas upon which we paint our masterpiece (or our semi-competent Tuesday morning look). The base determines how the pigment adheres, how long it lasts, and how comfortable it feels on the delicate skin of your eyelids.
Typical ingredients you might find include:
- Water: The most basic solvent, helps with the overall consistency.
- Silicones (e.g., Dimethicone, Cyclopentasiloxane): These provide slip and glide, allowing for smooth application. They also contribute to the eyeshadow’s longevity.
- Emollients (e.g., Glycerin, Caprylic/Capric Triglyceride): These moisturize the skin, preventing the eyeshadow from drying out and creasing.
- Film Formers (e.g., Polyurethane-35, Acrylates Copolymer): These create a thin, flexible film that holds the pigment in place and prevents fading.
Why are these important? A well-formulated base means less creasing, less fading, and a more comfortable wear throughout the day. Nobody wants eyeshadow that feels like sandpaper or disappears before lunchtime!
(Professor Sparkle displays a slide showing magnified images of eyeshadow creasing on the eyelid. The audience groans.)
1.2 Pigments: The Color Explosion! 🌈
This is where the fun begins! Pigments are the finely ground particles that provide the eyeshadow with its color.
- Inorganic Pigments (e.g., Iron Oxides, Titanium Dioxide): These are generally more stable, less prone to fading, and considered safe for use on the skin. They provide a range of matte and shimmer shades.
- Mica: This is a mineral that provides a shimmery or pearlescent effect. It reflects light, creating a luminous finish.
- Synthetic Fluorphlogopite: A synthetic mica that offers a smoother, more intense shimmer than natural mica.
The EasyGlow Difference: Many liquid eyeshadows boast intense pigmentation, but the key is blendable pigmentation. The EasyGlow formula often strikes a balance between rich color payoff and ease of blending, making it forgiving for beginners.
(Professor Sparkle pulls out a small brush and swipes it across a swatch of eyeshadow on her hand. The color is vibrant but easily blends with a finger.)
1.3 Shimmers and Glitters: The Sparkle Factor! ✨✨✨
Ah, the sparkle! This is what elevates eyeshadow from "blah" to "BAM!" But let’s be clear: there’s a fine line between a subtle shimmer and looking like you fell into a glitter factory.
- Particle Size Matters: Smaller particles tend to create a softer, more diffused shimmer. Larger particles create a more dramatic, glittery effect.
- Quality is Key: Cheap glitter can be scratchy and irritating. Look for formulas that use finely milled, cosmetic-grade glitter.
The EasyGlow Advantage: The EasyGlow sets often feature shimmers that are finely milled and blend seamlessly into the base color, creating a sophisticated, radiant finish. They avoid the chunky, fallout-prone glitter that can make you look like a toddler raided your makeup bag.
(Professor Sparkle shudders dramatically. A slide appears showing a photo of someone covered in glitter. The caption reads: "Glitter Gone Wrong.")
1.4 The Dual-End Design: Genius or Gimmick? 🤔
The "dual-end" part is what makes this set particularly interesting. Typically, one end features a matte or shimmer base color, while the other end features a coordinating glitter or shimmer topper.
Benefits:
- Convenience: Two shades in one package, perfect for travel or on-the-go touch-ups.
- Coordination: The shades are designed to complement each other, taking the guesswork out of creating a cohesive eye look.
- Versatility: You can wear each shade alone or layer them for a more dramatic effect.
Potential Drawbacks:
- Formula Consistency: It’s crucial that the formulas of both ends are compatible. If one end is too dry or too oily, it can affect the overall performance.
- Packaging Design: The packaging needs to be sturdy and leak-proof to prevent the product from drying out or mixing.
Table 1: Analyzing the Formula Components
| Component | Function | Potential Benefits | Potential Drawbacks |
|---|---|---|---|
| Base Ingredients | Provides adhesion, longevity, and comfort. | Long-lasting wear, minimal creasing, comfortable feel. | Can feel heavy or greasy if not formulated properly. |
| Pigments | Provides color. | Intense color payoff, good blendability. | Can be patchy or difficult to blend if not finely milled. |
| Shimmers/Glitters | Adds sparkle and dimension. | Radiant finish, enhances the eye. | Can be chunky, irritating, or cause fallout if not high-quality. |
| Dual-End Design | Combines two complementary shades in one package. | Convenience, coordinated looks, versatility. | Formula inconsistency, packaging issues, potential for drying out. |
(Professor Sparkle takes a sip of water, then clears her throat.)
Now that we’ve dissected the formula, let’s move on to the fun part: application!
Part 2: Application – From Tube to Total Transformation 🖌️
(Professor Sparkle gestures towards a makeup station set up on the stage. A model is seated patiently.)
Applying liquid eyeshadow can seem daunting, but with the right techniques and a little practice, you can achieve stunning results.
2.1 Preparing the Canvas: Priming is Paramount! 🎨
Just like a painter primes their canvas, you need to prepare your eyelids before applying eyeshadow. This helps to create a smooth, even surface, prevents creasing, and extends the wear time of your eyeshadow.
Just like a painter primes their canvas, you need to prepare your eyelids before applying eyeshadow. This helps to create a smooth, even surface, prevents creasing, and extends the wear time of your eyeshadow.
- Eye Primer: A dedicated eye primer is your best friend. It creates a tacky base that helps the eyeshadow adhere better.
- Concealer: If you don’t have an eye primer, you can use a small amount of concealer to even out your skin tone and create a base for the eyeshadow. Just be sure to set it with a light dusting of powder to prevent creasing.
Professor Sparkle’s Pro Tip: Don’t over-apply primer or concealer. A thin layer is all you need. Too much product can actually cause creasing!
(Professor Sparkle applies a small amount of eye primer to the model’s eyelid, using a light tapping motion.)
2.2 Application Techniques: Mastering the Art of the Swipe
The key to successful liquid eyeshadow application is to work quickly and blend, blend, blend!
- Direct Application: You can apply the eyeshadow directly to your eyelid using the applicator wand. Start with a small amount and build up the intensity as needed.
- Finger Application: For a softer, more diffused look, dab the eyeshadow onto your fingertip and then gently pat it onto your eyelid.
- Brush Application: Use a synthetic brush to apply and blend the eyeshadow. A flat shader brush is great for packing on color, while a blending brush is perfect for creating a seamless transition.
Professor Sparkle’s Pro Tip: Work in small sections. Liquid eyeshadows tend to dry quickly, so it’s important to blend them out before they set.
(Professor Sparkle demonstrates each application technique on the model’s eye.)
2.3 Blending Strategies: Achieving Seamless Transitions
Blending is the key to a professional-looking eyeshadow application. Here are a few techniques to try:
- Use a Blending Brush: A fluffy blending brush is your best weapon against harsh lines and uneven color. Use windshield-wiper motions to blend the eyeshadow into the crease and outer corner of your eye.
- Work in Circular Motions: Circular motions help to soften the edges of the eyeshadow and create a seamless transition.
- Use a Light Hand: Apply light pressure to the brush to avoid creating muddy or uneven color.
Professor Sparkle’s Pro Tip: If you’re struggling to blend, try adding a small amount of translucent powder to your blending brush. This will help to create a smoother, more even finish.
(Professor Sparkle demonstrates blending techniques on the model’s eye, using a variety of brushes.)
2.4 Layering and Building Intensity: Taking it to the Next Level
One of the great things about liquid eyeshadows is that you can easily layer them to create different looks.
- Start with a Base Color: Apply a matte or shimmer base color all over your eyelid.
- Add Depth to the Crease: Use a darker shade to define the crease of your eye.
- Highlight the Inner Corner: Apply a light shimmer to the inner corner of your eye to brighten and open up your eyes.
- Top with Glitter (Sparingly!): Apply a small amount of glitter to the center of your eyelid for a pop of sparkle.
Professor Sparkle’s Pro Tip: When layering eyeshadows, start with the lightest shade and gradually build up to the darkest shade. This will help you to create a more seamless and blended look.
(Professor Sparkle demonstrates layering techniques on the model’s eye, creating a complex and beautiful look.)
Table 2: Application Troubleshooting
| Problem | Solution |
|---|---|
| Eyeshadow is creasing. | Use an eye primer, set with powder, and avoid applying too much product. |
| Eyeshadow is patchy. | Apply a thin layer of primer, use a good quality brush, and blend thoroughly. |
| Eyeshadow is fading. | Use an eye primer, set with powder, and choose a long-wearing formula. |
| Glitter is falling out. | Use a glitter glue or a sticky base, and apply the glitter sparingly. |
| Eyeshadow is drying too quickly. | Work in small sections and blend quickly. |
| Difficulty blending the two end colors | Use a blending brush with soft bristles and blend in circular motions. |
(Professor Sparkle pauses, admiring her work on the model.)
Now that we’ve mastered the application techniques, let’s talk about the finish!
Part 3: The Radiant Finish – Shine Bright Like a Diamond (Without Looking Like a Disco Ball) 💎
(Professor Sparkle dims the lights, and a single spotlight shines on the model’s eyes. They sparkle and shimmer beautifully.)
The ultimate goal of eyeshadow is to enhance your eyes and create a beautiful, radiant finish. But how do you achieve that perfect glow without going overboard?
3.1 Understanding Different Finishes:
- Matte: A matte finish is flat and non-reflective. It’s perfect for creating a natural, understated look or for defining the crease of your eye.
- Shimmer: A shimmer finish reflects light, creating a luminous and radiant effect. It’s great for highlighting the eyelid and adding dimension to your look.
- Glitter: A glitter finish is the most dramatic and eye-catching. It’s perfect for special occasions or for adding a touch of sparkle to your everyday look.
Professor Sparkle’s Pro Tip: Choose a finish that complements your skin tone and eye color. Lighter skin tones tend to look best with shimmer finishes, while darker skin tones can pull off glitter finishes with ease.
(Professor Sparkle displays a slide showing examples of matte, shimmer, and glitter eyeshadow finishes.)
3.2 Achieving the Perfect Glow:
- Start with a Shimmer Base: Apply a shimmer eyeshadow all over your eyelid.
- Add Depth with a Matte Shade: Use a matte eyeshadow to define the crease of your eye.
- Highlight the Inner Corner: Apply a light shimmer to the inner corner of your eye to brighten and open up your eyes.
- Use a Light Touch: Less is more when it comes to shimmer and glitter. Start with a small amount and build up the intensity as needed.
Professor Sparkle’s Pro Tip: If you’re worried about looking too shiny, try using a matte eyeshadow on your brow bone to balance out the shimmer on your eyelid.
(Professor Sparkle adjusts the lighting to showcase the different facets of the model’s eyeshadow.)
3.3 Avoiding Common Mistakes:
- Overdoing the Glitter: Too much glitter can make you look like a disco ball. Use it sparingly and only on specific areas of your eyelid.
- Using the Wrong Brush: Using the wrong brush can lead to uneven application and poor blending. Choose brushes that are specifically designed for eyeshadow application.
- Forgetting to Blend: Blending is crucial for creating a seamless and professional-looking finish. Take the time to blend your eyeshadow thoroughly.
- Ignoring Your Skin Tone: What looks good on one person may not look good on another. Choose eyeshadow colors that complement your skin tone and eye color.
Professor Sparkle’s Pro Tip: Don’t be afraid to experiment! The best way to find what works for you is to try different colors, finishes, and techniques.
(Professor Sparkle addresses the audience directly.)
And there you have it! A comprehensive guide to the Liquid Dual-end EasyGlow Eyeshadow Set. Remember, makeup is all about having fun and expressing yourself. Don’t be afraid to experiment, make mistakes, and learn from them. And most importantly, remember to sparkle!
(Professor Sparkle throws a handful of glitter into the air. The audience applauds enthusiastically. The lights fade.)
Table 3: EasyGlow Eyeshadow Set: Pros and Cons
| Feature | Pros | Cons |
|---|---|---|
| Formula | Typically blendable, pigmented, and designed for comfortable wear. Often contains finely milled shimmers. | Potential for formula inconsistencies between the two ends. Some may find silicones irritating. |
| Application | Easy to apply with fingers or brushes. Dual-end design encourages coordinated looks. | Liquid formula requires quick blending. Potential for drying out if not stored properly. |
| Finish | Radiant and luminous, with a variety of shimmer and glitter options. Can be layered for different effects. | Potential for over-application of glitter. Requires careful blending to avoid harsh lines. |
| Convenience | Travel-friendly and perfect for on-the-go touch-ups. | Packaging needs to be sturdy to prevent leakage or drying out. May not offer the same level of color variety as a traditional palette. |
| Overall Value | Often offers good value for money, providing two complementary shades in one product. | Quality can vary depending on the brand. It’s essential to research reviews before purchasing. |
(The screen displays a final message: "Go forth and sparkle! ✨")
For detailed product specifications and purchases, please go to :https://zenamakeup.com/products/liquid-dual-end-easyglow-eyeshadow-set-double-your-eye-sparkles-day-night
Leave a Reply