Glitterati for Hooded Eyes: A Cream Eyeshadow Stick Masterclass 🌟
Welcome, my dazzling disciples, to the sacred art of glittering the hooded eye! Let’s face it, having hooded eyelids can feel like trying to paint a masterpiece on a disappearing canvas. You carefully craft a smoky eye, blink once, and POOF! Gone. Swallowed by the hood. Vanished into the abyss. But fear not, for I, your humble (and exceptionally sparkly) guide, am here to unveil the secrets to rocking glitter cream eyeshadow sticks even with those gorgeous, but sometimes challenging, hooded lids.
This isn’t just a tutorial; it’s a transformation. We’re going from "hooded and hidden" to "hooded and hypnotic." We’re going to learn how to use the power of strategically placed glitter and cream shadows to create eye looks that are not only stunning but also actually visible. Buckle up, grab your favorite glitter stick (or three!), and let’s dive in!
Lecture Outline:
- Understanding the Hood (Your Eyelid, Not Little Red Riding Hood’s Grandma): What are hooded eyes, and why are they tricky?
- Why Cream Eyeshadow Sticks are Your New BFF: The benefits of cream formulas and why they’re perfect for hooded lids.
- The Glitter Gauntlet: Choosing the Right Glitter and Stick Formula: Not all glitter is created equal!
- Prep Like a Pro: Creating a Flawless Canvas: Priming is crucial for longevity and glitter adhesion.
- The Technique: Glitter Placement for Maximum Impact: Where to put the glitter to actually SEE it!
- Blending Bootcamp: Avoiding the dreaded ‘one-streak-of-glitter’ look.
- Layering Like a Boss: Adding Dimension and Drama.
- The Finishing Touches: Completing the Look and Preventing Fallout.
- Troubleshooting: Common Glitter Cream Eyeshadow Stick Woes and How to Fix Them.
- Beyond the Basics: Advanced Techniques and Creative Looks.
- Product Recommendations: My Holy Grail Glitter Cream Eyeshadow Sticks.
- Final Thoughts: Embrace the Sparkle!
1. Understanding the Hood (Your Eyelid, Not Little Red Riding Hood’s Grandma) 🐺:
Okay, first things first: let’s define what we’re working with. Hooded eyes are characterized by an extra fold of skin that hangs over the eyelid, often obscuring the crease when the eyes are open. This can make traditional eyeshadow techniques seem… well, pointless. It’s like painting a mural and then immediately covering half of it with a curtain.
Why are they tricky?
- Crease Coverage: The hood often covers the meticulously blended crease color.
- Limited Visible Lid Space: You have less real estate to work with compared to other eye shapes.
- Smudging and Transfer: The skin-on-skin contact can lead to eyeshadow transferring onto the upper lid.
- Disappearing Acts: Colors can look dramatically different when your eyes are open versus closed.
But don’t despair! Hooded eyes are beautiful and expressive, and with the right techniques, you can create stunning looks that accentuate their unique shape. Think of it as a challenge, not a curse! 💪
2. Why Cream Eyeshadow Sticks are Your New BFF 💖:
Enter the cream eyeshadow stick, our hero in this glittering saga! Why are these little tubes of pigment so perfect for hooded eyes? Let’s break it down:
- Ease of Application: They’re incredibly easy to apply, even for beginners. Just swipe and blend!
- Quick and Convenient: Perfect for those rushed mornings when you need a touch of sparkle in a hurry.
- Buildable Color: You can build up the intensity from a subtle shimmer to a full-on glitter explosion.
- Creamy Texture: The creamy formula glides on smoothly and blends seamlessly.
- Less Fallout: Generally, cream shadows have less fallout than powder shadows, which is a HUGE win.
- Long-Lasting (with proper prep): They tend to stay put longer than powder shadows, especially with a good primer.
In short, cream eyeshadow sticks are the lazy girl’s (or busy person’s) secret weapon for achieving a glamorous look with minimal effort. They are like the swiss army knife of eye makeup! 🛠️
3. The Glitter Gauntlet: Choosing the Right Glitter and Stick Formula ✨:
Not all glitter is created equal, my friends. Some glitter is chunky and abrasive, while others are finely milled and smooth. And the formula of the cream eyeshadow stick itself matters just as much.
Here’s a handy guide to help you navigate the glitter gauntlet:
| Feature | Good Glitter Choices | Bad Glitter Choices |
|---|---|---|
| Glitter Size | Fine or micro glitter, iridescent glitter | Chunky glitter, large hex glitter (unless you’re going for a very specific look) |
| Formula | Creamy, blendable, long-wearing, quick-drying | Dry, patchy, easily creasing, slow-drying |
| Color Payoff | Highly pigmented, buildable | Sheer, uneven, requiring multiple layers |
| Texture | Smooth, comfortable, non-irritating | Gritty, scratchy, irritating to the eyes |
| Longevity | Sets well, minimal creasing, minimal fading | Creases easily, fades quickly, transfers significantly |
| Overall Vibe | Sophisticated sparkle, subtle shimmer, everyday glam | Overly theatrical, costume-y, potentially messy |
Key Considerations:
- Test before you invest: Swatch the stick on the back of your hand to check the texture, color payoff, and blendability.
- Read reviews: See what other people with hooded eyes (or similar eye shapes) have to say about the product.
- Consider your skin type: If you have oily lids, opt for a long-wearing, oil-free formula.
- Think about the occasion: A subtle shimmer is perfect for everyday wear, while a more intense glitter is great for special events.
4. Prep Like a Pro: Creating a Flawless Canvas 🎨:
This is non-negotiable. Primer is your best friend, your soulmate, your ride-or-die in the world of hooded eyelids. It creates a smooth base for your eyeshadow, prevents creasing, and helps the glitter adhere better.
Here’s your priming protocol:
- Cleanse: Start with a clean, dry eyelid.
- Eye Cream (Optional): If you have dry skin, apply a lightweight eye cream and allow it to fully absorb.
- Primer: Apply a thin layer of eyelid primer to your entire lid, from lash line to brow bone. Pay special attention to the crease area.
- Set (Optional): For extra insurance, you can lightly set the primer with a translucent powder. This is especially helpful if you have oily lids.
Pro Tip: Use a primer specifically designed for oily eyelids if you struggle with creasing. 💪
5. The Technique: Glitter Placement for Maximum Impact 🎯:
Alright, here’s where the magic happens! The key to making glitter work on hooded eyes is strategic placement. We want to highlight the areas that are actually visible when your eyes are open.
Here’s the breakdown:
- The Center of the Lid: Apply the glitter cream eyeshadow stick directly to the center of your lid, focusing on the area that is visible when your eyes are open. Think of it as creating a spotlight for your eyes.
- The Inner Corner: A touch of glitter in the inner corner can instantly brighten your eyes and make them appear larger.
- The Lower Lash Line (Optional): A thin line of glitter along the lower lash line can add a subtle pop of sparkle.
- The Brow Bone (Subtle Highlight): A very light application under the brow bone can lift the eye and add dimension.
Avoid:
- The Crease: Applying glitter directly to the crease can make your eyes look smaller and more hooded.
- The Entire Lid: Covering your entire lid in glitter can be overwhelming and unflattering.
Think of it as sculpting with glitter, not painting a wall. 🏛️
6. Blending Bootcamp: Avoiding the dreaded ‘one-streak-of-glitter’ look 🖌️:
6. Blending Bootcamp: Avoiding the dreaded ‘one-streak-of-glitter’ look 🖌️:
Nobody wants to look like they accidentally swiped a glitter bomb across their eyelid. Blending is key to creating a seamless, professional-looking finish.
Here’s your blending strategy:
- Use Your Finger: Your finger is your best blending tool for cream eyeshadow sticks. The warmth of your finger helps to melt the product into the skin.
- Small, Circular Motions: Use small, circular motions to blend the edges of the glitter.
- Blend Upwards and Outwards: Blend the glitter upwards and outwards towards the outer corner of your eye.
- Clean Brush (Optional): You can use a clean, fluffy brush to soften the edges even further.
- Don’t Over-Blend: Be careful not to over-blend, as this can make the glitter disappear.
Pro Tip: Work quickly, as cream eyeshadow sticks can set quickly. ⏰
7. Layering Like a Boss: Adding Dimension and Drama 🎭:
Want to take your glitter game to the next level? Try layering different shades and textures of eyeshadow.
Here are some layering ideas:
- Base Shadow: Apply a matte eyeshadow in a neutral shade (like brown or taupe) to your crease and outer corner for definition.
- Shimmer Shadow: Apply a shimmer shadow to your lid before applying the glitter cream eyeshadow stick. This will create a more multidimensional effect.
- Different Glitter Shades: Layer different shades of glitter to create a custom look.
- Eyeliner: A thin line of black or brown eyeliner can help to define your eyes and make the glitter pop.
Remember, layering is all about experimentation. Don’t be afraid to try different combinations and see what works best for you. ✨
8. The Finishing Touches: Completing the Look and Preventing Fallout 🛡️:
You’ve got the glitter on, you’ve blended like a pro, now it’s time for the finishing touches!
Here’s your checklist:
- Mascara: Apply several coats of mascara to your upper and lower lashes.
- Setting Spray: Spritz your face with setting spray to lock everything in place.
- Clean Up: Use a cotton swab dipped in makeup remover to clean up any fallout.
- Check Your Reflection: Make sure everything looks even and balanced.
Pro Tip: Apply mascara after your eyeshadow to avoid getting glitter on your mascara wand.
9. Troubleshooting: Common Glitter Cream Eyeshadow Stick Woes and How to Fix Them 🚑:
Even with the best techniques, things can sometimes go wrong. Here are some common issues and how to fix them:
| Problem | Solution |
|---|---|
| Creasing | Use a good eyelid primer, set the primer with translucent powder, choose a long-wearing formula, avoid applying too much product. |
| Fallout | Apply eyeshadow before foundation, use a gentle application technique, use a setting spray, clean up fallout with a cotton swab. |
| Uneven Application | Use a light hand, build up the color gradually, blend thoroughly, apply a second layer of product to even out the application. |
| Glitter Overload | Use a lighter shade of glitter, apply less product, blend more thoroughly, tone down the rest of your makeup. |
| Glitter Looks Dull/Flat | Layer different shades of glitter, use a shimmer shadow as a base, add a touch of highlighter to the inner corner of your eye. |
| Stick is dragging/dry | Make sure your eyelids are properly moisturized (but not oily!), use a very light hand, consider warming the tip of the stick slightly before application (be careful!). |
10. Beyond the Basics: Advanced Techniques and Creative Looks 🎨:
Once you’ve mastered the basics, it’s time to get creative! Here are some advanced techniques to try:
- Halo Eye: Apply a dark eyeshadow to the inner and outer corners of your eye and a glitter shadow to the center of your lid.
- Cut Crease: Define your crease with a dark eyeshadow and then apply a glitter shadow to the lid below the crease.
- Ombre Effect: Use two or more shades of glitter eyeshadow to create an ombre effect on your lid.
- Graphic Liner: Use a glitter cream eyeshadow stick to create a graphic eyeliner look.
The possibilities are endless! Don’t be afraid to experiment and have fun with your makeup. 🎉
11. Product Recommendations: My Holy Grail Glitter Cream Eyeshadow Sticks 🏆:
Okay, time for the juicy stuff! Here are some of my favorite glitter cream eyeshadow sticks for hooded eyes:
| Product Name | Features | Why I Love It |
|---|---|---|
| Laura Mercier Caviar Stick Eye Colour | Creamy, blendable, long-wearing, available in a variety of shimmer and matte shades. | A classic for a reason! The formula is amazing, and the shimmer shades are perfect for a subtle, everyday sparkle. |
| Bobbi Brown Long-Wear Cream Shadow Stick | Long-wearing, waterproof, crease-resistant, available in a range of neutral and vibrant shades. | These are incredibly long-lasting and perfect for oily lids. The color payoff is fantastic, and they blend beautifully. |
| Kiko Milano Eyeshadow Stick | Affordable, creamy, blendable, available in a wide range of colors and finishes. | A budget-friendly option that doesn’t compromise on quality. The color selection is amazing, and they’re perfect for experimenting with different looks. |
| Charlotte Tilbury Colour Chameleon | Infused with light-reflecting pigments, smudge-proof, long-lasting, available in shades designed to enhance specific eye colors. | These are designed to enhance your natural eye color. The formula is luxurious, and the shimmer is absolutely stunning. |
This is just a starting point, of course. Do your research and find the products that work best for you! 🕵️♀️
12. Final Thoughts: Embrace the Sparkle! ✨:
So there you have it, my glittering goddesses! Everything you need to know to rock glitter cream eyeshadow sticks, even with hooded eyes. Remember, makeup is all about expressing yourself and having fun. Don’t be afraid to experiment, break the rules, and embrace your inner sparkle!
Now go forth and glitter! ✨💖🌟🎉🌈
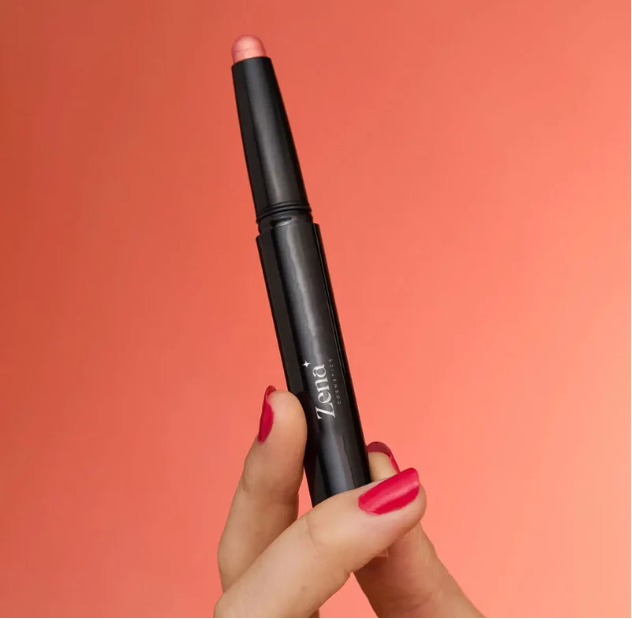
For detailed product specifications and purchases, please go to :https://zenamakeup.com/products/glitter-cream-eyeshadow-stick-shimmer-for-all-eyes-colors
Leave a Reply