The Liquid Alchemy: Mastering the Dual-End EasyGlow Eyeshadow Set for Eye-Catching Looks
(Lecture Hall Doors Swing Open with a Flourish. A Single Spotlight Illuminates You, the Eyeshadow Alchemist, at the Podium. You adjust your glasses dramatically.)
Alright, settle in, my shimmering students! Welcome to "Liquid Alchemy: Mastering the Dual-End EasyGlow Eyeshadow Set." Today, we’re not just talking eyeshadow; we’re diving headfirst into a world of pigment potential, a universe where two seemingly disparate shades collide to create looks that are, dare I say, utterly mesmerizing.
(You gesture wildly with a hand, nearly knocking over a beaker filled with… glitter.)
Forget your dusty palettes and fiddly brushes for a moment. We’re embracing the future! We’re talking about the Dual-End EasyGlow Eyeshadow Set – a sleek, portable powerhouse that puts the power of effortless eye artistry right at your fingertips. Think of it as the Swiss Army knife of your makeup bag, but instead of a corkscrew and a magnifying glass, you get two glorious shades of liquid magic.
(You pause for dramatic effect, then wink.)
But here’s the secret: merely owning the set doesn’t make you a makeup master. You need to understand the nuances, the subtle dance of colors, the… ahem… alchemy, to truly unlock its potential. So, grab your notebooks, sharpen your pencils (or, you know, open your notes app), and prepare to become a liquid eyeshadow virtuoso!
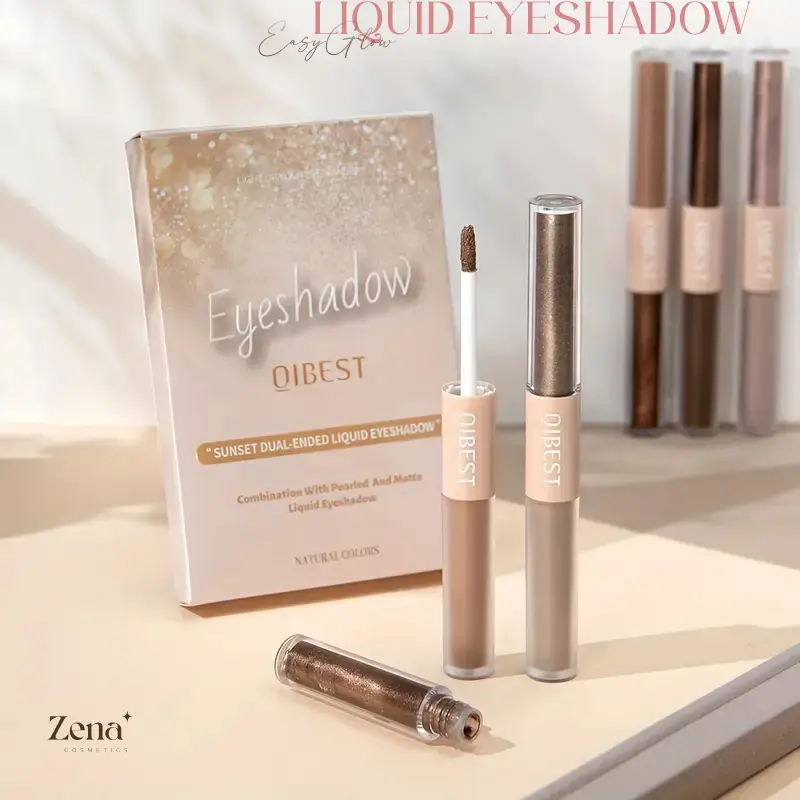
(A slide appears on the screen behind you, emblazoned with the title and a picture of a gleaming Dual-End EasyGlow Eyeshadow Set.)
Lecture Outline:
- The Anatomy of Awesome: Understanding the Dual-End Dynamo 🔬
- Color Harmony: The Foundation of Flawless 🎨
- Application Techniques: From Simple Sweeps to Smoldering Statements ✨
- Recipe Book: Combining Shades for Killer Looks 📖
- Troubleshooting & Pro Tips: Avoiding the Glitterpocalypse ⚠️
- Beyond the Basics: Expanding Your Liquid Eyeshadow Horizons 🌌
1. The Anatomy of Awesome: Understanding the Dual-End Dynamo 🔬
(You pick up a Dual-End EasyGlow Eyeshadow Set, examining it with the intensity of a scientist studying a new species.)
Before we start blending like Bob Ross on a caffeine binge, let’s dissect our subject. What is this marvel of modern makeup engineering?
The Dual-End EasyGlow Eyeshadow Set typically features:
- Two Liquid Eyeshadows: Obvious, right? But these aren’t your grandma’s chalky shadows. We’re talking about creamy, pigmented, often shimmer-laden formulas that glide on like a dream.
- Applicator Wands: Usually doe-foot applicators, designed for precise placement and easy blending. Think of them as tiny paintbrushes for your eyelids.
- Long-Lasting Formula: Most sets boast impressive staying power, minimizing creasing and fading. (Unless you’re planning on a spontaneous rain dance, you should be good.)
- Variety of Finishes: Matte, shimmer, metallic, glitter – the possibilities are endless!
(You present a table on screen.)
| Feature | Description | Advantage |
|---|---|---|
| Liquid Formula | Smooth, creamy texture that applies easily and blends seamlessly. | Intense pigmentation, buildable coverage, and minimal fallout compared to powder shadows. |
| Dual-End Design | Two complementary or contrasting shades in one convenient package. | Simplified application, pre-selected color combinations, and portability for on-the-go touch-ups. |
| Doe-Foot Applicator | Precise applicator for controlled placement and blending. | Allows for targeted application, creating defined lines and gradients. |
| Long-Lasting Wear | Formulated to resist creasing, fading, and smudging. | Ensures your eye look stays vibrant and intact throughout the day or night. |
(You tap the table with a pointer.)
See? It’s not just pretty packaging; it’s a carefully crafted system designed to make your life easier and your eyes… well, glow!
2. Color Harmony: The Foundation of Flawless 🎨
(You dramatically sweep your arm across the stage, revealing a giant color wheel.)
Ah, color theory! The bane of art students and the secret weapon of makeup artists. Don’t worry, we won’t get bogged down in the complexities of complementary and analogous colors. But understanding a few key principles will elevate your eyeshadow game from "meh" to "magnificent."
- Complementary Colors: Colors opposite each other on the color wheel (e.g., blue and orange, purple and yellow). These create high contrast and can make your eyes pop. Think of pairing a warm bronze with a cool blue for a dramatic effect.
- Analogous Colors: Colors next to each other on the color wheel (e.g., blue, blue-green, green). These create a harmonious and subtle look. Think of using a gradient of teal, emerald, and forest green.
- Neutral Colors: Shades like browns, grays, blacks, and whites. These are your workhorses, perfect for creating depth and definition. Think of using a matte brown as a base and layering a shimmery champagne on top.
(You pull out a selection of Dual-End EasyGlow Eyeshadow Sets and demonstrate different color pairings.)
Example Pairings:
- Warm Bronze & Cool Emerald: A classic combination that suits almost everyone. The bronze adds warmth, while the emerald provides a pop of color. Perfect for a sophisticated evening look.
- Rose Gold & Deep Plum: Romantic and sultry. The rose gold adds a touch of shimmer, while the plum creates depth and definition. Ideal for a date night or a special occasion.
- Champagne & Matte Brown: A foolproof everyday look. The champagne brightens the inner corner, while the brown defines the crease. Simple, elegant, and effortless.
- Silver & Charcoal Gray: Edgy and modern. The silver adds a metallic sheen, while the charcoal gray creates a smoky effect. Perfect for a night out or a concert.
(You present another table.)
| Shade Category | Color Examples | Best For |
|---|---|---|
| Neutrals | Champagne, Beige, Brown, Gray, Black | Base colors, crease definition, highlighting the inner corner, creating subtle everyday looks. |
| Warm Tones | Gold, Bronze, Copper, Peach, Coral, Orange, Red | Adding warmth and dimension to the eyes, creating vibrant and eye-catching looks. |
| Cool Tones | Silver, Blue, Purple, Green, Teal, Pink (Cool-toned) | Creating sophisticated and dramatic looks, making the eyes appear brighter, and complementing cool skin tones. |
| Brights | Hot Pink, Electric Blue, Neon Green, Canary Yellow | Adding a pop of color and personality to the eyes, creating bold and statement-making looks (use with caution and a steady hand!). |
(You emphasize a point with a dramatic flourish.)
Remember, these are just suggestions! The best way to find your perfect pairings is to experiment and see what works for you. Don’t be afraid to break the rules and create something truly unique!
3. Application Techniques: From Simple Sweeps to Smoldering Statements ✨
(You roll up your sleeves, ready to demonstrate.)
Now for the fun part: application! Liquid eyeshadow can be a bit intimidating at first, but with a few simple techniques, you’ll be blending like a pro in no time.
- The Simple Sweep: This is your everyday, no-fuss application. Simply swipe one shade across the entire eyelid, blending out the edges with your finger or a brush. Perfect for a quick and easy wash of color.
- The Two-Toned Wonder: Apply a lighter shade to the inner corner and a darker shade to the outer corner, blending them seamlessly in the middle. This creates depth and dimension.
- The Halo Eye: Apply a darker shade to the inner and outer corners of the eyelid, leaving the center bare. Then, apply a lighter, shimmery shade to the center to create a "halo" effect. This makes your eyes appear larger and brighter.
- The Cut Crease (Liquid Style): This requires a bit more precision. Use a concealer or a light eyeshadow to carve out a sharp line in your crease. Then, apply a darker shade to the lid below the crease, and a lighter shade to the area above the crease. This creates a dramatic and defined look.
- The Smoked Out Siren: Apply a darker shade to the lash line and blend upwards, creating a smoky effect. Then, apply a lighter shade to the inner corner to brighten the eyes. This is perfect for a night out.
(You demonstrate each technique on a volunteer student – or a mannequin head if no one’s brave enough.)
Key Tips for Application:
- Start with a primer: This will create a smooth base and prevent creasing.
- Apply in thin layers: Building up the color gradually will prevent clumping and ensure even application.
- Blend, blend, blend!: This is crucial for a seamless finish. Use a fluffy brush or your finger to blend the edges of the eyeshadow.
- Set with powder (optional): If you have oily eyelids, you can set the liquid eyeshadow with a translucent powder to prevent creasing.
(You present a visual guide, a series of images illustrating each technique.)
(You add a touch of humor.)
(You add a touch of humor.)
And remember, practice makes perfect! Don’t be discouraged if your first attempt looks like a toddler attacked your face with glitter. Just keep experimenting, and you’ll get there!
4. Recipe Book: Combining Shades for Killer Looks 📖
(You unveil a large, ornate book titled "The Grimoire of Gorgeous Gaze.")
Now for the real magic! Let’s explore some specific shade combinations and the looks you can create with them.
(You present a series of "recipes," each detailing a specific look and the shades required.)
Recipe 1: The Golden Hour Glam
- Shades: Warm Bronze & Champagne
- Technique: Apply the bronze to the entire lid, blending upwards. Apply the champagne to the inner corner and brow bone to highlight.
- Occasion: Date night, evening event, anytime you want to feel glamorous.
- Extra Credit: Add a winged eyeliner for extra definition.
Recipe 2: The Emerald Enchantress
- Shades: Deep Forest Green & Shimmery Teal
- Technique: Apply the forest green to the outer corner and crease, blending inwards. Apply the teal to the center of the lid.
- Occasion: Concert, festival, anytime you want to make a statement.
- Extra Credit: Line the lower lash line with a teal eyeliner for extra impact.
Recipe 3: The Rosy Romance
- Shades: Rose Gold & Soft Plum
- Technique: Apply the rose gold to the entire lid, blending upwards. Apply the plum to the outer corner and crease for depth.
- Occasion: Romantic dinner, wedding, anytime you want to look effortlessly beautiful.
- Extra Credit: Add a touch of rose gold highlighter to the inner corner.
Recipe 4: The Smoky Siren
- Shades: Charcoal Gray & Silver
- Technique: Apply the gray to the lash line and blend upwards, creating a smoky effect. Apply the silver to the inner corner and center of the lid to brighten the eyes.
- Occasion: Night out, party, anytime you want to look seductive.
- Extra Credit: Smudge black eyeliner along the lower lash line for a more intense look.
(You add more recipes to the table.)
| Look Name | Shades | Technique | Occasion | Extra Credit |
|---|---|---|---|---|
| Berry Bliss | Deep Burgundy & Shimmering Mauve | Burgundy in the crease, Mauve on the lid, blended seamlessly. | Fall evenings, holiday parties, a touch of understated drama. | Add a burgundy lip for a monochromatic masterpiece. |
| Ocean Eyes | Navy Blue & Iridescent White | Navy on the outer corner, blending into a wash of Iridescent White across the lid. | Coastal getaways, summer nights, making blue eyes really pop. | A touch of blue mascara on the outer lashes. |
| Sunset Glow | Burnt Orange & Golden Yellow | Orange in the crease, blending into Yellow on the lid, mimicking a sunset. | Music festivals, summer parties, bringing the sunshine indoors. | A golden highlight on the cheekbones to complete the sun-kissed look. |
| Galaxy Glam | Deep Indigo & Silver Glitter | Indigo as a base, with Silver Glitter layered on top, creating a galactic effect. | Special events, concerts, turning heads and capturing attention. | Star-shaped face gems for extra cosmic flair. |
(You close the Grimoire with a satisfying thud.)
These are just a few examples, of course. The possibilities are endless! The key is to experiment and find what works best for you.
5. Troubleshooting & Pro Tips: Avoiding the Glitterpocalypse ⚠️
(You put on a pair of safety goggles.)
Alright, let’s talk about potential pitfalls. Liquid eyeshadow is amazing, but it can also be a bit… temperamental.
Common Problems & Solutions:
- Creasing: This is usually caused by oily eyelids or applying too much product. Use a primer, apply thin layers, and set with powder if necessary.
- Patchy Application: This can be caused by dry eyelids or using a poor-quality eyeshadow. Exfoliate your eyelids regularly, use a hydrating primer, and invest in a good-quality eyeshadow.
- Fallout: This is more common with glittery eyeshadows. Apply the eyeshadow with a damp brush or your finger to minimize fallout. You can also use a glitter glue.
- Difficulty Blending: This can be caused by applying the eyeshadow too quickly or using a brush that’s too stiff. Work quickly, use a fluffy brush, and blend, blend, blend!
(You share some pro tips.)
Pro Tips:
- Use a mixing medium: If your liquid eyeshadow is too thick, you can add a drop of mixing medium to thin it out.
- Create a custom eyeliner: Use a fine-tipped brush to apply liquid eyeshadow as an eyeliner.
- Layer with powder eyeshadow: You can layer powder eyeshadow on top of liquid eyeshadow to create a more complex look.
- Clean your applicators regularly: This will prevent bacteria from building up and ensure smooth application.
(You display a slide with common errors and their solutions, using humorous illustrations.)
(You remove the safety goggles.)
Remember, even the most experienced makeup artists make mistakes. Don’t be afraid to experiment and learn from your blunders. After all, that’s how you become a true artist!
6. Beyond the Basics: Expanding Your Liquid Eyeshadow Horizons 🌌
(You gaze into the distance, as if contemplating the vastness of the cosmos.)
You’ve mastered the basics. You’re blending like a boss. Now what? It’s time to push your boundaries and explore the limitless possibilities of liquid eyeshadow!
- Experiment with different finishes: Try combining matte, shimmer, and metallic eyeshadows for a multidimensional look.
- Create graphic liner looks: Use a liquid eyeshadow and a fine-tipped brush to create bold and artistic eyeliner designs.
- Use liquid eyeshadow as a base for glitter: This will help the glitter adhere better and prevent fallout.
- Mix and match different Dual-End EasyGlow Eyeshadow Sets: Create your own custom color combinations and unique looks.
(You show examples of advanced techniques and creative looks, using images and videos.)
(You offer a final word of encouragement.)
The world of liquid eyeshadow is vast and exciting. Don’t be afraid to experiment, to break the rules, and to create something that is uniquely you. So go forth, my shimmering students, and paint the world with your glorious gaze!
(You take a bow as the lights fade. Confetti rains down from the ceiling. The lecture hall erupts in applause.)
(The end… or is it just the beginning?)
For detailed product specifications and purchases, please go to :https://zenamakeup.com/products/liquid-dual-end-easyglow-eyeshadow-set-double-your-eye-sparkles-day-night
Leave a Reply