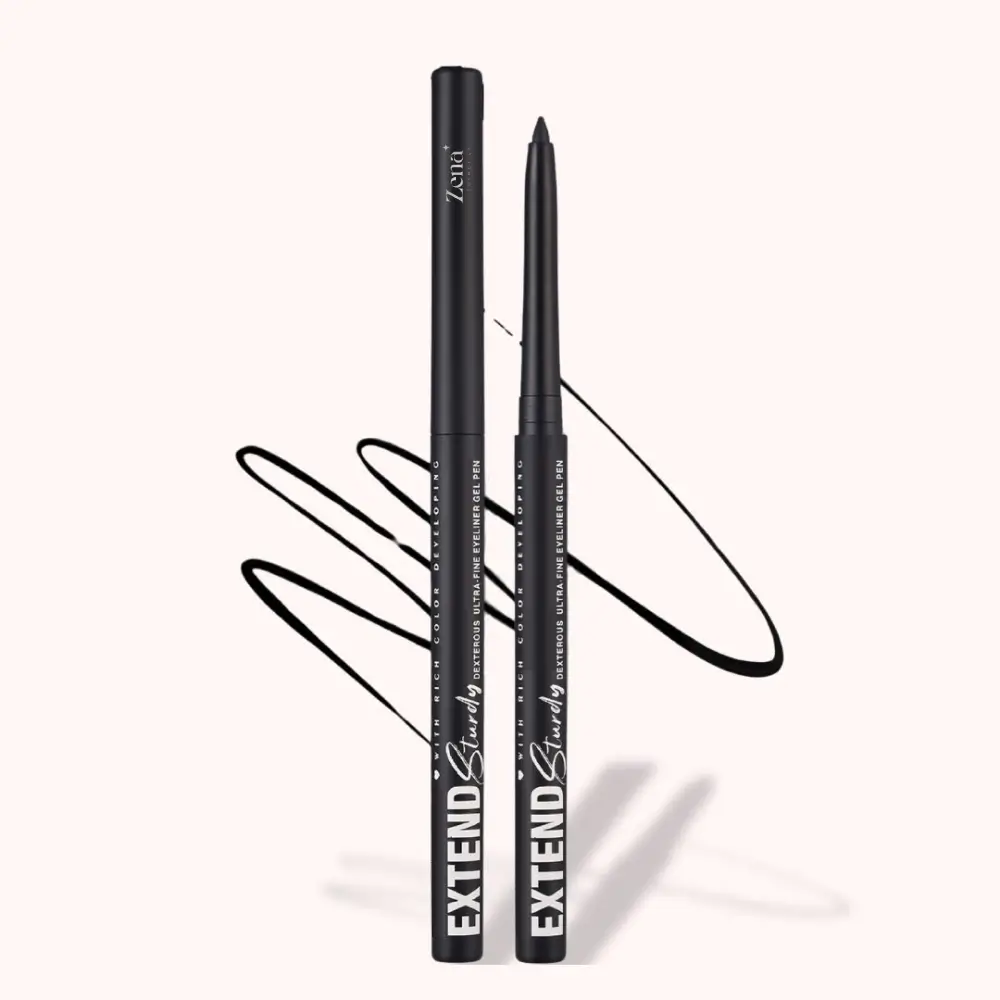
Define Your Look with Confidence: Long-wear Precision Gel Eyeliner Pen for a Line That Won’t Budge or Fade
(Lecture Hall Doors Slam Open with a Dramatic WHOOSH. Professor Eyelineria, sporting perfectly winged liner and a mischievous glint in her eye, strides to the podium.)
Alright, settle down, settle down, my darlings! Today, we’re tackling a topic near and dear to my heart (and, hopefully, soon to be near and dear to your eyes!): The Long-Wear Precision Gel Eyeliner Pen – a weapon of mass beautification that refuses to surrender to smudging, fading, or the dreaded raccoon eye.
Forget everything you think you know about eyeliner struggles. We’re ditching the shaky hands, the uneven lines, and the constant mirror checks. We’re entering a new era of eyeliner empowerment!
(Professor Eyelineria taps the screen, revealing a title slide with a glamorous image of flawlessly lined eyes. A dramatic fanfare plays.)
Lecture Overview:
- Module 1: The Eyeliner Hall of Shame (aka Why Your Current Eyeliner is Probably Failing You) 😭
- Module 2: Gel Eyeliner Pens: The Superhero of the Eyeliner World! 🦸♀️
- Module 3: Precision is Key: Mastering the Art of Application (From Beginner to Pro!) 🎨
- Module 4: Longevity, Longevity, Longevity! How to Make Your Liner Last All Day (and Night!) ⏰
- Module 5: Choosing Your Weapon: Finding the Perfect Gel Eyeliner Pen for YOU! ⚔️
- Module 6: Troubleshooting Eyeliner Emergencies (Because Let’s Be Real, They Happen!) 🚨
- Module 7: Beyond the Basics: Creative Liner Looks to Unleash Your Inner Artist! 🧑🎨
(Professor Eyelineria adjusts her spectacles, a twinkle in her eye.)
Let’s dive in, shall we?
Module 1: The Eyeliner Hall of Shame (aka Why Your Current Eyeliner is Probably Failing You) 😭
(The screen displays a series of comical images: smudged eyeliner, crooked wings, a woman frantically wiping her eyes.)
Ah, yes. The Eyeliner Hall of Shame. We’ve all been there. It’s a place filled with memories of good intentions gone horribly, hilariously wrong. Let’s face it, not all eyeliners are created equal. Some are downright treacherous.
Here’s a breakdown of the usual suspects and their crimes against beauty:
| Eyeliner Type | Common Crimes | Why It Happens |
|---|---|---|
| Pencil Eyeliner | Smudging, fading, transferring, blunt tip | Waxy formula, poor pigmentation, friction from blinking |
| Liquid Eyeliner (Brush Tip) | Uneven lines, thick application, flaking, difficult to control | Watery formula, unsteady hand, brush splaying |
| Liquid Eyeliner (Felt Tip) | Skipping, dragging, drying out, inconsistent color | Tip drying out, pressure sensitivity, formula not smooth enough |
| Gel Eyeliner (Pot & Brush) | Messy application, brush cleaning required, product drying out | Requires separate brush, gel drying out, inconsistent application |
(Professor Eyelineria sighs dramatically.)
The struggle is real, my friends. But fear not! There is a solution. A beacon of hope in the eyeliner abyss!
Module 2: Gel Eyeliner Pens: The Superhero of the Eyeliner World! 🦸♀️
(The screen transforms, showing a sleek gel eyeliner pen radiating light. Heroic music swells.)
Enter the Gel Eyeliner Pen! A revolutionary hybrid that combines the best of both worlds: the intense pigmentation and long-lasting power of gel eyeliner with the precision and ease of use of a pen.
(Professor Eyelineria grabs a gel eyeliner pen from her desk and holds it up for the class to see.)
These little beauties are designed for maximum control and minimal fuss. Here’s why they’re superior:
- Intense Pigmentation: Gel formulas are renowned for their rich, saturated color. One swipe and you’re good to go!
- Long-Wearing Formula: Forget smudging and fading. These pens are designed to stay put, even through sweat, tears, and late-night dance parties. 🎉
- Precision Tip: The fine tip allows for precise application, whether you’re going for a subtle tightline or a dramatic wing.
- Smooth Glide: No skipping or dragging! The gel formula glides effortlessly across your eyelid, creating a flawless line every time.
- Ease of Use: No messy pots or brushes required! Simply twist (or click) and apply. Perfect for beginners and pros alike.
- Convenience: Portable and mess-free, perfect for travel and touch-ups on the go. ✈️
(Professor Eyelineria winks.)
Basically, it’s like having a professional makeup artist living inside your eyeliner pen.
Module 3: Precision is Key: Mastering the Art of Application (From Beginner to Pro!) 🎨
(The screen displays a series of diagrams and step-by-step instructions on eyeliner application.)
Okay, now for the fun part! Let’s talk technique. Even the best eyeliner pen can’t work miracles if you’re wielding it like a toddler with a crayon.
Here’s a breakdown of techniques, from beginner-friendly to advanced:
Beginner Level: The Tightline
- What it is: Applying eyeliner to the upper waterline, between the lashes.
- Why it’s great: Makes your lashes look thicker and your eyes appear more defined without being overly dramatic.
- How to do it: Gently lift your upper eyelid and carefully apply the gel eyeliner pen to the waterline. Use short, controlled strokes.
- Pro Tip: Start in the middle and work your way outwards. Use a cotton swab to clean up any mistakes.
Intermediate Level: The Classic Liner
- What it is: A simple, defined line along the upper lash line.
- Why it’s great: Versatile and flattering on all eye shapes.
- How to do it: Start at the inner corner of your eye and draw a thin line along your upper lash line, gradually thickening it as you move towards the outer corner.
- Pro Tip: Use short, feathery strokes. Connect the dots if you’re feeling shaky.
Advanced Level: The Winged Liner
- What it is: A dramatic, angled line that extends beyond the outer corner of your eye.
- Why it’s great: Creates a lifted and glamorous look.
- How to do it: Extend the line from your lower lash line upwards at a 45-degree angle. Then, connect the end of the wing to the outer corner of your upper lash line, filling in the triangle.
- Pro Tip: Use tape as a guide for a perfectly symmetrical wing. Practice makes perfect!
(Professor Eyelineria demonstrates each technique on a volunteer student – much to the amusement of the class.)
General Application Tips:
- Start Small: It’s always easier to add more eyeliner than to remove too much.
- Use a Mirror: Invest in a good magnifying mirror for close-up work.
- Rest Your Elbow: Stabilize your hand by resting your elbow on a table or counter.
- Hold the Pen Lightly: Avoid gripping the pen too tightly, which can lead to shaky lines.
- Practice Makes Perfect: Don’t get discouraged if you don’t get it right the first time. Keep practicing and you’ll be a pro in no time!
Module 4: Longevity, Longevity, Longevity! How to Make Your Liner Last All Day (and Night!) ⏰
(The screen displays a ticking clock and various images of people looking fresh and flawless hours after applying their makeup.)
So, you’ve mastered the application. Now, how do you ensure your masterpiece lasts all day (and night)? Here are some tips for maximizing the longevity of your gel eyeliner:
- Prime Your Lids: Use an eyeshadow primer to create a smooth, even base for your eyeliner. This will help prevent creasing and smudging.
- Set with Eyeshadow: After applying your eyeliner, gently dust a matching eyeshadow over the line to set it in place.
- Avoid Oily Products: Steer clear of oily eyeshadows or moisturizers near your lash line, as they can break down the eyeliner.
- Blot Away Excess Oil: If you have oily eyelids, blot them with blotting papers throughout the day to prevent smudging.
- Use a Setting Spray: A makeup setting spray can help lock everything in place and prevent your eyeliner from fading.
- Choose a Waterproof Formula: For extra staying power, opt for a waterproof gel eyeliner pen.
(Professor Eyelineria pulls out a bottle of setting spray and mists it dramatically over her face.)
Module 5: Choosing Your Weapon: Finding the Perfect Gel Eyeliner Pen for YOU! ⚔️
(The screen displays a variety of gel eyeliner pens with different features and price points.)
Not all gel eyeliner pens are created equal. Here’s what to consider when choosing the right one for you:
| Feature | Considerations |
|---|---|
| Tip Type | Fine tip for precise lines, slightly thicker tip for bolder looks. |
| Formula | Waterproof, smudge-proof, long-wearing, hypoallergenic, cruelty-free. |
| Pigmentation | Rich, intense color payoff. |
| Ease of Application | Smooth glide, even distribution of product. |
| Price Point | Budget-friendly to luxury options. |
| Reviews | Read online reviews to see what other users think. |
| Color Options | Black is a classic, but consider brown, navy, or other colors for a more subtle or playful look. |
| Dispensing Mechanism | Twist-up or click-pen. Consider ease of use and control over product dispensing. |
(Professor Eyelineria points to the screen.)
Do your research! Read reviews, experiment with different brands, and find the pen that feels most comfortable and performs best for you.
Module 6: Troubleshooting Eyeliner Emergencies (Because Let’s Be Real, They Happen!) 🚨
(The screen displays images of common eyeliner mishaps: smudges, uneven lines, broken tips.)
Even with the best eyeliner pen and the most skilled application, eyeliner emergencies can happen. Here’s how to handle them:
- Smudges: Use a cotton swab dipped in makeup remover to gently clean up any smudges.
- Uneven Lines: Use a cotton swab to even out the lines or add more eyeliner to the thinner side.
- Crooked Wings: Use tape or a business card to create a clean, sharp line.
- Broken Tip: If the tip of your gel eyeliner pen breaks, try sharpening it with a pencil sharpener (if possible) or using a small brush to apply the remaining product.
- Dry Eyeliner: If your gel eyeliner pen is drying out, try storing it upside down or adding a drop of eye drops to the tip.
(Professor Eyelineria pulls out a bag of emergency supplies: cotton swabs, makeup remover, tape, etc.)
Remember, don’t panic! A little patience and a few simple tools can fix almost any eyeliner mishap.
Module 7: Beyond the Basics: Creative Liner Looks to Unleash Your Inner Artist! 🧑🎨
(The screen displays a variety of creative eyeliner looks: double wing, graphic liner, colorful liner, etc.)
Now that you’ve mastered the basics, it’s time to get creative! The possibilities are endless.
Here are some ideas to get you started:
- Double Wing: Create two wings, one above the other, for a dramatic and edgy look.
- Graphic Liner: Use your gel eyeliner pen to create geometric shapes or abstract designs around your eyes.
- Colorful Liner: Experiment with different colors of gel eyeliner to add a pop of color to your look.
- Inner Corner Highlight: Use a white or shimmery gel eyeliner pen to highlight the inner corner of your eyes, making them appear brighter and more awake.
- Smoked Out Liner: Apply your gel eyeliner and then smudge it out with a brush for a soft, smoky effect.
(Professor Eyelineria shows examples of each look on the screen, inspiring gasps and murmurs of excitement from the class.)
Don’t be afraid to experiment and try new things! Eyeliner is a form of self-expression, so have fun with it!
(Professor Eyelineria beams at the class.)
And that, my friends, concludes our lecture on the glorious world of long-wear precision gel eyeliner pens! Go forth and conquer the world, one perfectly lined eye at a time!
(The lecture hall erupts in applause as Professor Eyelineria takes a bow, her perfectly winged liner catching the light.)
(Class dismissed! Don’t forget to pick up your free gel eyeliner pen sample on the way out! 😉)
For detailed product specifications and purchases, please go to :https://zenamakeup.com/products/long-wear-precision-gel-eyeliner-pen
Leave a Reply