The Fine Art of the Fine Line: A Lecture on Mastering the Long-Wear Precision Gel Eyeliner Pen
(Or, How to Achieve Winged Perfection Without Looking Like a Sleep-Deprived Raccoon)
(Lecture Hall Atmosphere: Imagine dim lighting, the faint scent of coffee, and the nervous shuffling of aspiring makeup artists. A projector displays the title in a glamorous, shimmering font.)
Professor (Me, obviously): Alright, settle down, settle down! Welcome, my budding Picassos of the eyelid, to Eyeliner 101. Today, we’re tackling a subject near and dear to my (perfectly lined) heart: The Fine Art of the Fine Line! 🖋️
(Dramatic pause for effect. Adjusts oversized glasses.)
Specifically, we’re diving deep into the magnificent, sometimes maddening, but ultimately rewarding world of using the Long-Wear Precision Gel Eyeliner Pen for those delicate, detailed lines that elevate your makeup from "meh" to "magnificent!" ✨
(Points to the title slide with a laser pointer. It zaps a tiny, sparkly star.)
Now, I know what you’re thinking: "Eyeliner? Professor, I can barely draw a straight line, let alone achieve that ethereal, minimalist look everyone’s rocking on Instagram!" Fear not, my friends! This isn’t about inherent talent; it’s about technique, practice, and understanding the tools at your disposal.
(Sips from an oversized mug that reads "Warning: May Spontaneously Apply Eyeliner.")
So, grab your pens, sharpen your wits, and prepare to embark on a journey of precision, patience, and maybe a few (hopefully hilarious) eyeliner mishaps along the way.
I. Why the Long-Wear Precision Gel Eyeliner Pen is Your New Best Friend (and Worst Enemy)
Let’s be honest, the eyeliner game is vast and varied. We’ve got pencils, creams, liquids, powders… it’s a veritable makeup jungle out there! 🌴 But why are we focusing on the Long-Wear Precision Gel Eyeliner Pen?
(The screen changes to a comparison chart with humorous icons.)
| Eyeliner Type | Pros | Cons | Best For | Level of Difficulty |
|---|---|---|---|---|
| Pencil ✏️ | Beginner-friendly, forgiving, blendable | Can smudge easily, not always super precise | Smokey eyes, tightlining | Easy |
| Cream/Gel Pot 🏺 | Intense pigment, long-lasting, versatile | Requires a brush, can dry out, steep learning curve | Dramatic looks, winged liner | Intermediate to Advanced |
| Liquid Liner 🧪 | Precise lines, dramatic finish, long-lasting (usually) | Can be unforgiving, prone to skipping, requires a steady hand | Cat eyes, graphic liner | Advanced |
| Long-Wear Precision Gel Eyeliner Pen 🖋️ | Super precise, long-lasting, relatively easy to control, less messy than gel pots | Can dry out if not stored properly, may require multiple layers for intense color payoff | Detailed work, thin lines, winged liner (with practice), everyday wear | Beginner to Intermediate (with practice!) |
(Gestures dramatically to the chart.)
See? The Gel Pen strikes a beautiful balance! It offers the precision of a liquid liner with the control of a pencil, and the long-wear power of a gel. It’s the Goldilocks of eyeliner! 🐻🐻🐻
But, like any powerful tool, it requires respect. ⚠️ Treat it right, and it will reward you with flawlessly defined eyes. Mistreat it, and you’ll end up looking like you lost a fight with a charcoal briquette. (Trust me, I’ve been there.)
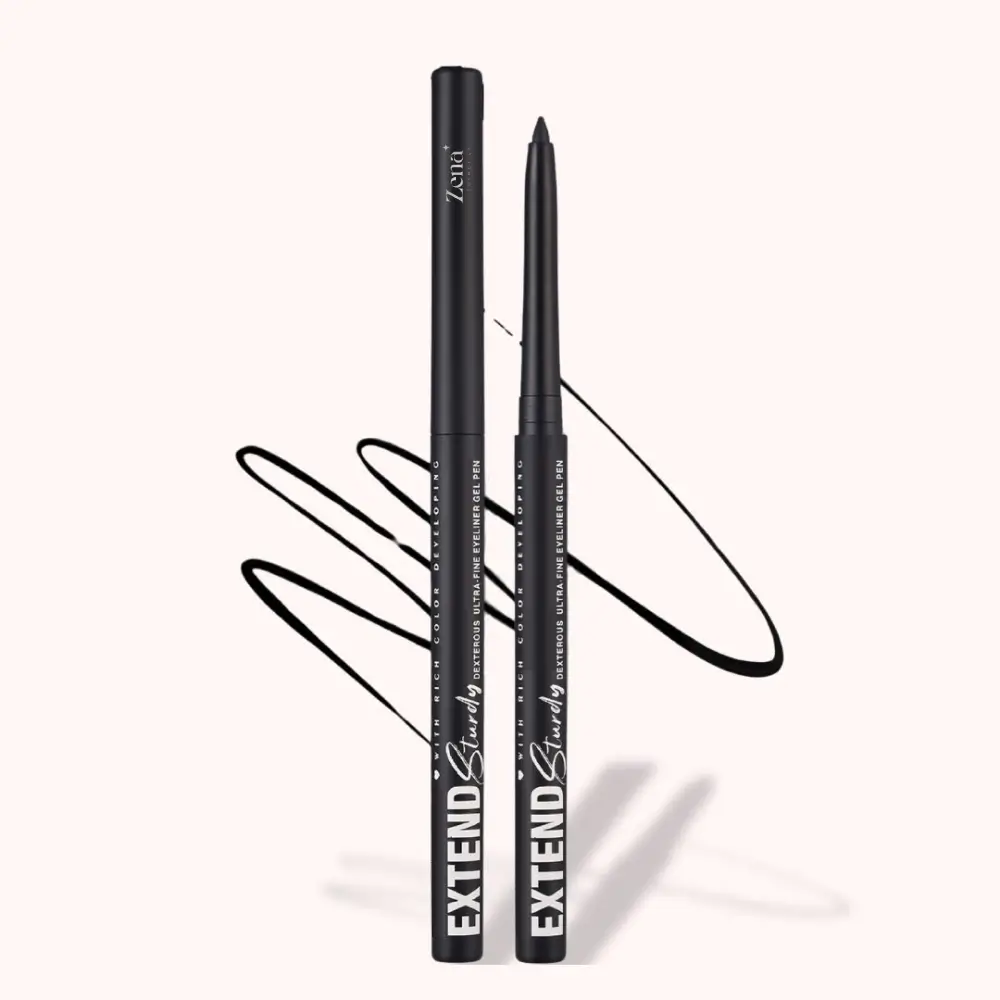
II. Understanding Your Weapon: Anatomy of the Gel Pen
Before we charge into battle, let’s familiarize ourselves with our weapon of choice.
(The screen displays a detailed diagram of a typical Long-Wear Precision Gel Eyeliner Pen, labelled with annotations.)
- The Tip: This is the star of the show! A fine, tapered tip (usually synthetic bristles or a felt tip) designed for creating incredibly thin lines. Think of it as a tiny calligraphy pen for your eyelids. ✍️
- The Body: This holds the precious gel formula. Some pens are twist-up, some are click-pens, and some just…are. 🤷♀️ Whatever the mechanism, ensure you’re dispensing the right amount of product. Too little, and the line will skip. Too much, and you’ll end up with a blobby mess.
- The Cap: This is crucial! Never, EVER leave your gel pen uncapped. The gel formula dries out faster than your patience when trying to parallel park. 🚗💨
(Adds a humorous anecdote.)
I once left my favorite gel pen uncapped overnight. The next morning, it was drier than the Sahara Desert. 🏜️ I tried everything to revive it – hot water, essential oils, even a heartfelt apology. Nothing worked. RIP, my beloved liner. Learn from my mistakes!
III. The Prep Work: Setting the Stage for Eyeliner Success
Just like a painter needs a primed canvas, you need prepped eyelids for optimal eyeliner application.
(The screen displays a list with icons.)
- Cleanse: Remove any traces of makeup, oil, or debris from your eyelids. A clean slate is essential! 🧼
- Prime: Use an eyeshadow primer to create a smooth, even surface and prevent creasing. This will also help your eyeliner last longer. 🛡️
- Set (Optional): If you have particularly oily eyelids, set your primer with a translucent powder. ☁️
- Eyeshadow (Optional): Apply your eyeshadow before your eyeliner. Trust me on this one. Trying to apply eyeshadow after a perfect winged liner is like trying to put toothpaste back in the tube. 🪥
(Stresses the importance of priming.)
Seriously, don’t skip the primer! It’s the unsung hero of the eyeliner game. It’s like the support bra for your eyelids – providing lift, support, and preventing any unsightly sagging. (Okay, maybe that’s a bit dramatic, but you get the idea.)
IV. The Technique: Mastering the Fine Line
Alright, it’s showtime! Let’s get those lines looking sharp enough to cut diamonds. 💎
(The screen displays a series of step-by-step diagrams demonstrating different techniques.)
A. The Dot-to-Dot Method:
This is a fantastic technique for beginners. It involves creating a series of small dots along your lash line and then connecting them. Think of it as playing connect-the-dots, but with eyeliner!
- Start with Light Pressure: Gently press the tip of the gel pen along your lash line, creating small, evenly spaced dots.
- Connect the Dots: Using short, light strokes, connect the dots to form a continuous line.
- Adjust as Needed: Thicken the line or add a wing as desired.
(Emphasizes the importance of light pressure.)
Remember, light pressure is key! You can always build up the intensity, but it’s much harder to remove a thick, wobbly line. Think of it like seasoning food – you can always add more salt, but you can’t take it away.
B. The Short Strokes Method:
This involves using short, overlapping strokes to create a smooth, even line.
This involves using short, overlapping strokes to create a smooth, even line.
- Start at the Inner Corner: Begin at the inner corner of your eye and use short, light strokes to move along your lash line towards the outer corner.
- Overlap the Strokes: Overlap each stroke slightly to create a seamless line.
- Build the Intensity: Gradually build the thickness and intensity of the line as desired.
(Explains the overlapping technique.)
The overlapping technique is crucial for achieving a smooth, even line. It’s like laying bricks – you need to overlap them to create a strong, stable wall.
C. The Winged Liner Technique (The Holy Grail of Eyeliner):
Ah, the winged liner. The bane of many makeup artists’ existence, but also the ultimate symbol of eyeliner mastery.
- Extend the Lower Lash Line: Imagine extending your lower lash line upwards towards the end of your eyebrow. This is the angle of your wing.
- Create the Wing: Using the tip of the gel pen, draw a line along this imaginary angle.
- Connect to the Upper Lash Line: Connect the end of the wing to the upper lash line, creating a triangle shape.
- Fill in the Triangle: Fill in the triangle with eyeliner.
(Offers a pro tip for achieving symmetrical wings.)
Pro tip: Use a piece of tape as a guide! Apply the tape along the desired angle of your wing, then apply your eyeliner. Remove the tape for a perfectly crisp, symmetrical wing. It’s like having a cheat sheet for eyeliner! 📝
(Warns against common winged liner mistakes.)
Avoid these common winged liner pitfalls:
- The Droopy Wing: This makes your eyes look tired and sad. 😭 Make sure your wing angles upwards.
- The Too-Long Wing: This looks unnatural and cartoonish. Keep your wing proportionate to your eye size.
- The Uneven Wing: This is the most common mistake. Practice makes perfect!
V. Troubleshooting: When Eyeliner Goes Wrong (and How to Fix It)
Let’s face it, even the most experienced makeup artists have eyeliner fails. It’s part of the process! The key is knowing how to fix those mistakes without completely starting over.
(The screen displays a list of common eyeliner problems and their solutions.)
| Problem | Solution |
|---|---|
| Wobbly Line | Use a cotton swab dipped in makeup remover to clean up the edges. 🧹 |
| Uneven Line | Thicken the thinner line to match the thicker line. |
| Smudging | Clean up the smudges with a cotton swab dipped in makeup remover. Reapply primer and powder to the area. |
| Dry Eyeliner Pen | Store the pen tip-down. If it’s still dry, try gently wiping the tip with a damp cloth. |
| Wing Too Thick | Use a cotton swab dipped in makeup remover to carefully thin out the wing. |
| Wing Too Long | Use a cotton swab dipped in makeup remover to shorten the wing. |
(Shares a personal anecdote about an epic eyeliner fail.)
I once went to a fancy gala with one eye sporting a perfectly executed wing and the other looking like it had been attacked by a Sharpie marker. 🖍️ I spent the next hour in the ladies’ room, frantically trying to salvage the situation. Eventually, I just embraced the asymmetry and called it "avant-garde." The moral of the story? Confidence is key, even when your eyeliner is a disaster.
VI. Practice Makes Perfect (and Reduces the Number of Eyeliner-Induced Tears)
(The screen displays a motivational quote: "The only way to become good at something is to practice. Then practice some more.")
Listen, I’m not going to sugarcoat it: mastering the fine line takes time and practice. You’re not going to achieve winged perfection overnight. But with dedication and perseverance, you will get there.
(Suggests practice exercises.)
Here are some practice exercises to help you hone your skills:
- Draw Straight Lines on Paper: Practice drawing straight lines of varying thicknesses on a piece of paper. This will help you develop control over the gel pen.
- Practice Different Wing Shapes: Experiment with different wing shapes on paper. Try a classic cat eye, a subtle flick, or a dramatic, exaggerated wing.
- Practice on Your Hand: Practice applying eyeliner on the back of your hand. This will give you a feel for the texture and consistency of the gel formula.
- Don’t Be Afraid to Experiment: Try different techniques and styles to find what works best for you.
(Offers words of encouragement.)
Don’t get discouraged if you don’t see results immediately. Eyeliner is a skill that takes time to develop. Just keep practicing, and you’ll eventually achieve the perfectly defined eyes of your dreams. ✨
VII. Storage and Maintenance: Keeping Your Gel Pen Alive and Kicking
(The screen displays a list of tips for storing and maintaining your gel eyeliner pen.)
- Store Tip-Down: This helps prevent the gel formula from drying out.
- Always Cap the Pen: Never leave the pen uncapped, even for a short period of time.
- Clean the Tip Regularly: Gently wipe the tip of the pen with a damp cloth to remove any buildup of product.
- Replace the Pen Regularly: Even with proper care, gel eyeliner pens will eventually dry out. Replace the pen every few months to ensure optimal performance.
(Reiterates the importance of storing the pen tip-down.)
Seriously, store it tip-down! It’s the most important thing you can do to keep your gel pen alive and kicking. Think of it like a vampire – it needs to be stored upside down to maintain its youthful vigor. (Okay, maybe that’s a bit of a stretch, but you get the idea.) 🧛
VIII. Conclusion: Go Forth and Conquer!
(The screen displays a final slide with the words "Go Forth and Conquer! …Your Eyelids, That Is.")
Congratulations, my eyeliner apprentices! You’ve now completed Eyeliner 101. You’re armed with the knowledge and techniques necessary to master the fine line.
(Raises a fist in the air.)
Now go forth and conquer your eyelids! Don’t be afraid to experiment, make mistakes, and learn from them. And remember, even the most seasoned makeup artists have bad eyeliner days. The key is to keep practicing and never give up on your quest for winged perfection.
(Bows dramatically as the lecture hall erupts in applause.)
(Optional: Hand out certificates of completion with a humorous quote about eyeliner.)
(The lights fade. The scent of coffee lingers in the air. Aspiring makeup artists scurry off to practice their newfound skills, armed with their Long-Wear Precision Gel Eyeliner Pens and a newfound sense of confidence.)
For detailed product specifications and purchases, please go to :https://zenamakeup.com/products/long-wear-precision-gel-eyeliner-pen
Leave a Reply