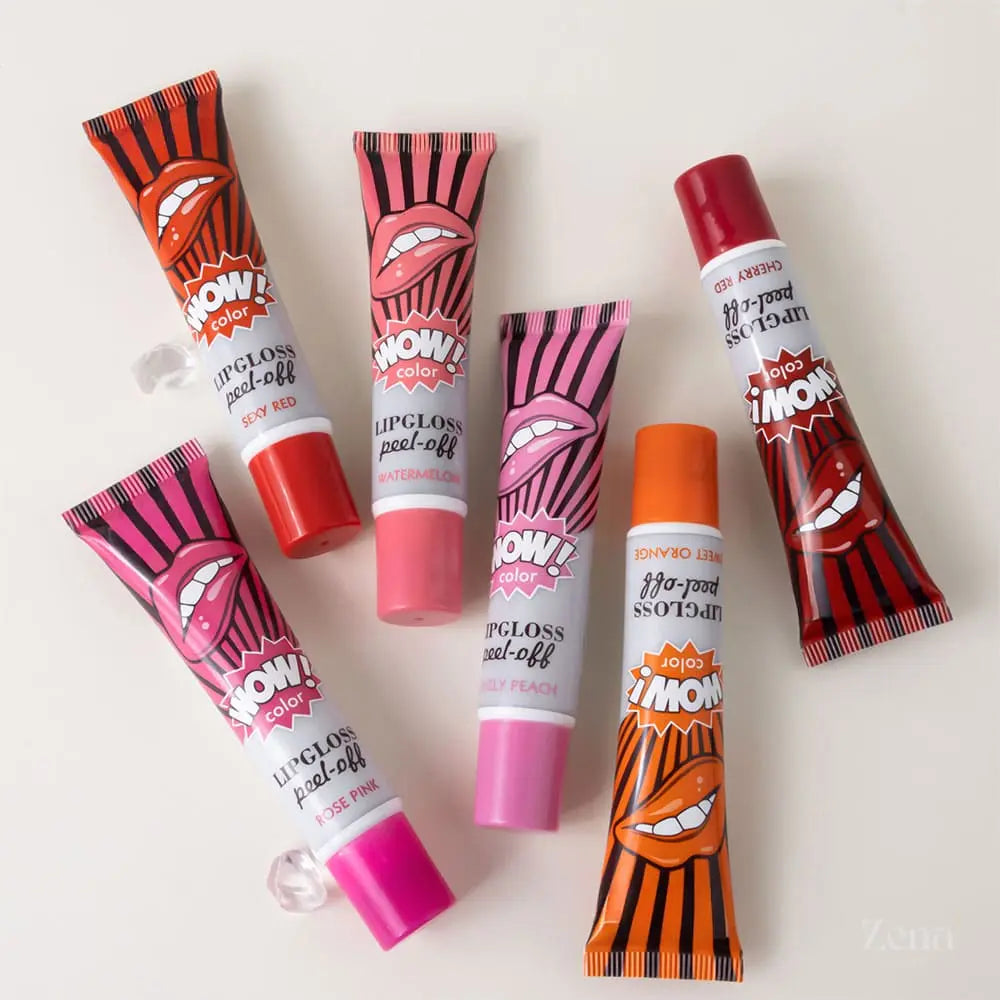
Applying the Peel Off Jelly Lip Stain for a Quick and Effortless Lip Color That Lasts All Day: A Lip Stain Lecture (with Snacks!) 💋
Welcome, darlings, to Lip Stain 101! Grab a seat, maybe a little snack (red velvet cupcakes are highly encouraged for thematic purposes 🧁), and prepare to become certified Peel-Off Jelly Lip Stain aficionados. Forget everything you think you know about lip color – we’re about to dive into a world of long-lasting, low-maintenance, and downright fun lip magic.
Forget lipstick that smudges on your coffee cup, lip gloss that attracts every stray hair within a five-mile radius, and lip liner that requires the steady hand of a neurosurgeon. We’re talking about a lip color revolution, people! 💥
Professor: (Adjusts oversized glasses perched on nose) I’m Professor Stain-tastic, and I’ll be your guide through the tantalizing terrain of peel-off jelly lip stains. This isn’t just about slapping on some color; it’s about understanding the science, mastering the technique, and unleashing your inner lip-staining artist. Ready? Let’s stain!
Lecture Outline:
- The Peel-Off Promise: What is this Jelly Magic Anyway?
- The Anatomy of a Peel-Off Lip Stain: Ingredients and How They Work (The Boring, But Important, Stuff)
- Choosing Your Perfect Shade: A Color Theory Crash Course (Don’t Panic!)
- Prep School: Preparing Your Lips for Stain-tastic Results (Exfoliation is Key!)
- Application 101: Mastering the Peel (No, Really. Mastering.)
- Troubleshooting Stain Fails: Common Mistakes and How to Fix Them (We’ve All Been There)
- Post-Stain Perfection: Hydration and Maintenance (Keeping Those Lips Lush)
- Beyond the Basics: Experimenting with Peel-Off Lip Stains (Gradient Lips, Anyone?)
- The Great Stain Debate: Pros, Cons, and Honest Opinions (Let’s Get Real!)
- Stain-tastic Resources: Brands, Products, and Where to Find Them (Your Shopping List)
1. The Peel-Off Promise: What is this Jelly Magic Anyway? 🤔
Imagine painting your lips with a vibrant, pigmented jelly, letting it dry, and then peeling it off to reveal a perfectly stained pout that lasts for hours. Sounds like something out of a futuristic beauty lab, right? Well, welcome to the future, my friends!
Peel-off jelly lip stains are essentially semi-permanent lip colors that achieve their longevity through a unique application and removal process. They are formulated to deposit pigment directly onto the lip surface, creating a stain that withstands eating, drinking, and even the most enthusiastic make-out sessions. (Use with caution, of course! 😉)
Think of it like this:
- Traditional Lipstick: A layer of color sitting on top of your lips. Easily smudged, transferred, and requires constant reapplication. Think of it as a fleeting romance. 💔
- Lip Gloss: A shiny, often sticky, layer that adds color and shine. Prone to attracting hair, dust, and general unpleasantness. Like that overly-clingy ex. 😬
- Peel-Off Jelly Lip Stain: Pigment infused into the lip surface. Long-lasting, transfer-proof, and requires minimal effort. The dependable, low-maintenance partner you’ve always dreamed of. 😍
2. The Anatomy of a Peel-Off Lip Stain: Ingredients and How They Work (The Boring, But Important, Stuff) 🤓
Okay, I know ingredient lists can be about as exciting as watching paint dry. But understanding what’s in your lip stain can help you make informed choices and avoid any potential allergic reactions or unwanted side effects.
Here’s a breakdown of the key ingredients you’ll typically find:
| Ingredient Category | Common Ingredients | Function | Potential Concerns |
|---|---|---|---|
| Film Formers | Polyvinyl Alcohol (PVA), Polyvinylpyrrolidone (PVP) | Create the peel-off film. They bind the pigments and other ingredients together. | Can be drying for some individuals. |
| Water | Aqua | The solvent that dissolves and carries the other ingredients. | None. |
| Humectants | Glycerin, Hyaluronic Acid, Butylene Glycol | Help retain moisture and prevent the stain from becoming too drying. | Rare allergic reactions. |
| Pigments | Red 7 Lake, Red 6 Lake, Iron Oxides | Provide the color. | Potential for staining (duh!), but usually safe. Some pigments might cause sensitivity. |
| Thickeners | Cellulose Gum, Xanthan Gum | Increase the viscosity of the formula, making it easier to apply and prevent it from running. | None. |
| Preservatives | Phenoxyethanol, Potassium Sorbate | Prevent bacterial growth and extend the shelf life of the product. | Can cause irritation in sensitive individuals. |
| Flavorings/Fragrance | Various | Add a pleasant scent or taste. | Common allergen. Opt for fragrance-free options if you have sensitive skin. |
How it Works: A Simplified Explanation
- Application: You apply the jelly-like formula to your lips.
- Film Formation: The film-forming agents (PVA, PVP) begin to dry and create a thin, flexible film.
- Pigment Deposition: As the film dries, the pigments are deposited onto the surface of your lips.
- Peeling: Once the film is completely dry, you peel it off, leaving behind the deposited pigment.
- Stained Lips: The pigment has now stained the upper layer of your lips, creating a long-lasting color.
Important Note: Always check the ingredient list before using a new lip stain, especially if you have known allergies or sensitivities.
3. Choosing Your Perfect Shade: A Color Theory Crash Course (Don’t Panic!) 🎨
Finding the perfect shade of peel-off lip stain is crucial for achieving that "effortlessly gorgeous" look. Here’s a simplified guide to help you navigate the color jungle:
-
Skin Tone:
- Fair Skin: Light pinks, nudes with pink undertones, peachy corals, and light berry shades work beautifully. Avoid shades that are too dark or intense, as they can look overwhelming.
- Medium Skin: A wider range of colors suits medium skin tones, including roses, mauves, berry shades, and vibrant corals.
- Olive Skin: Warm shades like brick reds, oranges, bronzes, and deep berries complement olive skin tones.
- Dark Skin: Rich, deep shades like plums, wines, chocolates, and vibrant reds look stunning on dark skin tones.
-
Undertones: Determining your skin’s undertone (warm, cool, or neutral) can further refine your shade selection.
- Warm Undertones: (Golden, yellow, or peachy) – Look for shades with warm undertones, like corals, oranges, and golden reds.
- Cool Undertones: (Pink, red, or blue) – Opt for shades with cool undertones, like pinks, berries, and blue-based reds.
- Neutral Undertones: You can wear almost any shade! Lucky you!
-
Lip Pigmentation: If your lips are naturally pigmented, consider choosing a shade that’s slightly deeper or more vibrant to ensure the color shows up effectively.
-
Experimentation is Key! Don’t be afraid to try different shades and see what you like best. Sample sizes or inexpensive brands are a great way to experiment without breaking the bank.
Color Cheat Sheet Table:
| Skin Tone | Undertone | Recommended Shades | Shades to Avoid (Generally) |
|---|---|---|---|
| Fair | Cool | Light pinks, cool nudes, light berries | Very dark or intense colors, muddy browns |
| Fair | Warm | Peachy corals, warm nudes, rosy pinks | Ashy grays, overly cool tones |
| Medium | Cool | Roses, mauves, berry shades, cool reds | Very pale or washed-out shades |
| Medium | Warm | Vibrant corals, warm reds, bronzes | Anything too cool toned that could make skin look sallow |
| Olive | Neutral | Brick reds, oranges, deep berries, rich browns | Anything too pastel or chalky |
| Dark | Cool | Plums, wines, blue-based reds, deep purples | Anything too light or sheer that won’t show up |
| Dark | Warm | Chocolates, vibrant reds, warm browns, deep oranges | Anything too ashy or gray that could look dull |
Pro-Tip: When in doubt, swatch the lip stain on the inside of your wrist to see how it looks against your skin tone.
4. Prep School: Preparing Your Lips for Stain-tastic Results (Exfoliation is Key!) 💋✨
Just like prepping a canvas before painting, preparing your lips before applying a peel-off lip stain is essential for achieving smooth, even, and long-lasting results. Dry, flaky lips are the enemy of a perfect stain.
Here’s your lip prep routine:
- Exfoliate: This is the MOST important step! Use a gentle lip scrub (DIY sugar scrub works wonders!) or a soft toothbrush to remove any dead skin cells. Exfoliating creates a smooth surface for the stain to adhere to evenly.
- DIY Lip Scrub Recipe: Mix 1 teaspoon of sugar with ½ teaspoon of honey and a few drops of olive oil. Gently massage onto your lips in a circular motion for 1-2 minutes, then rinse with warm water.
- Hydrate: Apply a moisturizing lip balm or lip mask to hydrate your lips. Look for ingredients like shea butter, cocoa butter, or hyaluronic acid.
- Blot: Before applying the lip stain, blot away any excess lip balm with a tissue. You want your lips to be moisturized, but not greasy.
Why is Prep So Important?
- Even Application: Exfoliating removes dead skin cells, preventing the stain from clinging unevenly and creating a patchy appearance.
- Longer Lasting Color: Hydrated lips hold onto the stain better, resulting in a longer-lasting color.
- Prevents Cracking: Dry lips are more prone to cracking and peeling, which can cause the stain to fade or look uneven.
Don’t skip the prep! Your lips will thank you. 🙏
5. Application 101: Mastering the Peel (No, Really. Mastering.) 👩🎨
Alright, class, it’s time to put your knowledge to the test! Applying a peel-off lip stain requires a little bit of practice and finesse, but with these tips, you’ll be a pro in no time.
Alright, class, it’s time to put your knowledge to the test! Applying a peel-off lip stain requires a little bit of practice and finesse, but with these tips, you’ll be a pro in no time.
Step-by-Step Application Guide:
- Apply a Thick, Even Layer: Using the applicator provided (or a lip brush for more precision), apply a generous and even layer of the lip stain to your lips. Make sure to cover every area, including the edges.
- Pro-Tip: Use a lip liner (matching the stain color) to outline your lips first for a more defined shape.
- Avoid Getting it on Your Teeth! This seems obvious, but it happens. Use a cotton swab to clean up any stray stain that gets on your teeth or around your lips.
- Let it Dry COMPLETELY: This is crucial! Allow the lip stain to dry completely. This usually takes 10-20 minutes, depending on the formula and the humidity. Do not, I repeat, DO NOT touch your lips during this time! Resist the urge!
- How to Tell if it’s Dry: The stain should feel tight and smooth, and the color should appear more concentrated. Gently touch the edge with your finger – if it doesn’t feel sticky, it’s ready to peel.
- Peel it Off! Once the stain is completely dry, gently peel it off, starting from the corners of your mouth. Peel slowly and carefully to avoid tearing the film.
- Pro-Tip: If the film is difficult to peel, try moistening the edges with a damp cotton swab.
- Admire Your Stained Lips! Now, bask in the glory of your perfectly stained pout!
Application Don’ts:
- Don’t apply a thin layer: A thin layer will dry too quickly and won’t deposit enough pigment.
- Don’t apply unevenly: Uneven application will result in a patchy stain.
- Don’t peel it off too early: Peeling the stain before it’s completely dry will result in a weak, uneven stain.
- Don’t be afraid to reapply: If you don’t like the initial color, you can reapply another layer for a more intense stain.
Application Emoji Guide:
- Apply Thick Layer: 🎨
- Wait Patiently: ⏳
- Peel Gently: 🐌
- Stain-tastic Lips: ✨💋
6. Troubleshooting Stain Fails: Common Mistakes and How to Fix Them (We’ve All Been There) 🛠️
Even the most experienced stainers encounter the occasional mishap. Don’t panic! Here’s a guide to common problems and their solutions:
| Problem | Possible Cause | Solution |
|---|---|---|
| Patchy Stain | Uneven application, dry lips, poor exfoliation | Exfoliate thoroughly, apply a thick, even layer of stain, moisturize lips beforehand. |
| Weak Color | Thin application, peeling too early | Apply a thicker layer of stain, allow it to dry completely before peeling, reapply another layer. |
| Stain Doesn’t Last | Dry lips, not enough prep, eating oily foods | Exfoliate and moisturize lips regularly, avoid oily foods immediately after application, use a lip primer. |
| Difficult to Peel | Stain is too dry, not enough moisture | Moisten the edges with a damp cotton swab, apply a thin layer of lip balm before applying the stain. |
| Stain Bleeds Outside Lip Line | Uneven application, lack of lip liner | Use a lip liner to outline your lips before applying the stain, apply a thin layer of concealer around lips. |
| Allergic Reaction | Sensitivity to ingredients | Discontinue use immediately, consult a doctor, switch to a hypoallergenic brand. |
The "Oops, I Messed Up" Emergency Kit:
- Cotton Swabs: For cleaning up stray stain.
- Makeup Remover: For removing the stain completely (if necessary).
- Lip Balm: For moisturizing your lips after removing the stain.
Remember, practice makes perfect! Don’t be discouraged if you don’t get it right the first time.
7. Post-Stain Perfection: Hydration and Maintenance (Keeping Those Lips Lush) 💧
You’ve achieved the perfect stain! Now, let’s keep those lips looking luscious and healthy.
Hydration is Key:
- Drink Plenty of Water: Staying hydrated from the inside out is crucial for maintaining healthy, moisturized lips.
- Apply Lip Balm Regularly: Use a hydrating lip balm throughout the day, especially after eating or drinking.
- Use a Lip Mask at Night: Treat your lips to a nourishing lip mask while you sleep for extra hydration.
Maintenance Tips:
- Avoid Excessive Lip Licking: Licking your lips can actually dry them out, leading to cracking and peeling.
- Protect Your Lips from the Sun: Use a lip balm with SPF to protect your lips from sun damage.
- Gentle Exfoliation: Continue to exfoliate your lips gently 1-2 times per week to remove any dead skin cells.
Think of your lip stain as an investment. Proper care will help it last longer and keep your lips looking their best.
8. Beyond the Basics: Experimenting with Peel-Off Lip Stains (Gradient Lips, Anyone?) 🌈
Once you’ve mastered the basic application, it’s time to unleash your creativity and experiment with different techniques.
- Gradient Lips: Apply a darker shade of lip stain to the inner part of your lips and a lighter shade to the outer part, blending the colors together for a gradient effect.
- Ombre Lips: Similar to gradient lips, but with a more defined transition between the two colors.
- Layering Colors: Apply multiple layers of different shades to create a custom color.
- Mixing and Matching: Combine different brands or formulas to create unique effects.
The sky’s the limit! Don’t be afraid to experiment and find what works best for you. Lip stains are a fun and versatile way to express your personal style.
9. The Great Stain Debate: Pros, Cons, and Honest Opinions (Let’s Get Real!) 🗣️
Like any beauty product, peel-off lip stains have their pros and cons. Let’s weigh them out:
Pros:
- Long-Lasting: The main selling point! Peel-off lip stains can last for hours, even through eating and drinking.
- Transfer-Proof: No more lipstick stains on your coffee cup or your partner’s cheek!
- Low Maintenance: Once applied, you don’t need to worry about reapplying throughout the day.
- Fun to Use: The peeling process is strangely satisfying!
- Affordable: Many brands offer peel-off lip stains at reasonable prices.
Cons:
- Can be Drying: The film-forming agents can dry out the lips, especially if not properly prepped and moisturized.
- Application Can Be Tricky: Requires practice and patience to achieve even results.
- Limited Shade Range: Some brands offer a limited selection of shades.
- Potential for Allergic Reactions: Some ingredients may cause irritation or allergic reactions in sensitive individuals.
- Uneven Fading: The stain may fade unevenly over time.
Honest Opinions:
- "I love how long-lasting peel-off lip stains are, but I definitely have to exfoliate and moisturize my lips religiously to prevent them from drying out." – Sarah
- "The first few times I tried using peel-off lip stains, I made a huge mess. But after a few tries, I got the hang of it, and now I’m obsessed!" – Jessica
- "I have sensitive skin, so I have to be careful about the ingredients in peel-off lip stains. I always look for hypoallergenic brands." – Emily
The Verdict:
Peel-off lip stains are a great option for those looking for a long-lasting, low-maintenance lip color. However, it’s important to be aware of the potential downsides and take steps to mitigate them. With proper prep, application, and maintenance, you can enjoy the benefits of peel-off lip stains without sacrificing the health of your lips.
10. Stain-tastic Resources: Brands, Products, and Where to Find Them (Your Shopping List) 🛒
Ready to start your peel-off lip stain journey? Here are a few popular brands and products to get you started:
| Brand | Product Name | Price Range | Key Features | Where to Buy |
|---|---|---|---|---|
| Berrisom | Oops! My Lip Tint Pack | $$ | Wide range of colors, long-lasting, easy to peel | Amazon, Ulta, Korean beauty retailers |
| Etude House | Dear Darling Water Gel Tint | $ | Affordable, hydrating formula, vibrant colors | Amazon, Korean beauty retailers |
| Rom&nd | Glasting Water Tint | $$ | Glossy finish, hydrating, long-lasting stain | Amazon, Korean beauty retailers |
| Maybelline | Color Stay Lip Color | $ | Long-lasting, transfer-proof, wide availability | Drugstores, Amazon, Ulta |
| Moonchild Beauty | Magic Peel-Off Lip Stain | $$$ | Vegan, cruelty-free, good range of colors | Moonchildbeauty.com, Amazon |
Shopping Tips:
- Read Reviews: Before purchasing a new lip stain, read online reviews to get an idea of its performance and potential downsides.
- Check Ingredients: Always check the ingredient list for any potential allergens or irritants.
- Start with a Sample: If possible, try a sample of the lip stain before purchasing the full-size product.
- Shop Around: Compare prices and availability at different retailers to find the best deal.
Congratulations, graduates! You have now completed Lip Stain 101. Go forth and stain those lips with confidence and flair! Remember, a little patience, a little practice, and a whole lot of lip balm are the keys to achieving stain-tastic results. Now, go treat yourself to a red velvet cupcake – you’ve earned it! 💋🧁🎉
For detailed product specifications and purchases, please go to :https://zenamakeup.com/products/peel-off-jelly-lip-stain
Leave a Reply