Glitterati! Unlocking the Secrets to Glitter Cream Shadow Stick Longevity: A Masterclass in Eye Base Application
(Professor Sparkle, PhD in Shimmerology, Adjusts Bedazzled Glasses)
Alright, darlings! Settle down, settle down! Today, we delve into a topic near and dear to my sparkly heart: conquering the glitter cream eyeshadow stick! We’ve all been there, haven’t we? Eyeshadow looking fabulous at 8 AM, resembling a Jackson Pollock painting gone wrong by noon. 😩 The culprit? Poor eye base.
Forget everything you think you know about slapping on some concealer and hoping for the best. This is serious business. We’re talking about harnessing the power of primers, understanding the nuances of textures, and ultimately, achieving eyeshadow looks that last longer than your last disastrous online dating experience. 😉
(Professor Sparkle clicks to the next slide, which features a sparkly unicorn)
Lecture Outline: From Zero to Hero in Glitter Shadow Application
- The Problem: Why Glitter Cream Shadows Are So Darn Fickle (Understanding the Enemy)
- Eye Base 101: The Foundation of Your Masterpiece (What Even Is an Eye Base?)
- The Contenders: Eye Base Types and Their Glitter Compatibility (The Lineup!)
- Choosing Your Weapon: Selecting the Perfect Eye Base for Your Needs (Personalized Sparkle!)
- Application Techniques: The Art of the Base Coat (Don’t Just Slap It On!)
- Setting the Stage: Locking in the Magic (Sealing the Deal)
- Troubleshooting: When Sparkle Goes Wrong (Avoiding Disaster)
- Bonus Round: Hacks and Pro Tips for Maximum Glitter Glam (Insider Secrets!)
(Professor Sparkle winks dramatically)
1. The Problem: Why Glitter Cream Shadows Are So Darn Fickle
Let’s be honest, glitter cream eyeshadow sticks are the demanding divas of the makeup world. They promise effortless sparkle, but often deliver creasing, fading, and glitter fallout that rivals a disco ball explosion in a vacuum cleaner. 💥 Why?
- Emollient Richness: These formulas are typically loaded with oils and emollients to give them that creamy, blendable texture. This is great for application, but not so great for longevity. The oil can cause the shadow to slip and slide, especially on oily lids.
- Glitter Gravity: Glitter, by its very nature, is heavy. Gravity is a relentless force! Without a strong, tacky base, those beautiful sparkles are going to migrate south faster than you can say "where’s my makeup remover?"
- Creasing Culprits: The combination of oiliness and lid movement leads to creasing. The shadow gathers in the folds of your eyelids, creating unsightly lines and a generally messy appearance. Think crumpled tinfoil, but on your face. Not a good look. 🙅♀️
- The Transfer Tango: Ever noticed glitter migrating to your brow bone, cheeks, or even your glasses? That’s transfer, baby! And it’s a sign your eye base is failing you.
(Professor Sparkle pulls out a magnifying glass and examines a glitter-covered tissue with mock seriousness)
2. Eye Base 101: The Foundation of Your Masterpiece
So, what is an eye base, anyway? Think of it as the primer for your eyelids. Its primary function is to create a smooth, even canvas for your eyeshadow, improve its adherence, and extend its wear time. It’s the unsung hero of any successful eyeshadow look.
Key Benefits of Using an Eye Base:
- Smooths Texture: Fills in fine lines and imperfections, creating a flawless base.
- Evens Skin Tone: Neutralizes discoloration and redness, allowing your eyeshadow to appear truer to color.
- Increases Pigment Intensity: Provides a tacky surface for the eyeshadow to grip onto, resulting in more vibrant color payoff.
- Extends Wear Time: Prevents creasing, fading, and transfer, keeping your eyeshadow looking fresh all day (or night!).
- Glitter Glue (for our purposes!): Provides the necessary stickiness to keep glitter where it belongs – on your eyelids!
(Professor Sparkle displays a chart illustrating the benefits of using an eye base vs. not using one. The chart features sad, drooping eyeshadow on one side and vibrant, long-lasting shadow on the other.)
3. The Contenders: Eye Base Types and Their Glitter Compatibility
Now, let’s explore the various types of eye bases and see which ones are best suited for our glitter-loving needs.
| Eye Base Type | Texture | Finish | Pros | Cons | Glitter Cream Shadow Compatibility | Rating (1-5, 5 being best) |
|---|---|---|---|---|---|---|
| Eye Primer (Standard) | Creamy, Silicone-Based | Matte/Satin | Smooths texture, evens skin tone, increases pigment intensity. Some are specifically formulated for long wear. | Can sometimes feel slippery, may not be sticky enough for heavy glitter. Some silicone-based primers can cause creasing if you have oily lids. | Moderate | 3 |
| Concealer | Creamy, Varying Coverage | Matte/Satin/Dewy | Readily available, can brighten the eye area, provides some level of base. | Can be too emollient, prone to creasing, doesn’t always provide enough grip for glitter. Dewy concealers are a HARD NO. | Low | 2 |
| Cream Eyeshadow (Matte) | Creamy, Pigmented | Matte | Can create a solid base color, increases pigment intensity of subsequent shadows. | Needs to be set with powder to prevent creasing. Can be difficult to blend other shadows on top if not applied properly. | Moderate | 3 |
| Glitter Glue/Adhesive | Gel/Liquid | Tacky/Clear | Specifically designed to hold glitter in place. Provides maximum grip and prevents fallout. | Can be drying, may feel sticky, requires precise application. Can sometimes be difficult to blend other shadows on top. | Excellent | 5 |
| Setting Spray (Primer) | Liquid | Varies | Some setting sprays can be used as primers. They create a slightly tacky base. | Not as effective as dedicated primers or glitter glues for holding glitter. Can be drying. | Low | 2 |
| Long-Wear Cream Shadow (Matte) | Creamy, Pigmented | Matte | Designed for long wear and crease resistance. Often contains ingredients that help absorb oil. Can create a solid base color and a grippy surface. | Can be drying for some skin types. Requires quick blending as they tend to set quickly. | High | 4 |
(Professor Sparkle taps a pen against the table, emphasizing the importance of the "Glitter Glue/Adhesive" category.)
4. Choosing Your Weapon: Selecting the Perfect Eye Base for Your Needs
Okay, class, pop quiz! Which eye base is right for you? The answer, as always in the world of makeup, is: it depends. Here’s a breakdown to help you choose wisely:
- Oily Lids: If your eyelids produce more oil than an OPEC convention, you need a power player. Look for long-wear matte cream shadows or a glitter glue specifically designed for oily skin. Powdering your eye base is a MUST.
- Dry Lids: Dry lids can handle more emollient formulas. A standard eye primer with hydrating ingredients might suffice. Just be careful not to overdo it on the moisture, as that can still lead to slippage.
- Sensitive Skin: Opt for fragrance-free, hypoallergenic formulas. Test a small area before applying to your entire eyelid. Standard eye primers or matte cream shadows are generally safe bets. Avoid glitter glues with harsh ingredients.
- Mature Skin: As we age, our eyelids can become crepey. Look for primers that smooth texture and fill in fine lines. Standard eye primers with hydrating ingredients and a smoothing effect are ideal. Avoid anything too drying or sticky.
- For Maximum Glitter Hold (Regardless of Skin Type): Glitter glue/adhesive is your best friend. Plain and simple.
(Professor Sparkle pulls out a variety of eye bases and demonstrates their textures on the back of her hand.)
5. Application Techniques: The Art of the Base Coat
Applying your eye base isn’t just about slapping it on and hoping for the best. It’s an art form! Here’s the secret sauce:
- Prep Your Lids: Start with clean, dry eyelids. Use a gentle cleanser to remove any oil or residue.
- Apply a Thin Layer: Less is more! Apply a thin, even layer of your chosen eye base to your entire eyelid, from lash line to brow bone (or just to the crease, depending on your desired look).
- Blend, Blend, Blend: Use your fingertip or a synthetic brush to blend the eye base seamlessly into your skin. Avoid harsh lines or patchiness.
- Wait for It: Allow the eye base to set for a minute or two before applying your glitter cream eyeshadow stick. This allows the base to become tacky and provides a better grip for the glitter.
- For Glitter Glues: Apply a very thin layer exactly where you want the glitter. These are fast-drying and don’t blend like traditional primers. Use a small, flat brush for precision.
(Professor Sparkle demonstrates the proper application technique on a student volunteer, offering encouraging words and adjusting the lighting for optimal viewing.)
6. Setting the Stage: Locking in the Magic
Setting your eye base with powder is crucial, especially if you have oily lids or are using a cream eyeshadow as your base. This helps to absorb excess oil and prevent creasing.
- Choose a translucent setting powder: This won’t alter the color of your eyeshadow.
- Use a fluffy brush: Apply a light dusting of powder to your entire eyelid, focusing on the crease area.
- Don’t overdo it: Too much powder can make your eyelids look dry and cakey.
(Professor Sparkle pulls out a giant powder puff and pretends to aggressively powder the student volunteer’s face, eliciting laughter from the class.)
7. Troubleshooting: When Sparkle Goes Wrong
Even with the best eye base and application techniques, things can sometimes go awry. Here are some common problems and their solutions:
- Creasing:
- Problem: Your eye base is too emollient, or you’re using too much product.
- Solution: Switch to a matte eye base or a glitter glue. Use less product and set with powder.
- Glitter Fallout:
- Problem: Your eye base isn’t sticky enough.
- Solution: Use a glitter glue/adhesive. You can also try applying the glitter cream shadow with your fingertip for better adhesion.
- Shadow Fading:
- Problem: Your eye base isn’t long-wearing enough.
- Solution: Switch to a long-wear eye primer or a matte cream shadow.
- Irritation:
- Problem: You’re allergic to an ingredient in your eye base.
- Solution: Discontinue use immediately and switch to a fragrance-free, hypoallergenic formula. Consult a dermatologist if the irritation persists.
(Professor Sparkle holds up a whiteboard with common eyeshadow problems and their corresponding solutions written in sparkly marker.)
8. Bonus Round: Hacks and Pro Tips for Maximum Glitter Glam
Alright, my glitter-obsessed friends, prepare to have your minds blown! Here are some insider secrets for achieving ultimate glitter eyeshadow longevity:
- Layering is Key: For extra staying power, layer a glitter glue with a similar-toned eyeshadow underneath. This creates a super-sticky base for the glitter to adhere to.
- Finger Application: Applying the glitter cream shadow with your fingertip can help to press the glitter into the base, minimizing fallout.
- Setting Spray Power: After applying your eyeshadow, lightly mist your eyelids with a setting spray. This will help to lock everything in place.
- Glitter Shield: Use a tissue or eyeshadow shield under your eyes while applying glitter to catch any fallout.
- Clean Up Crew: Keep a small, angled brush and some makeup remover on hand to clean up any stray glitter particles.
- Embrace the Mess (Sometimes!): Let’s be real, glitter is messy. Sometimes, you just have to embrace the sparkle and rock the glitter fallout like a boss! ✨
(Professor Sparkle strikes a dramatic pose, covered in glitter, and winks at the camera.)
And that, my dazzling darlings, concludes our lecture on eye base application for glitter cream eyeshadow sticks! Go forth and create shimmering masterpieces! Remember, practice makes perfect, and don’t be afraid to experiment to find what works best for you. Now, if you’ll excuse me, I have a date with a disco ball. Class dismissed! 💖
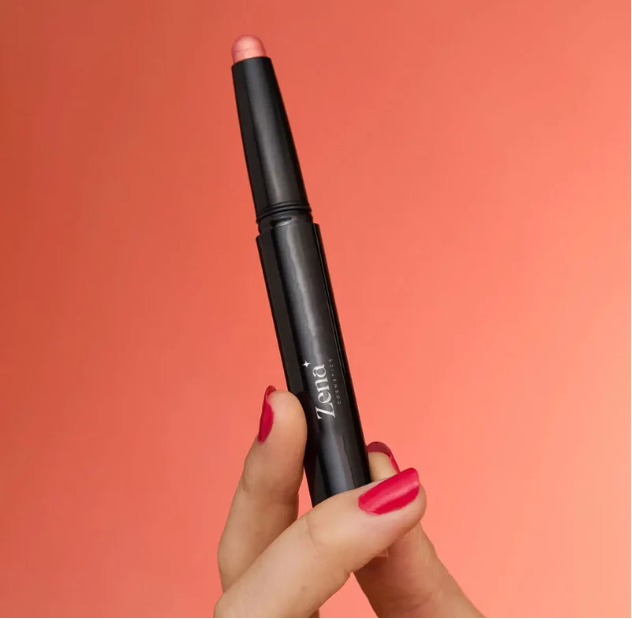
For detailed product specifications and purchases, please go to :https://zenamakeup.com/products/glitter-cream-eyeshadow-stick-shimmer-for-all-eyes-colors
Leave a Reply