Lecture Hall: Level Up Your Pout with Peel-Off Jelly Lip Stains! 💋
Professor: Dr. Kiss-and-Tell (That’s me!)
Course: Lip Stain 101: Mastering the Jelly Peel
Welcome, future Lip Stain Masters! 👋
Alright class, settle down, settle down! Today, we’re diving deep into the magical world of peel-off jelly lip stains. Forget those sticky, transfer-prone lipsticks of yesteryear! We’re talking about long-lasting, kiss-proof color that’s so natural, it looks like you woke up with it (even if you haven’t seen the inside of a bedroom in 72 hours – we don’t judge!).
But let’s be honest, folks. Achieving that perfect, even, and long-lasting stain isn’t always a walk in the park. It requires finesse, technique, and a healthy dose of patience. That’s why you’re here, and that’s why I’m here – to guide you through the perils and pitfalls of the peel-off jelly lip stain universe and transform you into a certified lip stain guru! 🎓
So grab your notebooks (or, you know, your phones), because class is officially in session!
Module 1: The Anatomy of a Perfect Peel – Preparation is Key! 🔑
Think of your lips as a canvas. Would you paint a masterpiece on a dirty, cracked, and uneven surface? Of course not! The same principle applies to lip stains. A flawless application starts with meticulous preparation.
1. Exfoliation: Buff Away the Bad, Embrace the Smooth! 🧽
- The Problem: Dry, flaky lips are the enemy of even color. The stain will cling to the dry patches, creating a patchy, uneven mess. Think of it like trying to wallpaper a bumpy wall – disaster! 😱
- The Solution: Exfoliate! Think of it as giving your lips a mini spa day.
- DIY Scrub: A simple sugar scrub is your best friend. Mix a teaspoon of sugar (brown or white) with a teaspoon of honey or olive oil. Gently massage onto your lips in circular motions for about a minute. Rinse with warm water and pat dry.
- Lip Scrub Products: There are tons of delicious lip scrubs on the market. Look for ones with natural ingredients like sugar, honey, or fruit extracts.
- Gentle Towel Method: In a pinch, a damp washcloth can work wonders. Gently rub your lips in circular motions to slough off dead skin.
- Frequency: Exfoliate 1-2 times a week, or whenever your lips feel dry and flaky. Don’t overdo it, or you’ll irritate them. We want kissable, not raw! 😉
2. Hydration: Quench Your Lips’ Thirst! 💧
- The Problem: Dry lips will absorb the stain unevenly, leading to patchy color and shorter wear time. Imagine trying to dye a sponge that’s already half-dry. It’s just not going to work! 😫
- The Solution: Hydrate, hydrate, hydrate!
- Lip Balm is Your BFF: Carry a good quality lip balm with you at all times and apply it liberally throughout the day. Look for ingredients like shea butter, cocoa butter, beeswax, or hyaluronic acid.
- Overnight Lip Mask: Treat your lips to an overnight lip mask for an extra boost of hydration. These masks are typically thicker and more emollient than regular lip balms.
- Drink Plenty of Water: Hydration starts from within! Aim to drink at least 8 glasses of water a day to keep your body (and your lips) hydrated.
- Key Tip: Apply lip balm before you start your makeup routine. This gives the balm time to sink in and create a smooth, hydrated base for the lip stain.
3. Clean Canvas: Remove All Traces of Previous Products! 🧼
- The Problem: Leftover lipstick, lip gloss, or even lip balm can create a barrier between the lip stain and your skin, preventing it from adhering properly. Think of it as trying to paint on a greasy surface. 🤮
- The Solution: Remove all traces of previous products.
- Makeup Remover: Use a gentle makeup remover to wipe away any lipstick or lip gloss.
- Micellar Water: Micellar water is a great option for removing lip balm or other residue.
- Clean Towel: A clean, damp towel can also work in a pinch.
- Important: Ensure your lips are completely dry before applying the lip stain.
Table 1: Lip Prep Checklist – A Recipe for Success
| Step | Description | Frequency | Why it Matters |
|---|---|---|---|
| Exfoliate | Gently remove dead skin cells using a sugar scrub, lip scrub, or damp towel. | 1-2x/week | Creates a smooth, even surface for the lip stain to adhere to. Prevents patchy color. |
| Hydrate | Apply a generous layer of lip balm or lip mask. | Daily | Keeps lips moisturized, preventing dry patches and ensuring even color absorption. |
| Cleanse | Remove all traces of previous lip products using makeup remover or micellar water. | Before use | Ensures the lip stain can directly contact the skin, maximizing color payoff and longevity. |
Module 2: Application Perfection – The Art of the Peel! 🎨
Now that our lips are primed and ready, it’s time to unleash the magic of the peel-off jelly lip stain! But hold your horses, eager beavers! There’s a right way and a wrong way to apply this stuff. Let’s learn the right way, shall we? 😉
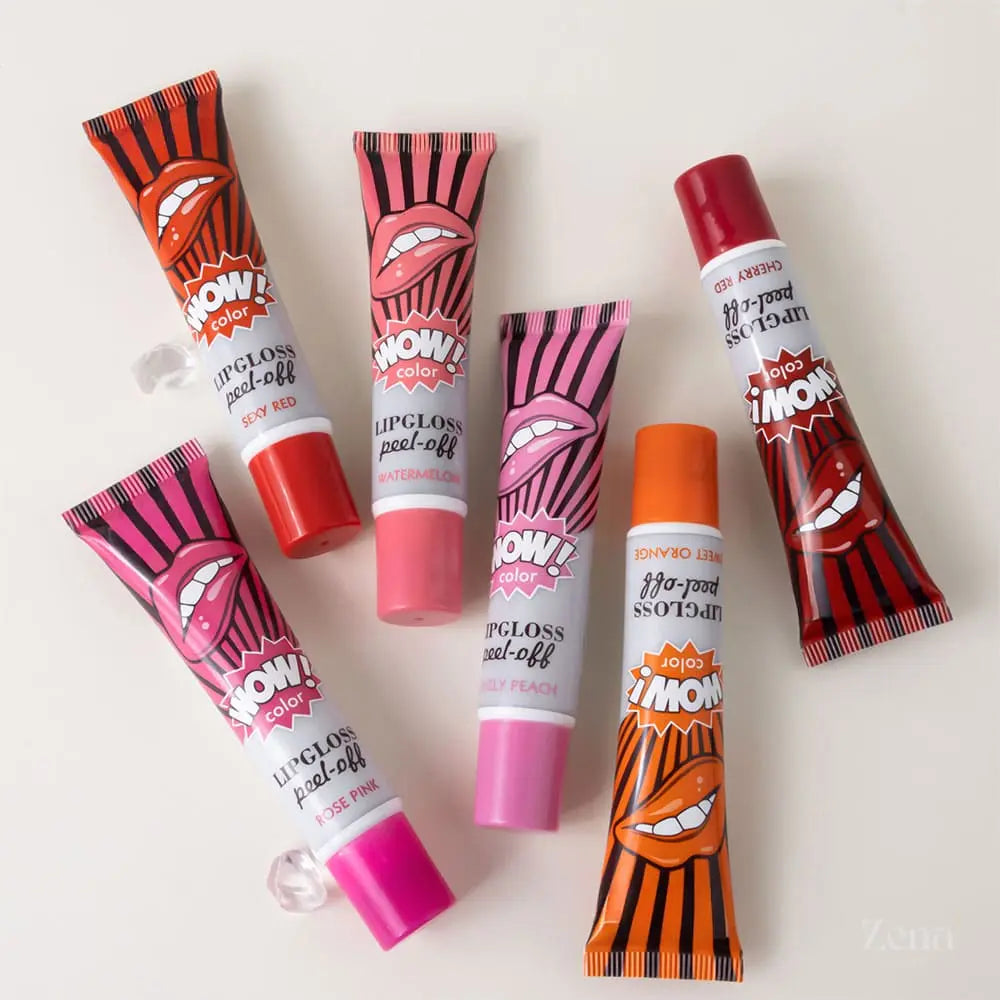
1. Choosing the Right Shade: Match Your Mood, Match Your Look! 🌈
- Consider Your Skin Tone: Fair skin tones look great with light pinks, peaches, and nudes. Medium skin tones can rock berries, corals, and roses. Dark skin tones shine with deep reds, plums, and chocolates.
- Think About the Occasion: A subtle nude is perfect for everyday wear, while a bold red is ideal for a night out.
- Don’t Be Afraid to Experiment: Try different shades to see what you like best! After all, it’s just lip stain. Have fun with it! 🎉
2. Application Technique: Even, Thick, and Precise! 🎯
- The Goal: Achieve a thick, even layer of lip stain across your entire lip surface. Think of it like painting a fence – you want to cover every inch!
- The Method:
- Start in the Center: Apply the lip stain to the center of your lips, then spread it outwards towards the corners.
- Use the Applicator: Use the applicator provided with the lip stain to create a thick, even layer. Don’t be stingy!
- Avoid Getting It on Your Skin: Use a cotton swab to clean up any stray marks around your lip line.
- Thickness Matters: A thicker layer will result in a more vibrant and long-lasting stain. A thin layer might peel off too easily or result in a faint, uneven color.
- Common Mistakes to Avoid:
- Applying Too Thinly: This will result in a weak, patchy stain.
- Applying Unevenly: This will create a blotchy, uneven look.
- Getting It On Your Skin: This can stain your skin and make it difficult to peel off the lip stain cleanly.
3. The Waiting Game: Patience is a Virtue! ⏳
- The Problem: Rushing the process will result in a weak, uneven stain. The lip stain needs time to fully dry and set.
- The Solution: Be patient! Let the lip stain dry completely before peeling it off.
- Drying Time: The drying time typically ranges from 10-20 minutes, depending on the formula and the thickness of the layer you applied.
- How to Tell When It’s Dry: The lip stain should feel completely dry to the touch and no longer sticky. It should also have a slightly shriveled appearance.
- Pro Tip: Avoid touching your lips or eating/drinking while the lip stain is drying.
4. The Peel: Gentle and Deliberate! 🦋
- The Goal: Remove the lip stain cleanly and evenly, leaving behind a beautiful, long-lasting color.
- The Method:
- Start at the Corner: Gently peel the lip stain from the corner of your mouth.
- Slow and Steady: Peel slowly and deliberately, working your way across your lips.
- Avoid Tugging: Don’t tug or pull on the lip stain, as this can irritate your lips.
- If It’s Stuck: If the lip stain is stuck in certain areas, gently moisten a cotton swab with water and use it to loosen the stain.
- What to Expect: You might feel a slight tingling sensation as you peel off the lip stain. This is normal and nothing to worry about.
- Important Note: Some formulas may leave a slight residue behind. This is also normal and can be easily removed with a damp cloth.
Table 2: Application Dos and Don’ts – A Guide to Lip Stain Success
| Do | Don’t | Why |
|---|---|---|
| Apply a thick, even layer. | Apply too thinly. | Ensures a vibrant and long-lasting stain. |
| Clean up any stray marks around your lip line with a cotton swab. | Get the lip stain on your skin. | Prevents staining and makes the peeling process cleaner. |
| Let the lip stain dry completely before peeling. | Peel the lip stain prematurely. | Allows the stain to properly adhere to your lips, resulting in a more even and long-lasting color. |
| Peel slowly and gently, starting from the corner of your mouth. | Tug or pull on the lip stain. | Avoids irritating your lips. |
| Moisturize your lips after peeling. | Forget to moisturize. | Keeps your lips hydrated and comfortable. |
Module 3: Maximizing Longevity – Making Your Stain Last! 🕰️
Congratulations! You’ve successfully applied your peel-off jelly lip stain. Now, let’s learn how to make that gorgeous color last as long as possible. We’re aiming for all-day, kiss-proof, coffee-proof, pizza-proof perfection! 🍕☕💋
1. Hydration is Key (Again!): Keep Those Lips Moisturized! 💧
- Why It Matters: Hydrated lips hold onto color better. Think of it like a sponge – a moist sponge absorbs and retains liquid better than a dry one.
- The Solution: Apply lip balm regularly throughout the day, especially after eating or drinking.
2. Avoid Oily Foods: Oil is the Enemy! 🍟
- Why It Matters: Oil can break down the lip stain and cause it to fade or wear off prematurely.
- The Solution: Be mindful of what you eat. Avoid oily foods as much as possible, or blot your lips with a napkin after eating.
3. Gentle Lip Care: Treat Your Lips with Kindness! 💖
- Why It Matters: Harsh lip products or excessive rubbing can damage the lip stain and shorten its lifespan.
- The Solution: Avoid using harsh lip scrubs or rubbing your lips vigorously with a towel. Be gentle when applying makeup or removing makeup.
4. Touch-Ups (If Necessary): A Little Dab Will Do Ya! 🤏
- Why It Matters: Even with the best application techniques, the lip stain may fade slightly over time, especially after eating or drinking.
- The Solution: If you notice any fading, you can reapply a thin layer of the lip stain to touch up the color.
Table 3: Longevity Hacks – Keep That Color Going Strong!
| Tip | Why It Works | How to Implement |
|---|---|---|
| Stay Hydrated | Hydrated lips hold onto color better. | Drink plenty of water and apply lip balm regularly. |
| Avoid Oily Foods | Oil can break down the lip stain. | Be mindful of what you eat and blot your lips after eating oily foods. |
| Gentle Lip Care | Harsh products or rubbing can damage the stain. | Avoid harsh lip scrubs and be gentle when applying or removing makeup. |
| Touch-Ups (If Needed) | To maintain the color intensity throughout the day. | Reapply a thin layer of lip stain to touch up the color if needed. |
Module 4: Troubleshooting – When Things Go Wrong (and How to Fix Them!) 🛠️
Even the most experienced lip stain aficionados encounter problems from time to time. Don’t panic! Here are some common issues and how to troubleshoot them:
1. Patchy Color:
- Cause: Uneven application, dry lips, or insufficient drying time.
- Solution:
- Exfoliate and Hydrate: Ensure your lips are properly exfoliated and hydrated before applying the lip stain.
- Apply Evenly: Use the applicator to create a thick, even layer of lip stain across your entire lip surface.
- Allow Sufficient Drying Time: Let the lip stain dry completely before peeling it off.
2. Faint Color:
- Cause: Applying too thinly, choosing a shade that’s too light for your skin tone, or insufficient drying time.
- Solution:
- Apply More Thickly: Use more product to create a thicker layer of lip stain.
- Choose a Deeper Shade: Experiment with different shades to find one that complements your skin tone.
- Allow Sufficient Drying Time: Let the lip stain dry completely before peeling it off.
3. Difficult to Peel Off:
- Cause: Getting the lip stain on your skin, applying too thinly, or insufficient drying time.
- Solution:
- Avoid Getting It On Your Skin: Use a cotton swab to clean up any stray marks around your lip line.
- Apply More Thickly: Use more product to create a thicker layer of lip stain.
- Allow Sufficient Drying Time: Let the lip stain dry completely before peeling it off.
- Moisten with Water: If the lip stain is stuck in certain areas, gently moisten a cotton swab with water and use it to loosen the stain.
4. Irritated Lips:
- Cause: Over-exfoliating, using harsh lip products, or being allergic to an ingredient in the lip stain.
- Solution:
- Exfoliate Gently: Avoid over-exfoliating your lips.
- Use Gentle Lip Products: Choose lip products that are free of harsh chemicals and fragrances.
- Discontinue Use: If you suspect you’re allergic to an ingredient in the lip stain, discontinue use immediately.
Table 4: Troubleshooting Guide – Fixing Common Lip Stain Problems
| Problem | Possible Cause(s) | Solution(s) |
|---|---|---|
| Patchy Color | Uneven application, dry lips, insufficient drying | Exfoliate and hydrate lips, apply evenly, allow sufficient drying time. |
| Faint Color | Thin application, light shade, insufficient drying | Apply more thickly, choose a deeper shade, allow sufficient drying time. |
| Difficult to Peel Off | On skin, thin application, insufficient drying | Avoid getting on skin, apply more thickly, allow sufficient drying time, moisten with water. |
| Irritated Lips | Over-exfoliating, harsh products, allergy | Exfoliate gently, use gentle products, discontinue use if allergic. |
Conclusion: You’re Now a Lip Stain Expert! 🎉
And that, my friends, concludes our intensive course on mastering the peel-off jelly lip stain! You’ve learned the secrets to achieving an even, long-lasting, and kissable pout. Now go forth and conquer the world, one perfectly stained lip at a time!
Remember, practice makes perfect. Don’t be discouraged if your first attempt isn’t flawless. Keep experimenting, keep learning, and keep perfecting your technique. Soon, you’ll be a lip stain pro!
Class dismissed! 🔔
For detailed product specifications and purchases, please go to :https://zenamakeup.com/products/peel-off-jelly-lip-stain
Leave a Reply