✨ Glitter & Go: Mastering Party Eye Makeup with a Single Glitter Cream Eyeshadow Stick ✨
(A Lecture on Effortless Sparkle)
Alright, glamour gladiators and sparkle sirens! Welcome, welcome, welcome to Glitter & Go 101, where we dismantle the myth that a breathtaking party eye requires a PhD in eyeshadow blending and the entire Sephora inventory. We’re here to prove that with one (yes, ONE) glitter cream eyeshadow stick, you can achieve looks that scream "party-ready" faster than you can say "pass the champagne!" 🥂
Forget the complicated palettes, the brushes that resemble tiny medieval torture devices, and the fear of fallout that haunts your dreams. We’re going minimalist, maximalist in impact, and ridiculously quick. Get ready to unleash your inner sparkle monster!
Our Curriculum (or: What We’re Covering Today):
- The Glitter Cream Eyeshadow Stick: A Love Story (and Why It’s Your New BFF) 🥰
- Tool Time (or: The Bare Necessities for Glitter Domination) 🛠️
- Prime Time (or: Setting the Stage for Sparkly Success) 🎭
- Glitter Application: The Art of Not Looking Like a Toddler Raided the Craft Aisle 🎨
- Look Book: 5 Glitter-ific Party Eye Looks You Can Master Tonight 📚
- Troubleshooting: When Sparkle Goes Rogue (and How to Tame It) 🚨
- Glitter Removal: The Gentle Art of Saying Goodbye (Without Scaring Your Face) 🧼
- Bonus Points: Level Up Your Glitter Game 🌟
I. The Glitter Cream Eyeshadow Stick: A Love Story (and Why It’s Your New BFF) 🥰
Let’s be honest, we’ve all been intimidated by the eyeshadow aisle. Palettes with a million shades, cryptic instructions, and the constant pressure to achieve "perfect" blending… it’s enough to make you want to hide under a blanket with a tub of ice cream. 😭
Enter the glitter cream eyeshadow stick. This unassuming little tube is a game-changer for several reasons:
- Ease of Use: It’s literally point, swipe, and blend. We’re talking kindergarten-level skill here.
- Pigment Powerhouse: Good glitter cream eyeshadow sticks pack a serious punch in terms of color and shimmer. One swipe can deliver more impact than multiple layers of powder shadow.
- Minimal Fallout: Cream formulas tend to adhere better than powders, meaning less glitter ending up on your cheeks (unless that’s the look you’re going for, in which case, you do you!).
- Blendability: They’re designed to be blended, giving you control over the intensity and distribution of the glitter.
- Travel-Friendly: Throw it in your purse, your gym bag, your emergency "going out" kit. It’s the ultimate on-the-go sparkle solution.
Think of it as your personal glitter fairy godmother, ready to transform you from drab to fab in seconds. ✨
II. Tool Time (or: The Bare Necessities for Glitter Domination) 🛠️
Okay, so you’ve got your glitter cream eyeshadow stick. Congratulations! But even the best tools need a little backup. Here’s what you’ll need to unleash its full potential:
| Tool | Purpose | Why You Need It |
|---|---|---|
| Your Fingers | Blending, smudging, tapping the glitter into place. | Seriously. Your fingers are the OG makeup tool. The warmth helps blend the cream formula seamlessly. Plus, they’re free! 💰 |
| Blending Brush | Softening edges, creating a more diffused look, blending with other shadows (if you’re feeling fancy). | A fluffy blending brush is your friend if you want a more polished, less "I just slapped glitter on my face" look. Think of it as the adult supervision for your glitter. 🧐 |
| Q-Tips | Cleaning up mistakes, sharpening edges, removing fallout. | Because even the best of us occasionally get glitter where it doesn’t belong. Q-tips are the unsung heroes of makeup application. 🦸♀️ |
| Makeup Remover Wipes | Wiping away major mishaps, cleaning up your workspace (because glitter gets everywhere). | Let’s face it, sometimes you just need to start over. Makeup remover wipes are your safety net. Plus, they’re great for cleaning up glitter that’s migrated to your forehead. 😓 |
| Mirror | Seeing what you’re doing (duh!). | A good mirror with decent lighting is essential. Nobody wants to leave the house looking like a glitter-bombed disco ball. 🪩 |
III. Prime Time (or: Setting the Stage for Sparkly Success) 🎭
Just like a painting needs a canvas, your eyelids need a primer. Priming your lids is crucial for:
- Extending Wear Time: Prevents creasing and fading, keeping your glitter looking fresh all night long.
- Intensifying Color: Provides a smooth, even base for the glitter to adhere to, making the color pop.
- Preventing Creasing: Nobody wants glitter settling into fine lines. Primer creates a barrier that prevents this from happening.
Types of Primers:
- Eyeshadow Primer: Specifically designed for eyelids. Look for one that’s long-lasting and crease-resistant.
- Concealer: In a pinch, concealer can work as a primer. Just make sure to set it with a light dusting of powder.
- Cream Eyeshadow Base: A cream eyeshadow in a neutral shade can also provide a good base for glitter.
Application:
- Apply a small amount of primer to your eyelids, from lash line to crease.
- Blend evenly with your finger or a brush.
- Let it set for a minute or two before applying your glitter.
IV. Glitter Application: The Art of Not Looking Like a Toddler Raided the Craft Aisle 🎨
This is where the magic happens! But before you dive in headfirst (literally), let’s go over some key techniques:
- Less is More (Initially): Start with a thin layer and build up the intensity as needed. It’s easier to add glitter than to take it away.
- Placement is Key: Consider the shape of your eyes and where you want the glitter to be most impactful.
- Blending is Your Friend: Use your finger or a brush to blend the edges of the glitter, creating a seamless transition.
- Tapping vs. Swiping: For maximum glitter payoff, tap the product onto your lid rather than swiping. This helps to pack the glitter on and minimize fallout.
- Layering for Dimension: If you’re feeling adventurous, try layering different shades of glitter cream eyeshadow sticks for a multi-dimensional effect.
V. Look Book: 5 Glitter-ific Party Eye Looks You Can Master Tonight 📚
Okay, showtime! Here are five easy party eye looks you can create using a single glitter cream eyeshadow stick:
Look 1: The Classic Glitter Lid
- Description: A simple yet stunning look where the entire eyelid is covered in glitter.
- How-To:
- Apply primer to your eyelids.
- Swipe the glitter cream eyeshadow stick across your entire eyelid, from lash line to crease.
- Use your finger or a brush to blend the edges of the glitter.
- Add a coat of mascara.
- Pro Tip: Choose a glitter shade that complements your skin tone and outfit. Gold, bronze, and silver are always safe bets.
Look 2: The Glitter Liner
- Description: A subtle yet sophisticated look where the glitter is used as an eyeliner.
- How-To:
- Apply primer to your eyelids.
- Use the tip of the glitter cream eyeshadow stick to draw a line along your upper lash line, starting from the inner corner of your eye and extending outwards.
- You can create a wing for a more dramatic effect.
- Add a coat of mascara.
- Pro Tip: Use a thin eyeliner brush to create a more precise line.
Look 3: The Glitter Inner Corner Pop
- Description: A bright and eye-opening look where a small amount of glitter is applied to the inner corner of the eye.
- How-To:
- Apply primer to your eyelids.
- Use your finger or a small brush to apply a small amount of glitter to the inner corner of your eye.
- Blend the glitter slightly into the surrounding eyeshadow (if you’re wearing any).
- Add a coat of mascara.
- Pro Tip: Choose a bright, shimmery shade like silver, gold, or champagne to really make your eyes pop.
Look 4: The Smoked-Out Glitter
- Description: A sultry and glamorous look where the glitter is blended with a dark eyeshadow for a smoky effect.
- How-To:
- Apply primer to your eyelids.
- Apply a dark eyeshadow (like black, brown, or gray) to your eyelids, blending it outwards and upwards.
- Swipe the glitter cream eyeshadow stick across your eyelids, focusing on the center of the lid.
- Use your finger or a brush to blend the glitter into the dark eyeshadow, creating a smoky effect.
- Add a coat of mascara.
- Pro Tip: Use a matte eyeshadow for a more dramatic contrast.
Look 5: The Two-Toned Glitter
- Description: A fun and playful look where two different shades of glitter cream eyeshadow sticks are used to create a gradient effect.
- How-To:
- Apply primer to your eyelids.
- Apply a lighter shade of glitter to the inner half of your eyelid.
- Apply a darker shade of glitter to the outer half of your eyelid.
- Use your finger or a brush to blend the two shades together, creating a seamless gradient.
- Add a coat of mascara.
- Pro Tip: Choose two shades that complement each other, like gold and bronze, or silver and blue.
VI. Troubleshooting: When Sparkle Goes Rogue (and How to Tame It) 🚨
Even the most skilled glitter artists encounter challenges. Here’s how to handle some common glitter emergencies:
| Problem | Solution |
|---|---|
| Glitter Fallout | Prevention is Key: Use a cream formula, tap the product onto your lid, and avoid rubbing. Clean Up: Use a piece of tape to gently lift the glitter off your skin. Avoid wiping, as this will only spread the glitter further. You can also use a fluffy brush to sweep away loose glitter. |
| Creasing | Prevention is Key: Use a good eyeshadow primer and set it with a light dusting of powder. Fix: Gently smooth out the creased glitter with your finger or a brush. You may need to reapply a small amount of glitter to the affected area. |
| Uneven Application | Use your finger or a brush to blend the glitter evenly across your eyelid. Add more product to areas that need more coverage. |
| Too Much Glitter | Gently blot the excess glitter with a tissue. You can also use a clean brush to sweep away some of the glitter. |
| Glitter in Your Hair | Use a dry shampoo to absorb the glitter and then brush it out. Avoid using water, as this will only make the glitter stick more. |
VII. Glitter Removal: The Gentle Art of Saying Goodbye (Without Scaring Your Face) 🧼
Removing glitter can be tricky, but it doesn’t have to be a nightmare. Here’s the key: be gentle!
- Oil-Based Makeup Remover: This is your best friend. Oil-based removers dissolve the adhesive in the glitter, making it easier to remove.
- Cotton Pads: Soak a cotton pad in makeup remover and gently press it against your eyelid for a few seconds to loosen the glitter.
- Gentle Wiping: Gently wipe away the glitter, being careful not to rub too hard.
- Q-Tips: Use Q-tips dipped in makeup remover to clean up any remaining glitter.
- Follow Up with Cleanser: After removing the glitter, wash your face with a gentle cleanser to remove any residue.
Important Note: Avoid using harsh scrubbing motions or abrasive cloths, as this can irritate your skin.
VIII. Bonus Points: Level Up Your Glitter Game 🌟
Ready to take your glitter game to the next level? Here are some bonus tips and tricks:
- Experiment with Colors: Don’t be afraid to try different shades of glitter. From classic gold and silver to bold blues and purples, the possibilities are endless!
- Mix and Match Textures: Combine glitter cream eyeshadow sticks with other eyeshadow textures, like matte or shimmer, for a more complex look.
- Use Glitter as a Highlighter: Apply a small amount of glitter to the high points of your face, like your cheekbones or brow bone, for a subtle glow.
- Create a Glitter Cut Crease: Use a glitter cream eyeshadow stick to create a dramatic cut crease.
- Embrace the Mess: Glitter is inherently messy, so don’t be afraid to embrace the sparkle! A little bit of fallout is part of the fun.
Conclusion: Go Forth and Sparkle!
Congratulations, you’ve officially graduated from Glitter & Go 101! You are now equipped with the knowledge and skills to create stunning party eye looks using a single glitter cream eyeshadow stick. So go forth, experiment, and embrace your inner sparkle! Remember, makeup is all about having fun, so don’t be afraid to get creative and express yourself. And most importantly, don’t forget to shine! ✨💖🎉
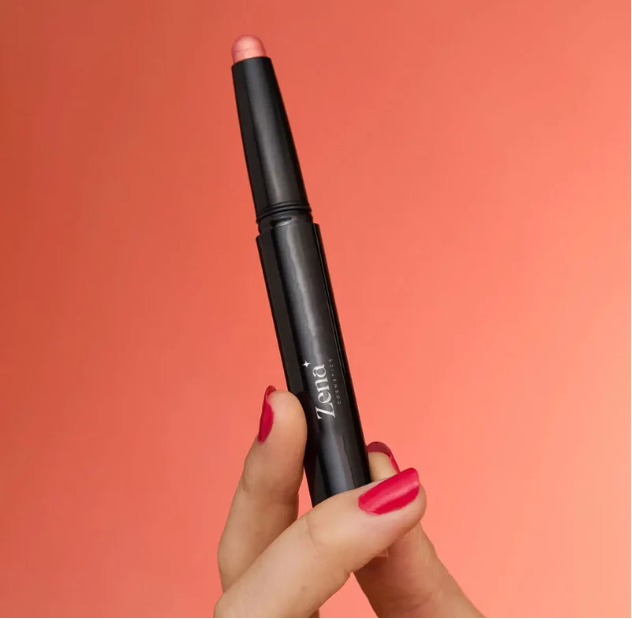
For detailed product specifications and purchases, please go to :https://zenamakeup.com/products/glitter-cream-eyeshadow-stick-shimmer-for-all-eyes-colors
Leave a Reply