Get Ready for Confidence: Sexy Stained Lip Marker Tint for a Smudge-Proof, Transfer-Proof Pop of Color
(Lecture Hall doors swing open with a flourish. You, the Beauty Professor, strut to the podium, adjust your glasses, and beam at the eager faces before you.)
Alright, alright, settle down class! Welcome, welcome! Today, we’re diving headfirst into the glorious, sometimes terrifying, and often misunderstood world of lip stains, specifically, the lip marker tint. Now, before you conjure images of permanent marker mishaps and clown-esque disasters, let me assure you, we’re going to navigate this territory with grace, humor, and the promise of a sexy, smudge-proof pout.
(Professor gestures dramatically with a brightly colored lip marker tint.)
Yes, my dears, sexy. We’re talking about a confidence booster in a pen, a weapon against the dreaded lipstick-on-teeth scenario, and a shortcut to that effortlessly chic, "I woke up like this" vibe. But only if we understand the nuances. So, grab your notebooks (or your iPads, I’m not judging… much!), because class is in session!
I. Introduction: The Lip Stain Renaissance (and Why You Should Care)
(Slide appears on screen: A montage of lipstick-stained coffee cups, wine glasses, and significant others looking slightly horrified.)
Let’s face it, ladies and gentlemen (and everyone in between!): traditional lipstick, while fabulous, can be a high-maintenance diva. It requires constant reapplication, careful attention to detail, and a healthy dose of paranoia to ensure it hasn’t migrated to your chin or, worse, your teeth.
Enter the lip stain! Lip stains, and their marker tint cousins, offer a revolutionary approach to lip color. They’re designed to dye the lips, rather than coat them, providing long-lasting, transfer-proof color that feels virtually weightless.
Think of it as the difference between painting a fence (lipstick) and staining a deck (lip stain). One sits on top, vulnerable to the elements, while the other penetrates and becomes part of the structure.
(Professor clicks to the next slide: A picture of a confident woman smiling, her lips perfectly stained a vibrant berry color.)
The lip stain is the ultimate "set it and forget it" product. It allows you to eat, drink, laugh, and even kiss (gasp!) without leaving a trail of color behind. And who doesn’t want that kind of freedom?
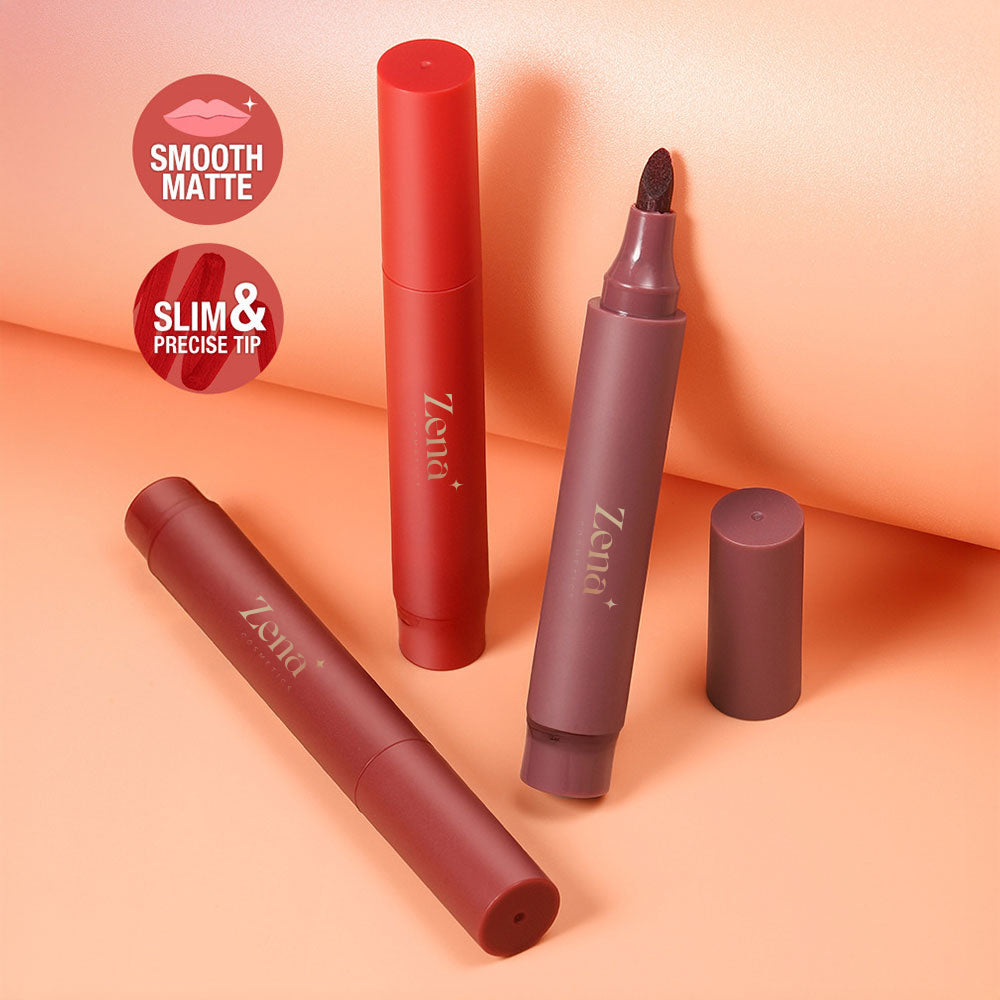
II. Decoding the Lip Marker Tint: What IS This Magical Device?
(Slide: A close-up photo of various lip marker tints, showcasing their different shapes and colors.)
Okay, so we’re on board with the idea of lip stains. But what distinguishes a marker tint from other types of lip stains? Excellent question! (Professor nods approvingly at an imaginary student.)
Lip marker tints are exactly what they sound like: lip stains packaged in a pen-like applicator with a felt tip. This design offers several advantages:
- Precision Application: The fine tip allows for precise outlining and filling, making it ideal for creating defined lips.
- Lightweight Formula: Marker tints typically have a watery, lightweight formula that dries quickly and doesn’t feel sticky or heavy on the lips.
- Buildability: You can easily layer the color to achieve your desired intensity, from a subtle wash to a bold statement.
- Portability: Their compact size makes them perfect for tossing in your purse for on-the-go touch-ups (though, honestly, you probably won’t need them!).
(Professor pulls out a lip marker tint and demonstrates its use on the back of their hand.)
Think of it as a calligraphy pen for your lips! It allows you to create beautiful, defined lines and effortlessly fill in the color.
III. The Science of Stain: How Does This Voodoo Work?
(Slide: A simplified diagram showing the process of lip stain absorption into the lip tissue.)
Alright, time for a little beauty science! How exactly do these lip stains work their magic?
Unlike traditional lipsticks that deposit pigment on the surface of the lips, lip stains contain dyes that are absorbed into the upper layers of the skin. This process is similar to how hair dye works. The dye molecules penetrate the skin and stain the cells, resulting in long-lasting color.
Here’s the breakdown:
- Pigment Selection: Lip stains use a special selection of pigments, often including food-grade dyes, designed to be safe for use on the lips and to effectively stain the skin.
- Solvent Delivery: The pigments are dissolved in a solvent, usually water or alcohol, which helps them to penetrate the skin.
- Absorption: Once applied, the solvent evaporates, leaving the pigments behind to be absorbed into the lip tissue.
- Long-Lasting Effect: Because the pigment is absorbed into the skin, it doesn’t easily transfer or smudge, resulting in a stain that lasts for hours, even after eating and drinking.
(Professor taps the slide with a pointer.)
The key is the absorption process. This is what sets lip stains apart from traditional lipsticks and glosses.
IV. Choosing Your Weapon: Selecting the Perfect Lip Marker Tint
(Slide: A collage of various lip marker tints from different brands, showcasing a range of colors and finishes.)
Now, let’s get down to the business of choosing the right lip marker tint for you. With so many options on the market, it can be overwhelming. But fear not, I’m here to guide you!
Here are some factors to consider:
- Color: This is the most obvious factor. Consider your skin tone, hair color, and personal style when choosing a shade.
- Fair Skin: Opt for light pinks, peaches, and nudes. Avoid dark or overly bright colors that can look harsh.
- Medium Skin: You have a wider range of options! Try berries, corals, and rosy shades.
- Dark Skin: Bold and vibrant colors like reds, fuchsias, and deep plums will look stunning.
- Formula: Not all lip marker tints are created equal. Some are more hydrating than others, while some have a more intense color payoff.
- Water-Based: These are typically the most lightweight and quick-drying. They may be less hydrating, so consider using a lip balm underneath.
- Gel-Based: These offer a slightly thicker consistency and may be more hydrating than water-based formulas.
- Oil-Based: These are the most hydrating option and often contain nourishing ingredients like jojoba oil or vitamin E.
- Finish: Lip marker tints come in a variety of finishes, from matte to glossy.
- Matte: Provides a long-lasting, velvety finish. It can be drying, so make sure to moisturize your lips beforehand.
- Satin: Offers a subtle sheen and is more comfortable to wear than matte finishes.
- Glossy: Provides a high-shine finish and can be more hydrating. However, it may not be as long-lasting as matte or satin finishes.
- Longevity: How long do you want the color to last? Some lip marker tints are designed to last for hours, while others may require more frequent reapplication.
- Brand: Do your research and read reviews before purchasing a lip marker tint. Some brands are known for their high-quality formulas and long-lasting color.
(Professor displays a helpful table on the screen.)
| Feature | Water-Based | Gel-Based | Oil-Based |
|---|---|---|---|
| Texture | Lightweight | Medium | Rich |
| Hydration Level | Low | Medium | High |
| Drying Time | Fast | Medium | Slow |
| Finish | Matte/Satin | Satin | Glossy |
| Longevity | Medium | High | Medium |
| Best For | Oily Lips | Normal Lips | Dry Lips |
(Professor winks.)
Consider this your cheat sheet!
V. Application Techniques: Mastering the Marker Tint Art
(Slide: Step-by-step photos demonstrating the proper application of a lip marker tint.)
Alright, you’ve chosen your weapon of choice. Now, let’s talk technique! Applying a lip marker tint is relatively straightforward, but there are a few tricks to ensure a flawless finish.
- Exfoliate: This is crucial! Lip stains will cling to any dry patches or flakes, accentuating them. Use a gentle lip scrub or a toothbrush to exfoliate your lips before applying the stain. 💋
- Hydrate: Apply a thin layer of lip balm to hydrate your lips. Allow the balm to absorb completely before applying the lip marker tint.
- Outline: Use the tip of the marker to carefully outline your lips. Start at the Cupid’s bow and work your way outwards.
- Fill: Fill in the rest of your lips with the marker tint, using short, even strokes.
- Layer (Optional): For a more intense color payoff, apply a second or even a third layer of the lip marker tint. Allow each layer to dry completely before applying the next.
- Blot (Optional): If you want a more natural, "just-kissed" look, gently blot your lips with a tissue after applying the lip marker tint.
- Seal (Optional): If you want to prolong the wear of your lip stain, you can apply a clear lip gloss or balm on top. This will also add extra hydration.
(Professor demonstrates the application process on their own lips, narrating each step.)
See? Easy peasy!
VI. Troubleshooting: Common Lip Marker Tint Mishaps and How to Fix Them
(Slide: A cartoon image of a person with unevenly stained lips looking distressed.)
Even with the best techniques, sometimes things can go wrong. Here are some common lip marker tint mishaps and how to fix them:
- Uneven Application: If the color is patchy or uneven, try exfoliating your lips again and reapplying the lip marker tint. You can also use a cotton swab to blend the color.
- Color Too Intense: If the color is too bright or bold for your liking, gently blot your lips with a tissue to remove some of the pigment. You can also apply a clear lip balm on top to soften the color.
- Color Not Lasting: If the color fades quickly, make sure you’re exfoliating and hydrating your lips properly. You can also try using a lip primer before applying the lip marker tint.
- Dry Lips: Some lip marker tints can be drying, especially matte formulas. Make sure you’re using a hydrating lip balm underneath and throughout the day.
- Feathering: If the color bleeds outside your lip line, use a clear lip liner to prevent feathering.
(Professor displays a helpful table with common problems and solutions.)
| Problem | Solution |
|---|---|
| Uneven Application | Exfoliate lips, reapply with even strokes, blend with a cotton swab. |
| Color Too Intense | Blot with a tissue, apply clear lip balm. |
| Color Not Lasting | Exfoliate, hydrate, use lip primer. |
| Dry Lips | Use hydrating lip balm before and during wear. |
| Feathering | Use a clear lip liner to prevent bleeding. |
(Professor smiles reassuringly.)
Don’t panic! There’s always a solution!
VII. Beyond the Basics: Pro Tips and Tricks for Lip Marker Tint Mastery
(Slide: A collection of creative lip makeup looks using lip marker tints.)
Now that you’ve mastered the basics, let’s explore some pro tips and tricks for taking your lip marker tint game to the next level:
- Create an Ombre Lip: Use two different shades of lip marker tint to create a gradient effect. Apply the darker shade to the outer edges of your lips and the lighter shade to the center. Blend the colors together for a seamless transition.
- Use as a Cheek Stain: For a natural, flushed look, dab a small amount of lip marker tint onto your cheeks and blend quickly with your fingers or a sponge.
- Mix and Match: Experiment with different colors and formulas to create your own custom shades.
- Combine with Other Lip Products: Layer a lip gloss or balm on top of your lip marker tint for added shine and hydration.
- Use as a Base: Apply a lip marker tint as a base before applying lipstick for longer-lasting color and a more vibrant finish.
(Professor shows examples of each technique on a model.)
The possibilities are endless!
VIII. Conclusion: Unleash Your Inner Confidence with Sexy Stained Lips!
(Slide: The same confident woman from the beginning, now with even more radiant lips and a contagious smile.)
(Professor beams at the class.)
Congratulations, my dears! You’ve officially graduated from Lip Marker Tint 101! You are now armed with the knowledge and skills to rock a smudge-proof, transfer-proof pout with confidence.
Remember, the key to success is experimentation. Don’t be afraid to try different colors, formulas, and techniques until you find what works best for you.
(Professor holds up a lip marker tint.)
This little pen is more than just a makeup product. It’s a tool for self-expression, a confidence booster, and a shortcut to feeling fabulous. So go forth, embrace the lip stain revolution, and unleash your inner confidence with sexy stained lips!
(Professor bows as the class erupts in applause. The lecture hall doors swing open, and the students rush out, eager to put their newfound knowledge to the test.)
(Final slide appears: "Go Forth and Stain! 😉")
For detailed product specifications and purchases, please go to :https://zenamakeup.com/products/sexy-stained-lip-marker-tint
Leave a Reply