Sexy Stained Lip Marker Tint: A Beginner’s Guide to the Wonderful (and Potentially Perilous) World of Lip Stains
(Lecture Hall – cue dramatic lighting and a chalkboard overflowing with lipstick swatches. Professor Lips, a charismatic figure in a bedazzled lab coat, strides confidently to the podium.)
Good morning, future lip-staining aficionados! 👋 Welcome to Lip Stain 101: Decoding the Sexy Stained Lip Marker Tint for the Uninitiated. I’m Professor Lips, and I’ll be your guide through the vibrant, sometimes treacherous, but ultimately rewarding landscape of lip staining.
Now, you might be sitting there, fresh-faced and eager, wondering, “Professor, is this ‘Sexy Stained Lip Marker Tint’ thing actually suitable for a beginner like me? I’ve only just graduated from ChapStick University!" Fear not, my dears! That’s precisely what we’re here to dissect.
Think of lip stains as the cool, mysterious cousins of lipsticks and glosses. They promise a long-lasting wash of color, a "your lips but better" effect, and a low-maintenance vibe. But, like any alluring relative, they come with their own quirks and demands.
Let’s embark on this journey together, shall we?
I. What IS a Lip Stain, Anyway? (And Why All the Hype?)
(Professor Lips clicks a remote, projecting a slide with a magnified image of a lip stain formula being absorbed into the skin.)
At its core, a lip stain is a cosmetic product designed to deposit pigment directly onto the lip skin. Unlike lipsticks, which sit on the surface, stains penetrate it. This is why they’re known for their impressive staying power – they literally become one with your lips!
Think of it like this:
- Lipstick: Painting a wall. You’re adding a layer on top.
- Lip Gloss: Adding a shiny varnish to that painted wall.
- Lip Stain: Dyeing the wall itself. It’s in the fabric, baby!
Here’s a quick table highlighting the key differences:
| Feature | Lipstick | Lip Gloss | Lip Stain |
|---|---|---|---|
| Pigmentation | High, opaque color | Sheer to medium, adds shine | Sheer to medium, natural flush of color |
| Staying Power | Moderate, requires reapplication | Low, needs frequent reapplication | High, long-lasting color |
| Texture | Creamy, matte, satin, etc. | Sticky, smooth, glossy | Watery, gel-like, felt-tip |
| Application | Precise, often requires lip liner | Easy, can be applied without a mirror | Requires careful application |
| Maintenance | Needs regular touch-ups | Needs frequent reapplication | Low, minimal touch-ups needed |
| Finish | Varies: matte, satin, glossy | Glossy, shiny | Natural, matte |
| Feel | Can feel heavy or noticeable on the lips | Can feel sticky or slippery | Lightweight, barely noticeable |
Why the hype?
- Longevity: Who wants to reapply lipstick every hour? ⏳ Lip stains offer hours of worry-free color.
- Natural Look: They create a subtle, "bitten lip" effect that’s perfect for a no-makeup makeup look. 💋
- Transfer-Proof: Kiss your coffee cup (and your significant other) without leaving a trace! ☕😘
- Low Maintenance: Apply and go! No constant checking required.
- Variety: From subtle tints to bolder pops of color, there’s a lip stain for every mood. 🌈
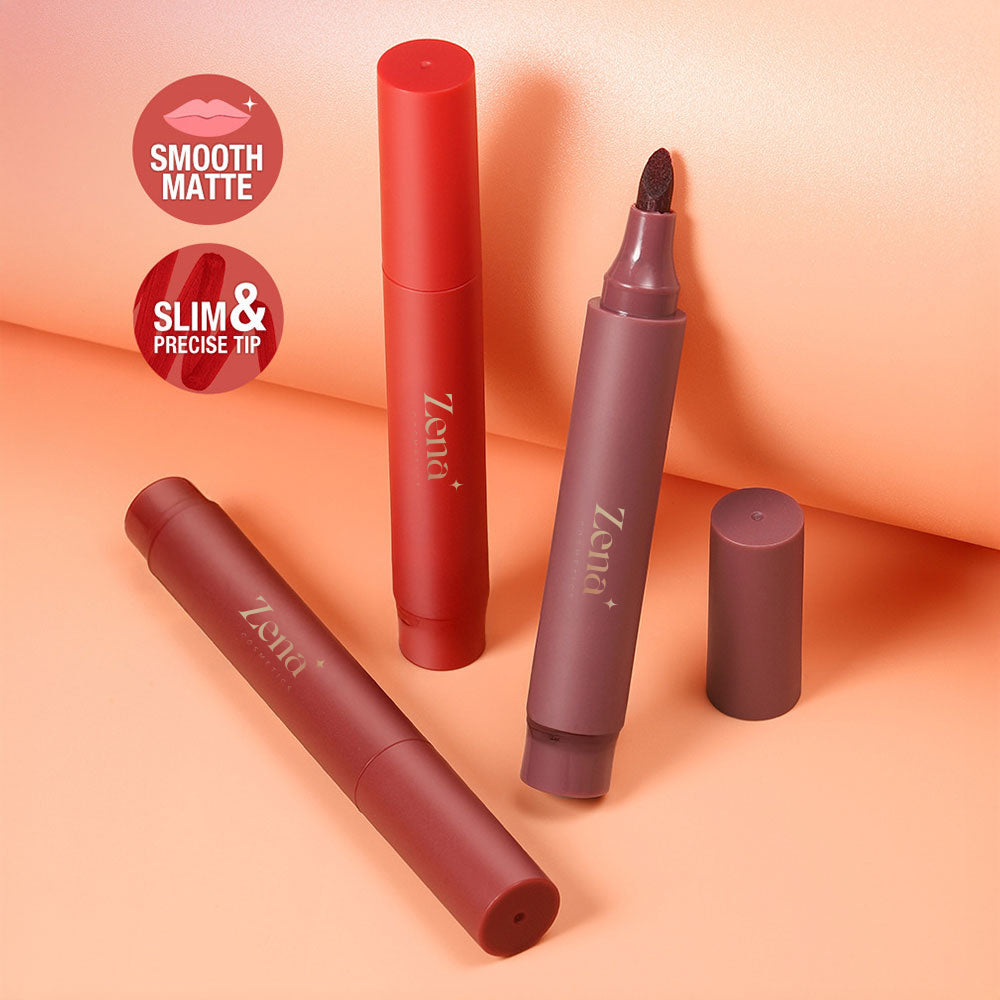
II. The Sexy Stained Lip Marker Tint: A Closer Look
(Professor Lips projects a picture of a lip marker tint.)
Okay, so we know what lip stains are. Now let’s zoom in on our specific subject: the "Sexy Stained Lip Marker Tint."
What is it?
A lip marker tint is essentially a lip stain packaged in a marker-like applicator. It usually has a felt-tip or brush-tip applicator that allows for precise application. The formula is typically water-based and contains dyes or pigments that stain the lips.
Pros:
- Precise Application: The marker tip allows for easy lining and filling in of the lips. ✍️
- Lightweight Formula: Feels like you’re wearing nothing at all.
- Travel-Friendly: Compact and leak-proof, perfect for on-the-go touch-ups. ✈️
- Buildability: You can layer the color for a more intense effect.
- Long-Lasting: As with most lip stains, the color lasts for hours.
Cons:
- Can Be Drying: Water-based formulas can sometimes dry out the lips. 🌵
- Application Requires Practice: Mistakes can be difficult to correct.
- Uneven Application: If your lips are dry or flaky, the color might cling to those areas. 😫
- Color Intensity: The initial color can appear very bright which mellows out.
III. Is it Beginner-Friendly? The Verdict!
(Professor Lips clears her throat dramatically.)
Alright, the million-dollar question: Can a newbie handle the Sexy Stained Lip Marker Tint?
The answer is…it depends!
Let’s break it down:
It CAN be beginner-friendly IF:
- You’re willing to practice: Rome wasn’t built in a day, and neither is a perfect lip stain application. Start with sheer shades and practice your technique.
- You prioritize hydration: Exfoliate your lips regularly and apply a hydrating lip balm before and after using the stain. 💧
- You embrace the "less is more" approach: Start with a light layer and build up the color gradually. You can always add more, but it’s harder to take away.
- You choose the right shade: Opt for a natural-looking shade that complements your skin tone. Think "your lips but better," not "clown lips." 🤡
- You’re patient with the application: Take your time and focus on even coverage. Don’t rush!
It might NOT be beginner-friendly IF:
- You’re impatient and expect instant perfection: Lip stains require a bit of finesse. If you’re easily frustrated, you might want to start with a more forgiving product like a tinted lip balm.
- You have very dry or chapped lips: The stain will cling to the dry patches and create an uneven, patchy look.
- You’re looking for a high-impact, opaque color: Lip stains are all about a subtle, natural flush of color. If you want a bold, dramatic lip, stick to lipstick.
- You don’t like the feeling of dryness on your lips: Even with proper hydration, some lip stains can feel a bit drying. If you prefer a moisturizing formula, a lip gloss might be a better option.
IV. Mastering the Art of the Lip Marker Tint: A Step-by-Step Guide
(Professor Lips unveils a large poster with a detailed application guide.)
Okay, newbies, listen up! Here’s your survival guide to conquering the Sexy Stained Lip Marker Tint:
Step 1: Prep Your Pout (Exfoliate and Hydrate!)
- Exfoliate: Use a gentle lip scrub or a soft toothbrush to remove any dead skin cells. This will create a smooth canvas for the stain. 💋
- Hydrate: Apply a generous layer of lip balm and let it soak in for a few minutes. Blot off any excess before applying the stain.
Step 2: Outline (Optional, But Recommended)
- Use the lip marker to create a precise outline of your lips. This will help prevent the stain from bleeding and create a more defined shape.
- For a more natural look, line just outside your natural lip line.
- For a fuller lip look, slightly overline your lips (but be careful not to go overboard!).
Step 3: Fill ‘Er Up!
- Start at the center of your lips and work your way outwards, using short, light strokes. 🖊️
- Apply the stain evenly, making sure to cover all areas of your lips.
- Avoid applying too much product at once. You can always add more later.
Step 4: Blot (For a Subtle Look)
- If you want a more subtle, natural look, blot your lips with a tissue after applying the stain. This will remove any excess product and create a softer finish.
Step 5: Layer (For More Intensity)
- If you want a more intense color, apply a second or third layer of stain.
- Wait a few minutes between each layer to allow the color to set.
Step 6: Seal the Deal (With Lip Balm!)
- Apply a thin layer of lip balm to lock in the color and add extra hydration. 💧
V. Troubleshooting Common Lip Stain Mishaps
(Professor Lips projects a slide with images of common lip stain application errors.)
Even the most experienced lip stain users can encounter problems. Here’s how to fix some common mishaps:
- Patchy Application:
- Cause: Dry or flaky lips.
- Solution: Exfoliate and hydrate your lips before applying the stain. Use a lip balm regularly.
- Uneven Color:
- Cause: Uneven application or uneven lip pigmentation.
- Solution: Apply the stain in thin, even layers. You may need to apply more product to areas that are less pigmented.
- Bleeding:
- Cause: The stain is bleeding outside your lip line.
- Solution: Use a lip liner to create a barrier. Apply the stain carefully, staying within your lip line.
- Too Dark:
- Cause: Applied too much product or chose a shade that’s too dark.
- Solution: Blot your lips with a tissue to remove excess product. Apply a lighter lip balm to soften the color.
- Too Dry:
- Cause: The stain is drying out your lips.
- Solution: Apply a hydrating lip balm before and after using the stain. Look for lip stains that contain moisturizing ingredients.
VI. Choosing the Right Sexy Stained Lip Marker Tint for You
(Professor Lips unveils a chart comparing different lip marker tint brands and formulas.)
Not all lip marker tints are created equal! Here’s what to consider when choosing the right one for you:
- Shade: Choose a shade that complements your skin tone and personal style. Start with natural-looking shades like nudes, pinks, and berries.
- Formula: Look for formulas that are hydrating and long-lasting. Avoid formulas that are too drying or contain harsh ingredients.
- Applicator: Choose an applicator that you feel comfortable using. Felt-tip applicators are generally easier for beginners.
- Brand: Do your research and read reviews before buying a lip stain. Some brands are known for their high-quality formulas and long-lasting color.
- Ingredients: Check the ingredients list for any potential allergens or irritants. Look for formulas that are free of parabens, sulfates, and phthalates.
VII. Lip Stain Care and Maintenance
(Professor Lips gestures towards a display of lip care products.)
Just like any beauty product, lip stains require a little TLC. Here are some tips for keeping your lips healthy and happy:
- Remove Your Lip Stain Properly: Don’t just rub it off! Use a makeup remover designed for long-wearing products.
- Hydrate, Hydrate, Hydrate: Drink plenty of water and use a hydrating lip balm regularly.
- Exfoliate Regularly: Keep your lips smooth and flake-free by exfoliating a few times a week.
- Protect Your Lips from the Sun: Use a lip balm with SPF to protect your lips from sun damage. ☀️
VIII. Conclusion: Embrace the Lip Stain Journey!
(Professor Lips smiles warmly.)
So, there you have it! The Sexy Stained Lip Marker Tint: A Beginner’s Guide. Is it suitable for beginners? Absolutely! With a little practice, patience, and the right product, anyone can master the art of the lip stain.
Remember, makeup is all about experimentation and self-expression. Don’t be afraid to try new things, make mistakes, and have fun! So go out there, stain those lips, and embrace your inner lip stain goddess! 💋👑
(Professor Lips bows as the lecture hall erupts in applause.)
(End of Lecture)
For detailed product specifications and purchases, please go to :https://zenamakeup.com/products/sexy-stained-lip-marker-tint
Leave a Reply