Lecture Hall: Cracking the Code of the Traceless Matte Foundation Repair Stick – A Step-by-Step Saga! 🕵️♀️💄
Alright, settle down everyone! Grab your coffee, silence your phones (unless you’re live-tweeting this monumental occasion), and prepare to be enlightened. Today, we’re diving deep, really deep, into the wondrous world of the Traceless Matte Foundation Repair Stick. Not just using it, mind you, but mastering it.
Think of this lecture as beauty school meets detective agency. We’re not just slapping on makeup; we’re investigating flaws, concocting solutions, and emerging victorious with a flawless (or traceless, if you will) complexion.
Professor’s Note: I’ve seen foundation application disasters that could rival the sinking of the Titanic. We’re here to prevent that. 🚢🙅♀️
Our Mission, Should You Choose to Accept It:
- Understand the why behind the application steps, not just the what.
- Transform your face into a canvas of matte perfection.
- Laugh a little (because let’s be honest, makeup mishaps are hilarious…in retrospect).
So, let’s get started! 🎬
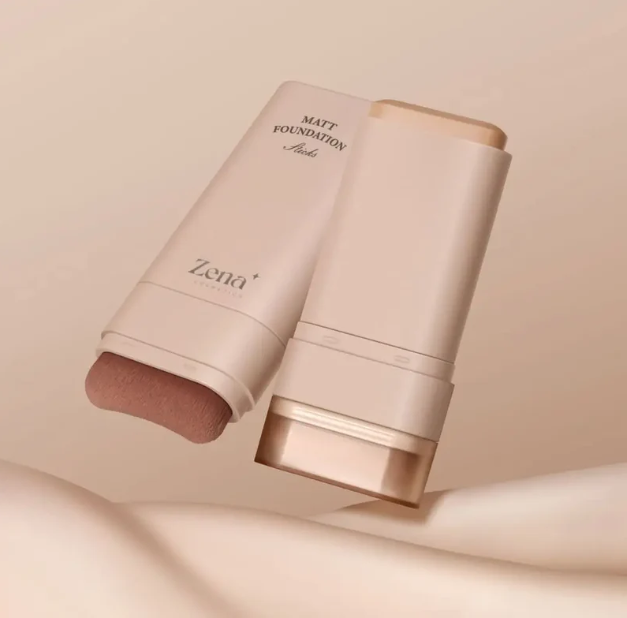
I. The Foundation Repair Stick: A Profile
Before we even think about touching our faces, let’s get acquainted with our weapon of choice. The Traceless Matte Foundation Repair Stick isn’t just another pretty face (pun intended!). It’s a multi-tasking marvel designed to:
- Conceal: Hide those pesky blemishes, dark circles, and redness like a magician. 🪄
- Correct: Even out skin tone and texture for a smooth, uniform canvas.
- Perfect: Create a flawless matte finish that lasts (emphasis on the lasts!).
Think of it as the Swiss Army Knife of your makeup bag. But instead of a corkscrew, it has…well, pigment.
Key Ingredients Decoded: (Okay, maybe not every ingredient, but the important ones!)
| Ingredient | Benefit | Professor’s Commentary |
|---|---|---|
| Silica | Absorbs excess oil, creates a matte finish, blurs imperfections. | Think of it as the blotting paper’s sophisticated cousin. Keeps shine at bay! ✨ |
| Emollients (e.g., Shea Butter, Jojoba Oil) | Provide hydration and prevent the stick from feeling dry or cakey. | Because no one wants a desert face! Hydration is key, even with matte formulas. 💧 |
| Pigments | Provide the color and coverage. | Choose wisely! Matching your skin tone is crucial. We’ll get to that. 🎨 |
| Dimethicone (Silicone) | Creates a smooth, silky texture and fills in fine lines. | The secret weapon for that airbrushed effect. Just don’t go overboard! 💨 |
II. Prep School: Laying the Groundwork for Success
You wouldn’t paint a masterpiece on a dirty, cracked canvas, would you? (Unless you’re going for a very abstract aesthetic.) The same logic applies to your face. Proper preparation is KEY.
Step 1: Cleanse and Exfoliate (The "Fresh Start" Phase)
- Why? Removing dirt, oil, and dead skin cells creates a smooth surface for the foundation to adhere to.
- How? Use a gentle cleanser appropriate for your skin type. Follow with a gentle exfoliator (chemical or physical) 1-2 times a week.
- Professor’s Anecdote: I once saw someone apply foundation over a layer of sunscreen and week-old makeup. It was…not pretty. Think of it as building a house on quicksand. 🏠➡️ 🕳️
Step 2: Hydrate (The "Moisture Barrier" Shield)
- Why? Even with emollients in the foundation, dehydrated skin can make the product look cakey and accentuate fine lines.
- How? Apply a lightweight, non-comedogenic moisturizer. Let it absorb fully before moving on.
- Professor’s Pro-Tip: If you have oily skin, opt for a gel-based moisturizer. Dry skin? Go for something richer and creamier. Know thy skin! 🤓
Step 3: Prime Time (The "Velvet Rope" Effect)
- Why? Primer creates a smooth, even surface, minimizes pores, and helps the foundation adhere better and last longer.
- How? Choose a primer that suits your skin type. Matte primers are ideal for oily skin, while hydrating primers work well for dry skin. Apply a thin layer all over your face.
- Professor’s Rant: Don’t skip the primer! It’s like skipping the undercoat on a car. Sure, the paint might stick, but it’s going to look…subpar. 🚗🎨
III. Color Theory 101: Finding Your Perfect Match
This is where things get serious. Choosing the wrong shade is like wearing shoes that are two sizes too small. Painful and visually jarring.
The Golden Rule: Match Your Undertone!
- Cool Undertones: Pink, red, or blueish hues. Look best in foundations with pink or red undertones.
- Warm Undertones: Yellow, golden, or peachy hues. Look best in foundations with yellow or golden undertones.
- Neutral Undertones: A mix of cool and warm tones. Can wear a wider range of shades.
How to Determine Your Undertone:
- The Vein Test: Look at the veins on your wrist. Blue/purple veins suggest cool undertones. Green veins suggest warm undertones. Blue-green veins suggest neutral undertones.
- The Jewelry Test: Which looks better on you, gold or silver jewelry? Gold tends to flatter warm undertones, while silver flatters cool undertones.
- The Sun Test: How does your skin react to the sun? Do you burn easily (cool undertones) or tan easily (warm undertones)?
Finding Your Shade:
- Test in Natural Light: Artificial lighting can be deceiving.
- Swatch on Your Jawline: Blend a small amount of the foundation on your jawline. The shade that disappears is the closest match.
- Consider Seasonal Changes: Your skin tone might be lighter in the winter and darker in the summer. Adjust your shade accordingly.
Professor’s Cautionary Tale: I once saw a student wearing a foundation that was three shades too light. She looked like a ghost who had just escaped from a haunted house. 👻 Please, don’t be that student.
IV. The Application Process: From Stick to Stunning
Now for the fun part! Time to wield that foundation repair stick like a pro.
Now for the fun part! Time to wield that foundation repair stick like a pro.
Step 1: Strategic Placement (The "Dot and Conquer" Method)
- Why? Applying the foundation directly to the areas that need the most coverage prevents a heavy, cakey look.
- How? Dot the foundation stick on the areas that need the most coverage, such as:
- Center of the forehead
- Bridge of the nose
- Cheeks (around the nose and under the eyes)
- Chin
- Any blemishes or areas of redness
Step 2: Blending is Your Best Friend (The "Seamless Transition" Technique)
- Why? Proper blending ensures that the foundation seamlessly melts into your skin, creating a natural-looking finish.
-
How? Use your preferred blending tool:
-
Damp Beauty Sponge: Provides a natural, airbrushed finish.
-
Foundation Brush: Offers more coverage and precision.
-
Fingers: Can work in a pinch, but requires more blending effort.
-
Technique: Use small, circular motions to blend the foundation outwards from the center of your face. Pay special attention to the hairline and jawline.
-
- Professor’s Blending Mantra: Blend, blend, and blend some more! It’s like kneading dough – the more you work it, the smoother it gets. 👩🍳➡️ 🥖
Step 3: Building Coverage (The "Less is More" Philosophy)
- Why? It’s always easier to add more coverage than to remove excess product.
- How? Start with a thin layer of foundation and build up coverage as needed. Focus on areas that require more concealing.
- Professor’s Pro-Tip: Use a stippling motion with your brush or sponge to build coverage in specific areas. This helps to avoid dragging the product and creating streaks.
Step 4: Spot Concealing (The "Targeted Strike" Approach)
- Why? To address any remaining blemishes or imperfections that need extra attention.
- How? Use the foundation stick or a concealer brush to apply a small amount of product directly onto the blemish. Gently blend the edges to seamlessly integrate it with the surrounding skin.
- Professor’s Analogy: Think of spot concealing as editing a photo. You’re just touching up the areas that need a little extra love. 📸
V. Setting the Stage: Locking in the Look
You’ve done the hard work. Now, let’s make sure it stays put!
Step 1: Setting Powder (The "Insurance Policy" for Your Foundation)
- Why? Setting powder helps to absorb excess oil, prevent creasing, and prolong the wear of your foundation.
- How? Use a large, fluffy brush to apply a light layer of translucent setting powder all over your face. Focus on the T-zone (forehead, nose, and chin), which tends to get oily.
- Professor’s Pet Peeve: Using too much setting powder can make your skin look dry and cakey. Less is more! ☁️
Step 2: Setting Spray (The "Final Seal" of Approval)
- Why? Setting spray helps to meld all the layers of makeup together, creating a seamless, natural-looking finish. It also helps to prolong the wear of your makeup and prevent it from transferring.
- How? Hold the setting spray bottle about 8-10 inches away from your face and mist evenly. Allow it to dry completely.
- Professor’s Fun Fact: Some setting sprays even contain ingredients that hydrate the skin, leaving you with a dewy, radiant glow. ✨
VI. Troubleshooting: Common Mistakes and How to Avoid Them
Even the most skilled makeup artists encounter challenges. Here’s a rundown of common foundation application mishaps and how to prevent them:
| Problem | Cause | Solution |
|---|---|---|
| Cakey Foundation | Dry skin, using too much product, not exfoliating, using the wrong primer. | Exfoliate regularly, moisturize thoroughly, use a hydrating primer, apply thin layers of foundation, blend well, and use a hydrating setting spray. |
| Streaky Foundation | Using the wrong brush, not blending properly, dry skin. | Use a dense, high-quality brush or a damp beauty sponge, blend in small, circular motions, and exfoliate and moisturize regularly. |
| Foundation Creasing | Dry skin, using too much product, not setting with powder. | Moisturize thoroughly, apply thin layers of foundation, blend well, set with a light layer of translucent powder, and avoid applying foundation too close to the eyes. |
| Foundation Oxidizing (Turning Orange) | Foundation reacting with your skin’s natural oils. | Choose a foundation that is slightly lighter than your skin tone, use a primer that creates a barrier between your skin and the foundation, and blot your skin throughout the day to remove excess oil. |
| Foundation Transferring | Not setting with powder, touching your face, humid weather. | Set with a light layer of translucent powder, avoid touching your face, and use a long-wearing setting spray. |
| Foundation Looking Patchy | Uneven skin texture, dry patches, not exfoliating. | Exfoliate regularly, moisturize thoroughly, use a smoothing primer, and apply foundation with a damp beauty sponge to gently blend over textured areas. |
VII. Beyond the Basics: Advanced Techniques
Once you’ve mastered the basics, you can experiment with more advanced techniques to customize your foundation application:
- Highlighting and Contouring: Use a lighter shade of foundation to highlight the high points of your face (cheekbones, bridge of the nose, forehead) and a darker shade to contour the hollows of your cheeks, jawline, and temples.
- Mixing Foundations: Create your perfect custom shade by mixing two or more foundations together.
- Layering Foundations: Use different foundations for different areas of your face to address specific concerns, such as redness or blemishes.
VIII. Final Thoughts: Embrace the Journey!
Applying foundation is a skill that takes time and practice to master. Don’t be discouraged if you don’t get it right away. Experiment with different products, techniques, and tools until you find what works best for you.
Remember, makeup is supposed to be fun! So, relax, experiment, and don’t be afraid to make mistakes. After all, even the most seasoned makeup artists have their fair share of foundation fails. 😜
Professor’s Parting Words: Go forth and conquer your complexion! May your foundation be flawless, your blending be seamless, and your confidence be radiant. Class dismissed! 👩🏫🎉
For detailed product specifications and purchases, please go to :https://zenamakeup.com/products/traceless-matte-foundation-repair-stick
Leave a Reply