Lecture: Cracking the Code to Medium Coverage with Traceless Matte Foundation Repair Stick: No More Cake Face! 🎂
Alright, beauty buffs and makeup mavens! Gather ’round, because today we’re diving deep into the intriguing world of the Traceless Matte Foundation Repair Stick. Yes, you heard right, a repair stick! Sounds like something you’d use on a cracked windshield, but trust me, in the right hands, this little powerhouse can be your secret weapon for achieving that coveted medium coverage, flawless finish.
Now, before you start picturing yourself looking like a meticulously plastered wall, let’s get one thing straight: we’re aiming for medium coverage. We want skin that looks like skin, just a slightly more polished, even-toned, and camera-ready version. Think "I woke up like this" (even if you didn’t!). We’re steering clear of "full coverage" territory, where your foundation could moonlight as a superhero mask. 🦸♀️ No one wants to look like they’re wearing a second face, especially in this day and age.
So, buckle up, grab your favorite coffee (or maybe a glass of wine, depending on the time of day!), and let’s embark on this journey together. I promise to make it informative, entertaining, and, dare I say, even a little bit humorous. 😉
Lecture Outline:
- Understanding the Beast: What is a Traceless Matte Foundation Repair Stick? 🧐
- The Art of the Medium: Why Aim for Medium Coverage? 🤔
- Prepping for Perfection: Skincare is the Foundation of Your Foundation! 🧼
- Tool Time: Choosing Your Weapon of Choice (Application Tools). 🧰
- Dot, Dot, Blend: Mastering the Application Technique. 🎨
- Building Coverage: A Layering Masterclass. 🧱
- Spot On: Concealing with Precision. 🎯
- Setting the Stage: Powders and Sprays for Longevity. 🎬
- Troubleshooting Time: Common Mistakes and How to Fix Them. 🚨
- Pro Tips and Tricks: Level Up Your Game! ✨
- The Verdict: Is the Traceless Matte Foundation Repair Stick Right For You? ⚖️
1. Understanding the Beast: What is a Traceless Matte Foundation Repair Stick? 🧐
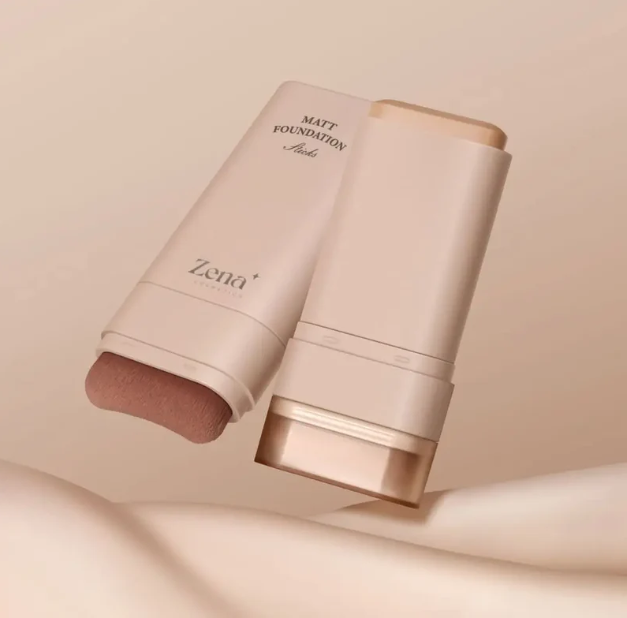
Let’s dissect this mouthful of a product name. A "Traceless Matte Foundation Repair Stick" is essentially a foundation in solid form, designed for targeted application and a matte finish. The "Traceless" part implies that it should blend seamlessly into the skin, leaving no obvious signs of makeup. The "Repair" aspect often refers to its ability to cover imperfections like blemishes, redness, and uneven skin tone.
Think of it as a super-concentrated foundation, packed into a convenient stick format. This makes it perfect for travel, touch-ups on the go, and precise application. Unlike liquid foundations, sticks tend to have a denser texture and offer buildable coverage.
Key Features to Look For:
| Feature | Description | Why It Matters |
|---|---|---|
| Texture | Creamy, blendable, not too dry or waxy. | A good texture is crucial for even application and preventing a cakey or patchy finish. |
| Pigmentation | Good color payoff with buildable coverage. | Allows you to control the level of coverage without having to use a lot of product. |
| Finish | Matte, but not flat or dull. Should have a slight luminosity to look natural. | A true matte finish can be drying, so look for a formula that balances mattifying properties with hydration. |
| Longevity | Stays put for several hours without oxidizing (changing color) or fading significantly. | No one wants their foundation to disappear halfway through the day! |
| Ingredients | Look for beneficial ingredients like antioxidants, hyaluronic acid, or vitamins. Avoid harsh chemicals or potential irritants if you have sensitive skin. | Good ingredients can actually benefit your skin while you’re wearing makeup. |
| Shade Range | A wide range of shades to match different skin tones and undertones. | Finding the right shade is paramount for a natural-looking finish. |
2. The Art of the Medium: Why Aim for Medium Coverage? 🤔
Why medium, you ask? Why not go all-in with full coverage and erase every last freckle and fine line? Well, my friends, there’s a certain allure to embracing your natural skin. Medium coverage offers the best of both worlds: it evens out skin tone, minimizes imperfections, and gives you a polished look without completely masking your features.
Benefits of Medium Coverage:
- Natural Look: Allows your skin to breathe and shine through, creating a more realistic and youthful appearance. ✨
- Comfortable Wear: Feels lighter on the skin compared to full coverage, reducing the risk of clogged pores and breakouts.
- Versatile: Can be built up in areas where you need more coverage, such as blemishes or redness, while keeping the rest of your face looking natural.
- Forgiving: Less likely to look cakey or heavy, even if you make a few mistakes during application.
- Photogenic: Provides a balanced look that photographs well without appearing overly made-up. 📸
Think of medium coverage as the "Goldilocks" of foundation – not too heavy, not too light, but just right. It’s the perfect balance between hiding imperfections and showcasing your natural beauty.
3. Prepping for Perfection: Skincare is the Foundation of Your Foundation! 🧼
This is where the magic truly begins! You can have the most amazing foundation in the world, but if your skin is a dry, flaky mess, it’s going to look, well, like a dry, flaky mess. Skincare is the crucial foundation upon which your makeup masterpiece will be built.
The Pre-Makeup Skincare Routine:
- Cleanse: Start with a gentle cleanser to remove dirt, oil, and makeup residue.
- Exfoliate (1-2 times per week): Exfoliation removes dead skin cells, creating a smooth canvas for your foundation. Avoid harsh scrubs; opt for a gentle chemical exfoliant or a soft washcloth.
- Tone: A toner helps to balance your skin’s pH level and prepare it for the next steps.
- Serum (Optional): Serums can target specific skin concerns, such as hydration, brightening, or anti-aging.
- Moisturize: This is non-negotiable! A well-hydrated skin will look smoother, plumper, and more radiant. Choose a moisturizer that suits your skin type.
- Sunscreen: Protect your skin from harmful UV rays with a broad-spectrum sunscreen. Apply it after your moisturizer.
- Primer (Optional): A primer can create a smooth, even surface for your foundation, helping it to last longer and preventing it from settling into fine lines.
Pro Tip: Allow each product to fully absorb into your skin before moving on to the next step. This will prevent your makeup from pilling or sliding around.
4. Tool Time: Choosing Your Weapon of Choice (Application Tools). 🧰
Now that your skin is prepped and primed, it’s time to choose your application tool. There are several options, each with its own advantages and disadvantages.
The Contenders:
- Fingers: The most readily available and cost-effective option. Fingers can warm up the foundation, making it easier to blend. However, they can also transfer oils and bacteria to your skin.
- Best for: Quick touch-ups, sheer coverage.
- Caution: Wash your hands thoroughly before applying makeup!
- Beauty Sponge (Damp): A damp beauty sponge provides a natural, airbrushed finish. It’s great for blending foundation seamlessly into the skin.
- Best for: Medium to full coverage, natural finish.
- Caution: Clean your sponge regularly to prevent bacteria buildup.
- Foundation Brush: Offers more control and precision than a sponge. Different types of brushes are available, such as flat-top, angled, and stippling brushes.
- Best for: Medium to full coverage, building coverage.
- Caution: Choose a brush with soft bristles to avoid irritating your skin.
Choosing the Right Tool for Medium Coverage:
For achieving medium coverage with a foundation stick, a damp beauty sponge or a stippling brush are excellent choices. The damp sponge will sheer out the foundation, creating a natural finish, while the stippling brush allows you to build coverage in specific areas.
5. Dot, Dot, Blend: Mastering the Application Technique. 🎨
Now for the fun part: applying the foundation! The key to achieving medium coverage is to use a light hand and build up the product gradually.
The Dotting Method:
- Apply Dots: Apply small dots of the foundation stick directly onto your face, focusing on areas where you need the most coverage, such as the center of your forehead, cheeks, chin, and nose. Less is more!
- Blend, Blend, Blend: Using your chosen tool (damp sponge or stippling brush), gently blend the foundation into your skin, starting from the center of your face and working outwards. Use small, circular motions to ensure even distribution.
- Don’t Forget the Edges: Pay attention to your hairline, jawline, and around your ears. Blend seamlessly to avoid harsh lines.
Pro Tip: Avoid dragging the foundation across your skin. Instead, use a stippling or patting motion to press the product into your pores.
6. Building Coverage: A Layering Masterclass. 🧱
If you need more coverage in certain areas, such as blemishes or redness, you can build up the foundation in thin layers.
The Layering Technique:
- Targeted Application: Apply a small amount of foundation directly onto the area that needs more coverage.
- Blend Carefully: Gently blend the foundation into the surrounding skin, using your chosen tool.
- Repeat as Needed: Repeat steps 1 and 2 until you achieve the desired level of coverage.
Pro Tip: Use a concealer that matches your skin tone to spot-conceal any stubborn blemishes or dark circles.
7. Spot On: Concealing with Precision. 🎯
Concealer is your best friend when it comes to achieving a flawless complexion. It can brighten under-eye circles, cover blemishes, and even out skin tone.
Concealer Application:
- Under-Eye Circles: Apply a concealer that is one shade lighter than your skin tone to the inner corner of your eye and blend outwards.
- Blemishes: Use a small, pointed brush to apply concealer directly onto the blemish. Gently pat the concealer into the skin to avoid disturbing the foundation.
- Redness: Apply a green-tinted concealer to neutralize redness before applying foundation.
Pro Tip: Set your concealer with a light dusting of translucent powder to prevent it from creasing.
8. Setting the Stage: Powders and Sprays for Longevity. 🎬
To ensure that your makeup lasts all day (or night!), it’s important to set it with powder and setting spray.
Powder Application:
- Translucent Powder: Use a large, fluffy brush to apply a light dusting of translucent powder all over your face. Focus on areas that tend to get oily, such as the T-zone.
- Pressed Powder: Use a pressed powder to touch up your makeup throughout the day.
Setting Spray Application:
- Hydrating Setting Spray: A hydrating setting spray will help to lock in your makeup and keep your skin looking fresh and dewy.
- Mattifying Setting Spray: A mattifying setting spray will help to control oil and keep your makeup looking matte.
Pro Tip: Hold the setting spray about 8-10 inches away from your face and spray in a "T" and "X" motion.
9. Troubleshooting Time: Common Mistakes and How to Fix Them. 🚨
Even the most experienced makeup artists make mistakes from time to time. Here are some common issues and how to fix them:
| Mistake | Solution |
|---|---|
| Cakey Foundation | Exfoliate your skin regularly, use a hydrating moisturizer, and apply foundation in thin layers. |
| Patchy Foundation | Ensure that your skin is properly moisturized and use a damp beauty sponge to blend the foundation seamlessly. |
| Foundation Oxidizes | Choose a foundation that is one shade lighter than your skin tone, and use a primer to create a barrier between your skin and the foundation. |
| Foundation Settles into Lines | Exfoliate your skin regularly, use a hydrating primer, and set your foundation with a light dusting of translucent powder. |
| Foundation Transfers Easily | Set your foundation with a setting spray and avoid touching your face throughout the day. |
10. Pro Tips and Tricks: Level Up Your Game! ✨
Ready to take your foundation game to the next level? Here are some pro tips and tricks:
- Mix and Match: Mix your foundation stick with a drop of facial oil for a dewy finish.
- Contour and Highlight: Use a darker shade of foundation stick to contour your face and a lighter shade to highlight.
- Use a Color Corrector: Use a color corrector to neutralize specific skin concerns, such as redness or dark circles.
- Bake Your Makeup: Apply a thick layer of translucent powder under your eyes and let it sit for 5-10 minutes before dusting it off. This will help to brighten your under-eye area and prevent creasing.
- Always Blend Downward: Blend your foundation downward to avoid accentuating facial hair.
11. The Verdict: Is the Traceless Matte Foundation Repair Stick Right For You? ⚖️
So, is the Traceless Matte Foundation Repair Stick your holy grail product? It depends! It’s a great option for those who:
- Prefer a matte finish.
- Want buildable coverage.
- Are looking for a convenient, travel-friendly foundation.
- Have oily or combination skin.
However, it may not be the best choice for those who:
- Have very dry skin.
- Prefer a dewy finish.
- Want a sheer coverage foundation.
Ultimately, the best way to know if a foundation is right for you is to try it out for yourself. Sample it at a makeup counter or purchase a travel-size version before committing to a full-size product.
Conclusion:
Mastering the art of medium coverage with a Traceless Matte Foundation Repair Stick takes practice, patience, and a little bit of experimentation. But with the right techniques and tools, you can achieve a flawless, natural-looking complexion that will have you feeling confident and ready to conquer the world! Remember, makeup is all about enhancing your natural beauty, not masking it. So, embrace your unique features, have fun with it, and don’t be afraid to experiment! Now go forth and create some makeup magic! ✨💄💋
For detailed product specifications and purchases, please go to :https://zenamakeup.com/products/traceless-matte-foundation-repair-stick
Leave a Reply