Lecture: Achieving a Flawless Canvas: Mastering the Traceless Matte Foundation Repair Stick
(Professor stands at a podium, adjusting oversized glasses. A slide appears on the screen: "Smooth Base Nirvana: The Traceless Matte Foundation Repair Stick Demystified!")
Alright, settle down, settle down! Welcome, my beauty aficionados, my makeup mavens, to today’s lecture on achieving the holy grail of makeup application: the flawless base. Forget world peace, forget finding the perfect avocado – this is what we’re truly striving for! And our secret weapon? The Traceless Matte Foundation Repair Stick.
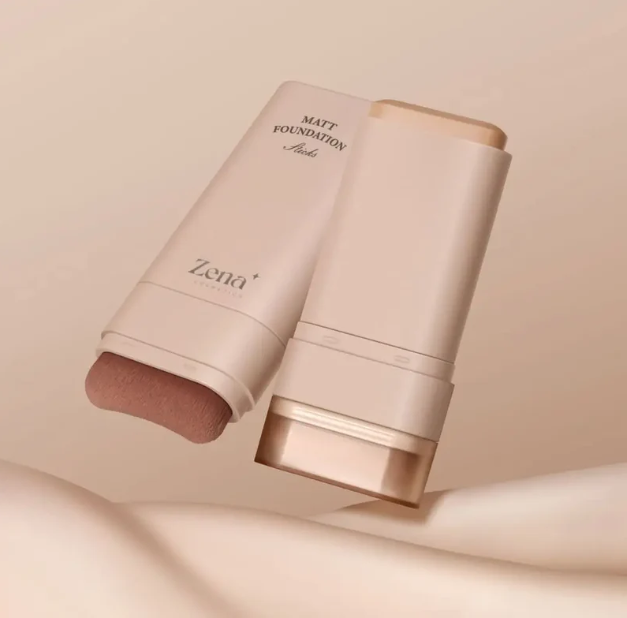
(Professor dramatically gestures towards a large, slightly beat-up, Traceless Matte Foundation Repair Stick displayed on a velvet cushion.)
This, my friends, is not just makeup; it’s a magic wand disguised as a convenient, portable stick! But like any powerful tool, it requires skill, finesse, and a healthy dose of common sense. So, grab your notebooks, silence your cellphones (unless you’re live-tweeting my brilliance, then by all means, proceed!), and let’s dive into the fascinating world of achieving a smooth, matte base that will make even your Instagram filters jealous.
I. Understanding Your Canvas: Prep is Key!
(Slide: "Your Skin: A Magnificent, Yet Temperamental, Masterpiece")
Before we even think about applying foundation, we need to acknowledge the truth: your skin is the canvas, and a lumpy, uneven canvas will result in a lumpy, uneven masterpiece. Think of it like trying to paint the Mona Lisa on a burlap sack – not ideal, right?
Therefore, proper skin preparation is absolutely paramount. It’s the foundation of your foundation, the backbone of your beauty, the… well, you get the picture.
Here’s a breakdown of the essential steps:
| Step | Description | Why it Matters | Emoji |
|---|---|---|---|
| Cleanse | Use a gentle cleanser suited to your skin type. Don’t scrub like you’re trying to erase a bad tattoo! | Removes dirt, oil, and makeup residue, preventing clogged pores and ensuring the foundation adheres properly. | 🧼 |
| Exfoliate (1-2x Weekly) | Physical (gentle scrub) or chemical (AHAs/BHAs) exfoliation. Think of it as spring cleaning for your face. Don’t overdo it, or you’ll resemble a lobster. | Removes dead skin cells, revealing a smoother surface for foundation application. Reduces patchiness and flakiness. | ✨ |
| Tone | Use a toner to balance your skin’s pH levels. Think of it as a referee ensuring everyone plays nice. | Prepares the skin for better absorption of subsequent skincare products. Can also help control oil production. | ⚖️ |
| Hydrate | Moisturize, moisturize, moisturize! Even oily skin needs hydration. Choose a moisturizer appropriate for your skin type. Think of it as giving your skin a big, juicy drink. | Creates a smooth, plump surface for foundation application. Prevents the foundation from clinging to dry patches and emphasizing wrinkles. | 💧 |
| Prime | Apply a primer suited to your skin’s needs (matte, hydrating, pore-filling, etc.). Think of it as building a solid foundation for your foundation. | Creates a smooth, even surface for foundation application. Helps to prolong the wear of your foundation and control oil production. Addresses specific skin concerns. | 🧱 |
(Professor taps the slide with a pointer.)
Important Note: Listen to your skin! If it’s screaming for moisture, don’t slap on a super-drying matte primer. If it’s already shiny enough to signal airplanes, skip the ultra-hydrating moisturizer. Your skin is a chatty little beast; pay attention to what it’s telling you!
II. Choosing Your Shade: The Art of the Match
(Slide: "Shade Matching: Not as Easy as it Looks (But We Can Help!)")
Okay, now for the tricky part: finding your perfect shade. This is where many people go wrong, ending up looking like they’re wearing a mask two shades too light or like they’ve been tangoing with a bronzer gone rogue.
Here’s how to avoid those makeup mishaps:
- Test in Natural Light: Indoor lighting can be deceiving. Head to a window or, even better, step outside to see the true color of the foundation.
- Swatch on Your Jawline: Don’t test on your hand! Your hand is a different color than your face. Apply a few different shades along your jawline and see which one disappears seamlessly.
- Consider Your Undertones: Are you warm, cool, or neutral? Understanding your undertones will help you choose a foundation that complements your skin.
- Warm: Golden, yellow, or peachy undertones.
- Cool: Pink, red, or blue undertones.
- Neutral: A balance of warm and cool undertones.
(Professor dramatically examines a student’s complexion.)
"I see… yes… definitely leaning towards warm undertones with a hint of mischief! Just kidding! But seriously, undertones are key!"
- Don’t Be Afraid to Mix: If you can’t find an exact match, don’t be afraid to mix two shades together to create your custom blend.
- Account for Seasonal Changes: Your skin tone might change slightly depending on the season. What works in the winter might be too light for the summer.
(Slide: A humorous image of someone with a clearly mismatched foundation shade.)
Important Reminder: Avoid the "ghost face" look! Your foundation should blend seamlessly into your neck. Don’t forget to blend down!
III. Application Techniques: Mastering the Stick
(Slide: "Application Techniques: From Dab to Fab!")
Alright, we’ve prepped our skin, found our perfect shade, now it’s time to unleash the power of the Traceless Matte Foundation Repair Stick!
Here are a few application techniques to consider:
-
Direct Application: Swipe the stick directly onto your face, focusing on areas that need the most coverage. This is great for quick and easy application, but be careful not to apply too much.
(Professor demonstrates on a volunteer, using short, controlled swipes.)
"Think of it like sketching, not coloring! Small, deliberate strokes are your friend."
-
Finger Application: Dab the stick onto your fingers and then apply to your face. This allows for more control and a more natural-looking finish.
-
Brush Application: Swirl a brush (dense foundation brush or a stippling brush) onto the stick and then apply to your face. This is great for achieving a more even and airbrushed finish.
-
Sponge Application: Dampen a beauty sponge and dab it onto the stick, then bounce it onto your face. This creates a sheerer, more natural-looking coverage.
(Table summarizing application techniques.)
| Technique | Coverage | Best For | Pro Tip | Emoji |
|---|---|---|---|---|
| Direct Application | Medium-Full | Quick touch-ups, targeted coverage | Use short, light strokes to avoid applying too much product. | ⚡️ |
| Finger Application | Light-Medium | Natural-looking coverage, targeted application | Warm the product between your fingers before applying for easier blending. | 👌 |
| Brush Application | Medium-Full | Even, airbrushed finish | Use a buffing motion to blend the foundation seamlessly into the skin. | 🖌️ |
| Sponge Application | Sheer-Medium | Natural, dewy finish (even with a matte foundation!), minimizing texture | Make sure your sponge is damp, not soaking wet! Gently bounce the sponge onto the skin, avoiding dragging. | 🧽 |
(Professor emphasizes the importance of blending.)
"Blending is the key! Blend, blend, blend like your life depends on it! Use a brush, a sponge, your fingers – whatever works for you! The goal is a seamless transition between your foundation and your natural skin."
"Blending is the key! Blend, blend, blend like your life depends on it! Use a brush, a sponge, your fingers – whatever works for you! The goal is a seamless transition between your foundation and your natural skin."
IV. Building Coverage: Less is More!
(Slide: "Building Coverage: From Barely There to Red Carpet Ready")
Remember the old adage, "Less is more"? It’s especially true when it comes to foundation. You can always add more, but it’s much harder to take away.
Start with a thin layer of foundation and build coverage as needed. Focus on areas that need the most coverage, such as blemishes, redness, or dark circles.
(Professor demonstrates how to spot conceal using the Traceless Matte Foundation Repair Stick.)
"This stick is fantastic for spot concealing! Just dab a little bit onto the blemish and blend it out with your finger or a small brush. Voila! Blemish be gone!"
V. Setting Your Foundation: Locking in the Look
(Slide: "Setting Your Foundation: Sealing the Deal")
You’ve prepped, you’ve matched, you’ve applied, you’ve blended… now it’s time to set your foundation! This is crucial for ensuring that your foundation stays in place all day long and doesn’t crease or fade.
Here are a few setting options:
-
Loose Powder: Use a fluffy brush to apply a light layer of loose powder all over your face. This is great for setting the foundation and controlling oil production.
(Professor demonstrates using a large, fluffy brush.)
"Think of it like dusting your face with fairy dust! Light and ethereal!"
-
Pressed Powder: Use a sponge or a brush to apply pressed powder to areas that tend to get oily, such as the T-zone. This is great for touch-ups throughout the day.
-
Setting Spray: Spritz a setting spray all over your face to lock in your makeup and create a more natural finish.
(Table summarizing setting options.)
| Option | Coverage | Best For | Pro Tip | Emoji |
|---|---|---|---|---|
| Loose Powder | Light | Setting foundation, controlling oil, blurring imperfections | Use a light hand and a fluffy brush to avoid looking cakey. | ☁️ |
| Pressed Powder | Light-Medium | Touch-ups, controlling oil in specific areas | Pat the powder onto the skin instead of rubbing to avoid disturbing the foundation. | 🧽 |
| Setting Spray | None | Locking in makeup, creating a natural finish | Hold the bottle about 8-10 inches away from your face and spray in an "X" and "T" motion. | 🌬️ |
(Professor winks at the audience.)
"And there you have it! A flawless, matte base that will make you feel like you can conquer the world! Or at least, conquer that awkward family gathering."
VI. Troubleshooting: Common Problems and Solutions
(Slide: "Troubleshooting: When Good Foundations Go Bad")
Even with the best techniques, sometimes things go wrong. Here are a few common problems and how to fix them:
-
Cakey Foundation: You’ve applied too much product! Gently blot your face with a damp beauty sponge to remove excess foundation. Next time, use less product and build coverage gradually.
-
Patchy Foundation: Your skin wasn’t properly prepped! Exfoliate regularly and moisturize well before applying foundation.
-
Foundation Creasing: Your foundation is settling into fine lines and wrinkles. Use a light layer of foundation and set it with a light dusting of loose powder.
-
Oily Skin Breakdown: Your skin is producing too much oil. Use a mattifying primer and setting powder to control oil production. Carry blotting papers with you for touch-ups throughout the day.
-
Foundation Oxidizing (Turning Orange): The foundation is reacting with your skin’s oils. Choose a foundation that is formulated to resist oxidation.
(Professor summarizes the key takeaways.)
"So, remember the golden rules: Prep your skin, choose the right shade, apply with the right technique, build coverage gradually, and set your foundation properly! And most importantly, practice, practice, practice! Makeup is an art form, and like any art form, it takes time and dedication to master."
(Professor beams at the audience.)
"Now go forth and create your flawless canvas! And don’t forget to tag me in your amazing makeup looks! Class dismissed!"
(Professor exits the stage to thunderous applause, leaving behind a single, perfectly applied Traceless Matte Foundation Repair Stick.)
For detailed product specifications and purchases, please go to :https://zenamakeup.com/products/traceless-matte-foundation-repair-stick
Leave a Reply