Get Symmetrical Brows Instantly with the Waterproof Stencil & Powder System: A ZenaMakeup Masterclass 🎓
Alright, makeup mavens, brow bosses, and symmetry seekers! Welcome, welcome, WELCOME to the ultimate masterclass on achieving eyebrow perfection with ZenaMakeup’s revolutionary Waterproof Stencil & Powder System! 🤩
I’m your product manager here at ZenaMakeup, and frankly, I’m obsessed with this product. Why? Because like many of you, I’ve spent countless hours wrestling with my eyebrows. One day they’re twins, the next they’re distant cousins living on opposite sides of the country. Sound familiar? 😩
Well, say goodbye to brow-raising frustration (pun intended!) and hello to effortless, symmetrical, and utterly gorgeous eyebrows. This system is designed for everyone, from the makeup newbie to the seasoned pro. So buckle up, grab your coffee (or wine, no judgement!), and let’s dive into the wonderful world of perfect brows.
What We’ll Cover Today:
- The Brow Struggle is Real (and Why Symmetry Matters!) – Let’s acknowledge the pain!
- Introducing the ZenaMakeup Waterproof Stencil & Powder System: Your New BFF – What’s in the kit and why it’s amazing.
- Step-by-Step Guide: Achieving Brow Nirvana – The nitty-gritty application process.
- Choosing the Right Stencil Shape for Your Face – Because one size doesn’t fit all.
- Powder Power: Selecting the Perfect Shade – Matchy-matchy matters!
- Tips & Tricks from the Pros (That’s Me!) – Secret weapons for brow mastery.
- Troubleshooting: Brow Blunders Be Gone! – Fixing common mistakes.
- Beyond the Basics: Level Up Your Brow Game – Taking your brows to the next level.
- Maintaining Your Brow Masterpiece – Keeping those brows looking fabulous all day long.
- Q&A: Your Burning Brow Questions Answered! – We’re here to help!
1. The Brow Struggle is Real (and Why Symmetry Matters!) 😭
Let’s be honest, eyebrows are the unsung heroes (or villains) of our faces. They frame our eyes, express our emotions, and can completely transform our overall look. But achieving that perfect arch, that flawless fill, that elusive symmetry? It can feel like climbing Mount Everest in stilettos. 👠
Why is symmetry so important? Well, our brains are wired to perceive symmetry as beautiful and harmonious. Symmetrical eyebrows create balance and make us appear more attractive. Think of it like this: symmetrical brows are like a well-composed photograph – everything just looks right.
The struggle is REAL because:
- Natural asymmetry: Most of us have naturally asymmetrical faces. One eyebrow might sit higher than the other, or have a different shape. It’s completely normal, but it makes achieving perfect symmetry a challenge.
- Plucking mishaps: We’ve all been there. One rogue pluck turns into a cascade of over-plucking, leaving us with sparse, uneven brows. 🙈
- Product overload: Too much pencil, too much gel, too much…everything! Overdoing it can lead to harsh, unnatural-looking brows.
- Time constraints: Who has time to spend an hour meticulously shaping their brows every morning? We need a quick, easy solution!
Table: The Emotional Rollercoaster of Eyebrow Struggles
| Situation | Emotion |
|---|---|
| One eyebrow looking amazing | Confidence! 😁 |
| The other eyebrow…not so much | Frustration 😠 |
| Over-plucking disaster | Regret 😭 |
| Trying to match them up | Annoyance 😤 |
| Finally achieving symmetry | Triumph! 🤩 |
That’s where the ZenaMakeup Waterproof Stencil & Powder System comes in!
2. Introducing the ZenaMakeup Waterproof Stencil & Powder System: Your New BFF 💖
This isn’t just another eyebrow product; it’s a system. We’ve carefully curated everything you need to achieve perfect, symmetrical brows in minutes. Think of it as your personal brow architect and artist, all rolled into one convenient package.
What’s included in the ZenaMakeup Waterproof Stencil & Powder System?
- Multiple Reusable Stencils: (Usually 6-10 different shapes) Forget freehanding! Our stencils are designed with a variety of brow shapes to suit different face shapes and preferences. They’re made from flexible, durable material that’s easy to clean and reuse.
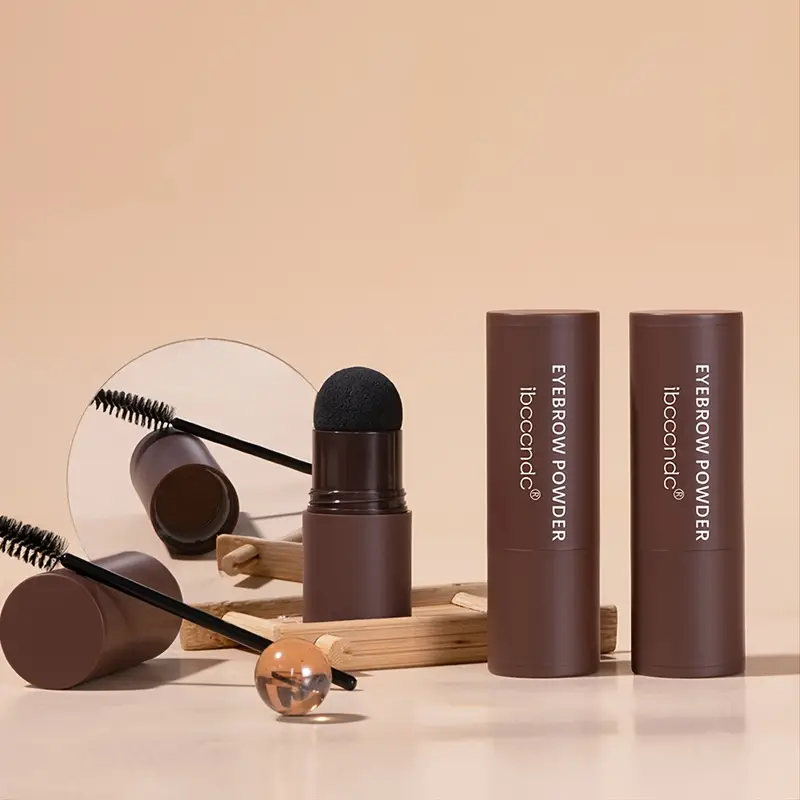
- Waterproof Brow Powder: Our highly pigmented, long-lasting powder fills in sparse areas and defines your brows with a natural-looking finish. It’s waterproof, smudge-proof, and sweat-proof, so your brows will stay flawless all day long.
- Dual-Ended Applicator Brush: This brush is your secret weapon. One end features a spoolie for grooming and blending, while the other end has an angled brush for precise application.
- Clear Setting Wax (Optional): For extra hold and definition, we include a clear setting wax to lock your brows in place. (Depending on the specific kit version)
- Instructional Guide (That’s what this article is for!): A detailed guide with step-by-step instructions and tips to help you achieve brow perfection.
Why is this system so amazing?
- Symmetry Guaranteed: The stencils ensure perfect symmetry every time. No more mismatched brows!
- Waterproof Formula: Our waterproof powder stays put, even through sweat, rain, or tears (happy tears, of course!).
- Natural-Looking Results: The powder formula creates a soft, natural finish that doesn’t look harsh or drawn-on.
- Quick & Easy Application: You can achieve perfect brows in just a few minutes. Perfect for busy mornings!
- Versatile: Suitable for all skill levels, from beginners to experienced makeup artists.
- Customizable: Choose the stencil shape and powder shade that best suits your face and hair color.
Table: ZenaMakeup Waterproof Stencil & Powder System – Key Features
| Feature | Benefit |
|---|---|
| Multiple Stencils | Find the perfect brow shape for your face. |
| Waterproof Powder | Long-lasting, smudge-proof, and sweat-proof. |
| Dual-Ended Brush | Precise application and blending. |
| Clear Setting Wax | Locks brows in place for extra hold. |
| Easy to Use | Perfect for beginners and professionals alike. |
| Customizable | Choose the right shape and shade for your unique look. |
| Saves Time | Achieve perfect brows in minutes. |
3. Step-by-Step Guide: Achieving Brow Nirvana 🙏
Okay, let’s get down to business! Here’s a detailed guide on how to use the ZenaMakeup Waterproof Stencil & Powder System to achieve brow nirvana.
Step 1: Prep Your Brows
- Start with clean, dry brows.
- Use the spoolie end of the applicator brush to brush your brows upwards and outwards, grooming them into your desired shape.
Step 2: Choose Your Stencil
- Hold different stencils up to your brow to see which shape best complements your face. (More on this in Section 4!)
- Once you’ve chosen your stencil, align it with your natural brow, ensuring that the start of the stencil aligns with the inner corner of your eye and the arch aligns with the outer third of your eye.
Step 3: Apply the Powder
- Using the angled brush end of the applicator, gently dip it into the brow powder. Tap off any excess powder to avoid over-application.
- Using light, feathery strokes, fill in the stencil with the brow powder. Start at the arch and work your way towards the tail of your brow. Then, fill in the front of your brow, using a lighter touch for a more natural look.
Step 4: Remove the Stencil
- Carefully remove the stencil, being careful not to smudge the powder.
Step 5: Blend, Blend, Blend!
- Use the spoolie end of the applicator brush to blend the powder into your natural brow hairs. This will soften any harsh lines and create a more natural-looking finish.
Step 6: Repeat on the Other Brow
- Repeat steps 2-5 on your other brow, using the same stencil.
Step 7: Set (Optional)
- If using the clear setting wax, apply a thin layer over your brows to lock them in place and add extra definition.
Step 8: Clean Up
- Use a cotton swab dipped in makeup remover to clean up any stray powder around your brows. This will create a crisp, clean line.
Congratulations! You’ve achieved brow nirvana! ✨
Visual Guide (Imagine photos here!):
Visual Guide (Imagine photos here!):
- [Photo: Clean, groomed brows]
- [Photo: Holding stencil up to brow]
- [Photo: Applying powder with angled brush]
- [Photo: Removing stencil]
- [Photo: Blending with spoolie]
- [Photo: Perfect, symmetrical brows!]
4. Choosing the Right Stencil Shape for Your Face 🧐
Just like jeans, one stencil shape does not fit all! Choosing the right stencil is crucial for achieving a flattering and natural-looking brow. Here’s a guide to help you find your perfect match:
- Oval Face: Lucky you! Almost any brow shape will suit your face. Experiment with different shapes to find your favorite. A soft, angled brow is a classic choice.
- Round Face: High-arched brows can help to lift and elongate your face. Avoid round, overly curved brows, as they can make your face appear even rounder.
- Square Face: Soft, curved brows can help to soften your strong jawline. Avoid harsh, angular brows, as they can accentuate the squareness of your face.
- Heart-Shaped Face: Rounded brows can help to balance your wider forehead and narrower chin. Avoid overly dramatic arches.
- Long Face: Flat, straight brows can help to make your face appear shorter. Avoid high arches, as they can further elongate your face.
- Diamond Face: Curved or slightly angled brows can complement your wider cheekbones. Avoid straight, flat brows.
Table: Brow Shape Recommendations by Face Shape
| Face Shape | Recommended Brow Shape(s) | Brow Shape to Avoid |
|---|---|---|
| Oval | Soft Angled, Curved, Straight | (Most shapes work!) |
| Round | High Arched, Angled | Round, Overly Curved |
| Square | Soft Curved, Rounded | Harsh Angled, Straight |
| Heart | Rounded, Soft Angled | Overly Dramatic Arches |
| Long | Flat, Straight | High Arches |
| Diamond | Curved, Slightly Angled | Straight, Flat |
Pro Tip: If you’re unsure which shape is right for you, try holding different stencils up to your face in front of a mirror and see which one looks most balanced and flattering. Don’t be afraid to experiment!
5. Powder Power: Selecting the Perfect Shade 🎨
Choosing the right brow powder shade is just as important as choosing the right stencil shape. The goal is to create a natural-looking brow that complements your hair color and skin tone.
Here’s a general rule of thumb:
- Light Hair: Choose a shade that’s one or two shades darker than your hair color.
- Dark Hair: Choose a shade that’s one or two shades lighter than your hair color.
- Gray Hair: Choose a soft, neutral gray or taupe shade.
Consider your skin tone:
- Warm Skin Tone: Choose a brow powder with warm undertones (e.g., reddish-brown, golden brown).
- Cool Skin Tone: Choose a brow powder with cool undertones (e.g., ash brown, taupe).
- Neutral Skin Tone: You can wear almost any shade!
Table: Brow Powder Shade Recommendations by Hair Color and Skin Tone
| Hair Color | Skin Tone | Recommended Brow Powder Shade(s) |
|---|---|---|
| Blonde | Warm | Honey Blonde, Golden Brown |
| Blonde | Cool | Ash Blonde, Taupe |
| Brunette | Warm | Chocolate Brown, Auburn |
| Brunette | Cool | Dark Ash Brown, Espresso |
| Redhead | Warm | Auburn, Copper |
| Black | Warm | Dark Brown, Soft Black |
| Black | Cool | Charcoal, Black |
| Gray | Neutral | Soft Gray, Taupe |
Pro Tip: When in doubt, go for a shade that’s slightly lighter than you think you need. It’s always easier to add more color than to remove it.
6. Tips & Tricks from the Pros (That’s Me!) 🤫
Alright, here are some insider secrets to take your brow game to the next level:
- Use a light hand: Apply the powder in light, feathery strokes to avoid a harsh, drawn-on look.
- Focus on sparse areas: Concentrate the powder on areas where your brows are naturally sparse.
- Blend, blend, blend!: I can’t stress this enough. Blending is key to achieving a natural-looking finish.
- Don’t be afraid to mix shades: If you can’t find the perfect shade, try mixing two different shades together to create a custom color.
- Use a brow gel: After applying the powder, use a clear or tinted brow gel to set your brows in place and add extra definition.
- Highlight your brow bone: Apply a matte or shimmer highlighter to your brow bone to lift your brows and make your eyes appear brighter.
- Clean your stencils: Clean your stencils regularly with soap and water to prevent product buildup.
- Practice makes perfect: Don’t get discouraged if you don’t get it right away. Keep practicing, and you’ll be a brow pro in no time!
Emoji Summary of Tips:
- Light Hand: 🪶
- Focus on Sparse Areas: 🎯
- Blend: 🌀
- Mix Shades: 🧪
- Brow Gel: 🔒
- Highlight: ✨
- Clean Stencils: 🧼
- Practice: 🏋️♀️
7. Troubleshooting: Brow Blunders Be Gone! 🚨
Even with the best system, mistakes can happen. Here’s how to fix some common brow blunders:
- Brows are too dark: Use a clean spoolie to brush through your brows and remove excess powder. You can also use a cotton swab dipped in makeup remover to lighten the color.
- Brows are uneven: Use a cotton swab dipped in makeup remover to clean up the edges of the darker brow and even them out.
- Brows are too harsh: Blend, blend, blend! Use a spoolie to soften any harsh lines.
- Brows are too sparse: Apply more powder to the sparse areas, using light, feathery strokes.
- Stencil is slipping: Hold the stencil firmly in place with your fingers while applying the powder.
Table: Common Brow Problems and Solutions
| Problem | Solution |
|---|---|
| Too Dark | Use a clean spoolie to brush through, use a cotton swab with makeup remover. |
| Uneven | Use a cotton swab with makeup remover to even out the edges. |
| Too Harsh | Blend, blend, blend! |
| Too Sparse | Apply more powder, using light, feathery strokes. |
| Stencil Slipping | Hold the stencil firmly in place. |
8. Beyond the Basics: Level Up Your Brow Game 🚀
Ready to take your brows to the next level? Here are some advanced techniques:
- Ombre Brows: Create a gradient effect by using a lighter shade of powder at the inner corner of your brow and a darker shade at the arch and tail.
- Laminated Brows: Achieve the "laminated brow" look by using a strong-hold brow gel to brush your brows upwards and outwards.
- Brow Mapping: Use a brow mapping technique to determine the ideal start, arch, and end points of your brows.
Emoji Enhancement Techniques:
- Ombre Brows: 🌈
- Laminated Brows: 🪄
- Brow Mapping: 🗺️
9. Maintaining Your Brow Masterpiece 👑
Now that you’ve achieved perfect brows, it’s important to maintain them!
- Grooming: Regularly brush your brows with a spoolie to keep them neat and tidy.
- Trimming: Trim any stray hairs that are growing outside of your desired brow shape.
- Plucking/Waxing: Remove any unwanted hairs around your brows to maintain a clean, defined shape.
- Touch-Ups: Touch up your brows as needed throughout the day to keep them looking fresh.
Table: Brow Maintenance Schedule
| Task | Frequency |
|---|---|
| Grooming | Daily |
| Trimming | Weekly |
| Plucking/Waxing | Bi-Weekly/Monthly |
| Touch-Ups | As Needed |
10. Q&A: Your Burning Brow Questions Answered! 🔥
Okay, brow bosses, let’s tackle your burning questions!
(This section would be populated with real questions from customers, but here are a few examples):
- Q: Can I use this system if I have very sparse brows?
- A: Absolutely! This system is perfect for filling in sparse areas and creating the illusion of fuller brows.
- Q: How do I clean the stencils?
- A: Simply wash them with soap and water.
- Q: My eyebrows are different colors than my hair. Which shade should I choose?
- A: Choose a shade that’s closer to your hair color, but slightly lighter.
- Q: Is this system cruelty-free?
- A: Yes! ZenaMakeup is committed to being cruelty-free. We never test our products on animals. 🐰
(We would add more questions as we receive them!)
Conclusion:
There you have it! Everything you need to know to achieve perfect, symmetrical brows with the ZenaMakeup Waterproof Stencil & Powder System. Remember, practice makes perfect, so don’t be afraid to experiment and have fun!
Go forth and conquer the world, one perfectly arched brow at a time! 😉
Thank you for joining our masterclass! 🎉
For detailed product specifications and purchases, please go to :https://zenamakeup.com/products/brow-stamp-kit-waterproof-3-in-1-stencil-powder
Leave a Reply