Alright, beauty enthusiasts, buckle up! 💄 I’m your product manager, and today, we’re diving deep into the wonderful world of brows with ZenaMakeup’s revolutionary Waterproof Brow Powder and Stencil Kit! 🚀
Forget those frustrating mornings battling uneven arches. We’re talking perfect, rain-proof, smudge-proof, and life-proof brows, achieved with the ease of stencils and the staying power of our amazing powder. Think of me as your brow guru, guiding you on this journey to brow nirvana. 🧘♀️
What’s the ZenaMakeup Waterproof Brow Powder & Stencil Kit All About?
Let’s be honest, brows are the frame of your face. They can instantly lift your look, add definition, and even make you look younger (who doesn’t want that?! 👵➡️👧). But let’s face it, achieving perfectly symmetrical, natural-looking brows can be a challenge. That’s where our kit comes in!
The ZenaMakeup Waterproof Brow Powder & Stencil Kit isn’t just another makeup product; it’s a brow solution! We’ve combined a finely milled, highly pigmented, waterproof brow powder with a set of reusable stencils to create a foolproof system for achieving stunning brows every single time.
Here’s what you get in the box of brow-licious goodness:
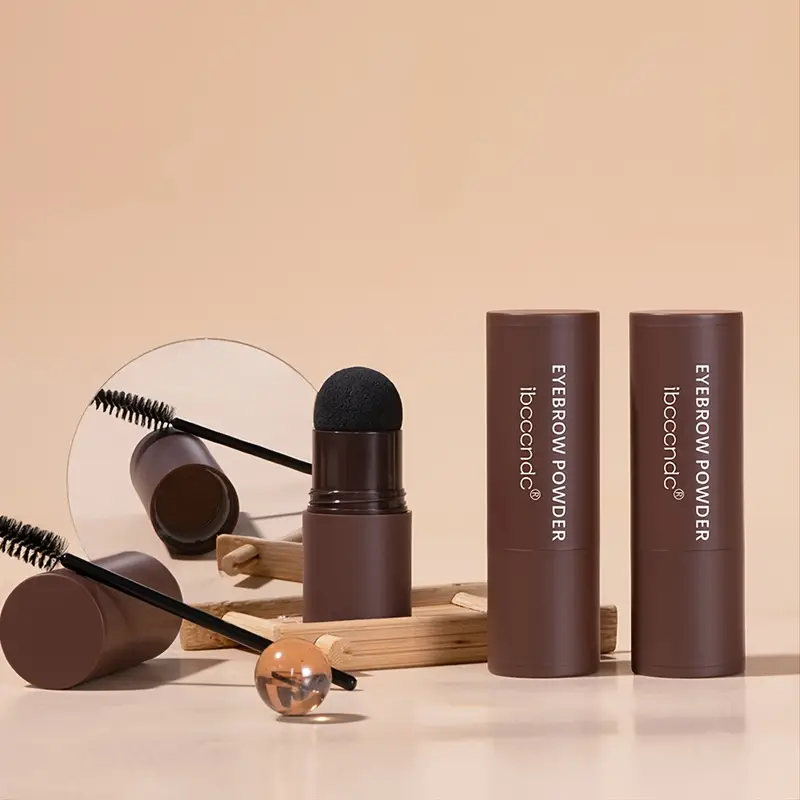
- Waterproof Brow Powder: This isn’t your grandma’s chalky brow powder. Our formula is super smooth, blendable, and packed with pigment. It’s designed to adhere to the brow hair and skin, filling in sparse areas and creating a natural-looking fullness. And the best part? It’s waterproof! 💦 Hello, pool parties and rainy days!
- Reusable Brow Stencils: Say goodbye to freehand fails! Our kit includes a variety of stencil shapes to suit different face shapes and brow preferences. These stencils are durable, flexible, and easy to clean, making them a breeze to use.
- Dual-Ended Applicator Brush: This essential tool features an angled brush for precise application and a spoolie brush for blending and grooming. It’s the perfect duo for creating flawless brows.
- Instruction Manual: A detailed guide to help you choose the right stencil, apply the powder, and achieve your desired brow look.
Why ZenaMakeup? Why Now?
Because you deserve brows that are as fabulous as you are! ✨ Seriously, we’ve thought of everything. We’ve used high-quality ingredients, tested the formula rigorously, and designed the stencils for ease of use. We’re confident that you’ll love the results.
Here’s a quick rundown of the ZenaMakeup difference:
| Feature | ZenaMakeup Brow Powder & Stencil Kit | Other Brow Products |
|---|---|---|
| Waterproof | Yes! Rain, sweat, tears…we’ve got you covered. | Often require setting spray or are prone to smudging. |
| Stencils | Variety of shapes for perfect symmetry every time. | Relies on freehand skills and can lead to uneven results. |
| Pigmentation | Rich, blendable, and buildable for natural to bold looks. | Can be patchy, chalky, or difficult to blend. |
| Ease of Use | Beginner-friendly with clear instructions. | Requires more practice and skill to achieve good results. |
| Long-Lasting | Stays put all day without fading or smudging. | May require touch-ups throughout the day. |
| Cruelty-Free | Absolutely! We love animals! 🐰 | May be tested on animals. |
| Vegan Option Available | Yes! We do care about our customer’s needs. | May contain animal-derived ingredients. |
Okay, Let’s Get Down to Business: Applying Waterproof Brow Powder Like a Pro!
This is where the magic happens! Follow these steps, and you’ll be rocking perfect brows in no time.
Step 1: Prep Your Brows (The Foundation for Flawless)
- Clean Slate: Start with clean, dry brows. Remove any makeup, oils, or lotions.
- Grooming is Key: Brush your brow hairs upwards with the spoolie brush to see their natural shape and identify any sparse areas. Trim any stray hairs that are too long or out of place. ✂️
- Optional: Brow Gel: If your brows are particularly unruly, you can apply a clear brow gel to hold them in place before applying the powder.
Step 2: Choose Your Weapon (The Stencil Selection Process)
This is crucial! The right stencil can make all the difference.
- Consider Your Face Shape: Different brow shapes complement different face shapes. Here’s a general guideline:
- Oval Face: You can rock almost any brow shape! Lucky you! 🎉
- Round Face: Opt for a high-arched brow to add definition and lift.
- Square Face: Soften your features with a rounded or curved brow.
- Heart-Shaped Face: A softer, lower arch will balance your features.
- Long Face: A flatter, straighter brow can make your face appear shorter.
- Experiment! Don’t be afraid to try different stencils until you find one that you love. Hold each stencil up to your brow and see how it looks.
- Placement is Paramount: Align the stencil with your natural brow line. The beginning of the stencil should align with the inner corner of your eye, and the arch should be positioned above the outer third of your eye.
Pro Tip: If you’re unsure which stencil to choose, start with a more natural shape and gradually experiment with bolder styles.
Step 3: Powder Power (Applying the Brow Powder)
Now for the fun part!
Now for the fun part!
- Dip and Tap: Dip the angled brush into the brow powder. Tap off any excess powder to prevent a heavy, unnatural look.
- Stencil Time: Hold the stencil firmly in place against your brow.
- Light Strokes: Using light, feathery strokes, fill in the stencil with the brow powder. Start at the arch and work your way towards the tail of the brow. Then, fill in the inner corner, using a lighter hand for a softer look. ✍️
- Build the Intensity: If you want a bolder brow, you can apply a second layer of powder. Just remember to use a light hand and blend well.
- Remove the Stencil: Carefully peel off the stencil. Ta-da! One perfectly shaped brow!
- Repeat on the Other Side: Repeat the process on your other brow. Take your time and make sure the brows are symmetrical.
Pro Tip: Don’t press too hard with the brush! Light strokes are key to achieving a natural-looking result.
Step 4: Blend, Blend, Blend! (The Secret to Natural-Looking Brows)
Blending is essential for softening the edges and creating a seamless look.
- Spoolie Power: Use the spoolie brush to blend the powder into your brow hairs. Brush upwards and outwards, following the natural direction of your hair growth.
- Soften the Edges: Pay extra attention to the inner corner of the brow. Use the spoolie brush to soften the edges and create a gradient effect.
- Check for Symmetry: Step back and examine your brows in the mirror. Are they even? Do they look natural? Make any necessary adjustments.
Pro Tip: If you’ve applied too much powder, you can use a cotton swab dipped in makeup remover to clean up any mistakes.
Step 5: Set It and Forget It! (Making Your Brows Last All Day)
While our formula is waterproof and long-lasting, setting your brows will ensure they stay put all day long.
- Optional: Brow Gel: Apply a clear or tinted brow gel to set your brows and hold them in place.
- Setting Spray: A light spritz of setting spray will further enhance the longevity of your brows.
Pro Tip: Avoid touching your brows throughout the day to prevent smudging.
Troubleshooting: Common Brow Problems and How to Fix Them
Even with the best products and techniques, brow mishaps can happen. Here’s how to troubleshoot some common problems:
- Brows are too dark: Use a clean spoolie brush to blend the powder and soften the color.
- Brows are uneven: Use a cotton swab dipped in makeup remover to clean up any mistakes and reshape the brows.
- Brows look unnatural: Blend, blend, blend! Use the spoolie brush to soften the edges and create a more natural look.
- Powder is smudging: Apply a setting spray to lock in the powder and prevent smudging.
- Can’t find the right stencil: Experiment with different stencils until you find one that complements your face shape and brow preference.
Care and Maintenance: Keeping Your Brows in Tip-Top Shape
- Clean Your Stencils: After each use, clean your stencils with soap and water to remove any residue.
- Store Your Powder Properly: Store your brow powder in a cool, dry place.
- Replace Your Brush: Replace your applicator brush every few months to ensure optimal application.
- Experiment! Don’t be afraid to try new techniques and products to find what works best for you.
Beyond the Basics: Advanced Brow Techniques
Once you’ve mastered the basics, you can start experimenting with more advanced brow techniques:
- Ombre Brows: Create a gradient effect by using a lighter shade of powder at the inner corner of the brow and a darker shade at the arch and tail.
- Highlighted Brows: Apply a highlighter just below the brow bone to lift the brow and add definition.
- Colored Brow Gel: Use a tinted brow gel to add color and dimension to your brows.
- Brow Lamination: For a longer-lasting solution, consider brow lamination, a professional treatment that straightens and lifts the brow hairs.
The ZenaMakeup Promise: Confidence in Every Brow
We believe that everyone deserves to have brows that make them feel confident and beautiful. With the ZenaMakeup Waterproof Brow Powder & Stencil Kit, achieving perfect brows is easier than ever. So go ahead, embrace your inner brow artist and create the brows of your dreams! ✨
Now go forth and conquer the world, one perfectly shaped brow at a time! 🌍💪
This is the end of my lecture about ZenaMakeup Waterproof Brow Powder & Stencil Kit. If you have any questions, feel free to ask! And don’t forget to share your brow transformations with us on social media using #ZenaMakeupBrows! We can’t wait to see your amazing results! 🎉
For detailed product specifications and purchases, please go to :https://zenamakeup.com/products/brow-stamp-kit-waterproof-3-in-1-stencil-powder
Leave a Reply