Get Defined and Filled Waterproof Brows Effortlessly with This System: A ZenaMakeup Masterclass 🎓
Hello, brow aficionados and fellow beauty buffs! 👋 Welcome, welcome, one and all, to ZenaMakeup’s brow-tastic masterclass! I’m your product manager and self-proclaimed brow guru, here to unveil the secret weapon you’ve been waiting for: The ZenaMakeup Defined & Filled Waterproof Brow System! 🦸♀️
Forget those days of struggling with mismatched pencils, smudged powders, and the existential dread of a disappearing brow. 👻 We’re about to embark on a journey to brow perfection, a journey filled with laughter, learning, and luscious, long-lasting brows that can withstand even the most epic of cry-fests (we’ve all been there!). 😭
Why This Lecture (and This System!) is a MUST-ATTEND
Let’s be real, brows are the unsung heroes of your face. They frame your eyes, sculpt your expression, and can even make you look instantly more awake (especially crucial after a late-night Netflix binge 😴). But achieving brow perfection can feel like climbing Mount Everest in stilettos. 🏔️
That’s where the ZenaMakeup Defined & Filled Waterproof Brow System comes in. We’ve taken all the guesswork (and frustration!) out of brow shaping and filling. Think of it as your personal brow artist, condensed into a convenient, easy-to-use kit. 🎨
This lecture will cover:
- The Brow Basics: Understanding your brow shape and how to work with it, not against it.
- The ZenaMakeup System Deconstructed: A deep dive into each component and its magical powers.
- Application Techniques: Step-by-step instructions for achieving natural-looking, defined brows.
- Troubleshooting Tips: Because sometimes, even the best of us have brow mishaps.
- Waterproof Wonders: The science behind the staying power and how to make your brows last all day (and night!).
- Beyond the Basics: Advanced techniques for achieving different brow looks, from soft and fluffy to bold and defined.
- Q&A Session: Your chance to grill me with all your burning brow questions! 🔥
So, grab your favorite beverage ☕, settle in, and let’s get this brow party started! 🎉
Part 1: Brow-sic Training – Understanding Your Brow Shape
Before we dive into the system itself, let’s talk about the foundation of brow perfection: your natural brow shape. 🌳 Everyone’s brows are unique, and understanding your natural arch, length, and thickness is crucial for achieving the most flattering look.
Think of your brows like a masterpiece. You wouldn’t just start slapping paint on a canvas without a plan, would you? 🖼️
Here’s a quick guide to identifying your brow shape:
| Brow Shape | Description | Suitable For |
|---|---|---|
| Arched | A pronounced peak in the brow. | Round or oval faces, as it helps to add structure and definition. |
| Straight | Minimal or no arch. | Longer faces, as it can create the illusion of width. |
| Rounded | A soft, curved brow with no sharp angles. | Angular faces, as it softens the features and adds a touch of femininity. |
| S-Shaped | A gentle curve followed by a slight peak. | Most face shapes, as it’s a versatile and flattering shape. |
| Tapered | Thicker at the inner corner and gradually thins out towards the tail. | People who want a more natural and subtle look. |
| Full & Bushy | Thick and dense brows that require minimal filling. | Those with strong facial features who want to emphasize their natural beauty. |
| Thin | Sparse brows that need significant filling and definition. | Those with delicate features who want to add a touch of drama to their look. |
Finding Your Starting Point, Arch, and End Point:
This is where the "pencil trick" comes in handy! ✏️
- Starting Point: Hold a pencil vertically against the side of your nose. Where the pencil intersects your brow is where your brow should ideally begin.
- Arch: Hold the pencil from the side of your nose to the outer edge of your iris (while looking straight ahead). Where the pencil intersects your brow is where your arch should ideally be.
- End Point: Hold the pencil from the side of your nose to the outer corner of your eye. Where the pencil intersects your brow is where your brow should ideally end.
Important Note: These are just guidelines! Don’t be afraid to experiment and find what looks best on you. The goal is to enhance your natural beauty, not to conform to some arbitrary brow standard. Embrace your unique brow quirks! ✨
Part 2: The ZenaMakeup Defined & Filled Waterproof Brow System Deconstructed
Alright, let’s get to the good stuff! 🤩 This system isn’t just a product; it’s an experience. A brow-changing, confidence-boosting, "I woke up like this" experience.
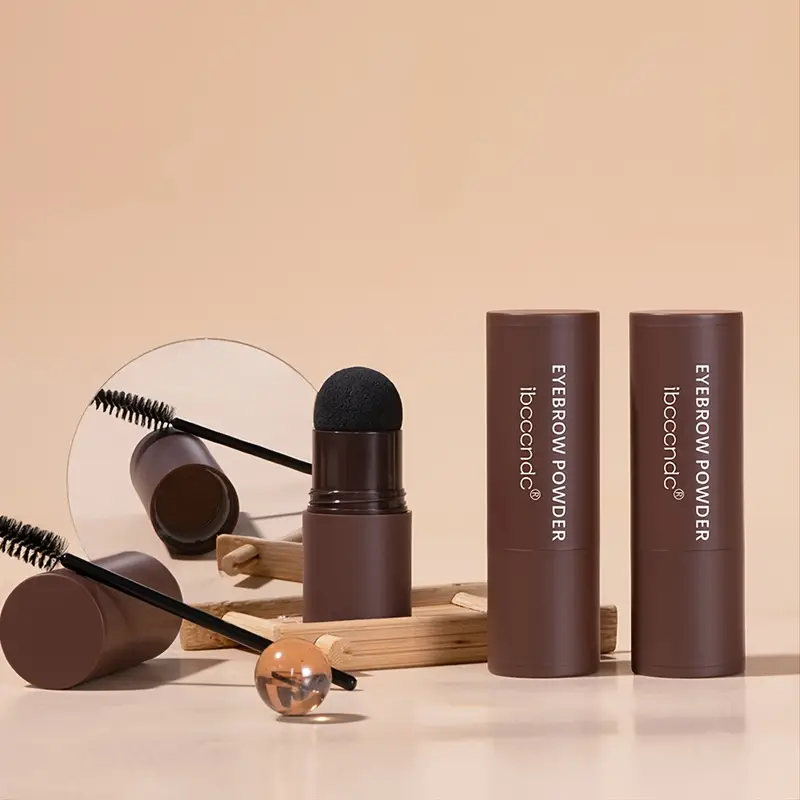
The system comprises three key components:
- The Waterproof Brow Pomade: The star of the show! This creamy, highly pigmented pomade is your secret weapon for creating defined, long-lasting brows. It’s waterproof, smudge-proof, and budge-proof, meaning your brows will stay put through thick and thin. Literally. 😉
- Key Features:
- Intense Pigmentation: A little goes a long way!
- Waterproof Formula: Resists sweat, water, and tears (both happy and sad!).
- Long-Lasting: Stays put for up to 24 hours.
- Buildable Coverage: From natural to bold, you’re in control.
- Available in a Range of Shades: To perfectly match your hair color. (See shade matching guide below!)
- Key Features:
- The Angled Brow Brush: This dual-ended brush is your brow-shaping sidekick. The angled brush is perfect for precise application and creating hair-like strokes, while the spoolie is essential for blending and grooming.
- Key Features:
- Angled Brush: For precise application and creating defined lines.
- Spoolie Brush: For blending and grooming brows.
- High-Quality Bristles: For smooth and even application.
- Durable Design: Built to last.
- Key Features:
- The Brow Stencils (Optional): Think of these as your training wheels. 🚴♀️ If you’re new to brow shaping or just want a little extra guidance, these stencils will help you achieve perfectly symmetrical brows every time.
- Key Features:
- Variety of Shapes: To suit different face shapes and brow preferences.
- Reusable: Easy to clean and reuse.
- Durable Material: Won’t tear or warp.
- Easy to Use: Simply align the stencil and fill in.
- Key Features:
Shade Matching Guide:
Choosing the right shade of brow pomade is crucial for achieving a natural-looking result. Here’s a quick guide to help you find your perfect match:
| Hair Color | ZenaMakeup Brow Pomade Shade Recommendation |
|---|---|
| Blonde | Light Brown, Taupe. Consider your skin tone. Fair skin tones work well with Taupe, while medium to deeper skin tones can pull off Light Brown. |
| Light Brown | Medium Brown, Auburn (if you have red undertones). |
| Medium Brown | Dark Brown, Chocolate Brown. |
| Dark Brown/Black | Espresso, Black. Use a light hand with Black to avoid harshness. |
| Red/Auburn | Auburn. Consider mixing with a touch of Medium Brown if your red hair is darker. |
| Gray/Silver | Taupe, Light Brown. Go slightly lighter than your natural hair color to avoid looking too severe. |
Pro Tip: If you’re unsure, it’s always better to go a shade lighter than darker. You can always build up the color, but it’s much harder to lighten it! 👍
Part 3: Application Techniques – Brow-tiful Transformations
Now for the fun part: applying the system! 🥳 Don’t worry, it’s easier than it looks. With a little practice, you’ll be a brow-shaping pro in no time.
Step-by-Step Guide:
- Prep Your Brows: Start with clean, dry brows. Use a spoolie to brush your brow hairs into their natural shape.
- Stencil Time (Optional): If using a stencil, align it with your brow and hold it firmly in place.
- Dip & Dab: Dip the angled brush into the brow pomade. A little goes a long way, so start with a small amount. Dab off any excess product onto the back of your hand.
- Outline & Define: Using the angled brush, create a light outline of your desired brow shape. Start at the inner corner of your brow and work your way towards the arch, then down to the tail.
- Fill It In: Use short, hair-like strokes to fill in any sparse areas within the outline. Focus on the areas where your brow hairs are naturally thinner.
- Blend, Blend, Blend: Use the spoolie to blend the pomade and soften any harsh lines. This is key for achieving a natural-looking result.
- Repeat on the Other Brow: Follow the same steps on your other brow. Pay attention to symmetry and make adjustments as needed.
- Clean Up (Optional): Use a cotton swab dipped in makeup remover to clean up any stray lines or smudges.
- Set It (Optional): For extra hold, you can set your brows with a clear brow gel.
Visual Guide:
(Imagine a series of images or short videos here demonstrating each step of the application process.)
Pro Tips for Perfect Application:
- Start Light: It’s always easier to add more product than to remove it.
- Use Hair-Like Strokes: Mimic the natural growth pattern of your brow hairs.
- Focus on the Sparse Areas: Don’t overfill the areas where your brows are already full.
- Blend, Blend, Blend! Can’t stress this enough! This is the key to natural-looking brows.
- Don’t Be Afraid to Experiment: Find what works best for you and your unique brow shape.
Part 4: Troubleshooting Tips – Brow-tastic Solutions
Even with the best products and techniques, brow mishaps can happen. Don’t panic! Here are some common problems and how to fix them:
| Problem | Solution |
|---|---|
| Brows are Too Dark | Use a clean spoolie to brush through your brows and remove excess product. You can also use a cotton swab dipped in makeup remover to lighten the color. |
| Brows are Uneven | Carefully compare your brows and make adjustments as needed. Use the angled brush to add more product to the thinner brow or a cotton swab to remove product from the thicker brow. |
| Brows Look Too Harsh | Blend, blend, blend! Use the spoolie to soften the lines and create a more natural look. |
| Pomade is Clumpy | Make sure you’re using a small amount of product and dabbing off any excess. You can also try warming up the pomade slightly by rubbing it between your fingers. |
| Brows Don’t Last All Day | Ensure you’re using the waterproof brow pomade and applying it correctly. You can also set your brows with a clear brow gel for extra hold. |
| Can’t Get Symmetrical Brows | Practice makes perfect! Use the brow stencils for guidance or try using a ruler to measure the distance between your brows and your nose. |
| Accidentally Created a Block Brow | Take a deep breath. Use a clean spoolie and brush horizontally through the brow to break up the blocky look. Add individual hair-like strokes with the pomade where needed to fill in any gaps. Less is more! |
Part 5: Waterproof Wonders – The Science of Staying Power
Okay, let’s talk about why this system is called "waterproof". This isn’t just a marketing buzzword; it’s a promise! 🤝 The ZenaMakeup Brow Pomade is formulated with special polymers that create a waterproof barrier on your skin. This barrier repels water, sweat, and other liquids, keeping your brows in place all day long.
How to Maximize Waterproof Performance:
- Clean, Dry Brows: Ensure your brows are clean and dry before applying the pomade.
- Avoid Oil-Based Products: Oil-based products can break down the waterproof barrier, so avoid using them on or around your brows.
- Don’t Rub: Avoid rubbing your brows, as this can also break down the waterproof barrier.
- Gentle Cleansing: When removing your makeup, use a gentle, oil-free makeup remover.
Testing the Waterproof Claim:
(Imagine a fun video here demonstrating the waterproof properties of the brow pomade. Show it being splashed with water, rubbed with a towel, and still looking perfect!)
Part 6: Beyond the Basics – Advanced Brow Techniques
Once you’ve mastered the basic application, you can start experimenting with different brow looks. Here are a few ideas:
- Soft & Fluffy Brows: Use a light hand with the pomade and focus on creating a natural, feathery look. Brush your brow hairs upwards with the spoolie to add volume.
- Bold & Defined Brows: Use a heavier hand with the pomade and create a sharp, defined outline. Fill in the brows completely for a dramatic look.
- Ombre Brows: Use two different shades of brow pomade to create a gradient effect. Start with the lighter shade at the inner corner of your brow and gradually transition to the darker shade towards the tail.
- Highlighted Brows: Apply a small amount of highlighter or concealer just below your brow bone to lift and define your brows.
The Power of a Good Arch:
Remember, the arch is key to creating a flattering brow shape. Play around with the placement and intensity of your arch to find what works best for your face. A higher arch can make you look more alert and youthful, while a lower arch can create a softer, more relaxed look.
Part 7: Q&A Session – Ask Me Anything!
Alright, folks, it’s time for the Q&A! This is your chance to ask me anything and everything about the ZenaMakeup Defined & Filled Waterproof Brow System. No question is too silly or too complex! I’m here to help you achieve your brow goals.
(Here, I would answer a series of common questions about the product, such as:
- Is this system suitable for sensitive skin?
- How long will the pomade last?
- Can I use this system if I have no brow hairs?
- What’s the best way to clean the brush?
- How do I choose the right stencil shape?
- Is the pomade cruelty-free?
- What’s the refund policy if I don’t like the product?
- Can I use this with other brow products I already own? )
Conclusion: Your Brow Journey Starts Now!
Congratulations! 🎉 You’ve officially completed the ZenaMakeup Brow Masterclass. You’re now armed with the knowledge and tools you need to achieve defined, filled, and waterproof brows that will make you feel confident and beautiful.
Remember, practice makes perfect. Don’t be afraid to experiment and have fun with your brows. And most importantly, embrace your unique brow quirks!
Thank you for joining me on this brow-tastic adventure! Now go forth and conquer the world, one perfectly shaped brow at a time! 💖
Bonus Offer: For a limited time, use code BROWBOSS at checkout for 15% off your ZenaMakeup Defined & Filled Waterproof Brow System! 🎁
Happy Brow Shaping! 😊
For detailed product specifications and purchases, please go to :https://zenamakeup.com/products/brow-stamp-kit-waterproof-3-in-1-stencil-powder
Leave a Reply