Lecture: Hairline Dye Powder: The Secret Weapon Against Gray Roots (Without Looking Like a Robot)
(Professor stands at a podium, adjusting oversized glasses and sipping from a mug that reads "Powered by Caffeine & Denial of Aging")
Alright class, settle down, settle down! Today we’re tackling a topic near and dear to many of our hearts (and hairlines): Root touch-up! But not just any root touch-up – we’re diving deep into the world of Hairline Dye Powder, that magical dust that promises to banish gray roots faster than you can say "where’s my reading glasses?".
(Professor winks dramatically)
However, like any powerful tool, hairline dye powder can be misused. The result? A hairline that looks less "naturally youthful" and more "accidentally inhaled a charcoal factory." So, buckle up, students, because we’re about to unlock the secrets to flawless, natural-looking hairline dye powder application.
I. The Problem: Gray Roots – The Uninvited Guests
(Professor clicks a slide displaying a picture of a single, defiant gray hair sticking up like a middle finger.)
Let’s face it: gray hair is a natural part of aging. Embrace it! Celebrate it! …Or, you know, subtly camouflage it with dye powder. The choice is yours. But for those of us who aren’t quite ready to surrender to the silver side, gray roots can be a real nuisance. They pop up faster than weeds in a poorly maintained garden, and they have an uncanny ability to appear right before that big presentation, important date, or unexpected Zoom meeting.
(Professor shudders dramatically.)
Root touch-up options abound, from permanent dyes to temporary sprays. But today, we’re focusing on hairline dye powder because of its unique advantages:
- Speed: Application is lightning fast. Think seconds, not hours.
- Convenience: Perfect for on-the-go touch-ups. Throw it in your purse, your gym bag, even your glove compartment (though maybe not while driving!).
- Low Commitment: Washes out with shampoo, so you’re not stuck with it until your next salon appointment.
- Precise Application: Allows you to target specific areas, unlike sprays that can leave a generalized, unnatural cast.
II. Understanding the Arsenal: Types of Hairline Dye Powder
(Professor gestures towards a table displaying various containers of dye powder.)
Not all powders are created equal, my friends. Let’s break down the common types:
| Type of Powder | Texture | Best For | Pros | Cons |
|---|---|---|---|---|
| Pressed Powder | Similar to face powder, compact and solid. | Fine, sparse gray hairs. | Easy to control, less likely to create a mess, portable. | Can sometimes look cakey if applied too heavily, less effective on thick, dense gray patches. |
| Loose Powder | Finely milled, like eyeshadow pigment. | Thicker, more concentrated gray areas. | Provides more coverage, blends well, can be customized by mixing shades. | Can be messy if not careful, requires a dedicated brush. |
| Stick/Crayon Formula | Creamy, solid stick, similar to a concealer. | Creating a sharp, defined hairline, filling in sparse areas. | Extremely precise application, ideal for shaping the hairline, good for travel. | Can sometimes look stiff if not blended properly, may not be as effective for covering large areas. |
| Mineral Based Powder | Loose powder with added minerals. | Sensitive scalps, those looking for a more natural option. | Often formulated with skin-friendly ingredients, can have a subtle, natural finish, gentle on the scalp. | May not provide as much coverage as other types, can be more expensive. |
| Water Resistant Powder | Similar to pressed or loose powder. | Sweating, swimming, or humid environments. | Designed to withstand moisture, helps prevent smudging and transfer, ideal for active individuals. | May require a special shampoo for removal, can sometimes feel slightly heavier on the hair. |
(Professor points a laser pointer at each container, making comical sound effects.)
III. The Essential Tools: Your Root Touch-Up Toolkit
(Professor reveals a tray filled with brushes, sponges, and other implements.)
A craftsman is only as good as their tools. Here’s what you’ll need to achieve hairline dye powder perfection:
- A Dedicated Brush: This is crucial! Choose a small, angled brush for precise application. Think eyeshadow brush, not blush brush.
- Angled Brush: Ideal for creating a sharp, defined hairline.
- Small Fluffy Brush: Perfect for blending and softening the edges.
- A Handheld Mirror: Allows you to see the back of your head and those pesky hidden grays.
- Hair Clips: To section your hair and keep it out of the way.
- A Tissue or Makeup Wipe: For cleaning up any stray powder.
- Hair Spray (Optional): For setting the powder and preventing transfer.
(Professor holds up a magnifying glass and squints comically.)
IV. Color Matching: The Key to a Natural Look
(Professor displays a color wheel, looking utterly perplexed.)
This, my friends, is where things can get tricky. Choosing the right shade is paramount. Here are some tips:
- Match Your Root Color: Aim for a shade that closely matches your natural root color, not the color of your processed hair.
- Go Slightly Lighter: If you’re unsure, err on the side of a slightly lighter shade. It’s easier to build up color than to tone it down.
- Consider Your Undertones: Are you warm, cool, or neutral? This will influence which shade looks best on you.
- Test It Out!: Before committing to a full application, test the powder on a small, inconspicuous area of your hairline.
- Mix and Match: Don’t be afraid to blend different shades to create a custom color that perfectly matches your hair.
(Professor pulls out a bag of mismatched socks.)
V. The Application Process: A Step-by-Step Guide to Root Resurrection
(Professor dramatically puts on a pair of gloves.)
Alright, let’s get down to business! Here’s a step-by-step guide to applying hairline dye powder like a pro:
- Prep Your Hair: Make sure your hair is clean and dry. Style it as you normally would.
- Section Your Hair: Use hair clips to section off the areas you want to touch up. Focus on the hairline, part, and temples.
- Apply the Powder: Dip your angled brush into the powder and tap off any excess. Gently dab the powder onto the gray roots, starting at the hairline and working your way back.
- Short, Light Strokes: Use short, light strokes to mimic the natural growth pattern of your hair.
- Layer the Color: Build up the color gradually, adding more powder as needed.
- Focus on the Roots: Avoid applying the powder to the scalp, as this can create a unnatural look.
- Blend, Blend, Blend: Use a small, fluffy brush to blend the powder into your hair. This will soften the edges and create a more natural transition.
- Buffing Motion: Use a buffing motion to blend the powder seamlessly into your hair.
- Check in the Mirror: Regularly check your work in the mirror to ensure that the powder is evenly distributed.
- Set the Powder (Optional): If desired, lightly spray your hair with hairspray to set the powder and prevent transfer.
- Admire Your Work: Take a step back and admire your flawless, youthful-looking hairline!
(Professor strikes a heroic pose.)
VI. Avoiding the "Fake" Factor: Pro Tips for Natural-Looking Results
(Professor pulls out a list titled "DON’Ts" in large, bold letters.)
Here are some common mistakes to avoid if you want to achieve a natural-looking result:
- DON’T Overdo It!: Less is more. Start with a small amount of powder and build up the color gradually.
- DON’T Use Too Much Product: Applying too much powder can create a cakey, unnatural look.
- DON’T Forget to Blend: Blending is essential for creating a seamless transition between your dyed hair and your roots.
- DON’T Use the Wrong Brush: A large, fluffy brush will distribute the powder unevenly and create a messy look.
- DON’T Apply to Wet Hair: Applying powder to wet hair will cause it to clump and create a muddy mess.
- DON’T Ignore Your Part: Your part is just as important as your hairline. Be sure to touch up any gray roots along your part.
- DON’T Forget the Back: Use a handheld mirror to check the back of your head for any stray gray hairs.
(Professor nods sagely.)
VII. Troubleshooting: Common Hairline Dye Powder Problems and Solutions
(Professor unveils a chart titled "Root Rescue 911.")
Even with the best techniques, problems can arise. Here’s how to troubleshoot common hairline dye powder issues:
| Problem | Possible Cause | Solution |
|---|---|---|
| Powder Looks Cakey | Applying too much powder, using the wrong brush, dry hair. | Use a small, fluffy brush to blend the powder into your hair. Apply a small amount of hair oil to dry hair before applying the powder. |
| Powder Transfers to Clothes/Pillow | Not blending properly, using a non-water-resistant powder. | Blend the powder thoroughly into your hair. Use a water-resistant powder if you’re concerned about transfer. |
| Powder Looks Too Dark | Using the wrong shade, applying too much powder. | Use a lighter shade of powder. Apply a small amount of powder and build up the color gradually. |
| Powder Looks Too Light | Using the wrong shade, not applying enough powder. | Use a darker shade of powder. Apply more powder to the gray roots. |
| Powder Doesn’t Stay Put | Oily scalp, using the wrong type of powder. | Use a powder specifically designed for oily scalps. Apply a dry shampoo to your roots before applying the powder. |
| Itchy Scalp | Sensitivity to ingredients, buildup of product on the scalp. | Use a mineral-based powder that is gentle on the scalp. Wash your hair regularly to remove any product buildup. |
(Professor dramatically removes the gloves.)
VIII. Conclusion: Embrace the Power of Hairline Dye Powder (Responsibly!)
(Professor beams at the class.)
And there you have it! You are now equipped with the knowledge and skills to conquer gray roots with the power of hairline dye powder. Remember, the key to success is practice, patience, and a healthy dose of self-awareness. Don’t strive for perfection; strive for natural-looking perfection.
(Professor winks.)
Now go forth and banish those gray roots! Just promise me you won’t accidentally dye your pets.
(Professor takes a final sip of coffee, leaving the class to ponder the profound implications of root touch-up.)
(End of Lecture)
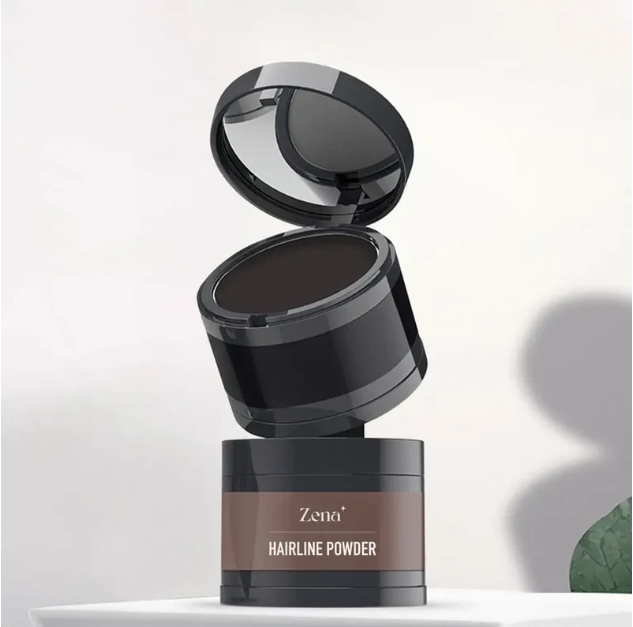
For detailed product specifications and purchases, please go to :https://zenamakeup.com/products/hairline-dye-powder-for-root-touch-up
Leave a Reply