The Great Glitter Gauntlet: Conquering Creasing with Pigmented Glitter Eyeshadow Cream on Oily Lids ⚔️✨ (A Lecture)
(Professor Sparklebottom adjusts her oversized, glitter-encrusted glasses and beams at the audience. A rogue sequin detaches from her lapel and floats dramatically to the floor.)
Welcome, my shimmering students, to Glitterology 101! Today, we embark on a perilous, yet dazzling, journey: taming the beast that is pigmented glitter eyeshadow cream on the dreaded oily eyelid. 😱
Yes, I see those nervous glances. The mere mention of “glitter” and “oily lids” in the same sentence can send shivers down the spines of even the most seasoned makeup artists. We’ve all been there. We’ve all experienced the horror of meticulously crafted glitter looks melting and migrating into a creased, muddy mess by lunchtime. 😫
But fear not, my dears! I, Professor Sparklebottom, am here to arm you with the knowledge, the tools, and the sass needed to conquer this chromatic challenge. We will not succumb to the oily lid’s tyranny! We will achieve glittery greatness! ✨
Lecture Outline:
I. The Enemy: Understanding Oily Lids and Glitter’s Quirks
- A. What Makes an Eyelid Oily (and Why It Hates Glitter)
- B. The Nature of Glitter Cream: A Delicate Balance
- C. Why Creasing Happens: The Perfect Storm
II. Fortification: Priming is Paramount (and Other Protective Measures)
- A. The Indispensable Eyeshadow Primer: Your First Line of Defense
- B. Setting the Stage: Powder Power
- C. Strategic Placement: Less is Often More
- D. The Blotting Paper Brigade: Keeping Oil at Bay
III. Weaponry: Choosing the Right Glitter Cream (and Applying It Like a Pro)
- A. Decoding the Labels: Ingredients to Look For (and Avoid)
- B. Application Techniques: Pat, Don’t Swipe!
- C. Brush Selection: Your Glitter Application Arsenal
- D. Layering for Longevity: Building a Glitter Fortress
IV. Maintenance and Rescue Operations: What to Do When Disaster Strikes
- A. The Crease Check: Regular Monitoring
- B. Emergency Repair Kit: Quick Fixes for Creasing
- C. When to Call in the Professionals (and Other Existential Glitter Crises)
V. Advanced Glitterology: Taking Your Glitter Game to the Next Level
- A. Glitter Placement for Different Eye Shapes
- B. Combining Glitter Creams with Other Eyeshadows
- C. The Ethical Considerations of Glitter (Yes, Really!)
I. The Enemy: Understanding Oily Lids and Glitter’s Quirks
(Professor Sparklebottom gestures dramatically to a projected diagram of an eyelid, complete with exaggerated oil glands.)
A. What Makes an Eyelid Oily (and Why It Hates Glitter)
Our eyelids, bless their expressive souls, are home to a veritable metropolis of sebaceous glands. These glands produce sebum, a natural oil that keeps our skin moisturized and protected. Now, for some of us, these glands operate like a well-oiled machine (pun intended!), producing just the right amount of sebum. For others, they go into overdrive, pumping out enough oil to rival a Texas oil well. 🛢️
Why is this bad news for glitter? Oil breaks down the binders in eyeshadow cream, especially those that hold the glitter particles in place. This leads to:
- Slippage: The glitter particles slide and migrate, creating a patchy, uneven look.
- Melting: The cream itself becomes more liquid, losing its structure and definition.
- Creasing: The eyeshadow settles into the fine lines and wrinkles around the eye, accentuating them and creating a decidedly un-glittery effect.
B. The Nature of Glitter Cream: A Delicate Balance
Glitter eyeshadow cream is a complex concoction. It’s a delicate balance between:
- Binders: These hold the glitter particles together and adhere them to the skin.
- Pigments: These provide the base color and depth.
- Emollients: These provide a smooth, creamy texture and prevent the product from drying out.
- Glitter Particles: The stars of the show! These come in various sizes, shapes, and colors, adding sparkle and dimension. ✨
The problem? Many glitter creams, particularly those with high glitter content, rely on emollients that can be easily broken down by oil. This makes them particularly susceptible to creasing on oily lids.
C. Why Creasing Happens: The Perfect Storm
Creasing isn’t just about oily lids. It’s about the interaction between oily lids, the glitter cream’s formulation, and environmental factors. Think of it as a perfect storm:
| Factor | Contribution to Creasing |
|---|---|
| Oily Lids | Excess sebum breaks down the binders in the glitter cream, causing it to slip and migrate. |
| Glitter Cream Formula | Some formulas are simply more prone to creasing than others, especially those with a high emollient content or poor-quality binders. |
| Application Technique | Applying too much product or swiping instead of patting can overload the eyelid and increase the likelihood of creasing. |
| Environmental Factors | Heat, humidity, and excessive sweating can exacerbate oil production and further contribute to creasing. |
| Eye Anatomy | Deep-set eyes or hooded lids are more prone to creasing due to the natural folds and creases in the skin. |
II. Fortification: Priming is Paramount (and Other Protective Measures)
(Professor Sparklebottom slams her fist on the podium, causing a small cascade of glitter to rain down.)
Now, let’s talk defense! We can’t change our oily lids (unless you’re considering some very drastic measures, which I don’t recommend!). But we can create a barrier between our skin and the glitter cream, minimizing the effects of oil and preventing the dreaded crease.
A. The Indispensable Eyeshadow Primer: Your First Line of Defense
Eyeshadow primer is your best friend in this glittery battle. It acts as a smooth, even base for your eyeshadow, preventing it from creasing, fading, or migrating. Think of it as a sticky, oil-absorbing shield for your eyelids.🛡️
-
Key Features of a Good Primer for Oily Lids:
- Oil-Controlling: Look for primers specifically formulated for oily skin. These often contain ingredients like silica or clay that absorb excess oil.
- Long-Wearing: Choose a primer that promises all-day wear.
- Grippy Texture: A slightly tacky texture will help the glitter cream adhere better and prevent slippage.
-
Application:
- Apply a thin layer of primer to your entire eyelid, from lash line to brow bone (if you plan on applying eyeshadow that high).
- Allow the primer to dry completely before applying any other products. This is crucial!
B. Setting the Stage: Powder Power
After applying your primer, consider setting it with a translucent powder. This will further absorb excess oil and create a smooth canvas for your glitter cream.
-
Types of Powder:
- Translucent Powder: A good option for all skin tones, as it won’t add any color to your eyeshadow.
- Setting Powder: Similar to translucent powder, but often contains ingredients that help to prolong the wear of your makeup.
- Tinted Powder: Can be used to even out skin tone or add a subtle wash of color.
-
Application:
- Use a fluffy brush to lightly dust the powder over your primed eyelids.
- Focus on the areas that tend to get the oiliest, such as the crease and the inner corner of the eye.
C. Strategic Placement: Less is Often More
Resist the urge to slather glitter cream all over your eyelids! Applying too much product is a surefire way to increase the likelihood of creasing.
- Focus on the Center: Apply the glitter cream to the center of your eyelid, where it will catch the light and create the most impact.
- Blend Outwards: Use a gentle patting motion to blend the edges of the glitter cream outwards, creating a seamless transition.
- Avoid the Crease: Try to avoid applying the glitter cream directly into the crease, as this is where creasing is most likely to occur.
D. The Blotting Paper Brigade: Keeping Oil at Bay
Blotting papers are your secret weapon for keeping oily lids at bay throughout the day. These thin sheets of paper absorb excess oil without disturbing your makeup.
- How to Use:
- Gently press a blotting paper onto your eyelids, focusing on the areas that tend to get the oiliest.
- Avoid rubbing or wiping, as this can smudge your makeup.
- Carry blotting papers with you and reapply as needed throughout the day.
III. Weaponry: Choosing the Right Glitter Cream (and Applying It Like a Pro)
(Professor Sparklebottom unveils a dazzling array of glitter creams, each shimmering with a unique brilliance.)
(Professor Sparklebottom unveils a dazzling array of glitter creams, each shimmering with a unique brilliance.)
Now that we’ve fortified our defenses, it’s time to choose our weapons wisely! Not all glitter creams are created equal. Some are formulated to withstand the oily onslaught better than others.
A. Decoding the Labels: Ingredients to Look For (and Avoid)
Pay close attention to the ingredient list when choosing a glitter cream. Here are some ingredients to look for:
| Ingredient | Benefit |
|---|---|
| Silica | Absorbs excess oil and helps to create a smooth, matte finish. |
| Clay (e.g., Kaolin) | Absorbs oil and helps to keep the glitter cream in place. |
| Dimethicone | Creates a smooth, silky texture and helps to prevent creasing. |
| Isododecane | A lightweight solvent that helps to create a long-wearing formula. |
| Synthetic Beeswax | Offers a more stable and less greasy alternative to natural beeswax, helping to improve the longevity of the glitter application. |
And here are some ingredients to avoid (or at least be wary of):
| Ingredient | Potential Issue |
|---|---|
| Mineral Oil | Can be greasy and contribute to creasing. |
| Shea Butter | Can be too emollient for oily lids and cause the glitter cream to slip. |
| High Glycerin Content | Can attract moisture and lead to a sticky feeling, potentially increasing the likelihood of creasing. |
B. Application Techniques: Pat, Don’t Swipe!
The way you apply your glitter cream can make all the difference in preventing creasing.
- Patting is Key: Use a patting motion to apply the glitter cream to your eyelids. This will help to press the product into the skin and prevent it from slipping.
- Avoid Swiping: Swiping can disrupt the base layer of primer and powder, leading to creasing. It can also drag the glitter particles around, creating a messy, uneven look.
- Build in Thin Layers: Apply the glitter cream in thin layers, building up the intensity as needed. This will help to prevent the product from becoming too thick and heavy, which can contribute to creasing.
C. Brush Selection: Your Glitter Application Arsenal
The right brush can make all the difference in achieving a flawless glitter application.
| Brush Type | Best Use |
|---|---|
| Flat Shader Brush | Ideal for applying glitter cream to the center of the eyelid with precision. |
| Small Detail Brush | Perfect for applying glitter to specific areas, such as the inner corner of the eye or along the lash line. |
| Blending Brush | Use a clean blending brush to soften the edges of the glitter cream and create a seamless transition. |
| Silicone Applicator | A non-absorbent option that allows for a more controlled application and prevents product waste. Easy to clean, too! |
D. Layering for Longevity: Building a Glitter Fortress
Layering is the key to creating a long-lasting, crease-resistant glitter look.
- Primer: As we’ve already discussed, this is your first line of defense.
- Powder: Set the primer with a translucent powder to absorb excess oil.
- Base Eyeshadow (Optional): Apply a matte eyeshadow in a similar color to the glitter cream to create a base and enhance the color payoff.
- Glitter Cream: Apply the glitter cream in thin layers, using a patting motion.
- Glitter Glue (Optional): For extra staying power, consider using a glitter glue on top of the glitter cream.
- Setting Spray: Finish with a generous spritz of setting spray to lock everything in place.
IV. Maintenance and Rescue Operations: What to Do When Disaster Strikes
(Professor Sparklebottom pulls out a well-worn makeup bag, filled with emergency glitter supplies.)
Even with the best preparation, creasing can still happen. But fear not! We have strategies for maintenance and rescue.
A. The Crease Check: Regular Monitoring
Make it a habit to check your eyeshadow periodically throughout the day, especially in the crease area. This will allow you to catch any creasing early and take corrective action before it becomes a major problem.
B. Emergency Repair Kit: Quick Fixes for Creasing
Keep these essentials in your emergency repair kit:
-
Blotting Papers: To absorb excess oil.
-
Q-Tips: To gently remove any creased eyeshadow.
-
Small Blending Brush: To blend out the edges of the repaired area.
-
Loose Powder: To set the repaired area.
-
Repair Procedure:
- Gently blot the creased area with a blotting paper.
- Use a Q-tip to carefully remove any excess eyeshadow from the crease.
- Use a small blending brush to blend out the edges of the repaired area.
- Lightly dust the area with loose powder to set it.
C. When to Call in the Professionals (and Other Existential Glitter Crises)
Sometimes, despite our best efforts, the glitter look just isn’t working. Maybe the creasing is too severe, or the glitter is migrating all over your face. In these cases, it’s okay to admit defeat and call in the professionals (or, you know, just remove the eyeshadow and start over).
V. Advanced Glitterology: Taking Your Glitter Game to the Next Level
(Professor Sparklebottom strikes a dramatic pose, scattering glitter everywhere.)
You’ve mastered the basics. Now, let’s explore the exciting world of advanced glitterology!
A. Glitter Placement for Different Eye Shapes
The placement of your glitter can significantly impact your overall look.
- Hooded Eyes: Apply glitter to the center of the lid, avoiding the crease. This will help to make your eyes appear larger and more open.
- Deep-Set Eyes: Apply glitter to the inner corner of the eye and along the brow bone to bring your eyes forward.
- Close-Set Eyes: Apply glitter to the outer corner of the eye to create the illusion of wider-set eyes.
- Wide-Set Eyes: Apply glitter to the inner corner of the eye to bring your eyes closer together.
B. Combining Glitter Creams with Other Eyeshadows
Don’t be afraid to experiment with combining glitter creams with other eyeshadows. A matte eyeshadow base can enhance the color payoff of the glitter cream and add depth to your look.
C. The Ethical Considerations of Glitter (Yes, Really!)
Many traditional glitters are made from microplastics, which can contribute to pollution. Consider using biodegradable glitter made from plant-based materials. It’s a small change that can make a big difference!
(Professor Sparklebottom smiles, her glitter-encrusted glasses twinkling in the light.)
And that, my shimmering students, concludes our lecture on conquering creasing with pigmented glitter eyeshadow cream on oily lids! Go forth, experiment, and create dazzling looks that will turn heads and spread joy. And remember, a little bit of glitter can make everything better! ✨💖🎉
(The lecture hall erupts in applause as Professor Sparklebottom takes a bow, leaving a trail of glitter in her wake.)
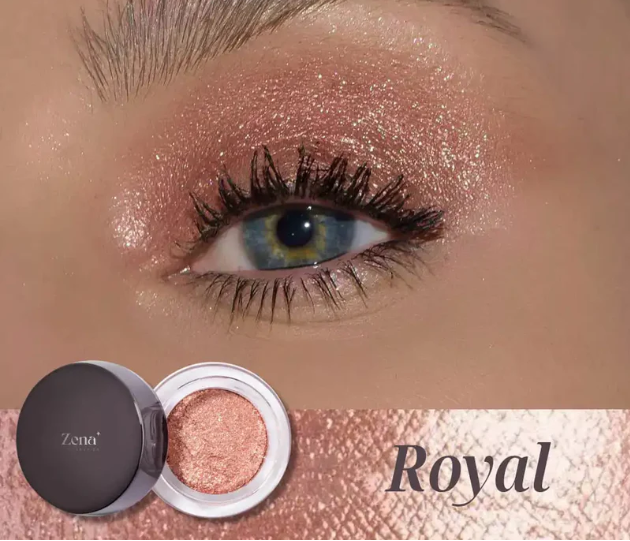
For detailed product specifications and purchases, please go to :https://zenamakeup.com/products/pigmented-glitter-eyeshadow-cream
Leave a Reply