Lecture Hall: Unlocking the Secrets of Opaque Glitter Payoff from Cream Eyeshadows
(Professor Glitter Bomb, resplendent in a lab coat dusted with iridescent shimmer, strides onto the stage. A single spotlight shines down on a table overflowing with glitter pots and makeup brushes.)
Alright, settle down, settle down! Welcome, aspiring sparkle enthusiasts, to Glitterati 101: Achieving Maximum Opaque Glitter Impact. I’m Professor Glitter Bomb, and I’m here to guide you through the often-murky, sometimes-sticky, but always-glamorous world of pigmented glitter cream eyeshadows.
(Professor gestures dramatically.)
Today, we’re tackling the Holy Grail of glitter application: opaque payoff. We’re not talking about a subtle shimmer, a whisper of sparkle. No, my dears! We’re talking about a supernova of glitter, a blindingly beautiful explosion of color and light that demands attention. We want to create a lid so stunning, it could stop traffic (please don’t actually stop traffic).
(Professor winks.)
So, grab your notebooks (or your phones, I’m not your grandma), and let’s dive into the science, the techniques, and the glittery magic required to achieve opaque color payoff from these deceptively simple cream formulas.
Part 1: Understanding the Beast – The Nature of Glitter Cream Eyeshadows
(Professor holds up a small pot of cream glitter eyeshadow.)
First, let’s understand what we’re dealing with. Glitter cream eyeshadows are a unique beast, a marriage of pigment, glitter, and a creamy base. The key to unlocking their potential lies in understanding each component.
- The Pigment: This is the color! It provides the base hue upon which the glitter dances. Pigment quality is crucial. Look for shadows with finely milled, highly concentrated pigments. Cheaper formulas often skimp on pigment, leading to a sheer, washed-out effect. 😩
- The Glitter: Ah, the star of the show! Glitter comes in various sizes, shapes, and finishes. From chunky holographic flakes to fine iridescent dust, the type of glitter significantly impacts the overall look and application. Larger glitter particles can be trickier to work with, often requiring more finesse to achieve even coverage. 🌟
- The Cream Base: This is the glue that holds everything together. The base can be anything from a silicone-based emollient to a water-based gel. Its consistency and texture are critical. A base that’s too dry will cause the glitter to flake and crumble. A base that’s too oily will lead to creasing and glitter fallout. 😫
Table 1: Components of Glitter Cream Eyeshadows
| Component | Function | Characteristics | Impact on Payoff |
|---|---|---|---|
| Pigment | Provides color base | Finely milled, highly concentrated is best | Determines color intensity & opacity |
| Glitter | Adds sparkle and shine | Size, shape, and finish varies greatly | Affects texture, application, and overall visual impact |
| Cream Base | Binds pigment and glitter | Consistency & texture vary (silicone, water-based) | Determines blendability, longevity, and potential for creasing/fallout |
(Professor points to the table with a laser pointer that leaves a trail of glitter.)
See? Even the laser pointer is contributing! Now, let’s move on to the challenges we face in achieving opaque glitter payoff.
Part 2: The Challenges of Opaque Glitter Application
(Professor throws her hands up in mock despair.)
Oh, the trials and tribulations! Getting that perfect, opaque glitter lid isn’t always a walk in the park. Here are some common obstacles you might encounter:
- Sheer Application: This is the most common complaint. The pigment is weak, the glitter is sparse, and the overall effect is…underwhelming. 👎
- Glitter Fallout: Those rogue glitter particles that end up on your cheeks, your nose, your clothes…everywhere except your eyelids! It’s the bane of every glitter lover’s existence. ✨➡️EVERYWHERE
- Creasing: Glitter cream shadows, especially those with oily bases, are prone to creasing, especially on hooded or oily lids. This can ruin the entire look and make you look like you haven’t slept in a week. 👵
- Uneven Texture: Applying glitter evenly can be a challenge. You might end up with patchy areas or clumps of glitter in certain spots. 😬
- Short Wear Time: Some glitter cream shadows fade or lose their intensity throughout the day, leaving you with a sad, glitter-less lid by evening. 😔
(Professor sighs dramatically.)
But fear not, my friends! These challenges are not insurmountable. With the right techniques and tools, you can conquer them all and achieve glitter greatness.
Part 3: The Arsenal – Tools and Primers for Glitter Domination
(Professor gestures to the table overflowing with brushes and primers.)
Now, let’s talk about your weapons of choice. Just like a knight needs his sword, a glitter artist needs her tools and primers.
-
Eyeshadow Primer: This is non-negotiable! A good eyeshadow primer creates a smooth, even base for your glitter cream shadow, preventing creasing and extending wear time. Look for primers specifically designed for glitter, as they often have a tackier texture that helps the glitter adhere.
- Recommendation: A tacky glitter glue like Nyx Glitter Primer, or a regular eyeshadow primer like Urban Decay Primer Potion for lighter payoff.
-
Application Brushes: Forget your fluffy blending brushes! For opaque glitter application, you need dense, flat brushes. Synthetic brushes work best as they don’t absorb as much product.
- Flat Shader Brush: For packing the glitter onto the lid.
- Small Detail Brush: For precise application in the inner corner or along the lash line.
- Silicone Applicator: These can work great for certain cream formulas, especially those with larger glitter particles.
-
Setting Spray: A good setting spray can help lock in your glitter and prevent fallout. Look for a setting spray that’s specifically designed for makeup longevity.
- Recommendation: Urban Decay All Nighter Setting Spray or Morphe Continuous Setting Mist.
-
Concealer/Cut Crease Tool: For cleaning up any edges or creating a sharp, defined look.
- Recommendation: A small angled brush and a full-coverage concealer.
(Professor holds up a variety of brushes, displaying each one with flourish.)
Remember, the right tools can make all the difference. Don’t skimp on quality!
Part 4: The Techniques – Mastering the Art of Opaque Glitter Application
(Professor cracks her knuckles and gets down to business.)
Alright, let’s get our hands dirty! Here are some tried-and-true techniques for achieving opaque glitter payoff:
Alright, let’s get our hands dirty! Here are some tried-and-true techniques for achieving opaque glitter payoff:
1. Prime and Perfect:
- Apply a thin layer of eyeshadow primer to your entire eyelid, from lash line to brow bone.
- Let the primer dry completely before moving on to the next step. This is crucial for preventing creasing.
- If you have oily lids, consider setting the primer with a translucent powder.
2. Base Layer of Similar Shade (Optional but Recommended):
- Apply a matte eyeshadow in a similar shade to your glitter cream shadow all over the lid. This will create a more even base and enhance the color payoff of the glitter.
- Blend the base shade well to avoid harsh lines.
3. The Packing Technique:
- Using a flat shader brush, pick up a generous amount of glitter cream eyeshadow.
- Instead of sweeping or blending, pack the glitter onto your eyelid in a patting motion. This will help build up the color and prevent fallout.
- Start in the center of the lid and work your way outwards.
4. Layering is Key:
- Don’t be afraid to layer! Apply multiple thin layers of glitter cream eyeshadow, allowing each layer to dry slightly before applying the next. This will help create a more opaque and dimensional look.
5. Press, Don’t Swipe:
- Avoid swiping the brush across your lid. This will only spread the glitter around and create a patchy effect. Instead, use a pressing motion to deposit the glitter onto your skin.
6. The Finger Method (For Maximum Impact):
- For the most intense glitter payoff, use your finger to apply the glitter cream shadow. The warmth of your finger will help melt the product and create a smoother, more even application.
- Gently press the glitter onto your lid, building up the color in layers.
7. Clean Up and Define:
- Use a small angled brush and concealer to clean up any edges and create a sharp, defined look.
- If you’re going for a cut crease, use the same technique to carve out the crease and create a dramatic effect.
8. Setting Spray Lockdown:
- Once you’re happy with your glitter application, spritz your face with a generous amount of setting spray. This will help lock in the glitter and prevent fallout throughout the day.
Table 2: Techniques for Opaque Glitter Application
| Technique | Description | Benefit |
|---|---|---|
| Prime & Perfect | Apply eyeshadow primer & let dry | Prevents creasing & extends wear time |
| Base Layer | Apply matte shadow in similar shade | Creates even base & enhances color |
| Packing Technique | Pat glitter onto the lid with flat brush | Builds color & prevents fallout |
| Layering | Apply multiple thin layers | Creates opaque & dimensional look |
| Press, Don’t Swipe | Use pressing motion, not swiping | Deposits glitter evenly, avoids patchiness |
| Finger Method | Use finger to apply glitter | Maximum impact, smooth & even application |
| Clean Up & Define | Use concealer to clean edges | Creates sharp, defined look |
| Setting Spray | Spritz face with setting spray | Locks in glitter & prevents fallout |
(Professor demonstrates each technique on a willing (and slightly terrified) volunteer.)
Remember, practice makes perfect! Don’t be discouraged if you don’t get it right away. Keep experimenting and tweaking your technique until you find what works best for you.
Part 5: Troubleshooting – Addressing Common Glitter Woes
(Professor puts on a pair of oversized sunglasses.)
Even with the best techniques, you might still encounter some glitter-related mishaps. Here’s how to troubleshoot some common issues:
- Glitter Fallout:
- Use a tacky glitter glue as your base.
- Apply your eye makeup before your foundation to make cleanup easier.
- Use scotch tape or a lint roller to gently remove any fallout from your face.
- Spritz your brush with setting spray before picking up the glitter.
- Creasing:
- Use an eyeshadow primer specifically designed for oily lids.
- Set your primer with a translucent powder.
- Avoid using glitter cream shadows with overly oily bases.
- Apply thin layers of glitter and allow each layer to dry completely.
- Uneven Application:
- Use a flat shader brush to pack the glitter onto your lid.
- Avoid swiping the brush across your skin.
- Use a small detail brush to fill in any patchy areas.
- Use your finger to gently press the glitter into the skin.
- Fading Color:
- Use a base layer of matte eyeshadow in a similar shade.
- Layer your glitter cream shadow for more intensity.
- Set your makeup with a setting spray.
(Professor removes the sunglasses, revealing eyes that sparkle with wisdom and glitter.)
Don’t be afraid to experiment and find what works best for your skin type and your preferred glitter formula.
Part 6: Advanced Techniques – Taking Your Glitter Game to the Next Level
(Professor pulls out a palette of vibrant, multi-chrome glitter cream eyeshadows.)
Once you’ve mastered the basics, you can start experimenting with more advanced techniques:
- Multi-Chrome Glitter: These shadows shift colors depending on the angle of the light, creating a mesmerizing effect. Use a finger to apply them for maximum color payoff.
- Glitter Cut Crease: A dramatic and eye-catching look that involves carving out the crease with concealer and applying glitter to the lid.
- Holographic Glitter: Creates a rainbow effect that’s perfect for special occasions.
- Glitter Liner: Use a small detail brush to apply glitter cream shadow along your lash line for a subtle but glamorous touch.
- Layering Different Glitter Textures: Combine chunky glitter with fine glitter for a more dimensional and interesting look.
(Professor demonstrates a quick multi-chrome glitter application, creating a stunning, shifting effect.)
The possibilities are endless! Don’t be afraid to get creative and experiment with different colors, textures, and techniques.
Conclusion: Embrace the Sparkle!
(Professor takes a final bow, showering the audience with a rain of biodegradable glitter.)
Congratulations, my glitterati! You are now equipped with the knowledge and skills to achieve opaque glitter payoff from cream eyeshadows. Go forth and create dazzling looks that will turn heads and inspire awe.
Remember, glitter is more than just makeup. It’s a statement. It’s an attitude. It’s a way to express your inner sparkle. So embrace the sparkle, have fun, and never be afraid to shine!
(Professor exits the stage, leaving behind a trail of glitter and a room full of newly inspired glitter enthusiasts.)
(End of Lecture)
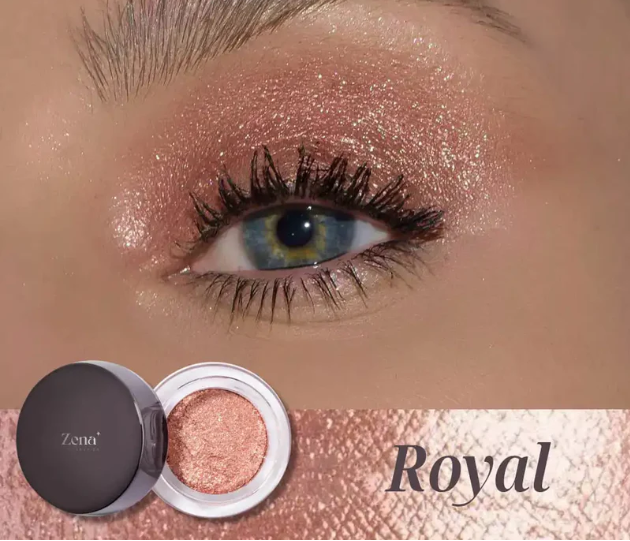
For detailed product specifications and purchases, please go to :https://zenamakeup.com/products/pigmented-glitter-eyeshadow-cream
Leave a Reply