Deluxe Liquid Glitter Cream Eyeshadow Stick: A Flawless Application Masterclass 🎓✨
Welcome, Glitterati! 👋
Prepare to embark on a dazzling journey into the world of liquid glitter eyeshadow sticks! Forget everything you think you know about glitter; we’re ditching the fallout, the mess, and the existential dread that comes with traditional loose glitter. Today, we’re mastering the art of achieving a sophisticated, eye-catching look with the ease and precision of a stick. We’re talking about Deluxe liquid glitter cream eyeshadow sticks – the kind that make you feel like a walking, talking disco ball (in the best possible way, of course!).
This isn’t just a makeup tutorial; it’s a Glitter Graduation Ceremony. By the end of this lecture, you’ll be armed with the knowledge and skills to apply your deluxe liquid glitter cream eyeshadow stick flawlessly, every single time. Consider this your official Glitter Guru certification course.
Course Outline:
- The Glitter Genesis: Understanding the Magic Behind Liquid Glitter Cream Eyeshadow Sticks
- The Prep Squad: Preparing Your Canvas for Maximum Sparkle
- Tool Time: Essential Tools for Glitter Application Domination
- Application Alchemy: Mastering the Art of the Swipe, Blend, and Layer
- Troubleshooting Tales: Conquering Common Glitter Gripes
- Glitter Glamour Galore: Exploring Different Looks and Techniques
- Cleanup Crew: Maintaining Your Glittery Masterpiece and Your Sanity
- The Glitter Oath: Your Commitment to Responsible Sparkle
1. The Glitter Genesis: Understanding the Magic Behind Liquid Glitter Cream Eyeshadow Sticks ✨
Let’s face it, glitter has a reputation. It’s the confetti of the craft world, the bane of every vacuum cleaner’s existence, and the persistent house guest that refuses to leave (even after you’ve changed the locks). But fear not! Liquid glitter cream eyeshadow sticks are here to redeem glitter’s tarnished image.
What makes them so special?
- Suspended Animation: Instead of loose, unruly particles, the glitter is suspended in a creamy, often hydrating, base. This means minimal fallout and maximum control. Think of it as glitter in a gilded cage, ready to be unleashed strategically.
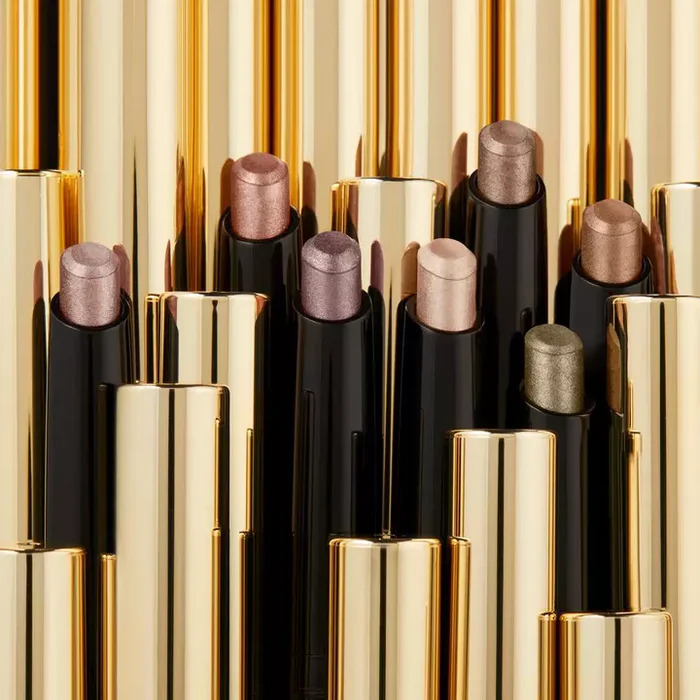
- Pigment Powerhouse: Many deluxe formulas boast intense color payoff, meaning you get a stunning wash of color and a dazzling shimmer in one swipe. It’s like a color-changing unicorn threw up on your eyelids (again, in the best possible way!).
- Blendability Bliss: The creamy texture allows for seamless blending, whether you’re using your fingers, a brush, or a cotton swab. No more harsh glitter lines!
- Longevity Legends: Deluxe formulas are often long-wearing and crease-resistant, meaning your glitter stays put from morning mimosas to late-night dance-offs.
The Anatomy of a Deluxe Glitter Stick:
| Feature | Description | Why It Matters |
|---|---|---|
| Glitter Particles | Finely milled, often multi-dimensional glitter in varying sizes and shapes. | Determines the sparkle factor! Smaller particles create a subtle shimmer, while larger particles provide a more dramatic, disco-ball effect. |
| Cream Base | Usually a blend of oils, waxes, and silicones that provide a smooth, blendable texture and help the glitter adhere to the skin. | The key to preventing fallout and ensuring comfortable wear. Look for hydrating ingredients like hyaluronic acid or vitamin E. |
| Pigments | Provide the base color of the eyeshadow. Can range from subtle nudes to vibrant jewel tones. | Adds depth and dimension to the glitter, creating a more complex and interesting look. |
| Applicator | The stick itself! Can be rounded, angled, or even have a built-in brush on the other end. | Influences the precision of application. A rounded tip is great for all-over washes of color, while an angled tip is ideal for creating defined lines. |
| Preservatives | Essential for maintaining the formula’s integrity and preventing bacterial growth. | Always check the expiration date! Nobody wants glitter-induced conjunctivitis. |
In short, deluxe liquid glitter cream eyeshadow sticks are a game-changer for anyone who loves sparkle but hates the mess. They’re the sophisticated, well-behaved cousins of traditional loose glitter.
2. The Prep Squad: Preparing Your Canvas for Maximum Sparkle 🎨
Just like a painter meticulously primes their canvas, you need to prep your eyelids for optimal glitter application. This isn’t just about making the glitter look good; it’s about ensuring it lasts all day (or night!) and prevents creasing.
The Essential Steps:
- Cleanse: Start with a clean slate! Gently cleanse your eyelids with a mild cleanser to remove any oil, dirt, or leftover makeup. Think of it as giving your eyelids a spa day before the glitter party.
- Pro Tip: Avoid using oily cleansers, as they can interfere with the glitter’s adhesion.
- Hydrate: Hydrated skin is happy skin! Apply a lightweight eye cream to moisturize your eyelids. This will help the glitter glide on smoothly and prevent creasing.
- Pro Tip: Allow the eye cream to fully absorb before moving on to the next step. You don’t want your glitter swimming in a sea of eye cream.
- Prime Time: Eye primer is your best friend in the world of eyeshadow. It creates a smooth, even base for your glitter and helps it stay put all day long.
- Application: Apply a thin layer of eye primer to your eyelids, blending it from your lash line to your brow bone.
- Types of Primer: Choose a primer that suits your skin type. Oily skin? Opt for a mattifying primer. Dry skin? Go for a hydrating one.
- Optional Base Shadow (for Depth): If you want to add depth and dimension to your glitter look, apply a matte eyeshadow in a complementary shade to your crease. This will create a beautiful gradient effect.
- Color Coordination: Experiment with different color combinations! A brown base shadow can enhance gold glitter, while a purple base shadow can make silver glitter pop.
Why is prepping so important?
- Enhanced Pigment Payoff: A smooth, primed surface allows the glitter to adhere evenly, resulting in a more vibrant and intense color.
- Longer Wear Time: Primer acts as a barrier between your skin and the glitter, preventing it from creasing or fading throughout the day.
- Reduced Fallout: A well-prepped eyelid provides a solid foundation for the glitter, minimizing fallout and keeping your under-eye area clean.
Think of prepping your eyelids as building a solid foundation for a glitter skyscraper. Without a strong base, the whole thing will crumble! 🏗️
3. Tool Time: Essential Tools for Glitter Application Domination 🛠️
While deluxe liquid glitter cream eyeshadow sticks are designed for easy application, having the right tools on hand can take your glitter game to the next level.
The Glitter Tool Kit:
| Tool | Purpose | Why You Need It |
|---|---|---|
| Eyeshadow Brush | For blending, layering, and applying base eyeshadow. Opt for a soft, fluffy brush for seamless blending. | Allows you to create a smooth transition between the glitter and your skin, and to build up the intensity of the glitter gradually. |
| Flat Shader Brush | For packing on glitter and creating a more concentrated effect. | Provides precise application and maximizes the sparkle factor. |
| Blending Brush | Specifically designed for blending out harsh lines and creating a soft, diffused look. | Essential for achieving a seamless, professional-looking finish. |
| Cotton Swabs | For cleaning up mistakes and defining edges. | Your secret weapon for achieving a crisp, clean glitter application. |
| Makeup Wipes | For removing any glitter fallout. | A must-have for keeping your under-eye area clean and preventing glitter from migrating down your face. |
| Concealer | For brightening the under-eye area and cleaning up any stray glitter. | Helps to create a polished, finished look and makes your eyes appear brighter and more awake. |
| Your Fingers! | Don’t underestimate the power of your fingertips! They can be used to blend, pat, and smudge the glitter for a natural, diffused effect. The warmth of your fingers helps the cream melt into the skin. | Your fingers are free, always available, and surprisingly effective for blending! Just make sure they’re clean! |
Brush Breakdown:
- Fluffy Blending Brush: Think of this as your eyeshadow Swiss Army knife. It’s perfect for blending out harsh lines, softening edges, and creating a smooth transition between colors.
- Flat Shader Brush: This brush is your glitter applicator extraordinaire. Its flat shape allows you to pack on glitter precisely and create a concentrated, dazzling effect.
- Pencil Brush: Ideal for detailed work, like applying glitter to the inner corner of your eye or along your lower lash line.
Choosing the Right Tools:
- Brush Quality: Invest in high-quality brushes that are soft, durable, and easy to clean.
- Handle Length: Choose brushes with comfortable handles that provide good control.
- Brush Shape: Experiment with different brush shapes to find what works best for your eye shape and application style.
Remember, the right tools can make all the difference between a glittery masterpiece and a glittery mess! 🖼️
4. Application Alchemy: Mastering the Art of the Swipe, Blend, and Layer 🧪
Now for the fun part! This is where you transform from a glitter novice into a glitter guru. Mastering the application technique is key to achieving a flawless, long-lasting, and absolutely stunning glitter look.
The Application Process:
- The Swipe: Gently swipe the glitter stick across your eyelid, starting at your lash line and working your way up to your crease.
- Pressure Control: Apply light pressure for a sheer wash of color, and increase pressure for a more intense, opaque look.
- Placement Precision: Think about the placement of the glitter. Do you want an all-over wash of color, a defined line, or a concentrated pop of sparkle in the center of your lid?
- The Blend: Immediately after applying the glitter, use your finger or a blending brush to blend out the edges.
- Circular Motions: Use small, circular motions to blend the glitter seamlessly into your skin.
- Avoid Harsh Lines: The goal is to create a soft, diffused look without any harsh lines or edges.
- The Layer: If you want to intensify the glitter, apply a second layer.
- Build Gradually: Build the intensity gradually, rather than applying a thick layer all at once.
- Spot Application: You can also layer glitter strategically, applying it only to certain areas, such as the center of your lid or the inner corner of your eye.
- The Define: Use a cotton swab dipped in makeup remover to clean up any mistakes and define the edges of your glitter application.
- Precision is Key: Pay attention to the shape and symmetry of your glitter.
- Sharp Lines: Create a sharp, clean line along your lash line for a more polished look.
- The Seal: To lock in the glitter and prevent creasing, set your eyeshadow with a translucent powder.
- Light Touch: Use a light hand when applying the powder to avoid dulling the glitter.
- Focus on the Crease: Focus on setting the crease area, where creasing is most likely to occur.
Application Techniques:
- All-Over Wash: Swipe the glitter stick across your entire eyelid, from lash line to crease, and blend out the edges for a sheer, shimmering look.
- Halo Eye: Apply a darker shade of eyeshadow to your outer and inner corners, leaving the center of your lid bare. Then, apply the glitter stick to the center of your lid and blend outwards for a halo effect.
- Glitter Liner: Use the edge of the glitter stick to create a defined line along your upper lash line. You can also use a fine-tipped eyeliner brush to pick up the glitter from the stick and apply it as a liner.
- Inner Corner Pop: Apply a small amount of glitter to the inner corner of your eye to brighten and illuminate your look.
- Layering with Shadows: Start with a base of matte eyeshadow. Then apply the glitter stick over top. This adds dimension and complexity.
Remember, practice makes perfect! Don’t be afraid to experiment with different application techniques and find what works best for you. 👩🔬
5. Troubleshooting Tales: Conquering Common Glitter Gripes 🚨
Even with the best techniques and tools, glitter application can sometimes be tricky. Here are some common problems and how to solve them:
5. Troubleshooting Tales: Conquering Common Glitter Gripes 🚨
Even with the best techniques and tools, glitter application can sometimes be tricky. Here are some common problems and how to solve them:
| Problem | Solution |
|---|---|
| Fallout | Prep, prep, prep! Make sure you’re using a good eye primer. Tap off excess. Before applying the glitter, tap off any excess product from the applicator. Use a flat shader brush. This will help to pack the glitter onto your eyelid, minimizing fallout. Apply concealer after eyeshadow. This will allow you to easily clean up any fallout. * Use glitter glue. For extra security, apply a thin layer of glitter glue to your eyelid before applying the glitter stick. |
| Creasing | Use a mattifying eye primer. This will help to absorb excess oil and prevent creasing. Set your eyeshadow with a translucent powder. This will help to lock in the glitter and prevent it from creasing. Avoid applying too much glitter. A thick layer of glitter is more likely to crease. Use an eye cream sparingly. Too much eye cream can cause your eyeshadow to crease. |
| Uneven Application | Apply the glitter in thin layers. This will allow you to build up the intensity gradually and avoid uneven application. Blend, blend, blend! Use a blending brush or your finger to blend out any harsh lines or edges. * Use a flat shader brush. This will help to pack the glitter onto your eyelid evenly. |
| Dull Glitter | Use a glitter primer. This will help to intensify the glitter and make it appear more vibrant. Layer the glitter over a similar shade of eyeshadow. This will enhance the color and sparkle of the glitter. * Apply a highlighter to the inner corner of your eye. This will brighten your eyes and make the glitter appear more radiant. |
| Glitter Migration | Set your eyeshadow with a setting spray. This will help to lock in the glitter and prevent it from migrating down your face. Avoid touching your eyes. This will prevent the glitter from transferring to your fingers and then to other parts of your face. * Use a long-wearing formula. Choose a deluxe liquid glitter cream eyeshadow stick that is formulated to be long-wearing and transfer-resistant. |
Remember, even the most experienced makeup artists encounter challenges. Don’t get discouraged if you don’t get it right the first time. Keep practicing, and you’ll eventually master the art of glitter application. 💪
6. Glitter Glamour Galore: Exploring Different Looks and Techniques 🎭
Now that you’ve mastered the basics, let’s explore some different glitter looks and techniques to unleash your inner sparkle artist!
Look 1: The Subtle Shimmer
- Technique: Apply a sheer wash of glitter to your eyelids for a subtle, everyday sparkle.
- Color Palette: Choose a neutral shade of glitter, such as champagne or rose gold.
- Occasion: Perfect for work, school, or a casual outing.
Look 2: The Bold and Bright
- Technique: Apply a concentrated layer of glitter to your eyelids for a bold, statement-making look.
- Color Palette: Choose a vibrant shade of glitter, such as sapphire blue or emerald green.
- Occasion: Ideal for parties, concerts, or special events.
Look 3: The Glitter Cut Crease
- Technique: Create a defined cut crease using a matte eyeshadow, then apply glitter to the lid below the crease.
- Color Palette: Experiment with contrasting colors for a dramatic effect.
- Occasion: Perfect for a night out or a photoshoot.
Look 4: The Glitter Gradient
- Technique: Apply a darker shade of eyeshadow to your outer corner and a lighter shade of glitter to your inner corner, blending the two together seamlessly.
- Color Palette: Choose shades within the same color family for a harmonious look.
- Occasion: Suitable for any occasion where you want to add a touch of glamour.
Look 5: The Glitter Wing
- Technique: Use a fine-tipped eyeliner brush to apply glitter along your upper lash line, creating a winged effect.
- Color Palette: Choose a shade of glitter that complements your eye color.
- Occasion: Perfect for adding a touch of sparkle to your everyday look.
Beyond the Eyelids:
- Glitter Highlight: Dab a small amount of glitter onto your cheekbones for a luminous highlight.
- Glitter Lips: Mix glitter with lip gloss for a dazzling lip look. (Be sure to use cosmetic-grade glitter!)
- Glitter Brows: Apply glitter to your eyebrows for a bold and edgy statement.
Don’t be afraid to experiment and create your own unique glitter looks! The possibilities are endless. 🌌
7. Cleanup Crew: Maintaining Your Glittery Masterpiece and Your Sanity 🧹
Once you’ve created your glitter masterpiece, it’s important to maintain it and clean up any mess to avoid looking like you wrestled a unicorn and lost.
Maintaining Your Glitter:
- Avoid Touching Your Eyes: This will prevent the glitter from smudging or transferring to other parts of your face.
- Use Setting Spray: A setting spray will help to lock in the glitter and prevent it from migrating.
- Blot, Don’t Rub: If you notice any creasing or fallout, gently blot the area with a tissue instead of rubbing it.
Removing Your Glitter:
- Use an Oil-Based Makeup Remover: Oil-based makeup removers are the most effective for dissolving glitter and removing it from your skin.
- Gently Massage: Gently massage the makeup remover onto your eyelids, paying attention to the lash line and crease area.
- Use a Cotton Pad: Use a cotton pad to wipe away the makeup remover and glitter.
- Double Cleanse: Follow up with a gentle cleanser to remove any remaining residue.
- Avoid Scrubbing: Avoid scrubbing your eyelids, as this can irritate the skin.
Cleaning Up Glitter Fallout:
- Use Sticky Tape: Press a piece of sticky tape onto the affected area to pick up any glitter particles.
- Use a Lint Roller: A lint roller can also be used to remove glitter from your clothes or furniture.
- Vacuum Carefully: If you need to vacuum up glitter, use a hose attachment and avoid dragging the vacuum across the surface.
Preventing Glitter Pollution:
- Use Biodegradable Glitter: Opt for biodegradable glitter made from plant-based materials instead of traditional plastic glitter.
- Dispose of Glitter Responsibly: Dispose of glitter in a sealed bag to prevent it from contaminating the environment.
- Be Mindful of Your Usage: Use glitter sparingly and avoid using it near waterways or sensitive ecosystems.
Remember, responsible glitter use is essential for protecting the planet and preserving the beauty of our natural world. 🌎
8. The Glitter Oath: Your Commitment to Responsible Sparkle 📜
Congratulations, Glitterati! You’ve reached the end of our Deluxe Liquid Glitter Cream Eyeshadow Stick Masterclass. You are now equipped with the knowledge and skills to apply glitter flawlessly, create stunning looks, and maintain your glittery masterpieces.
But with great glitter power comes great glitter responsibility. As a newly certified Glitter Guru, I ask you to take the following oath:
I solemnly swear:
- To use my glitter powers for good, not evil.
- To always prep my eyelids before applying glitter.
- To blend, blend, blend until my heart is content.
- To clean up any glitter mess I create.
- To use biodegradable glitter whenever possible.
- To inspire others to embrace their inner sparkle.
Go forth and glitter responsibly! The world needs your sparkle. ✨
(Class dismissed!) 💖
For detailed product specifications and purchases, please go to :https://zenamakeup.com/products/liquid-glitter-waterproof-eyeshadow-stick
Leave a Reply