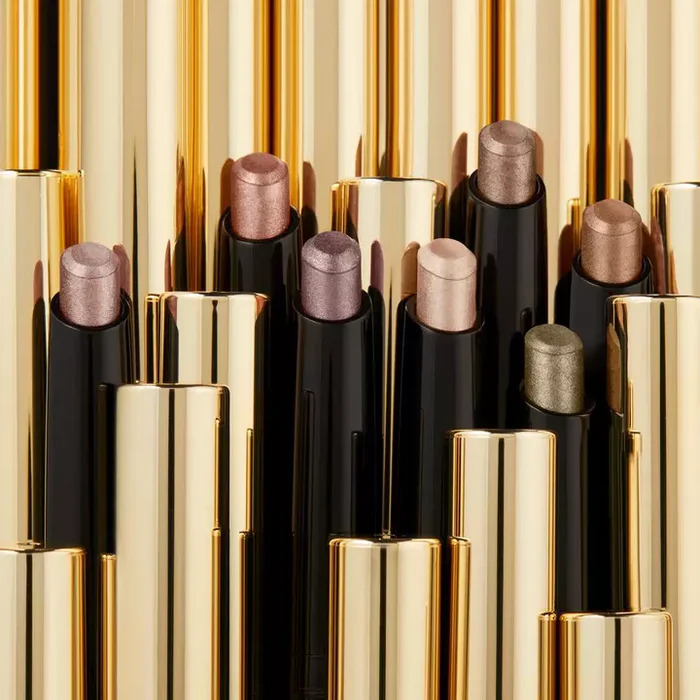
Lecture: Conquering the Crease: Achieving a Flawless Finish with Liquid Glitter Cream Eyeshadow Sticks ✨
Welcome, Glamour Gladiators! ⚔️
Today, we embark on a quest, a shimmering, sparkling, and utterly fabulous quest, to tame the beast known as creasing in the realm of liquid glitter cream eyeshadow sticks. We’ve all been there: you meticulously craft a dazzling eye look, step out feeling like a disco ball goddess, and then… BAM! An hour later, you catch a glimpse of yourself in the mirror and discover your lids resemble a crumpled paper bag, glitter migrating to the crease like glittery refugees fleeing a war-torn zone. 😩
Fear not, my dazzling disciples! Today, we will arm ourselves with the knowledge, the tools, and the chutzpah to conquer this cosmetic conundrum and achieve a truly crease-proof finish with our beloved liquid glitter cream eyeshadow sticks. This isn’t just about applying makeup; it’s about mastering the art of glitter alchemy! 🧙♀️
Lecture Outline:
-
Understanding the Enemy: The Crease Conspiracy 🕵️♀️
- Why do eyeshadows crease? (The scientific & comedic explanation)
- The villains: oil, gravity, and the blinking bandit.
- The role of skin type, climate, and lifestyle.
-
The Arsenal: Tools and Tactics for a Crease-Proof Canvas 🎨
- Primer power: Selecting the right primer for glitter domination.
- Setting spray sorcery: Locking in the sparkle.
- Brush basics: Application techniques that make a difference.
-
The Glitterati Guide: Choosing the Right Formula and Application 🌟
- Decoding the ingredients list: What to look for (and what to avoid).
- Layering like a pro: Techniques for maximizing impact and longevity.
- The "pat and blend" method: A detailed demonstration.
- Avoiding the "too much is never enough" trap (sometimes it is!).
-
The Aftercare: Maintaining Your Masterpiece 🛡️
- Touching up techniques: Keeping the sparkle alive.
- Preventative measures: Lifestyle tweaks for crease-free confidence.
- The importance of proper makeup removal (no glitter left behind!).
-
Troubleshooting: When Things Go Wrong (and How to Fix Them) 🚑
- Common creasing culprits and their solutions.
- Dealing with fallout and glitter migration.
- Salvaging a disastrous glitter situation.
1. Understanding the Enemy: The Crease Conspiracy 🕵️♀️
Why do eyeshadows crease? Let’s break it down, both scientifically and comedically.
The Scientific Explanation:
- Oil Production: Our eyelids are naturally oily. Sebum, the oily substance secreted by our sebaceous glands, is meant to keep our skin moisturized. However, this oil can break down the pigments and binders in eyeshadow, causing them to separate and collect in the creases of our eyelids.
- Gravity: Yep, good ol’ gravity! It’s constantly pulling everything down, including your eyeshadow. This force contributes to the migration of pigment into the creases.
- Blinking: We blink, on average, 15-20 times per minute. That’s a lot of eyelid friction! This constant movement and pressure can contribute to the breakdown and creasing of eyeshadow.
- Skin Elasticity: As we age, our skin loses elasticity. This means our eyelids may have more folds and wrinkles, providing more places for eyeshadow to settle and crease.
The Comedic Explanation:
Imagine your eyelids as tiny, perpetually hungry Pac-Mans. They’re constantly munching on the oil your skin produces, and that oil is like a slippery slide for your eyeshadow. Gravity is the grumpy landlord, demanding rent (in the form of pristine, crease-free lids), and blinking is the constant rave party happening on your face, shaking things up and causing chaos. It’s a glittery mess! 🕺
The Villains Identified:
- Oil: The slippery saboteur.
- Gravity: The grumpy landlord.
- The Blinking Bandit: The rave-throwing rebel.
The Role of Skin Type, Climate, and Lifestyle:
- Skin Type: Oily skin = a higher risk of creasing. Dry skin can also cause creasing if the eyeshadow draws moisture away from the skin.
- Climate: Humid climates exacerbate oil production, making creasing more likely. Dry climates can lead to dehydration and flakiness, which can also contribute to creasing.
- Lifestyle: Frequent rubbing of the eyes, strenuous activities that cause sweating, and even certain medications can affect oil production and skin condition, impacting eyeshadow creasing.
Table: The Crease Culprits and Their Impact
| Culprit | Impact on Eyeshadow | Mitigation Strategy |
|---|---|---|
| Oil Production | Breaks down eyeshadow, causing it to slip & crease. | Use oil-absorbing primer, blot eyelids throughout the day. |
| Gravity | Pulls eyeshadow downwards, into creases. | Use a long-wearing formula, set with powder, and avoid heavy application. |
| Blinking | Creates friction, causing eyeshadow to break down. | Use a crease-resistant formula, avoid rubbing eyes. |
| Skin Elasticity | More folds & wrinkles provide places for creasing. | Use a smoothing primer, avoid heavy or shimmery shadows in deep wrinkles. |
| Humidity | Increases oil production, exacerbating creasing. | Use a waterproof formula, set with powder, consider blotting papers. |
| Dryness | Can cause flakiness, leading to uneven eyeshadow. | Use a hydrating primer, avoid powder eyeshadows if skin is very dry. |
2. The Arsenal: Tools and Tactics for a Crease-Proof Canvas 🎨
Now, let’s equip ourselves with the tools and techniques to wage war on the crease!
Primer Power: Selecting the Right Primer for Glitter Domination:
Primer is the foundation of any successful eyeshadow look, especially when dealing with glitter. It creates a smooth, even surface for the eyeshadow to adhere to, and it helps to control oil production. But not all primers are created equal!
- For Oily Lids: Look for oil-controlling or mattifying primers. These will help to absorb excess oil and create a more stable base for your glitter. Ingredients like silica are your friends!
- For Dry Lids: Opt for hydrating primers that contain ingredients like hyaluronic acid or glycerin. These will help to moisturize the skin and prevent the eyeshadow from drying out and creasing.
- For Sensitive Lids: Choose fragrance-free and hypoallergenic primers to minimize irritation.
Application is Key! Apply a thin, even layer of primer to your eyelids, from lash line to brow bone. Allow it to set for a minute or two before applying your eyeshadow. Think of it like building a sandcastle – you need a solid foundation! 🏰
Setting Spray Sorcery: Locking in the Sparkle:
Setting spray is the ultimate finishing touch. It helps to lock in your eyeshadow, prevent creasing, and extend its wear time.
- Choose Wisely: Opt for a setting spray specifically designed for long wear and oil control.
- Spray Smart: Hold the bottle about 8-10 inches away from your face and spray in an "X" and "T" motion. Avoid spraying too close, as this can cause the eyeshadow to smudge.
- Let it Dry: Allow the setting spray to dry completely before touching your eyelids.
Brush Basics: Application Techniques That Make a Difference:
The type of brush you use and how you apply your eyeshadow can also impact creasing.
- Dense Brushes: Use dense, flat brushes to pack the glitter onto your eyelids. This will help to minimize fallout and prevent the glitter from spreading into the creases.
- Tapered Blending Brushes: Use tapered blending brushes to blend the edges of the eyeshadow and create a seamless transition.
- Gentle Application: Avoid rubbing or dragging the brush across your eyelids. Instead, use a patting motion to apply the eyeshadow. Remember, we’re building a masterpiece, not sanding a table! 🪵
3. The Glitterati Guide: Choosing the Right Formula and Application 🌟
Let’s dive into the nitty-gritty of selecting the perfect liquid glitter cream eyeshadow stick and mastering its application.
Decoding the Ingredients List: What to Look for (and What to Avoid):
Understanding the ingredients list can help you choose a formula that is less likely to crease.
-
Look For:
- Film Formers: These ingredients help to create a flexible, long-wearing film on the skin, preventing creasing. Examples include acrylates copolymer and trimethylsiloxysilicate.
- Emollients: These ingredients help to keep the skin moisturized and prevent it from drying out. Examples include shea butter and jojoba oil (in moderation!).
- Silicone-Based Formulas: Silicones can create a smooth, even surface and help to prevent creasing. However, some people are sensitive to silicones.
-
Avoid (or be cautious of):
- High Oil Content: Formulas with a high oil content are more likely to crease.
- Alcohol: Alcohol can dry out the skin, leading to creasing.
- Parabens: While generally considered safe, some individuals prefer to avoid parabens.
Layering Like a Pro: Techniques for Maximizing Impact and Longevity:
Layering is key to creating a vibrant, long-lasting glitter look.
- Primer: As discussed, the essential foundation.
- Base Eyeshadow (Optional): A matte or satin eyeshadow in a similar shade to your glitter can help to create a more even base and enhance the glitter’s color.
- Liquid Glitter Cream Eyeshadow Stick: Apply a thin layer of the glitter eyeshadow to your eyelids.
- Glitter Topper (Optional): For added sparkle, you can apply a loose glitter or glitter pigment on top of the cream eyeshadow.
- Setting Spray: Lock everything in place!
The "Pat and Blend" Method: A Detailed Demonstration:
This technique is crucial for minimizing creasing and maximizing glitter impact.
- Prep: Apply your primer and base eyeshadow (if using).
- Pat: Using your finger or a dense, flat brush, gently pat the glitter eyeshadow onto your eyelids. Avoid swiping or rubbing, as this can disrupt the base and cause creasing.
- Blend: Use a tapered blending brush to blend the edges of the glitter eyeshadow, softening any harsh lines.
- Build: If you want a more intense glitter effect, apply a second thin layer of glitter eyeshadow, using the same patting and blending technique.
- Set: Finish with a setting spray.
Avoiding the "Too Much is Never Enough" Trap (Sometimes it is!):
While glitter is undeniably fabulous, applying too much can actually increase the risk of creasing. Overloading your eyelids with product can weigh them down and make them more prone to folding. Start with a thin layer and build up the intensity gradually.
4. The Aftercare: Maintaining Your Masterpiece 🛡️
Congratulations, you’ve created a dazzling glitter eye look! Now, let’s learn how to keep it looking fresh all day long.
Touching Up Techniques: Keeping the Sparkle Alive:
Even with the best techniques, some creasing may still occur, especially after several hours of wear.
- Blotting: Gently blot your eyelids with a blotting paper to absorb excess oil.
- Re-Blending: Use a clean blending brush to gently re-blend the eyeshadow in the creases.
- Setting Spray: Reapply a light mist of setting spray to refresh the look.
Preventative Measures: Lifestyle Tweaks for Crease-Free Confidence:
- Hydration: Drink plenty of water to keep your skin hydrated.
- Avoid Rubbing Your Eyes: This is a major cause of creasing.
- Sun Protection: Protect your eyelids from sun damage by wearing sunglasses and applying sunscreen.
The Importance of Proper Makeup Removal (No Glitter Left Behind!):
Removing your makeup properly is essential for maintaining healthy skin and preventing irritation.
- Use a Gentle Makeup Remover: Choose a makeup remover specifically designed for removing waterproof and long-wearing makeup.
- Soak a Cotton Pad: Soak a cotton pad with makeup remover and gently press it against your eyelids for a few seconds to dissolve the makeup.
- Wipe Gently: Wipe away the makeup in a downward motion. Avoid rubbing or tugging at your skin.
- Double Cleanse (Optional): Follow up with a gentle cleanser to remove any remaining residue.
- Moisturize: Apply a moisturizer to your eyelids to replenish hydration.
5. Troubleshooting: When Things Go Wrong (and How to Fix Them) 🚑
Even the most skilled makeup artists encounter challenges. Let’s address some common glitter eyeshadow issues and their solutions.
Table: Troubleshooting Common Creasing Culprits
| Problem | Possible Cause | Solution |
|---|---|---|
| Eyeshadow Creasing Within Hours | Oily lids, wrong primer, too much product | Use oil-absorbing primer, blot eyelids, apply thinner layers, set with powder & spray. |
| Glitter Fallout | Loose glitter, poor adhesion, dry skin | Use glitter glue, apply glitter with a dense brush, hydrate skin, apply eyeshadow before foundation. |
| Eyeshadow Feels Heavy and Cakey | Too much product, dry skin | Apply thinner layers, use hydrating primer, blend thoroughly, avoid powder eyeshadows. |
| Eyeshadow Irritating the Eyelids | Sensitive skin, fragrance, harsh ingredients | Use hypoallergenic primer and eyeshadow, avoid fragrance, patch test new products. |
| Difficulty Blending Glitter Shadows | Dry formula, poor application | Use a damp brush, apply glitter over a cream base, blend quickly before it sets, use a blending brush. |
Dealing with Fallout and Glitter Migration:
- Apply Eyeshadow Before Foundation: This allows you to clean up any fallout without ruining your foundation.
- Use Eyeshadow Shields: These disposable shields can be placed under your eyes to catch fallout.
- Tape Technique: Apply a piece of tape under your eyes to catch fallout.
- Damp Brush: Use a damp brush to pick up and remove any stray glitter particles.
Salvaging a Disastrous Glitter Situation:
- Don’t Panic! Take a deep breath and assess the situation.
- Remove Excess Product: Use a cotton swab or tissue to gently remove any excess glitter or eyeshadow.
- Re-Blend: Use a clean blending brush to re-blend the eyeshadow and smooth out any harsh lines.
- Start Over (If Necessary): If the situation is beyond repair, don’t be afraid to remove the entire look and start over. It happens to the best of us!
Conclusion:
Congratulations, my glitter-loving comrades! You have now been armed with the knowledge and techniques to conquer the crease and achieve a flawless, crease-proof finish with your liquid glitter cream eyeshadow sticks. Remember, practice makes perfect, so don’t be afraid to experiment and find what works best for you. Now go forth and sparkle! ✨🌟💫
For detailed product specifications and purchases, please go to :https://zenamakeup.com/products/liquid-glitter-waterproof-eyeshadow-stick
Leave a Reply