Lecture: Sparkling Solutions – Navigating the Galaxy of Deluxe Liquid Glitter Cream Eyeshadow Sticks
Welcome, Glitterati! ✨ Prepare yourselves for a deep dive into the shimmering, dazzling, and sometimes downright messy world of deluxe liquid glitter cream eyeshadow sticks. I’m your guide, Professor Sparkle McShimmerpants, and today we’re conquering the quest for that perfect portable sparkle.
(Disclaimer: Side effects of this lecture may include an uncontrollable urge to buy more glitter and a sudden desire to wear sparkly socks. You have been warned.)
Lecture Outline:
- The Allure of the Shimmer Stick: Why Bother with Glitter in a Stick? (Why not just throw loose glitter at your face? Well…)
- Decoding the Deluxe: What Makes a Glitter Stick "Deluxe"? (Ingredients, formulation, and promises, oh my!)
- Glitter Spectrum: Fine vs. Chunky – Choosing Your Sparkle Level (Subtle glow or full-on disco ball? We’ll decide.)
- The Anatomy of a Great Glitter Stick: Key Ingredients and Considerations (Parabens? Oils? Let’s get scientific!)
- Application Techniques: From Subtle Shimmer to Galactic Glam (How to apply without looking like a preschooler.)
- Top Contenders: A Glitter Stick Showdown! (Round ’em up, partner! We’re reviewing!)
- Longevity and Removal: Making the Sparkle Last (and Vanish) (Because no one wants glitter in their eyebrows for a week.)
- Troubleshooting Glitter Woes: Preventing Fallout and Creasing (The dark side of sparkle… and how to avoid it.)
- DIY Glitter Stick? Maybe Not. But Let’s Talk About It. (Just kidding… mostly.)
- The Future of Sparkle: What’s Next for Glitter Sticks? (Predicting the sparkly apocalypse… or at least some cool new trends.)
1. The Allure of the Shimmer Stick: Why Bother with Glitter in a Stick?
Let’s be honest, glitter is the confetti of the beauty world. It’s fun, festive, and has a knack for showing up where it absolutely doesn’t belong (like your morning coffee ☕). But loose glitter? Shudders. It’s a commitment. A messy commitment. A commitment that could end with glitter embedded in your carpet for the next decade.
Enter the liquid glitter cream eyeshadow stick: the civilized way to embrace your inner disco ball.
Why choose a stick over loose glitter?
- Convenience: Toss it in your purse and bam, instant sparkle on the go! No need to lug around a whole glitter kit and pray you don’t spill it everywhere.
- Control: Precise application means you can target specific areas without a glitter explosion. Think of it as glitter sniper rifle vs. a glitter grenade. 🎯
- Less Fallout: A good formula will adhere to your lid, minimizing the dreaded glitter migration to your cheeks (and everywhere else).
- Blendability: Cream formulas blend beautifully, allowing you to create subtle washes of shimmer or build up to intense glittery goodness.
- Less Mess: Need I say more?
(Professor McShimmerpants’ Pro Tip: Always have a lint roller handy. Just in case.)
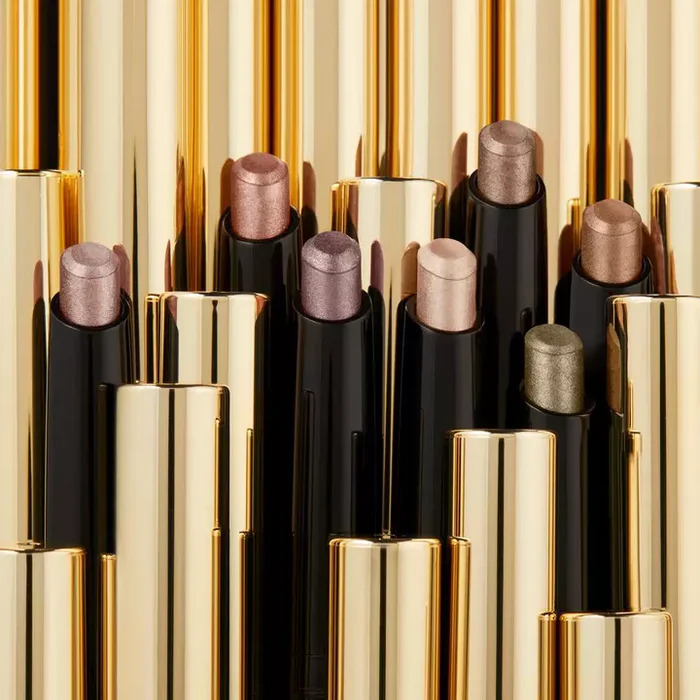
2. Decoding the Deluxe: What Makes a Glitter Stick "Deluxe"?
Not all glitter sticks are created equal. Some are fabulous, some are forgettable, and some are just plain… sticky. So, what separates the "deluxe" from the "meh"?
Key Indicators of a Deluxe Glitter Stick:
| Feature | Deluxe Level | Budget Level |
|---|---|---|
| Pigmentation | Intense color payoff with minimal effort. The glitter should POP! ✨ | Sheer color payoff, requiring multiple layers. Glitter may be sparse. 😐 |
| Formula | Smooth, creamy texture that glides on effortlessly. Doesn’t feel sticky, dry, or gritty. Feels like a luxurious dream. ☁️ | Often sticky, dry, or gritty. May tug on the eyelid during application. Feels like a regretful decision. 😖 |
| Glitter Quality | High-quality glitter that’s reflective and multi-dimensional. Often made of PET or synthetic mica for a smooth feel. 💎 | Low-quality glitter that can look dull or chunky. May feel rough or scratchy. 🧱 |
| Longevity | Long-wearing formula that stays put for hours without creasing, fading, or significant fallout. A true commitment to sparkle. 🕰️ | Short-wearing formula that creases, fades, and sheds glitter like a Christmas tree in January. Gone in 60 seconds. 💨 |
| Ingredients | Contains skin-loving ingredients like vitamin E, jojoba oil, or hyaluronic acid. May be free of parabens, sulfates, and phthalates. 🌿 | May contain harsh chemicals or irritants. Ingredient list may be vague or nonexistent. ⚠️ |
| Packaging | Sturdy and well-designed packaging that prevents breakage or leakage. Feels luxurious and looks pretty on your vanity. 🎀 | Flimsy packaging that’s prone to breaking or leaking. May look and feel cheap. 🗑️ |
| Price | Higher price point, reflecting the quality of the ingredients and formulation. You get what you pay for! 💰💰💰 | Lower price point, but may compromise on quality. Sometimes a steal, sometimes a disappointment. 💸 |
In short, a deluxe glitter stick is an investment in sparkle that delivers on its promises of pigmentation, longevity, and overall fabulousness.
3. Glitter Spectrum: Fine vs. Chunky – Choosing Your Sparkle Level
Glitter comes in all shapes and sizes, from the subtle shimmer of micro-glitter to the bold statement of chunky glitter. Choosing the right size depends on your desired look and comfort level.
- Fine Glitter: Think subtle shimmer, a delicate glow. It’s perfect for everyday wear or adding a touch of sophistication to your evening look. It blends easily and is less likely to cause fallout. Think of it as the "pearl" of the glitter world. 🦪
- Chunky Glitter: This is where the party starts! Chunky glitter makes a bold statement, adding dimension and drama to your eyes. It’s perfect for special occasions, festivals, or when you just want to feel extra fabulous. However, it can be more prone to fallout and may require a glitter glue for extra hold. Think of it as the "confetti cannon" of the glitter world. 🎊
Here’s a handy guide to help you decide:
| Glitter Type | Appearance | Best For | Fallout Risk | Application Tips |
|---|---|---|---|---|
| Fine Glitter | Small, closely packed glitter particles that create a smooth, shimmering effect. | Everyday wear, subtle glam, adding a touch of shimmer to a neutral look, highlighting inner corners of the eyes. | Low | Can be applied directly from the stick or blended with a brush or finger. |
| Chunky Glitter | Larger, individual glitter particles that create a textured, eye-catching effect. | Special occasions, festivals, bold looks, creating a dramatic effect, adding dimension to the lid. | High | Best applied with a finger or a small brush. Use a glitter glue or primer for extra hold. Press the glitter onto the lid rather than swiping to minimize fallout. |
(Professor McShimmerpants’ Pro Tip: Don’t be afraid to mix and match! Layer fine glitter over chunky glitter for a multidimensional effect.)
4. The Anatomy of a Great Glitter Stick: Key Ingredients and Considerations
Reading the ingredient list of a glitter stick might not sound glamorous, but it’s crucial for ensuring you’re putting something safe and effective on your delicate eyelids.
Here are some key ingredients to look for (and avoid):
- Good Guys:
- Emollients (e.g., Jojoba Oil, Shea Butter, Vitamin E): These ingredients help to moisturize and soften the skin, preventing the formula from drying out and creasing.
- Film Formers (e.g., Silicones, Polymers): These create a flexible film that helps the glitter adhere to the lid and prevents fallout.
- Humectants (e.g., Hyaluronic Acid, Glycerin): These attract moisture to the skin, keeping it hydrated and plump.
- Questionable Characters:
- Parabens (e.g., Methylparaben, Propylparaben): Preservatives that have been linked to hormone disruption. Many brands are now paraben-free.
- Sulfates (e.g., SLS, SLES): Harsh detergents that can irritate the skin and cause dryness.
- Phthalates (e.g., DBP, DEP, DEHP): Plasticizers that have been linked to health concerns.
- Alcohol Denat.: Can be drying and irritating to the skin, especially around the delicate eye area.
Important Considerations:
- Allergies: Always check the ingredient list for potential allergens.
- Sensitivity: If you have sensitive skin, opt for hypoallergenic and fragrance-free formulas.
- Ethical Sourcing: Consider brands that use ethically sourced glitter (e.g., synthetic mica instead of natural mica, which can be linked to child labor).
(Professor McShimmerpants’ Pro Tip: When in doubt, do a patch test! Apply a small amount of the glitter stick to your inner arm and wait 24 hours to see if you have any reaction.)
5. Application Techniques: From Subtle Shimmer to Galactic Glam
Applying a glitter stick might seem straightforward, but there are a few tricks to ensure a flawless, long-lasting sparkle.
Techniques for Different Looks:
- Subtle Shimmer:
- Apply a thin layer of the glitter stick to the center of your eyelid.
- Gently blend the edges with your finger or a soft brush.
- This creates a subtle halo effect that catches the light.
- All-Over Glam:
- Apply the glitter stick to your entire eyelid, from lash line to crease.
- Blend the edges with a brush to create a seamless transition.
- Build up the intensity by layering the glitter stick.
- Smoked Out Sparkle:
- Apply a dark eyeshadow to your lid and blend it out.
- Apply the glitter stick over the dark eyeshadow, focusing on the center of the lid.
- Blend the edges of the glitter stick with a brush to create a smoky effect.
- Graphic Glitter:
- Use a fine-tipped brush to apply the glitter stick in a precise line or shape.
- This is perfect for creating a glittery winged liner or adding a touch of sparkle to your lower lash line.
Tips for Flawless Application:
- Prime Your Lids: Use an eyeshadow primer to create a smooth base and prevent creasing.
- Use Your Fingers: The warmth of your fingers can help to melt the glitter stick and blend it seamlessly.
- Pat, Don’t Swipe: Patting the glitter stick onto your lid will minimize fallout and maximize pigmentation.
- Set It and Forget It: Use a setting spray to lock in the sparkle and prevent it from migrating.
(Professor McShimmerpants’ Pro Tip: For extra staying power, apply a glitter glue or adhesive before applying the glitter stick. This is especially important for chunky glitter.)
6. Top Contenders: A Glitter Stick Showdown!
Alright, folks, time for the main event! Let’s pit some popular glitter sticks against each other in a battle for ultimate sparkle supremacy!
(Disclaimer: These are based on general trends and subjective opinions. Your mileage may vary.)
| Glitter Stick | Price Range | Glitter Type | Pigmentation | Longevity | Blendability | Overall Rating | Pros | Cons |
|---|---|---|---|---|---|---|---|---|
| Stila Glitter & Glow Liquid Eyeshadow | $$$ | Fine | High | High | Excellent | ⭐️⭐️⭐️⭐️⭐️ | Intense shimmer, long-lasting, easy to blend, wide range of shades. | Can be pricey, some shades may have a slightly gritty texture. |
| Laura Mercier Caviar Stick Eye Colour | $$$ | Fine | Medium | Medium | Excellent | ⭐️⭐️⭐️⭐️ | Creamy texture, easy to blend, buildable coverage, comfortable to wear. | Not all shades have a noticeable glitter effect, can crease on oily lids. |
| ColourPop Super Shock Shadow | $ | Varies | High | Medium | Good | ⭐️⭐️⭐️⭐️ | Affordable, wide range of shades and finishes, unique bouncy texture. | Can be prone to drying out, requires a specific application technique. |
| NYX Professional Makeup Jumbo Eye Pencil | $ | Fine (some) | Medium | Low | Good | ⭐️⭐️⭐️ | Very affordable, versatile, can be used as an eyeliner or eyeshadow base. | Limited glitter shades, prone to creasing, not very long-lasting. |
| Haus Labs PhD Hybrid Lip Glaze | $$$ | Fine | High | High | Great | ⭐️⭐️⭐️⭐️⭐️ | Can be used on the lips AND eyes, high end, very pigmented, and long lasting. | The color is very saturated, so it can be too much for everyday wear. |
(Professor McShimmerpants’ Pro Tip: Read reviews and watch swatches before buying a glitter stick to get a better idea of the color and texture.)
7. Longevity and Removal: Making the Sparkle Last (and Vanish)
A glittery eye look is only as good as its staying power. No one wants to look like they’ve been attacked by a fairy halfway through the day.
Tips for Extending the Sparkle:
- Prime Time: As mentioned before, a good eyeshadow primer is essential for preventing creasing and fallout.
- Setting Spray: Spritz your face with a setting spray after applying your makeup to lock in the sparkle.
- Avoid Touching: Resist the urge to touch your eyes throughout the day. This will only transfer the glitter and cause it to fade.
- Blotting Papers: Keep blotting papers on hand to absorb excess oil and prevent creasing.
Removing the Glitter Without a Glitterpocalypse:
- Oil-Based Cleanser: An oil-based cleanser is the best way to dissolve glitter and remove it gently.
- Micellar Water: Micellar water can also be effective, but you may need to use a few cotton pads.
- Tape Trick: For stubborn glitter, wrap a piece of tape around your finger, sticky side out, and gently dab it over the affected area.
- Be Gentle: Avoid rubbing your eyes harshly, as this can irritate the skin and cause wrinkles.
(Professor McShimmerpants’ Pro Tip: Invest in a good makeup remover specifically designed for glitter. Your skin will thank you.)
8. Troubleshooting Glitter Woes: Preventing Fallout and Creasing
Even with the best products and techniques, glitter can sometimes be a challenge. Here are some common problems and how to solve them:
- Fallout:
- Cause: Dry formula, poor adhesion, excessive application.
- Solution: Use a glitter glue or primer, apply the glitter stick in thin layers, pat the glitter onto the lid instead of swiping.
- Creasing:
- Cause: Oily eyelids, heavy formula, lack of primer.
- Solution: Use an oil-controlling primer, apply a thin layer of the glitter stick, set your makeup with a powder.
- Irritation:
- Cause: Allergies, harsh ingredients, sensitive skin.
- Solution: Choose hypoallergenic formulas, avoid products with known irritants, do a patch test before applying to your eyes.
- Drying:
- Cause: Alcohol-based formulas, dry skin, overuse.
- Solution: Choose hydrating formulas, use a moisturizer before applying the glitter stick, avoid applying the glitter stick every day.
(Professor McShimmerpants’ Pro Tip: If you’re struggling with fallout, try applying your eye makeup before your foundation. This way, you can easily clean up any glitter that falls onto your face.)
9. DIY Glitter Stick? Maybe Not. But Let’s Talk About It.
Okay, let’s be real. While the internet is bursting with DIY beauty hacks, making your own glitter stick is generally not a good idea. The risk of irritation, infection, and just plain messiness is too high.
Why DIY Glitter Sticks are a Bad Idea:
- Ingredient Safety: You need to be incredibly careful about the ingredients you use around your eyes. Some glues and adhesives can be toxic or irritating.
- Sanitization: It’s difficult to sanitize homemade products properly, increasing the risk of bacterial contamination.
- Formula Stability: Creating a stable formula that won’t separate, dry out, or become rancid is challenging.
- Glitter Safety: Not all glitter is eye-safe. You need to use cosmetic-grade glitter that’s specifically designed for use around the eyes. Craft glitter can be sharp and abrasive.
However, If you are absolutely determined to DIY…
- Use Cosmetic-Grade Glitter Only: This is non-negotiable.
- Start with a Simple Base: A clear lip balm or eyeshadow primer can work as a base.
- Sanitize Everything: Clean your tools and containers thoroughly.
- Do a Patch Test: Test the mixture on your inner arm before applying it to your eyes.
- Proceed with Extreme Caution: And don’t blame me if things go horribly wrong!
(Professor McShimmerpants’ Pro Tip: Seriously, just buy a glitter stick. It’s safer, easier, and probably cheaper in the long run.)
10. The Future of Sparkle: What’s Next for Glitter Sticks?
The beauty industry is constantly evolving, and glitter sticks are no exception. So, what can we expect to see in the future of sparkle?
- Sustainable Glitter: Expect to see more brands using biodegradable glitter made from plant-based materials.
- Customizable Glitter Sticks: Imagine being able to create your own unique glitter stick by mixing and matching different colors and textures.
- Smart Glitter: Glitter that changes color or reacts to light. The possibilities are endless!
- Glitter-Infused Skincare: Glitter sticks that not only add sparkle but also deliver skincare benefits.
- Virtual Glitter: Augmented reality filters that allow you to try on different glitter looks without actually applying any product.
(Professor McShimmerpants’ Pro Tip: Get ready for the glitter revolution! The future is bright… and sparkly!)
Conclusion:
Congratulations, Glitterati! You’ve successfully navigated the glittering galaxy of liquid glitter cream eyeshadow sticks. Armed with this knowledge, you’re now ready to find your perfect sparkle and unleash your inner disco ball.
Remember, glitter is all about having fun and expressing yourself. So, go forth, experiment, and don’t be afraid to shine! ✨
(Class dismissed! Now go forth and sparkle!)
For detailed product specifications and purchases, please go to :https://zenamakeup.com/products/liquid-glitter-waterproof-eyeshadow-stick
Leave a Reply