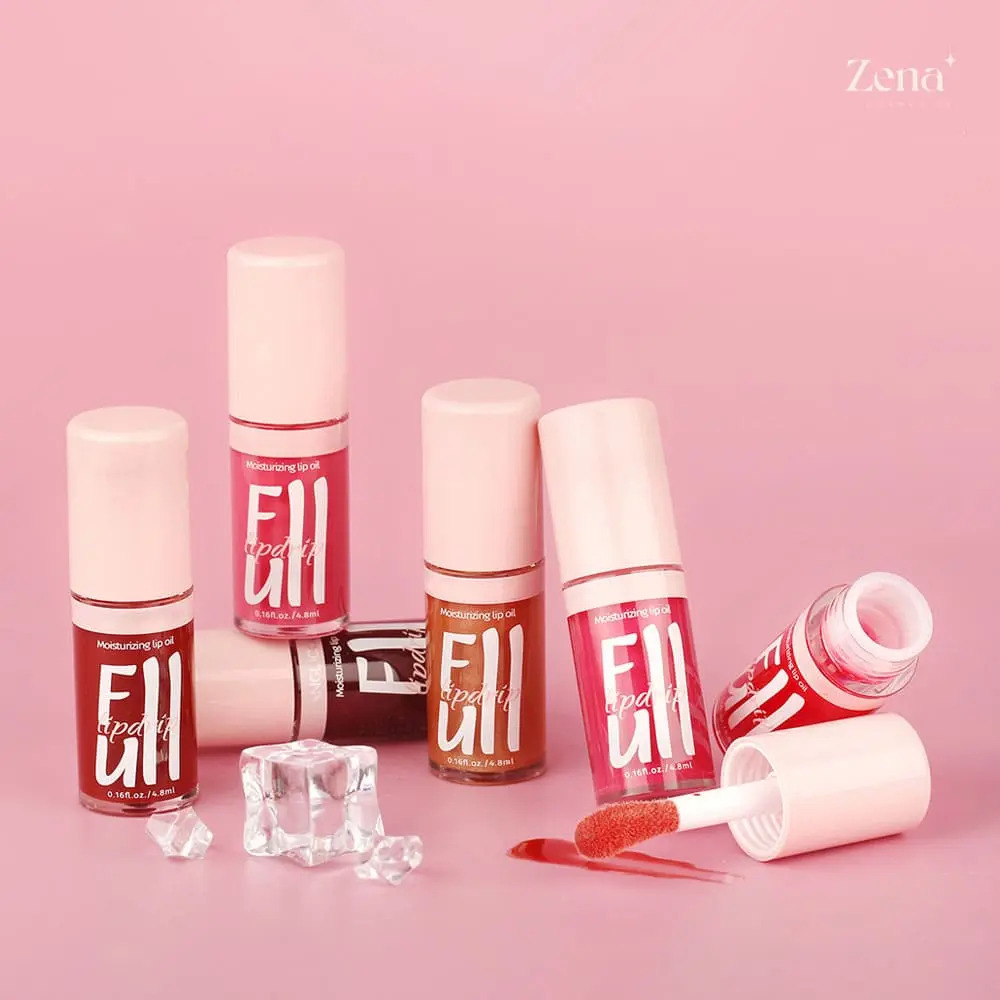
Lecture: The Art & Science of Juicy Glam: Mastering Lip Oil Application for a Smooth, Kissable Finish 💋
Welcome, Glam Gurus, to Lip Oil University! 🎓 Today’s lecture will delve into the often-underestimated, yet surprisingly complex, world of lip oil application. Forget your grandmother’s waxy lip balms! We’re talking next-level hydration, a touch of glamorous shine, and a finish so smooth, it’ll make your lips look like they’ve been kissed by an angel (or at least a very well-paid aesthetician).
So, grab your favorite Juicy Glam Lip Oil (or a comparable contender – we’re open-minded here!), your notepad, and get ready to become a certified Lip Oil Application Expert! 👩🎓
I. Lip Oil: More Than Just Shiny Stuff (The Why Behind the How)
Before we dive headfirst into application techniques, let’s understand why lip oil is different and why it deserves its place in your beauty arsenal.
Think of your lips like a delicate, vintage silk scarf. You wouldn’t just toss it in the washing machine with bleach and hope for the best, would you? No! You’d treat it with care, understanding its fragile nature.
Your lips are the same. They’re constantly exposed to the elements: sun, wind, dryness, the occasional overly enthusiastic kiss (we’ve all been there!), and the harsh chemicals lurking in some lipsticks. Lip oil acts as that gentle, protective conditioner for your pout.
Here’s the breakdown of its fabulousness:
- Hydration Powerhouse: Unlike some lipsticks that can dry your lips out (the horror!), lip oils are packed with moisturizing ingredients like jojoba oil, coconut oil, argan oil, and hyaluronic acid. These ingredients sink deep into the skin, providing long-lasting hydration and preventing chapping. 💧
- Glossy Goodness, Minus the Stickiness: Remember those sticky, goopy lip glosses from the early 2000s? Yeah, let’s not relive that. Lip oils offer a beautiful, healthy-looking shine without the annoying stickiness that attracts every rogue hair strand within a five-mile radius. ✨
- Subtle Color, Major Impact: Many lip oils come with a subtle tint, enhancing your natural lip color without the commitment of a full-blown lipstick. Perfect for those "no makeup makeup" days or when you just want a little something extra. 🎨
- Healing Properties: Some lip oils contain ingredients like Vitamin E and antioxidants, which help to heal and protect your lips from environmental damage. Consider it a spa day for your pout! 🧘♀️
II. Prepping for Perfection: Laying the Foundation for Lip Oil Glory
Just like you wouldn’t build a house on a shaky foundation, you can’t expect a flawless lip oil application on chapped, flaky lips. Prepping your lips is crucial for achieving that smooth, kissable finish we’re after.
Here’s your step-by-step guide to lip prep perfection:
- Exfoliate, Exfoliate, Exfoliate! 🧽 This is non-negotiable! Dead skin cells are the enemy of smooth lips. You can use a lip scrub (store-bought or DIY – a mixture of sugar and honey works wonders) or gently exfoliate with a soft toothbrush.
- DIY Lip Scrub Recipe:
- 1 teaspoon granulated sugar (brown or white, your choice!)
- ½ teaspoon honey (for hydration and antibacterial properties)
- A drop of olive oil or coconut oil (for extra moisture)
- Mix all ingredients together and gently massage onto your lips in circular motions for 1-2 minutes. Rinse with warm water and pat dry.
- DIY Lip Scrub Recipe:
- Hydrate Like Your Life Depends On It! 💧 Apply a hydrating lip balm before your lip oil. This creates a moisture barrier and prevents the oil from just sitting on top of dry skin. Look for balms containing shea butter, cocoa butter, or ceramides.
- Optional: Lip Liner for Definition. ✏️ If you want a more defined lip shape, especially if you’re using a tinted lip oil, apply a lip liner that matches your natural lip color or the shade of the oil. This will prevent the oil from bleeding and create a more polished look.
Let’s visualize this with a handy table:
| Step | Action | Why? | Product Recommendations (Optional) |
|---|---|---|---|
| 1. Exfoliate | Gently scrub away dead skin cells. | Removes flakes, creating a smooth surface for even application. | Store-bought: Fresh Sugar Lip Polish, DIY: Sugar & Honey Scrub |
| 2. Hydrate | Apply a moisturizing lip balm. | Provides a base layer of hydration, preventing the oil from being absorbed too quickly and leaving your lips feeling dry. | Affordable: Aquaphor Healing Ointment, Luxury: Laneige Lip Sleeping Mask (can be used during the day as a balm) |
| 3. Define | Apply lip liner (optional). | Creates a defined lip shape, prevents bleeding, and adds dimension to your lips. Especially useful for tinted lip oils. | Drugstore: NYX Slim Lip Pencil, High-End: Charlotte Tilbury Lip Cheat Lip Liner |
III. The Art of Application: From Swiping to Stroking (Yes, It Matters!)
Now for the main event: applying the lip oil itself! This isn’t rocket science, but there are definitely techniques that will elevate your application from "meh" to "magnificent."
Here’s the breakdown:
- Choose Your Weapon (Applicator, That Is!) ⚔️ Most lip oils come with a doe-foot applicator, which is perfect for precise application. However, you can also use your fingertip for a more natural, diffused look.
- Less is More (Seriously!) 🤏 Don’t overload the applicator. Start with a small amount of product and build up if needed. Too much lip oil can feel greasy and slippery. Remember, we’re aiming for a hydrated sheen, not a glazed donut.
- The Dot & Swipe Method: Apply a small dot of lip oil to the center of your bottom lip and another dot to the center of your top lip. Then, gently swipe the applicator across your lips, spreading the oil evenly.
- The Finger Tap Method: Apply a small amount of lip oil to your fingertip and gently tap it onto your lips, blending it outwards. This method is great for achieving a more natural, "just kissed" look.
- Don’t Forget the Corners! ⚠️ Pay attention to the corners of your mouth, as they tend to be the driest. Make sure to apply a small amount of oil to these areas to prevent chapping.
- Blot, Blot, Blot! (If Necessary) 🧻 If you feel like you’ve applied too much oil, gently blot your lips with a tissue. This will remove excess product and prevent that greasy feeling.
Let’s illustrate these techniques with some emojis:
- Dot & Swipe: 💧➡️👄
- Finger Tap: 👆💧➡️👄
- Blot: 👄➡️🧻
IV. Troubleshooting: Common Lip Oil Application Woes (and How to Fix Them!)
- Dot & Swipe: 💧➡️👄
- Finger Tap: 👆💧➡️👄
- Blot: 👄➡️🧻
IV. Troubleshooting: Common Lip Oil Application Woes (and How to Fix Them!)
Even the most seasoned lip oil aficionados can run into application hiccups. Here are some common problems and their solutions:
- Problem: My lip oil feels greasy.
- Solution: You’re probably using too much! Start with a smaller amount and blot off any excess with a tissue. You might also want to try a lip oil with a lighter formula.
- Problem: My lip oil is bleeding outside my lip line.
- Solution: Use a lip liner to create a barrier around your lips. You can also try applying the lip oil with your fingertip for more control.
- Problem: My lips still feel dry after applying lip oil.
- Solution: Your lips are probably severely dehydrated. Make sure you’re exfoliating regularly and using a hydrating lip balm before applying the lip oil. You might also want to consider using a more occlusive balm at night.
- Problem: My lip oil has a weird taste.
- Solution: Check the ingredient list! Some lip oils contain artificial flavors or sweeteners that can taste unpleasant. Opt for a lip oil with natural flavors or one that is fragrance-free.
- Problem: The color of my tinted lip oil is uneven.
- Solution: Exfoliate your lips thoroughly to remove any dead skin cells that might be causing the uneven color. Apply the lip oil in thin, even layers, and blend well with your fingertip.
V. Lip Oil & Lipstick: A Harmonious Relationship (Or, How to Layer Like a Pro)
Can you wear lip oil with lipstick? Absolutely! In fact, layering lip oil with lipstick can create a stunning and long-lasting look. Here’s how to do it right:
- Option 1: Lip Oil as a Primer. Apply a thin layer of lip oil before your lipstick. This will create a smooth base and prevent the lipstick from drying out your lips. Blot off any excess oil before applying the lipstick to prevent it from slipping.
- Option 2: Lip Oil as a Topper. Apply your lipstick as usual, then dab a small amount of lip oil on top for added shine and hydration. This works best with matte lipsticks, as the oil will help to soften the finish.
- Option 3: The Lip Oil Sandwich. Apply a thin layer of lip oil, followed by your lipstick, and then another thin layer of lip oil. This creates a super-hydrated and glossy look.
VI. Beyond the Basics: Advanced Lip Oil Techniques (For the Truly Obsessed)
Ready to take your lip oil game to the next level? Here are some advanced techniques for the truly obsessed:
- The Lip Oil Mask: Apply a thick layer of lip oil to your lips before bed and leave it on overnight. This will deeply hydrate and nourish your lips while you sleep. Wake up to a soft, plump pout!
- The Lip Oil & Lip Scrub Combo: Exfoliate your lips with a lip scrub, then immediately apply a generous amount of lip oil. This will help to lock in moisture and prevent chapping.
- The Custom Lip Oil Blend: Mix a few drops of your favorite essential oil (like peppermint or lavender) into your lip oil for added benefits and a personalized scent. Always use essential oils that are safe for topical application and dilute them properly.
VII. Choosing Your Weapon: Navigating the Lip Oil Landscape (A Buyer’s Guide)
With so many lip oils on the market, choosing the right one can feel overwhelming. Here’s a guide to help you navigate the lip oil landscape:
- Consider your needs: Are you looking for intense hydration, a subtle tint, or a long-lasting shine?
- Read the ingredient list: Look for oils that are rich in moisturizing ingredients like jojoba oil, coconut oil, argan oil, and hyaluronic acid. Avoid oils that contain harsh chemicals or artificial fragrances.
- Test before you buy: If possible, try a sample of the lip oil before you buy it to make sure you like the texture, scent, and color.
- Read reviews: See what other people are saying about the lip oil before you make a purchase.
Here’s a quick reference table to get you started:
| Feature | Consider this… | Examples of Ingredients/Formulas |
|---|---|---|
| Hydration | For dry, chapped lips, prioritize oils with hyaluronic acid, shea butter, and ceramides. | Hyaluronic acid lip oils, Shea butter lip balms, Ceramide-enriched formulas. |
| Tint | Choose a tint that complements your skin tone. Consider sheer formulas for a natural look. | Berry tints for cool tones, Peach tints for warm tones, Universal clear oils. |
| Shine | Consider the level of shine you desire. Some oils offer a subtle sheen, while others provide a high-gloss finish. | High-shine formulas with light-reflecting particles, Matte lip oils (rare, but exist!), Natural sheen oils. |
| Ingredients | Look for nourishing oils like Jojoba, Argan, Coconut, and Vitamin E. Avoid harsh chemicals and artificial scents. | Jojoba oil lip oils, Argan oil lip treatments, Coconut oil infused balms, Vitamin E enriched oils. |
| Applicator | Doe-foot applicators offer precision, while rollerball applicators provide a massaging effect. | Standard doe-foot applicators, Rollerball applicators for lip massage, Squeeze tube applicators for easy dispensing. |
VIII. Conclusion: Embrace the Juicy Glam!
Congratulations, Glam Gurus! You’ve officially completed Lip Oil University! You are now armed with the knowledge and skills to achieve a smooth, kissable finish with your favorite lip oil.
Remember, practice makes perfect. Don’t be afraid to experiment with different techniques and products until you find what works best for you. And most importantly, have fun! Lip oil is a versatile and fun way to enhance your natural beauty. So go out there and embrace the Juicy Glam! 🎉
Final Exam (Just Kidding… Mostly!)
What are the three essential steps for prepping your lips for lip oil application?
(Answer: Exfoliate, Hydrate, Define (optional))
Good luck, and may your lips always be hydrated and fabulous! 💋
For detailed product specifications and purchases, please go to :https://zenamakeup.com/products/juicy-glam-lip-oil-gloss
Leave a Reply