Lecture: Using the Matte End of Liquid Dual-End Fusion Eyeshadow as an All-Day Base: A Masterclass in Eye Alchemy 🧙♀️
Alright, class, settle down, settle down! Put away your spreadsheets and your doom-scrolling, because today, we’re diving headfirst into the magical, mystical, and often misunderstood world of eyeshadow bases! 🎨👁️
Specifically, we’re tackling a topic near and dear to my makeup-loving heart: Using the matte end of a liquid dual-end fusion eyeshadow as an all-day base.
Now, I know what you’re thinking: "Professor, isn’t that a little unorthodox? Isn’t that like using a Ferrari to pick up groceries?" Well, maybe. But a Ferrari can pick up groceries, and it’ll look damn good doing it! Similarly, a high-quality liquid matte eyeshadow can be an absolutely stellar eyeshadow base, providing you know what you’re doing.
So, grab your notebooks, your favorite coffee (or something stronger, no judgment here 🍹), and prepare to have your eye makeup game forever changed!
Lecture Outline:
- The Case for the Base: Why Bother? (And Why We’re Rebelling Against the Norm!) 🙅♀️
- Liquid Dual-End Fusion Eyeshadow: A Deep Dive into the Weapon of Choice. ⚔️
- Why the Matte End? A Texture Tale. 🧶
- The Application Art: From Blob to Brilliance. 🖌️
- Choosing Your Shade: Finding the Perfect Soulmate for Your Eyes. 👯♀️
- Blending Like a Boss: Techniques for a Seamless Canvas. 🎨
- The Good, the Bad, and the Potentially Ugly: Troubleshooting Common Issues. 🚑
- Setting the Stage: Powder Shadows & Beyond! ✨
- The Final Verdict: Is It Worth It? 🤔
- Bonus Round: Pro Tips & Tricks from the Trenches! 💣
1. The Case for the Base: Why Bother? (And Why We’re Rebelling Against the Norm!) 🙅♀️
Let’s be honest. Applying eyeshadow without a base is like trying to paint a masterpiece on a greasy pizza box. It’s just… not going to work. 🍕➡️🎨🚫
An eyeshadow base, in its simplest form, acts like a primer for your eyelids. It creates a smooth, even canvas for your eyeshadow to adhere to, preventing creasing, fading, and that dreaded patchy, uneven application. Think of it as the foundation for your eye look (pun intended!).
Benefits of Using an Eyeshadow Base:
- Increased Pigment Payoff: Your eyeshadows will look way more vibrant and true to color. Think "muted watercolor" versus "bold, impactful statement."
- Extended Wear Time: Say goodbye to midday creasing and faded eyeshadow! A good base will keep your look locked in all day (or night) long. ⏰
- Smoother Application: No more struggling to blend! A base provides a slip that allows your eyeshadow to glide on effortlessly.
- Crease Prevention: The holy grail! A base fills in fine lines and prevents eyeshadow from settling into them. 🙏
Why Rebel Against the Norm?
Okay, so we know we need a base. But why use a liquid matte eyeshadow when there are tons of dedicated eyeshadow primers out there?
- Multi-Tasking Marvel: Why buy a separate primer when you can get two products in one? Efficiency, my friend! This saves space in your makeup bag and money in your wallet. 💰
- Color Correction Potential: A tinted matte eyeshadow base can help neutralize discoloration on your eyelids, creating an even more perfect canvas.
- Built-in Shadow: Some liquid matte eyeshadows are so beautiful on their own that they can serve as a base and a wash of color. Talk about killing two birds with one perfectly blended stone! 🐦
- It’s Fun! Let’s face it, experimenting with makeup is fun! Don’t be afraid to break the rules and try something new. You might just discover your holy grail product! 🏆
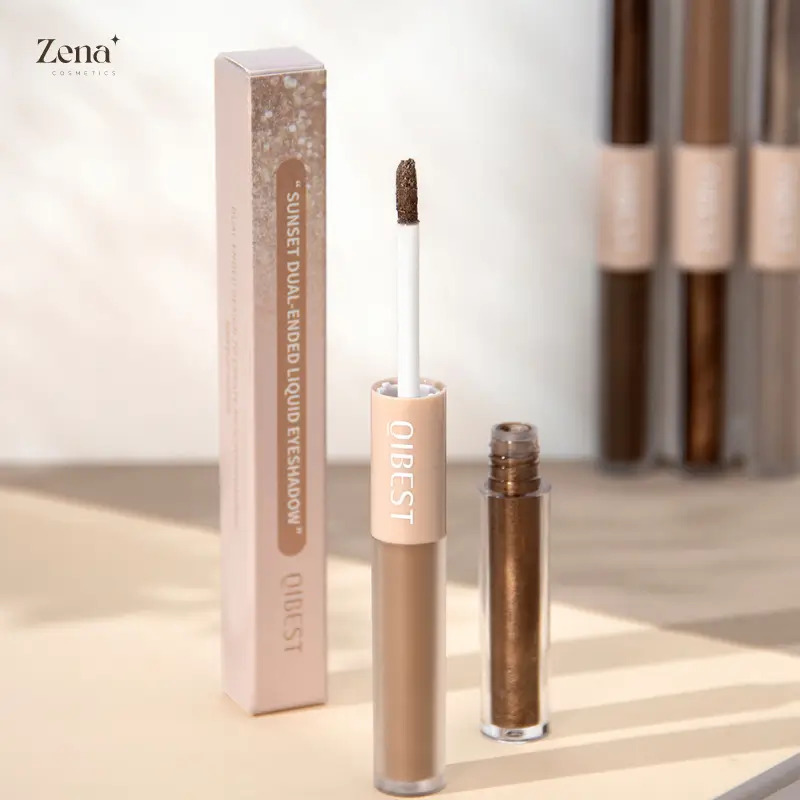
2. Liquid Dual-End Fusion Eyeshadow: A Deep Dive into the Weapon of Choice. ⚔️
Not all liquid eyeshadows are created equal. We’re talking about the dual-end fusion kind – the ones with a liquid matte on one side and a shimmering or glittery formula on the other. These are the key to unlocking our eyeshadow base potential.
Why This Particular Type?
- Versatility: You get both a matte and a shimmer option, allowing for endless eye look possibilities.
- Formulation Matters: Liquid eyeshadows are generally designed to be long-wearing and pigmented, making them ideal for a base.
- Convenience: Two products in one package? Yes, please!
Key Features to Look For:
- Long-Wearing Formula: Crucial for all-day wear. Look for claims like "crease-proof," "fade-resistant," and "waterproof."
- Pigmentation: You want a base that will provide a good color payoff, even when blended out.
- Blendability: This is non-negotiable! The matte formula should blend easily and seamlessly onto the eyelids.
- Comfort: No one wants an eyeshadow base that feels tight or itchy. Choose a formula that feels comfortable and lightweight.
- Color Range: Opt for a range of neutral shades that will complement your skin tone and eyeshadow collection.
Example Brands (Just to Get You Started!):
- Huda Beauty Matte & Metal Melted Shadows
- Stila Suede Shade Liquid Eyeshadows & Glitter & Glow Liquid Eyeshadow
- Revlon ColorStay Glaze Stick Eyeshadow
(Disclaimer: I’m not affiliated with any of these brands, these are just examples based on the features we’ve discussed!)
3. Why the Matte End? A Texture Tale. 🧶
Now, before you start slathering glitter all over your eyelids (tempting, I know!), let’s talk about why we’re specifically focusing on the matte end of the dual-end fusion eyeshadow.
Matte vs. Shimmer: The Battle of the Textures
- Matte: Provides a smooth, even, and non-reflective surface for your eyeshadow to adhere to. Think of it as a blank canvas.
- Shimmer: Contains light-reflecting particles that can interfere with the adhesion of other eyeshadows. It can also accentuate texture and fine lines.
The Benefits of Using a Matte Base:
- Enhanced Pigment: Matte eyeshadows provide a better base for other eyeshadows to grip onto, resulting in more vibrant and true-to-color results.
- Improved Blendability: A matte base creates a smoother surface for blending, preventing patchiness and uneven application.
- Crease Prevention: Matte formulas tend to be more absorbent, helping to prevent oil buildup and creasing.
Think of it this way: Imagine trying to build a house on a foundation of sand (shimmer) versus a foundation of solid concrete (matte). Which house is going to last longer? Exactly! 🏠
4. The Application Art: From Blob to Brilliance. 🖌️
Alright, we’ve got our weapon of choice. Now, let’s learn how to wield it like a pro!
Step-by-Step Application Guide:
- Prep Your Lids: Start with clean, dry eyelids. You can use a gentle cleanser or micellar water to remove any oil or residue.
- Pro Tip: A light dusting of translucent powder can help further absorb oil and create a smooth canvas.
- Apply a Small Amount: Less is more! Start with a tiny dot of the liquid matte eyeshadow on your eyelid. You can always add more if needed. Think "pea-sized" for the entire lid.
- Caution: Applying too much product will result in a sticky, creasy mess.
- Blend, Blend, Blend: Use your finger, a synthetic brush, or a blending sponge to blend the eyeshadow evenly across your eyelid. Focus on blending the edges to create a seamless transition.
- Blending Techniques (More on this later!)
- Build Up Coverage (Optional): If you want more coverage or color correction, you can apply a second thin layer of the liquid matte eyeshadow.
- Set with Powder (Optional): If you have oily eyelids or want to ensure extra-long wear, you can set the liquid matte eyeshadow with a translucent or skin-toned powder.
Application Tools: Choosing Your Weapon
- Fingers: This is a great option for beginners! The warmth of your finger helps to melt the product and blend it seamlessly.
- Pros: Easy, convenient, and free!
- Cons: Can be messy, may not be as precise as a brush.
- Synthetic Brush: A synthetic brush is ideal for applying and blending liquid eyeshadows. Look for a flat, dense brush or a fluffy blending brush.
- Pros: More precise than fingers, allows for controlled application.
- Cons: Requires cleaning.
- Blending Sponge: A damp blending sponge can be used to blend the liquid matte eyeshadow for a soft, diffused look.
- Pros: Creates a natural, airbrushed finish.
- Cons: Absorbs product, requires cleaning.
Important Considerations:
- Work Quickly: Liquid eyeshadows tend to dry down quickly, so you need to blend them out before they set.
- Avoid Creasing: Be careful not to apply too much product in the crease of your eyelid, as this can lead to creasing.
- Practice Makes Perfect: Don’t be discouraged if you don’t get it right the first time! Keep practicing and experimenting until you find the application technique that works best for you.
5. Choosing Your Shade: Finding the Perfect Soulmate for Your Eyes. 👯♀️
The shade of your liquid matte eyeshadow base can make or break your entire eye look. Choosing the right shade will enhance your eyeshadows, correct discoloration, and create a flattering canvas for your artistry.
Key Factors to Consider:
- Skin Tone: Match your base to your skin tone for a natural, seamless look.
- Fair Skin: Opt for light, neutral shades like ivory, cream, or beige.
- Medium Skin: Choose shades like taupe, warm brown, or peach.
- Dark Skin: Go for rich, deep shades like chocolate brown, bronze, or terracotta.
- Eye Color: Consider your eye color when choosing a base.
- Blue Eyes: Warm-toned shades like copper, bronze, and gold can enhance blue eyes.
- Green Eyes: Purple, mauve, and plum shades can make green eyes pop.
- Brown Eyes: Brown eyes are versatile and can wear almost any shade.
- Desired Effect: Do you want to brighten your eyes, correct discoloration, or simply create a neutral base?
- Brightening: Choose a shade that is slightly lighter than your skin tone.
- Color Correction: Use a color-correcting shade to neutralize discoloration (e.g., peach for dark circles).
- Neutral Base: Opt for a shade that matches your skin tone exactly.
Shade Recommendations:
| Skin Tone | Eye Color | Recommended Shade |
|---|---|---|
| Fair | Blue | Light Peach, Cream |
| Fair | Green | Light Mauve, Ivory |
| Fair | Brown | Beige, Light Taupe |
| Medium | Blue | Copper, Warm Brown |
| Medium | Green | Plum, Taupe |
| Medium | Brown | Bronze, Peach |
| Dark | Blue | Bronze, Terracotta |
| Dark | Green | Deep Plum, Chocolate Brown |
| Dark | Brown | Rich Brown, Deep Bronze |
Experimentation is Key! Don’t be afraid to try different shades and see what works best for you.
6. Blending Like a Boss: Techniques for a Seamless Canvas. 🎨
Blending is the foundation of any good eye look, and it’s especially important when using a liquid matte eyeshadow as a base. A poorly blended base can lead to patchy eyeshadow, uneven color, and a generally unflattering result.
Blending Techniques:
- Circular Motions: Use small, circular motions to blend the edges of the eyeshadow into your skin. This will create a seamless transition and prevent harsh lines.
- Windshield Wiper Motion: Use a windshield wiper motion to blend the eyeshadow across your eyelid. This technique is great for blending the eyeshadow into the crease of your eye.
- Tapping Motion: Use a tapping motion to blend the eyeshadow into the inner corner of your eye. This will help to brighten your eyes and prevent the eyeshadow from looking too heavy.
- "Fluffing" Technique: Use a fluffy blending brush to "fluff" the edges of the eyeshadow. This will create a soft, diffused look.
Tools for Blending:
- Blending Brush: A fluffy blending brush is essential for creating a seamless blend. Look for a brush with soft, flexible bristles.
- Finger: Your finger can be used to blend the edges of the eyeshadow for a natural, diffused look.
- Blending Sponge: A damp blending sponge can be used to blend the eyeshadow for an airbrushed finish.
Blending Tips:
- Start with a Clean Brush: A clean blending brush will prevent the eyeshadow from looking muddy or streaky.
- Use a Light Hand: Apply light pressure when blending to avoid creating harsh lines.
- Take Your Time: Blending takes time! Don’t rush the process.
- Practice Makes Perfect: The more you practice blending, the better you’ll become.
7. The Good, the Bad, and the Potentially Ugly: Troubleshooting Common Issues. 🚑
Even with the best techniques and products, things can still go wrong. Let’s troubleshoot some common issues you might encounter when using a liquid matte eyeshadow as a base:
- Creasing:
- Cause: Applying too much product, oily eyelids, not setting with powder.
- Solution: Apply a thin layer of product, use an oil-absorbing primer, set with a translucent powder.
- Patchy Application:
- Cause: Uneven skin texture, dry eyelids, not blending properly.
- Solution: Exfoliate your eyelids, moisturize your eyelids, use a damp blending sponge.
- Eyeshadow Not Adhering:
- Cause: Base is too dry, base is too oily, using the wrong type of eyeshadow.
- Solution: Apply a hydrating primer underneath the base, set the base with a light dusting of powder, use a high-quality eyeshadow.
- Eyeshadow Looking Muddy:
- Cause: Using too many shades, not blending properly, using dirty brushes.
- Solution: Use fewer shades, blend thoroughly, clean your brushes regularly.
- Base Drying Too Quickly:
- Cause: Using a fast-drying formula, working too slowly.
- Solution: Work quickly, apply the base in small sections, use a damp blending sponge.
Don’t Panic! Most of these issues can be easily fixed with a few simple adjustments.
8. Setting the Stage: Powder Shadows & Beyond! ✨
Now that you’ve created the perfect base, it’s time to apply your powder eyeshadows!
Tips for Applying Powder Shadows Over a Liquid Matte Base:
- Use a Light Hand: Apply your powder shadows with a light hand to avoid creating a heavy, cakey look.
- Tap Off Excess Product: Before applying your powder shadows, tap off any excess product from your brush. This will prevent fallout and ensure a smooth application.
- Blend, Blend, Blend: Blend your powder shadows thoroughly to create a seamless transition between shades.
- Experiment with Different Finishes: Don’t be afraid to experiment with different finishes, such as matte, shimmer, and glitter.
Beyond Powder Shadows:
You can also use your liquid matte base as a foundation for other types of eye makeup, such as:
- Cream Shadows: Cream shadows will adhere beautifully to a liquid matte base.
- Loose Pigments: A liquid matte base will help to grip loose pigments and prevent them from falling out.
- Eyeliner: A liquid matte base can help to prevent eyeliner from smudging or fading.
The possibilities are endless! Let your creativity run wild and experiment with different looks.
9. The Final Verdict: Is It Worth It? 🤔
So, after all this, is using the matte end of a liquid dual-end fusion eyeshadow as an all-day base actually worth it?
The Pros:
- Multi-Purpose Product: Saves money and space in your makeup bag.
- Long-Wearing: Provides excellent wear time for eyeshadows.
- Enhances Pigment: Makes eyeshadows look more vibrant.
- Smooth Application: Creates a smooth, even canvas for eyeshadow application.
The Cons:
- Can Be Tricky to Apply: Requires practice and skill to apply correctly.
- Can Be Drying: May be too drying for some skin types.
- Not All Formulas Are Created Equal: Some formulas may not be suitable for use as a base.
The Verdict:
If you’re willing to put in the time and effort to master the application technique, using the matte end of a liquid dual-end fusion eyeshadow as an all-day base can be a game-changer. It’s a great way to get more use out of your makeup products and create stunning, long-lasting eye looks. However, if you’re looking for a quick and easy solution, a dedicated eyeshadow primer might be a better option.
Ultimately, it’s up to you to decide if it’s worth it!
10. Bonus Round: Pro Tips & Tricks from the Trenches! 💣
- Use a Setting Spray: A spritz of setting spray after applying your eyeshadow can help to further lock in your look and prevent creasing.
- Warm Up the Product: If your liquid matte eyeshadow feels too thick or dry, try warming it up in your hands before applying it.
- Use a Color Corrector: If you have dark circles or discoloration on your eyelids, use a color-correcting shade of liquid matte eyeshadow as a base. Peach is great for dark circles!
- Mix and Match: Don’t be afraid to mix and match different shades of liquid matte eyeshadow to create your perfect custom base.
- Have Fun! Makeup is all about experimentation and self-expression. Don’t be afraid to try new things and have fun with it!
And that, my friends, concludes our lecture on using the matte end of a liquid dual-end fusion eyeshadow as an all-day base! Go forth and create some eye-catching masterpieces! Now, if you’ll excuse me, I need a nap. All this makeup talk has made me tired! 😴
For detailed product specifications and purchases, please go to :https://zenamakeup.com/products/liquid-dual-end-matte-glitter-fusion-eyeshadow
Leave a Reply