Liquid Dual-End Matte & Glitter Fusion Eyeshadow: A Graphic Masterclass 🎨✨
Welcome, Beauties and Bold Brows! Prepare to dive headfirst into the glittering, pigment-packed world of liquid dual-end matte & glitter fusion eyeshadows. Forget subtlety, we’re here for drama, dimension, and looks so sharp they could cut glass (but please, don’t try that at home ⚠️).
This lecture will break down everything you need to know about these magical makeup marvels, from understanding their formula to mastering graphic eye looks that will leave everyone speechless. Buckle up, grab your brushes (or fingers, we don’t judge!), and let’s get started!
Lecture Outline:
- What IS This Thing? The Anatomy of a Dual-End Wonder 🧐
- Decoding the Formula: Matte vs. Glitter Showdown 🧪💥
- Why Liquid? Advantages Over Powder Shadows 🏆
- Tools of the Trade: Brushes, Blenders, and Your Own Two Hands 🖌️🖐️
- Mastering the Matte: Application Techniques and Blending Brilliance ☁️
- Glitter Mania: Placement, Pigment Payoff, and Preventing Fallout Fiascos ✨
- Graphic Eye 101: Simple Shapes to Statement Styles 📐➡️💥
- Color Theory Crash Course: Making Your Eyes Pop! 🌈
- Troubleshooting Temptations: Common Mistakes and How to Fix Them 🛠️
- The Grand Finale: Creating a Full Graphic Eye Look 🎉
- Beyond the Basics: Creative Uses and Advanced Techniques 🚀
- Product Recommendations: Our Faves and Why! 🌟
- Care and Keeping: Extending the Life of Your Liquid Gold 🔑
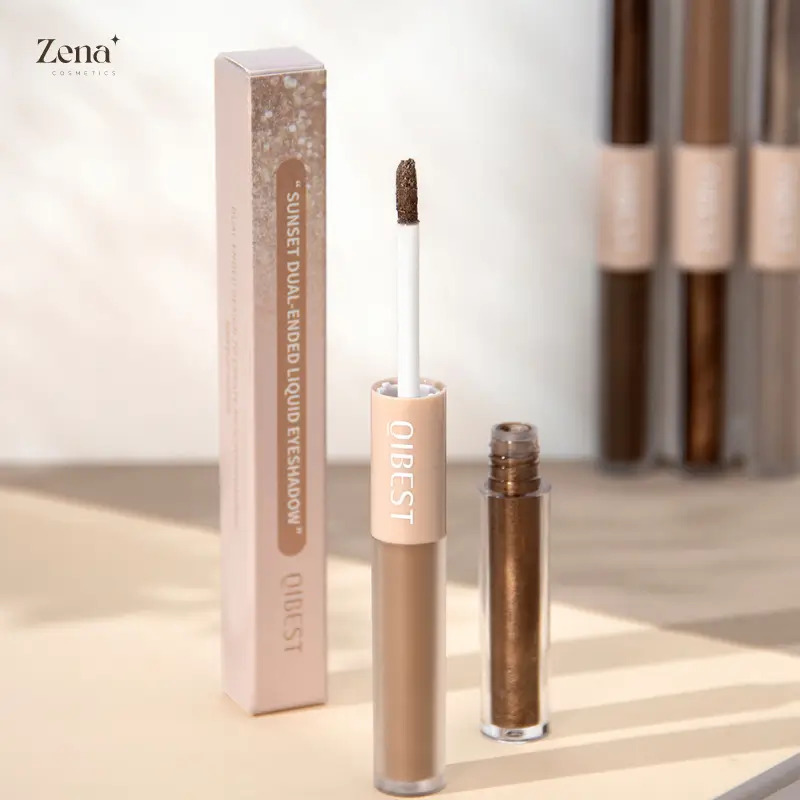
1. What IS This Thing? The Anatomy of a Dual-End Wonder 🧐
Imagine a magical wand, but instead of turning you into a frog (unless that’s your thing…), it transforms your eyelids into a canvas of color and sparkle. That, my friends, is the essence of a liquid dual-end matte & glitter fusion eyeshadow.
These ingenious products typically feature:
- One end: A creamy, highly pigmented matte liquid eyeshadow. This is your base, your contour, your foundation for fabulousness.
- The other end: A dazzling glitter liquid eyeshadow, often suspended in a clear or subtly tinted base. This is your spotlight, your sparkle, your "look at me!" moment.
The beauty of this dual-ended design is convenience. It’s like having a dynamic duo ready to conquer your eye look in one sleek package. No more rummaging through endless palettes – your matte and glitter dreams are united!
Think of it like this:
| Feature | Matte End | Glitter End |
|---|---|---|
| Purpose | Base color, contour, definition | Sparkle, highlight, focal point |
| Texture | Creamy, smooth, opaque | Liquid, often with suspended glitter particles |
| Finish | Matte, velvety | Glittery, shimmery, sparkly |
| Application | Precise application, blending | Targeted placement, tapping |
| Overall Vibe | Sophisticated, understated (until you add glitter!) | Glamorous, playful, attention-grabbing |
2. Decoding the Formula: Matte vs. Glitter Showdown 🧪💥
Understanding the science behind these formulas helps you wield them like a pro.
- Matte Magic: Liquid matte eyeshadows typically rely on a combination of:
- Pigments: For intense color payoff. The higher the pigment concentration, the richer the color.
- Volatile Silicones or Water: These create the liquid consistency and allow for smooth application. They evaporate after application, leaving behind the matte finish.
- Polymers: These provide adhesion to the skin and help the shadow stay put without creasing.
- Thickeners: To control the viscosity and prevent the shadow from being too runny.
- Glitter Galore: Glitter liquid eyeshadows are a different beast altogether:
- Glitter Particles: The star of the show! These can range in size from fine shimmer to chunky glitter flakes.
- Binding Agent: A clear or tinted liquid base (often silicone or water-based) that holds the glitter particles in suspension and adheres them to the skin.
- Film Formers: These create a flexible film that keeps the glitter from scattering all over your face (a fate we all want to avoid!).
- Adhesives: To further enhance glitter adhesion and prevent fallout.
Important Note: Always check the ingredient list, especially if you have sensitive skin or allergies. Look for hypoallergenic and ophthalmologist-tested formulas to minimize the risk of irritation.
3. Why Liquid? Advantages Over Powder Shadows 🏆
Powder eyeshadows have been the reigning champions for decades, but liquid shadows are challenging their throne. Here’s why:
- Intense Pigment: Liquid formulas often deliver a more saturated and vibrant color payoff compared to powders. Think of it as the difference between a watercolor and an oil painting.
- Long-Lasting Wear: Liquid shadows tend to adhere to the skin better than powders, resulting in less fallout and creasing, especially with proper priming.
- Ease of Application: While there’s a learning curve, many find liquid shadows easier to apply precisely, especially for graphic looks.
- Buildable Coverage: You can build up the intensity of liquid shadows from a sheer wash of color to a bold, opaque statement.
- Unique Finishes: Liquid formulas allow for a wider range of finishes, from super matte to ultra-glittery, that are difficult to achieve with powders.
- Less Fallout: Liquid formulas, especially glitter versions, are less prone to fallout compared to loose glitter or powder shadows. This keeps your undereye area clean and your look flawless.
Think of it this way:
| Feature | Powder Eyeshadows | Liquid Eyeshadows |
|---|---|---|
| Pigmentation | Can vary, often requires building | Generally more intense and vibrant |
| Longevity | Can crease or fade, requires primer | Often longer-lasting, less prone to creasing |
| Application | Blending is key, can be messy | Precise application, can be tricky at first |
| Finish Options | Matte, shimmer, satin | Matte, glitter, metallic, satin |
| Fallout | Can be significant, especially with shimmer | Generally less fallout, easier to control |
4. Tools of the Trade: Brushes, Blenders, and Your Own Two Hands 🖌️🖐️
Choosing the right tools can make or break your liquid eyeshadow experience. Here’s a rundown:
- For Matte Shadows:
- Flat Shader Brush: For packing color onto the lid.
- Blending Brush: For softening edges and creating seamless transitions. Look for fluffy, tapered brushes.
- Angled Brush: For precise application along the lash line or creating winged liner.
- Your Finger: Don’t underestimate the power of your fingertip! It can be surprisingly effective for blending and creating a soft wash of color.
- For Glitter Shadows:
- Flat, Stiff Brush: For packing glitter onto the lid.
- Small Detail Brush: For precise glitter placement.
- Your Finger (Again!): Tapping glitter onto the lid with your finger can minimize fallout and maximize impact.
- Other Essentials:
- Eyelid Primer: A must-have for extending wear and preventing creasing.
- Cotton Swabs: For cleaning up mistakes.
- Makeup Remover: For removing stubborn glitter.
Pro Tip: Synthetic brushes are generally better for liquid shadows as they don’t absorb as much product as natural brushes.
5. Mastering the Matte: Application Techniques and Blending Brilliance ☁️
Applying matte liquid eyeshadow is all about precision and blending. Here’s the breakdown:
- Prime Your Lids: This is non-negotiable! Primer creates a smooth canvas and helps the shadow adhere better.
- Apply a Small Amount: Less is more! Start with a tiny dot of product on the back of your hand or a palette. You can always add more, but it’s harder to remove excess.
- Dab Onto the Lid: Use a flat shader brush or your fingertip to dab the shadow onto your lid, focusing on the areas where you want the most color.
- Blend, Blend, Blend: Use a fluffy blending brush to soften the edges and create a seamless transition. Work quickly, as liquid shadows tend to set fast. Use small, circular motions to blend the edges into your crease and brow bone.
- Build Coverage: If you want a more intense color, repeat steps 3 and 4.
Blending Tips:
- Work in Layers: Building the color gradually prevents patchiness.
- Use a Clean Brush: A clean blending brush is essential for achieving a smooth, diffused finish.
- Don’t Over-Blend: Over-blending can sheer out the color and make it disappear.
- Blend Towards the Brow Bone: This creates a soft, natural transition.
6. Glitter Mania: Placement, Pigment Payoff, and Preventing Fallout Fiascos ✨
Glitter is all about impact, but it can also be messy. Here’s how to achieve maximum sparkle with minimal fallout:
- Apply Glitter Glue (Optional): If you’re using chunky glitter or are prone to fallout, a glitter glue or adhesive can help keep the glitter in place.
- Apply in Thin Layers: Don’t glob on the glitter! Apply a thin, even layer to the desired area.
- Tap, Don’t Swipe: Tapping the glitter onto the lid with your finger or a flat brush is more effective than swiping, as it minimizes fallout.
- Use a Setting Spray: After applying the glitter, mist your face with a setting spray to help lock it in place.
Fallout Prevention Strategies:
- Work Over a Tissue: Hold a tissue under your eye while applying glitter to catch any stray particles.
- Use a Damp Brush: Dampening your brush slightly can help the glitter adhere better and prevent fallout.
- Press, Don’t Rub: Pressing the glitter onto the lid is gentler and less likely to cause fallout than rubbing.
- Clean Up with Tape: If you do get glitter fallout, use a piece of tape to gently lift it away from your skin.
7. Graphic Eye 101: Simple Shapes to Statement Styles 📐➡️💥
Now for the fun part! Graphic eye looks are all about using lines, shapes, and colors to create bold and eye-catching designs. Here are a few ideas to get you started:
- The Floating Crease: Use a matte liquid shadow to create a line just above your natural crease. This adds definition and drama.
- The Double Wing: Create a classic winged liner and then add a second wing above it, using a different color or finish.
- The Color Block: Divide your lid into sections and fill each section with a different color.
- The Geometric Design: Use tape or stencils to create geometric shapes on your lid.
- The Halo Eye: Apply a dark color to the outer and inner corners of your lid and a lighter color in the center. This creates a halo effect.
Tools for Precision:
- Angled Brush: Essential for creating sharp lines and wings.
- Thin Liner Brush: For intricate details.
- Tape: For creating clean lines and geometric shapes.
- Stencils: For creating more complex designs.
8. Color Theory Crash Course: Making Your Eyes Pop! 🌈
Understanding color theory can help you choose eyeshadow colors that complement your eye color and skin tone.
- Complementary Colors: These are colors that are opposite each other on the color wheel (e.g., blue and orange, green and red). Using complementary colors can make your eyes pop.
- Analogous Colors: These are colors that are next to each other on the color wheel (e.g., blue and green, red and orange). Using analogous colors creates a harmonious and balanced look.
- Neutral Colors: These are colors like black, white, brown, and beige. Neutral colors can be used to create a subtle and sophisticated look or to balance out bolder colors.
Eye Color Recommendations:
- Blue Eyes: Warm tones like bronze, gold, copper, and terracotta.
- Green Eyes: Purple, plum, mauve, and burgundy.
- Brown Eyes: Almost any color! You’re lucky. Experiment with blues, greens, purples, and golds.
- Hazel Eyes: Green, gold, bronze, and brown.
9. Troubleshooting Temptations: Common Mistakes and How to Fix Them 🛠️
Even the most seasoned makeup artists make mistakes. Here are a few common liquid eyeshadow mishaps and how to fix them:
- Patchy Application: You applied too much product at once or didn’t blend quickly enough. Solution: Use a small amount of product and blend immediately. If the shadow is already set, use a damp cotton swab to gently remove the patchy areas and reapply.
- Creasing: Your lids are oily or you didn’t use primer. Solution: Use an eyelid primer and set your eyeshadow with a translucent powder.
- Fallout: You used too much glitter or didn’t apply it properly. Solution: Use a glitter glue or adhesive and tap the glitter onto the lid. Clean up any fallout with tape.
- Uneven Lines: Your winged liner is wobbly or asymmetrical. Solution: Use tape to create a clean line or practice your technique.
10. The Grand Finale: Creating a Full Graphic Eye Look 🎉
Let’s put everything we’ve learned into practice! Here’s a step-by-step guide to creating a stunning graphic eye look using your liquid dual-end eyeshadow:
- Prime Your Lids: Apply an eyelid primer to create a smooth base.
- Create a Base Color: Use the matte end of your eyeshadow to create a base color on your lid. Blend the edges into your crease.
- Create a Graphic Shape: Use tape or a stencil to create a graphic shape on your lid.
- Fill in the Shape: Use the matte end of your eyeshadow to fill in the shape with a contrasting color.
- Add Glitter: Use the glitter end of your eyeshadow to add sparkle to the shape or to highlight certain areas.
- Clean Up: Use a cotton swab to clean up any mistakes.
- Add Liner and Mascara: Finish the look with eyeliner and mascara.
11. Beyond the Basics: Creative Uses and Advanced Techniques 🚀
Once you’ve mastered the basics, you can start experimenting with more advanced techniques:
- Ombre Lids: Blend two or more matte colors together to create an ombre effect.
- Cut Crease: Use a concealer to create a sharp cut crease and then fill it in with a glitter shadow.
- Reverse Cat Eye: Instead of creating a wing on the upper lash line, create a wing on the lower lash line.
- Use as Eyeliner: Use the matte side as a vibrant, long-lasting eyeliner.
- Body Art: Get creative! Use the glitter side for body art designs.
12. Product Recommendations: Our Faves and Why! 🌟
(Disclaimer: This is subjective and based on personal preferences. Always do your own research before purchasing any product.)
- [Insert Brand Name] Dual-End Liquid Eyeshadow: Highly pigmented, long-lasting, and comes in a wide range of colors.
- [Insert Brand Name] Glitter & Glow Liquid Eyeshadow: Super sparkly, minimal fallout, and easy to apply.
- [Insert Brand Name] Matte Liquid Eyeshadow: Comfortable to wear, blends beautifully, and comes in a variety of skin tones.
Considerations:
- Pigmentation: How intense is the color payoff?
- Longevity: How long does it last without creasing or fading?
- Ease of Application: Is it easy to blend and apply?
- Fallout (Glitter): How much fallout is there?
- Price: Is it affordable?
- Color Range: Does it offer a variety of colors to suit your needs?
13. Care and Keeping: Extending the Life of Your Liquid Gold 🔑
Proper care will ensure your liquid eyeshadows last longer and perform their best:
- Store Properly: Store your liquid eyeshadows upright in a cool, dry place.
- Close Tightly: Always close the lids tightly after use to prevent the product from drying out.
- Clean the Applicator: Wipe the applicator with a clean tissue after each use to prevent contamination.
- Don’t Add Water or Thinner: Adding water or thinner can alter the formula and make it less effective.
- Replace Regularly: Liquid eyeshadows typically have a shelf life of 6-12 months. Dispose of them if they start to smell bad, change texture, or irritate your skin.
Congratulations! You’ve officially graduated from Liquid Dual-End Matte & Glitter Fusion Eyeshadow 101. Go forth and create dazzling graphic eye looks that will turn heads and break hearts (but hopefully not break the bank!). Remember, makeup is all about experimentation and self-expression. Don’t be afraid to try new things and have fun! 💖✨
For detailed product specifications and purchases, please go to :https://zenamakeup.com/products/liquid-dual-end-matte-glitter-fusion-eyeshadow
Leave a Reply