Liquid Dual-End Matte & Glitter Fusion Eyeshadow: Beginner-Friendly or Beginner-FOOLISH? 🤪
Alright, class, settle down! Today, we’re diving headfirst into the shimmering, sometimes terrifying, world of liquid dual-end matte & glitter fusion eyeshadows. Is this the magical unicorn product that will launch your makeup artistry career? Or is it a glittery, goopy trap waiting to ensnare the uninitiated? Let’s find out! 🧐
(Disclaimer: I’ve seen some things, people. Seen things. Glitter in places it shouldn’t be. Blending nightmares that haunt my dreams. So, buckle up.)
Lecture Outline:
- What IS This Creature? (Defining the Dual-End Liquid Eyeshadow)
- The Allure of the Dual-End: Why We’re So Tempted (Pros & Cons)
- Beginner-Friendliness: The Great Debate (Rating System)
- Mastering the Matte: Techniques & Tools (For Smooth Sailing)
- Taming the Glitter: Application & Placement (Shine Bright, Not Blind!)
- Blending Like a Boss: Seamless Transitions (Say Goodbye to Harsh Lines!)
- Product Recommendations: The Good, the Bad, and the Glittery (Reviews & Alternatives)
- Troubleshooting: SOS! Glitterpocalypse! (Common Problems & Solutions)
- Advanced Techniques: Level Up Your Look (For the Ambitious Apprentice)
- Final Verdict: To Buy or Not to Buy? (The Bottom Line)
1. What IS This Creature? (Defining the Dual-End Liquid Eyeshadow)
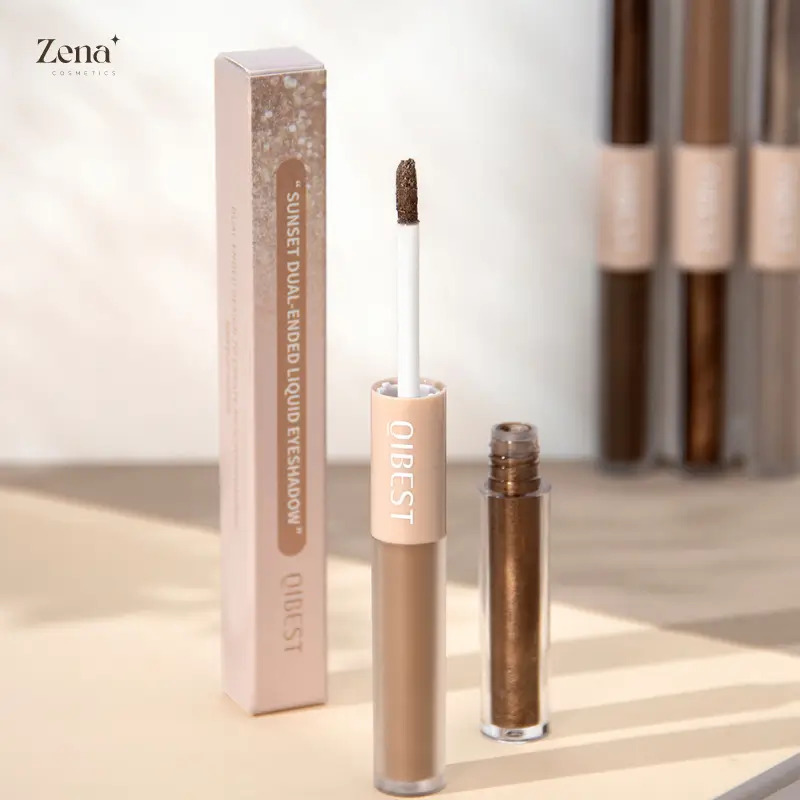
Imagine, if you will, a pen. But instead of ink, one end dispenses a velvety, matte eyeshadow, and the other explodes with dazzling glitter. 💥 That, my friends, is the essence of a dual-end liquid eyeshadow.
These beauties typically come in a tube with two separate applicators. One applicator, usually a doe-foot applicator, delivers the matte base. The other applicator, which can vary from a brush to a sponge tip or even a glitter-laden wand, dispenses the glitter.
Key Characteristics:
- Dual Functionality: Matte base + Glitter topper = Instant eye look!
- Liquid Formulation: Provides intense pigment and long-lasting wear.
- Variety of Finishes: From subtle shimmer to full-on disco ball. 🕺
- Convenience: All-in-one product, perfect for travel or quick looks.
- Potential for Mess: Let’s be honest, glitter always finds a way.
2. The Allure of the Dual-End: Why We’re So Tempted (Pros & Cons)
Why are we drawn to these shimmering sirens of the makeup world? Let’s break it down:
✨Pros:
- Speed & Efficiency: One product, two steps, instant glam! Perfect for busy bees. 🐝
- Portability: Toss it in your bag and you’re ready for anything.
- Experimentation: Easy way to play with color and texture without committing to a full palette.
- Beginner Appeal: Seems easier than blending multiple powder shadows. (Spoiler alert: sometimes it is, sometimes it’s not.)
- Instant Gratification: Who doesn’t love a little sparkle? ✨
😩Cons:
- Blending Challenges: Liquid formulas can dry quickly, making blending a race against time.
- Glitter Fallout: Prepare for glitter to migrate to your cheeks, nose, and possibly your entire living room. 🏠
- Patchy Application: Can be difficult to achieve an even, opaque base.
- Potential for Creasing: Especially on oily eyelids. (Primer is your friend!)
- Formula Consistency: Quality varies wildly between brands.
Table: Pros & Cons at a Glance
| Feature | Pros | Cons |
|---|---|---|
| Speed | Quick and easy application, ideal for busy mornings. | Fast-drying formula can make blending difficult and unforgiving. |
| Portability | Compact and convenient for travel or on-the-go touch-ups. | May leak or spill if not properly sealed, leading to a glitter explosion in your bag. |
| Pigmentation | Intense color payoff with vibrant shades. | Can be too intense for some beginners, leading to a clown-like appearance if not applied carefully. 🤡 |
| Glitter | Adds instant glam and sparkle to any look. | Glitter fallout can be a nightmare, ending up everywhere but your eyelids. |
| Overall | All-in-one product offers convenience and versatility. | Formula quality and consistency can vary significantly between brands, leading to uneven application and potential creasing. |
3. Beginner-Friendliness: The Great Debate (Rating System)
So, are these dual-ended wonders actually beginner-friendly? The answer, as with most things in life, is: it depends.
Factors Influencing Beginner-Friendliness:
- Formula: Is it easy to blend? Does it dry down too quickly?
- Applicator: Is it precise and user-friendly?
- Pigmentation: Is it buildable or intensely pigmented from the get-go?
- Glitter Type: Chunky glitter is generally harder to control than fine shimmer.
- Your Skill Level: Be honest with yourself! Have you mastered basic eyeshadow application?
Rating System:
- 🥇 Beginner-Friendly (Gold Star): Easy to blend, forgiving formula, buildable pigmentation, minimal fallout.
- 🥈 Intermediate (Silver Star): Requires some blending skills, may have slight fallout, pigmentation may be intense.
- 🥉 Advanced (Bronze Star): Requires precise application, prone to fallout, highly pigmented, may dry down quickly.
Remember: Practice makes perfect! Don’t be discouraged if your first attempt isn’t flawless.
4. Mastering the Matte: Techniques & Tools (For Smooth Sailing)
The matte side is the foundation of your look. Treat it with respect!
Tools:
- Doe-foot Applicator: The standard applicator. Use it to apply the matte color to your lid.
- Blending Brush: A fluffy blending brush is essential for softening edges.
- Your Finger: Yes, really! Sometimes, a gentle finger tap is the best way to blend out the edges. (Clean fingers, people!)
Techniques:
- Less is More: Start with a small amount of product and build up the color gradually. It’s easier to add than to remove!
- Work Quickly: Liquid eyeshadows tend to dry fast. Blend immediately after application.
- Pat, Don’t Drag: Pat the color onto your lid, rather than dragging the applicator. This will prevent streaks and uneven application.
- Focus on the Crease: Use a windshield-wiper motion with your blending brush to blend the matte color into your crease.
- Use a Primer: A good eyeshadow primer will create a smooth base and prevent creasing. (Seriously, don’t skip this step!)
Example using icons:
- 💧 Apply: Dot matte eyeshadow onto your lid.
- 🖐️ Pat: Gently pat to spread the color.
- 🔄 Blend: Use a fluffy brush in circular motions.
- ✨ Prime: Always start with an eyeshadow primer!
5. Taming the Glitter: Application & Placement (Shine Bright, Not Blind!)
Ah, glitter. The bane of our existence, yet so irresistible.
Tools:
- Applicator (Provided): Use the applicator that comes with the product. (Usually a brush, sponge, or wand).
- Finger: Again, your finger can be your best friend for precise glitter placement.
- Small Detail Brush: For applying glitter to specific areas, like the inner corner of your eye.
- Lint Roller: For cleaning up glitter fallout. (Accept it, it’s going to happen.)
Techniques:
- Placement is Key: Decide where you want the glitter to shine. All over the lid? Just in the center? Inner corner highlight?
- Tap, Don’t Swipe: Tap the glitter onto your lid, rather than swiping. This will prevent fallout.
- Build Up the Intensity: Start with a light layer and add more glitter until you achieve your desired level of sparkle.
- Use a Glitter Glue: If you’re dealing with stubborn glitter, a glitter glue or adhesive can help it stay put.
- Work in Sections: If you’re applying glitter to a large area, work in small sections to prevent the glitter from drying out before you can blend it.
Important Safety Tip: Avoid getting glitter in your eye! It’s painful and can cause serious damage. If glitter does get in your eye, flush it out with plenty of water immediately.
6. Blending Like a Boss: Seamless Transitions (Say Goodbye to Harsh Lines!)
6. Blending Like a Boss: Seamless Transitions (Say Goodbye to Harsh Lines!)
The key to a professional-looking eyeshadow look is seamless blending. This is where many beginners struggle, but fear not!
Techniques:
- Blend the Matte First: Make sure the matte base is blended before applying the glitter.
- Use a Clean Blending Brush: A clean brush will help you soften the edges of the eyeshadow without adding more color.
- Windshield Wiper Motion: Use a windshield wiper motion to blend the colors together.
- Circular Motions: Use small, circular motions to blend the edges of the eyeshadow.
- Go Back and Forth: Blend the matte color into the glitter, and then blend the glitter back into the matte color.
- Patience is Key: Blending takes time and practice. Don’t get discouraged if it doesn’t look perfect right away.
Troubleshooting Harsh Lines:
- Add More Matte Color: If you have a harsh line between the matte and glitter, add a little more matte color to the crease and blend again.
- Use a Transition Shade: Apply a neutral transition shade to the crease to help blend the colors together.
7. Product Recommendations: The Good, the Bad, and the Glittery (Reviews & Alternatives)
Let’s get real. Not all dual-end liquid eyeshadows are created equal. Here are a few recommendations, based on beginner-friendliness:
Table: Product Recommendations
| Product Name | Brand | Rating (Beginner-Friendliness) | Pros | Cons | Price Range |
|---|---|---|---|---|---|
| Stila Shimmer & Glow Liquid Eyeshadow Duo | Stila | 🥈 (Intermediate) | Beautiful shimmer, long-lasting, good color selection. | Can be a bit pricey, shimmer can have some fallout. | $$$ |
| ColourPop Super Shock Shadow Duo | ColourPop | 🥇 (Beginner-Friendly) | Affordable, easy to apply, buildable color, minimal fallout. | Limited color selection, can crease on oily lids without primer. | $ |
| NYX Professional Makeup Lid Lingerie Glitter | NYX | 🥉 (Advanced) | Intense glitter payoff, long-lasting. | Can be messy, prone to fallout, requires a steady hand. | $$ |
| e.l.f. Cosmetics Liquid Glitter Eyeshadow | e.l.f. | 🥇 (Beginner-Friendly) | Very affordable, easy to apply, good for beginners experimenting with glitter. | Less intense glitter payoff, may not last as long as other options. | $ |
Alternatives:
- Loose Glitter + Glitter Glue: Gives you more control over the glitter placement.
- Shimmer Eyeshadow Palette: Provides a variety of shimmer shades and finishes.
- Eyeshadow Sticks: Easy to apply and blend, perfect for beginners.
8. Troubleshooting: SOS! Glitterpocalypse! (Common Problems & Solutions)
Uh oh. Things aren’t going as planned. Don’t panic!
Problem: Glitter Fallout Everywhere!
Solution:
- Apply Eyeshadow First: Do your eyeshadow before your foundation to make cleanup easier.
- Use a Makeup Wipe: Gently wipe away any fallout with a makeup wipe.
- Use Tape: Press a piece of tape onto the affected area to pick up the glitter.
- Embrace the Sparkle: Sometimes, you just have to accept that you’re going to have glitter on your face for the rest of the day. Own it! ✨
Problem: Patchy Application of Matte Color
Solution:
- Exfoliate Your Eyelids: Dry, flaky skin can prevent the eyeshadow from applying evenly.
- Use a Primer: A primer will create a smooth base for the eyeshadow.
- Apply Multiple Layers: Build up the color gradually to achieve an even finish.
Problem: Creasing
Solution:
- Use a Primer: (I know, I sound like a broken record, but it’s important!)
- Set with Powder: Lightly set the eyeshadow with a translucent powder.
- Use an Eyeshadow Base: An eyeshadow base will help the eyeshadow adhere to your lid and prevent creasing.
Problem: Blending Nightmare
Solution:
- Work Quickly: Liquid eyeshadows dry fast, so blend immediately after application.
- Use a Clean Blending Brush: A clean brush will help you soften the edges of the eyeshadow without adding more color.
- Don’t Give Up! Keep blending until you achieve a seamless transition.
9. Advanced Techniques: Level Up Your Look (For the Ambitious Apprentice)
Ready to take your dual-end liquid eyeshadow skills to the next level?
- Cut Crease: Use the matte shade to create a defined cut crease and then apply the glitter to the lid.
- Halo Eye: Apply the matte shade to the inner and outer corners of your eye and then apply the glitter to the center of your lid.
- Ombre Effect: Use two different shades of matte eyeshadow to create an ombre effect and then apply glitter to the lighter shade.
- Graphic Liner: Use the applicator of the liquid eyeshadow like eyeliner to create geometric shapes or artistic designs.
10. Final Verdict: To Buy or Not to Buy? (The Bottom Line)
So, are dual-end liquid matte & glitter eyeshadows beginner-friendly?
The answer is: It depends on the product and your willingness to practice.
If you’re a complete makeup novice, I recommend starting with a beginner-friendly option like the ColourPop Super Shock Shadow Duo or the e.l.f. Cosmetics Liquid Glitter Eyeshadow. These products are affordable, easy to use, and forgiving.
If you’re a bit more experienced, you can try an intermediate option like the Stila Shimmer & Glow Liquid Eyeshadow Duo. Just be prepared for a bit of a learning curve.
Ultimately, the best way to decide if these products are right for you is to try them out for yourself. Don’t be afraid to experiment and have fun!
(Class Dismissed! Now go forth and sparkle responsibly! ✨)
For detailed product specifications and purchases, please go to :https://zenamakeup.com/products/liquid-dual-end-matte-glitter-fusion-eyeshadow
Leave a Reply