Contour Like a Pro: Unleash Your Oval Face’s Hidden Radiance with ZenaMakeup’s Contour Stick!
Alright, beauty enthusiasts, gather ’round! Prepare to have your makeup game transformed from "meh" to "magnificent" with ZenaMakeup’s revolutionary Contour Stick. Forget everything you thought you knew about contouring – we’re about to embark on a journey of sculpted cheekbones, defined jawlines, and a radiant complexion that screams, "I woke up like this…after strategically applying this amazing stick!"
As your friendly neighborhood product manager at ZenaMakeup, I’m here to spill the tea (the shade tea, that is!) on how our Contour Stick is about to become your new best friend. We’ve formulated this creamy, blendable masterpiece to be your secret weapon in achieving a flawlessly contoured look, especially if you’re blessed with the coveted oval face.
But First, Darling, Why Contour at All? (And Why an Oval Face is the Perfect Canvas)
Think of your face as a blank canvas. A gorgeous, naturally beautiful canvas, of course! But even the most breathtaking masterpieces benefit from a little strategic shading and highlighting. Contouring is all about using shadows to sculpt, define, and enhance your natural features. It’s like giving your face a mini facelift without the needles!
Now, let’s talk oval faces. You lucky ducks! The oval face shape is often considered the "ideal" because of its balanced proportions. But even with a perfectly proportioned face, contouring can add dimension, bring out your cheekbones, and create a more sculpted, refined look. It’s the difference between a painting and a sculpture. And honey, we want you looking like a masterpiece!
Why ZenaMakeup’s Contour Stick? (Because We’re Not Playing Around)
Okay, okay, enough with the build-up. Let’s get down to the nitty-gritty. What makes our Contour Stick so darn special?
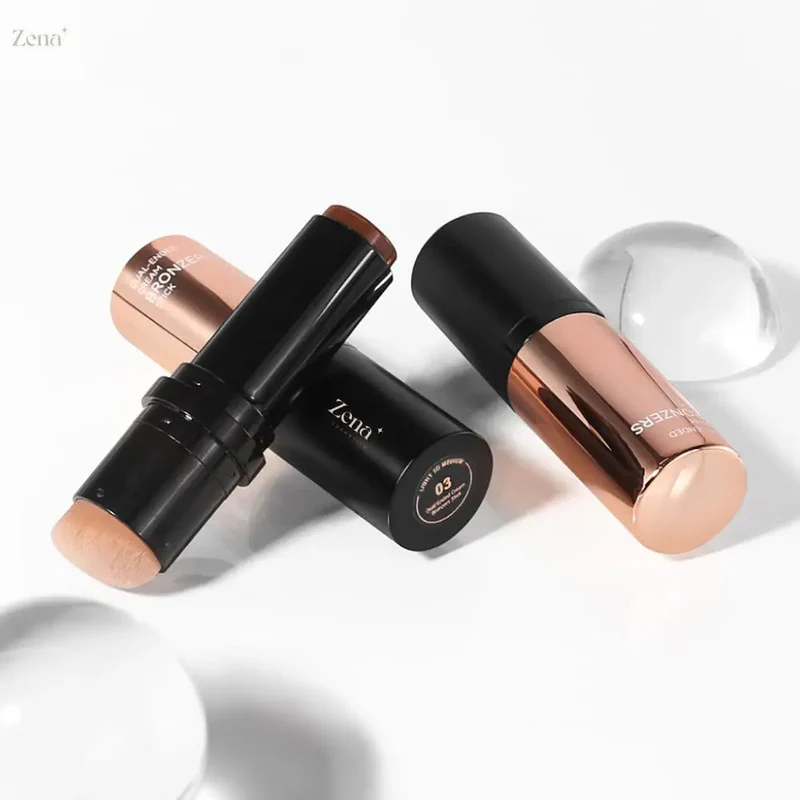
- Creamy, Dreamy Formula: We’ve banished the days of chalky, hard-to-blend contour products. Our formula is as smooth as butter (vegan butter, of course!), gliding effortlessly onto your skin and blending like a dream. No harsh lines, no muddy patches, just a seamless, natural-looking contour.
- Perfect Shade Range: Finding the right contour shade is like finding the perfect pair of jeans – it’s a struggle! That’s why we’ve meticulously crafted a range of shades to complement a variety of skin tones. From fair to deep, we’ve got you covered. We understand the struggle is real, so we made it easy!
- Beginner-Friendly: Intimidated by contouring? Don’t be! Our Contour Stick is designed for everyone, from makeup newbies to seasoned pros. The creamy formula and easy-to-blend texture make it virtually foolproof.
- Buildable Coverage: Want a subtle, everyday contour? Or a dramatic, red-carpet-ready look? Our Contour Stick allows you to build the intensity to your desired level. It’s your contour, your rules!
- Long-Lasting Power: We know you don’t have time for your contour to fade halfway through the day. Our formula is designed to last, keeping you sculpted and defined from morning till night.
The Oval Face Contouring Bible: Your Step-by-Step Guide to Sculpting Perfection
Alright, buckle up, buttercups! It’s time to learn the secrets of contouring for an oval face using our ZenaMakeup Contour Stick.
Step 1: Prep Your Canvas
Just like a painter preps their canvas, you need to prep your skin! Start with a clean, moisturized face. Apply your foundation and concealer as usual. This creates a smooth, even base for your contour to glide onto.
Step 2: Locate Your Cheekbones (Find Your Inner Sculptor!)
This is crucial! The key to a natural-looking contour is to place it correctly. Here’s the trick:
- The "Fish Face" Method: Suck in your cheeks like you’re trying to imitate a fish. You should see a hollow appear beneath your cheekbone. That’s where you’ll be applying your contour.
- The Finger Method: Place two fingers side-by-side along the side of your face, starting near your ear and moving towards your mouth. The area directly beneath your fingers is where you’ll apply your contour.
Step 3: Apply the Contour Stick (Draw Your Masterpiece!)
Using your ZenaMakeup Contour Stick, draw a line directly underneath your cheekbone, following the hollow you identified in Step 2. Start at your ear and blend towards the center of your cheek, stopping about two finger-widths away from your nose.
Important Tip: Don’t bring the contour too close to your mouth! This can create a harsh, unnatural look.
Step 4: Blend, Blend, Blend! (The Secret Ingredient to a Flawless Contour)
This is where the magic happens! Grab your favorite blending brush (a dense, angled brush works best) and start blending the contour line upwards towards your cheekbone. Use light, circular motions to soften the line and seamlessly blend it into your foundation.
Pro Tip: Blend, blend, blend! We can’t stress this enough. The more you blend, the more natural your contour will look.
Step 5: Contour Your Forehead (Frame Your Face!)
To add even more dimension to your oval face, you can also contour your forehead. Apply a thin line of contour along your hairline, starting at your temples and blending inwards. This will help to create the illusion of a smaller forehead and a more balanced face shape.
To add even more dimension to your oval face, you can also contour your forehead. Apply a thin line of contour along your hairline, starting at your temples and blending inwards. This will help to create the illusion of a smaller forehead and a more balanced face shape.
Step 6: Contour Your Jawline (Chisel That Chin!)
For added definition, apply a thin line of contour along your jawline, starting at your ear and blending towards your chin. This will help to create a more sculpted jawline and a more defined profile.
Step 7: Highlight (Bring Out the Light!)
Contouring is all about creating shadows, but highlighting is all about bringing out the light! Apply a highlighter to the high points of your face, such as your cheekbones, brow bone, and the bridge of your nose. This will help to accentuate your features and create a radiant glow.
Step 8: Set It and Forget It! (Seal the Deal!)
To ensure your contour stays in place all day long, set it with a translucent powder. This will help to absorb excess oil and prevent your contour from fading or smudging.
Contouring Tips & Tricks for Oval Faces (Unlock Your Inner Makeup Artist!)
- Go Easy on the Contour: Remember, the goal is to enhance your natural features, not to completely reshape your face. Start with a light application of contour and build up the intensity as needed.
- Choose the Right Shade: Select a contour shade that is two to three shades darker than your natural skin tone. Avoid shades that are too warm or too orange, as these can look unnatural.
- Don’t Forget to Blend! We’ve said it before, and we’ll say it again: blending is key to a flawless contour. Take your time and blend until there are no harsh lines or obvious transitions.
- Experiment and Have Fun! Contouring is a technique that requires practice. Don’t be afraid to experiment with different techniques and products until you find what works best for you.
Addressing Common Contouring Concerns (We’ve Got Your Back!)
- "I’m Afraid of Looking Muddy!" The key to avoiding a muddy contour is to choose the right shade and to blend, blend, blend! Start with a light application and build up the intensity as needed.
- "I Don’t Know Where to Place My Contour!" Use the "fish face" or "finger method" to locate your cheekbones. This will help you to apply your contour in the correct place.
- "I’m Not Good at Blending!" Practice makes perfect! Use a dense, angled brush and light, circular motions to blend your contour seamlessly into your foundation.
Why Choose ZenaMakeup? (We’re More Than Just Makeup!)
At ZenaMakeup, we’re passionate about creating high-quality, affordable cosmetics that empower you to feel confident and beautiful. We believe that makeup should be fun and accessible to everyone, regardless of their skill level or budget.
We’re committed to:
- Cruelty-Free Products: We never test our products on animals.
- Vegan Formulas: We strive to use vegan ingredients whenever possible.
- Sustainable Practices: We’re constantly working to reduce our environmental impact.
- Community Engagement: We’re passionate about giving back to our community.
Ready to Unleash Your Inner Sculptor?
Don’t wait any longer! Grab your ZenaMakeup Contour Stick today and start sculpting your way to a more defined, radiant complexion. We promise, you won’t regret it!
Exclusive Offer for Our Readers!
Use code zenamakeup2025 at checkout on our website https://zenamakeup.com/ and receive a special discount on your entire ZenaMakeup order! This is our way of saying thank you for joining the ZenaMakeup family.
Connect With Us!
We love seeing your ZenaMakeup looks! Tag us on social media and use the hashtag #ZenaMakeup for a chance to be featured on our page.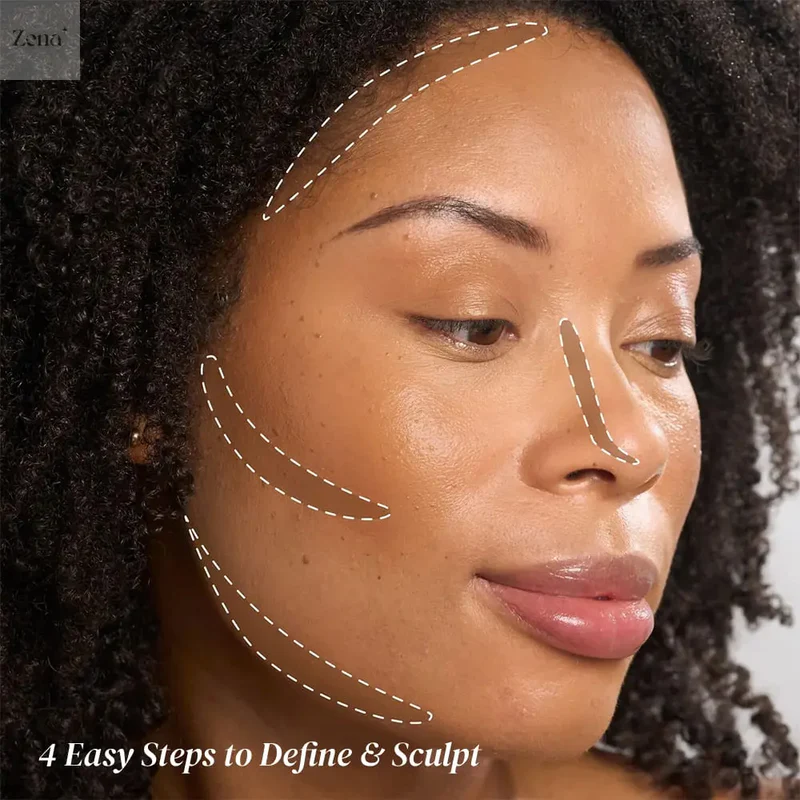
Have questions or feedback? We’d love to hear from you! Contact us at [email protected].
So, what are you waiting for? Get contouring and get ready to shine! ✨ Your oval face is about to become a work of art! And remember, with ZenaMakeup, you’re not just wearing makeup, you’re wearing confidence. You’re wearing empowerment. You’re wearing ZenaMakeup!
Get ready to embrace your inner goddess, one contour line at a time! Happy sculpting! 💋
For detailed product specifications and purchases, please go to :https://zenamakeup.com/products/professional-cream-contour-stick
Leave a Reply