Lecture: Glitterati Glam: Mastering the Deluxe Liquid Glitter Cream Eyeshadow Stick for Professional-Looking Eyes
(Cue dramatic intro music with sparkling sound effects and a spotlight)
Alright, Glitterati! Welcome, welcome, welcome to Glitterati Glam 101! Today, we’re ditching the art school pretense and diving headfirst into the sparkly, dazzling, and sometimes slightly terrifying world of… GLITTER! 🤩
Specifically, we’re tackling the Deluxe Liquid Glitter Cream Eyeshadow Stick. This little stick of magic (or potential disaster, depending on your approach) can transform you from drab to fab in seconds. But fear not, my fellow shimmer enthusiasts, because by the end of this lecture, you’ll be wielding this weapon of mass sparkle like a seasoned pro.
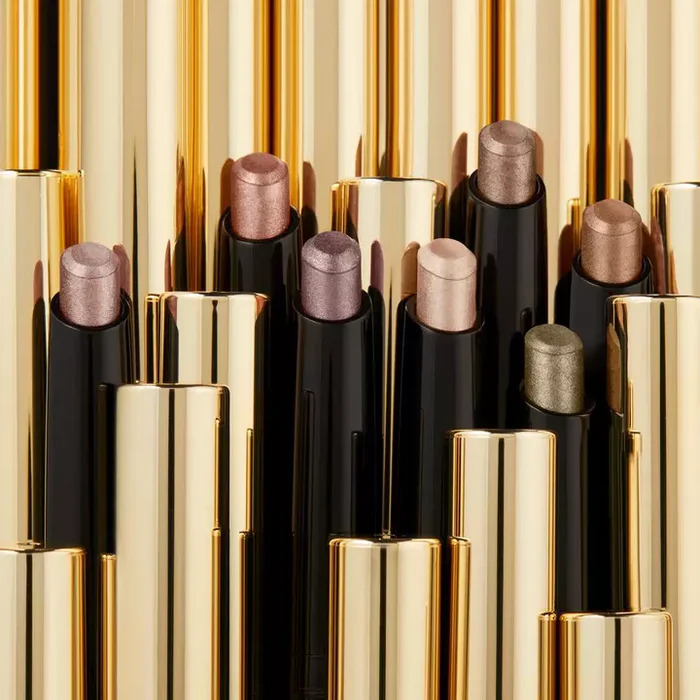
(Slide appears: A close-up shot of a shimmering Deluxe Liquid Glitter Cream Eyeshadow Stick)
I. The Glitterati Genesis: Understanding Your Weapon
Before we even THINK about applying glitter, let’s understand what we’re working with. A Deluxe Liquid Glitter Cream Eyeshadow Stick isn’t your grandma’s loose glitter (thank goodness!). It’s a sophisticated blend of pigments, glitter particles, and a creamy or gel-like base. This base is key – it’s what holds the glitter together, adheres it to your eyelid, and (hopefully) prevents it from migrating to your cheekbones, your eyebrows, and potentially your next-door neighbor.
(Slide appears: A table comparing different types of glitter eyeshadow)
| Glitter Eyeshadow Type | Pros | Cons | Best For | Application Tips |
|---|---|---|---|---|
| Loose Glitter | Most intense sparkle, customizable | Messy, fallout, requires glue, potential eye irritation | Special occasions, dramatic looks | Use a glitter glue primer, apply with a flat brush, tap on gently |
| Pressed Glitter | Less messy than loose glitter, good pigment | Can still have fallout, may require a tacky base | Everyday glitter looks, layering | Apply with a finger or a dense brush, build up in layers |
| Liquid Glitter (Our Star!) | Easy to apply, minimal fallout, long-lasting, often buildable | Can be less intense than loose glitter, some formulas can be drying | Quick and easy looks, beginners, layering | Apply directly from the applicator, blend quickly with a finger or brush |
| Glitter Cream | Blendable, buildable, often hydrating | Can crease, less intense sparkle than loose glitter | Subtle shimmer, all-day wear | Apply with a finger or brush, set with powder for longevity |
Key Features of a Deluxe Liquid Glitter Cream Eyeshadow Stick:
- Creamy Texture: This is what sets it apart. It’s not dry and scratchy like some glitter formulas. The creaminess allows for smooth application and comfortable wear. Think of it as the cashmere sweater of glitter. 😌
- Long-Lasting Formula: Deluxe formulas often boast long-wearing power. We want our glitter to stay put through dance parties, awkward family gatherings, and emergency chocolate binges.
- Buildable Pigment: A good stick allows you to control the intensity. Want a subtle shimmer? One swipe. Want to look like a disco ball? Layer it on, baby! 🕺
- Minimal Fallout: This is crucial. Nobody wants to look like they’ve been attacked by a glitter bomb. A deluxe formula minimizes fallout, keeping the sparkle where it belongs – on your eyelids!
- Comfortable Wear: No scratchy, itchy eyelids here! A good formula will feel comfortable and lightweight.
II. Priming for Perfection: The Foundation of Flawless Glitter
Just like a painter needs a primed canvas, your eyelids need to be prepped before you unleash the glitter beast. This is arguably the MOST important step. Skip it, and you’ll be battling creasing, fallout, and a generally sad-looking glitter situation.
(Slide appears: Step-by-step images of priming the eyelids)
The Priming Protocol:
- Cleanse: Start with a clean, dry eyelid. Remove any makeup or oil residue with a gentle cleanser or makeup remover. Think of it as clearing the stage for our star – the glitter!
- Moisturize (Optional): If you have dry eyelids, a lightweight, oil-free moisturizer is your friend. Allow it to fully absorb before moving on. We don’t want our glitter sliding around on a greasy slip-n-slide.
- Prime: This is non-negotiable. Use an eyeshadow primer specifically designed for long wear and creasing. Apply a thin layer all over your eyelid, blending it up to your brow bone. Primer acts like glue (in a good way!), gripping onto the glitter and preventing it from creasing or migrating.
- Pro Tip: For extra staying power, consider using a glitter glue primer as your base. These are specifically formulated to adhere to glitter particles.
- Set (Optional): If you have oily eyelids, you can set your primer with a light dusting of translucent powder. This will further mattify the lid and create a smooth surface for the glitter.
(Humorous Interlude: A meme of a cat covered in glitter with the caption "My life if I skip eyeshadow primer.")
III. Application Artistry: Mastering the Stick
Now for the fun part! Let’s get that glitter on! But before you go wild, let’s talk technique. A Deluxe Liquid Glitter Cream Eyeshadow Stick is incredibly user-friendly, but a little finesse goes a long way.
(Slide appears: Diagrams showing different eyeshadow placement techniques)
Application Techniques:
- Direct Application: The easiest method. Simply swipe the stick directly onto your eyelid. Start with a thin layer and build up the intensity as desired.
- Placement Options:
- All Over the Lid: For maximum sparkle.
- Center of the Lid: To brighten and add dimension.
- Inner Corner: To open up the eyes and add a touch of shimmer.
- Lower Lash Line: For a subtle pop of glitter.
- Placement Options:
- Brush Application: For more precision and control. Swipe the stick onto the back of your hand and pick up the product with a flat, synthetic eyeshadow brush. Apply to the eyelid in thin layers, blending as you go.
- Brush Recommendation: A flat, synthetic brush works best for packing on the glitter. A blending brush can be used to soften the edges.
- Finger Application: For a more diffused and blended look. Swipe the stick onto your finger and gently pat the product onto your eyelid. This method is great for creating a sheer wash of glitter.
- Pro Tip: Use your ring finger for the most gentle application.
Key Application Tips:
- Start Small: It’s always easier to add more glitter than to take it away. Begin with a thin layer and build up the intensity gradually.
- Blend Quickly: The creamy formula can set quickly, so blend the edges immediately after application.
- Avoid Over-Blending: Over-blending can sheer out the glitter and reduce its impact. Focus on softening the edges rather than blending the glitter all over the lid.
- Layering is Key: For maximum impact, layer different shades of glitter. Start with a base shade and add a pop of color or shimmer on top.
- Clean Up Fallout: Use a clean, fluffy brush to gently sweep away any fallout under the eyes. Or, use a piece of tape (gently!) to pick up stray glitter particles.
(Humorous Interlude: A GIF of someone trying to blend glitter eyeshadow with a giant paintbrush, resulting in glitter everywhere.)
IV. Glitter Goes Glam: Creating Stunning Looks
Now that you’ve mastered the application techniques, let’s explore some dazzling looks you can create with your Deluxe Liquid Glitter Cream Eyeshadow Stick.
(Slide appears: Examples of different glitter eyeshadow looks)
(Slide appears: Examples of different glitter eyeshadow looks)
Look Ideas:
- The Classic Shimmer: Apply a neutral eyeshadow base (browns, taupes, or creams) and then apply the glitter stick all over the lid. This is a simple yet elegant look perfect for everyday wear.
- The Smokey Sparkle: Create a classic smokey eye with dark eyeshadows (blacks, grays, or purples) and then apply the glitter stick to the center of the lid to add a pop of sparkle.
- The Cut Crease Glitter: Create a defined cut crease with a matte eyeshadow and then fill the lid with the glitter stick. This is a more dramatic look perfect for special occasions.
- The Halo Eye: Apply a darker eyeshadow to the inner and outer corners of the eye and then apply the glitter stick to the center of the lid to create a halo effect.
- The Pop of Color: Use a bright colored eyeshadow as a base and then apply a contrasting glitter shade on top.
(Slide appears: A table outlining suggested eyeshadow pairings)
| Glitter Stick Color | Suggested Base Eyeshadow Colors | Look Inspiration |
|---|---|---|
| Gold | Browns, bronzes, champagne, warm tones | Golden goddess, sun-kissed glow |
| Silver | Grays, blacks, cool tones, purples | Icy queen, futuristic vibes |
| Rose Gold | Pinks, mauves, burgundy, warm tones | Romantic shimmer, delicate sparkle |
| Bronze | Browns, greens, golds, earthy tones | Earthy glam, natural shimmer |
| Holographic | Any color! (Black is a great base) | Festival vibes, unicorn dreams |
V. Setting for Success: Locking in the Sparkle
We’ve applied our glitter, we’ve blended like Picasso on a sugar rush, and now we need to make sure that masterpiece STAYS PUT! Setting your glitter eyeshadow is crucial for preventing fallout and creasing.
(Slide appears: Products for setting glitter eyeshadow)
Setting Techniques:
- Setting Spray: A light mist of setting spray can help to lock in the glitter and prevent it from moving around. Choose a setting spray with a fine mist to avoid disturbing the glitter.
- Pro Tip: Hold the setting spray at arm’s length and close your eyes before spraying.
- Translucent Powder (Use Sparingly): If you have oily eyelids, you can lightly dust a translucent powder over the glitter to help absorb excess oil. Use a fluffy brush and a very light hand to avoid dulling the sparkle. Over-powdering can diminish the glitter’s shine.
- Glitter Glue (For Extra Hold): If you’re using a particularly glittery or chunky formula, you can apply a thin layer of glitter glue over the glitter to further secure it.
(Humorous Interlude: A picture of someone using hairspray to set their makeup with the caption "Don’t be this person.")
VI. Troubleshooting Twinkles: Common Glitter Fails and How to Fix Them
Let’s face it, even the best-laid glitter plans can go awry. Here’s a rundown of common glitter eyeshadow problems and how to troubleshoot them:
(Slide appears: A table of common glitter eyeshadow problems and solutions)
| Problem | Solution |
|---|---|
| Fallout | Use a good eyeshadow primer, apply in thin layers, use a glitter glue, clean up fallout with a clean brush or tape. |
| Creasing | Use a good eyeshadow primer, set with translucent powder, avoid applying too much product. |
| Uneven Application | Use a brush for more precise application, blend quickly, build up the intensity in layers. |
| Dull Sparkle | Use a glitter glue to amplify the sparkle, avoid over-powdering, choose a highly pigmented glitter stick. |
| Irritation | Use hypoallergenic glitter, avoid getting glitter in your eyes, remove makeup thoroughly at the end of the day. |
VII. Removal Ritual: Saying Goodbye to the Glam
After a night of dazzling and sparkling, it’s time to bid adieu to our glittery masterpiece. Proper removal is crucial for preventing eye irritation and ensuring your eyelids stay healthy.
(Slide appears: Step-by-step images of removing glitter eyeshadow)
Removal Protocol:
- Oil-Based Makeup Remover: This is your best friend for removing glitter. Oil-based removers gently dissolve the glitter and makeup without requiring harsh rubbing.
- Cotton Pad or Wipe: Soak a cotton pad or makeup wipe with the oil-based remover and gently press it onto your eyelid for a few seconds.
- Gently Wipe Away: Gently wipe away the glitter and makeup. Avoid rubbing or scrubbing, as this can irritate the skin.
- Repeat if Necessary: Repeat the process until all the glitter is removed.
- Wash Your Face: Wash your face with a gentle cleanser to remove any remaining makeup or residue.
- Moisturize: Apply a moisturizer to hydrate and soothe your eyelids.
(Humorous Interlude: A GIF of someone wrestling with a glitter-covered face, desperately trying to remove it.)
VIII. Glitterati Graduation: Embrace the Sparkle!
Congratulations, my sparkly students! You’ve officially graduated from Glitterati Glam 101! You are now equipped with the knowledge and skills to master the Deluxe Liquid Glitter Cream Eyeshadow Stick and create stunning, professional-looking glitter eye looks at home.
(Slide appears: A confetti explosion with the text "You Did It!")
So go forth, embrace the sparkle, and let your inner Glitterati shine! ✨ Just remember to always have fun, experiment with different looks, and never be afraid to add a little extra glitter to your life.
(End with dramatic outro music and sparkling sound effects.)
Assignment: Create three different glitter eye looks using your Deluxe Liquid Glitter Cream Eyeshadow Stick and share them on social media with the hashtag #GlitteratiGlam. Bonus points for creativity and originality!
For detailed product specifications and purchases, please go to :https://zenamakeup.com/products/liquid-glitter-waterproof-eyeshadow-stick
Leave a Reply