Achieving a Seamless, Luminous Eye Look Even with Limited Makeup Experience Using This Easy Set: A Lecture in Luminous Loveliness 👁️✨
Welcome, darling makeup novices and time-strapped goddesses, to "Eyes Wide Open: A Masterclass in Effortless Eye Enchantment!" 🥂
Forget the complicated contouring charts and the 47 brushes you don’t know how to clean (we’ve all been there!). Today, we’re diving headfirst into the glorious world of luminous eye makeup, using a minimalist approach and a foolproof set. Think of it as your secret weapon for looking effortlessly radiant, even if your makeup skills peak at swiping on lip balm. 💄
Your Instructor: Yours truly, a recovering makeup hoarder who finally realized that less is often more (and also less stressful). I’ve spent years battling eyeshadow palettes that resembled abstract art disasters on my face, so trust me, I understand the struggle.
Our Mission: To equip you with the knowledge and techniques to create a stunning, luminous eye look, even if you only have 5 minutes and a shaky hand.
Lecture Outline:
- The Luminous Eye Philosophy: Why "glow" is the ultimate goal. ✨
- The Holy Grail Easy Set: Unveiling your essential tools and products. 🧰
- Prepping for Perfection: The crucial steps before you even touch the eyeshadow. 🧴
- The "One-and-Done" Eyeshadow Technique: For the ultimate beginner. 🥇
- The "Two-Step Tango": Adding dimension without the drama. 💃
- Highlighting Heaven: Where to place that shimmer for maximum impact. 🌟
- Liner Lowdown: Simple strategies for defining your eyes. ✍️
- Mascara Magic: The secret to luscious lashes (without clumps!). 🪄
- Brow Power: Framing your face for a polished finish. 眉
- Troubleshooting & Tips: Because life (and makeup) isn’t always perfect. ⚠️
- Practice Makes Perfect (and Pictures!): Your homework assignment. 📸
1. The Luminous Eye Philosophy: Why "Glow" is the Ultimate Goal ✨
Let’s be honest, nobody needs makeup. But makeup, especially when done right, can be a powerful tool. It can boost your confidence, enhance your natural features, and even make you look like you slept for eight hours (even if you were binge-watching Netflix until 3 AM).
The "luminous eye" philosophy is all about harnessing the power of light. We’re not aiming for a heavy, dramatic look that screams "I spent three hours in front of the mirror!" Instead, we’re striving for a soft, diffused, and radiant effect that catches the light and makes your eyes appear brighter, bigger, and more awake. Think "lit from within" rather than "painted on."
Why is this approach so appealing?
- It’s flattering on everyone: Regardless of your skin tone, eye color, or age, a luminous eye look can enhance your natural beauty.
- It’s versatile: It can be dressed up or down, making it perfect for everything from a casual brunch to a formal event.
- It’s easy to achieve: With the right techniques and products, even a complete beginner can master this look.
- It makes you look… well, alive! Let’s face it, we all need a little help in that department sometimes.
2. The Holy Grail Easy Set: Unveiling Your Essential Tools and Products 🧰
The key to achieving a luminous eye look without the fuss is to pare down your arsenal to the essentials. Here’s what you really need:
| Item | Description | Why It’s Essential | Pro Tip |
|---|---|---|---|
| Eyeshadow Primer | A base that helps eyeshadow adhere better, last longer, and prevent creasing. | Prevents eyeshadow from fading, creasing, and generally misbehaving. Think of it as the glue that holds your eye look together. | A little goes a long way! A pea-sized amount is usually enough for both eyes. |
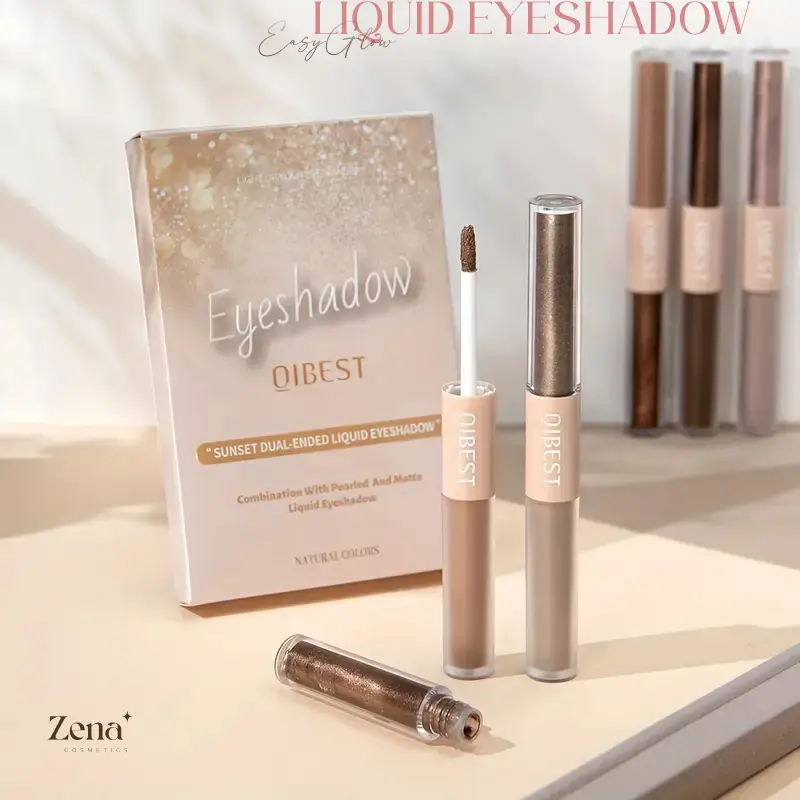
| Neutral Eyeshadow Palette | A palette with a range of neutral shades, from light to dark, in matte and shimmer finishes. | Provides versatility for creating both subtle and more dramatic looks. Choose warm or cool tones based on your skin tone and preference. | Look for palettes with shades that you’ll actually use. Avoid those with colors that intimidate you. |
| Eyeshadow Brush (Fluffy) | A soft, fluffy brush for blending eyeshadow seamlessly. | Essential for creating a diffused, natural look. A fluffy brush allows you to blend harsh lines and create a smooth transition between colors. | Invest in a good quality brush – it will make a world of difference! |
| Eyeshadow Brush (Small, Detail) | A smaller, denser brush for applying eyeshadow to specific areas, like the inner corner or lower lash line. | Provides precision for applying highlight shades and creating definition. | Use this brush to apply a pop of shimmer to the inner corner of your eye for an instant brightening effect. |
| Eyeliner (Pencil or Gel) | A pencil or gel eyeliner in a neutral shade (brown, black, or charcoal). | Defines the eyes and adds depth. A pencil is easier to use for beginners, while a gel liner provides more intensity. | Don’t be afraid to smudge your eyeliner for a softer, more natural look. |
| Mascara | A mascara that adds volume and length to your lashes. | Opens up the eyes and completes the look. Choose a formula that suits your lash type and desired effect. | Apply multiple thin coats of mascara, allowing each coat to dry slightly before applying the next, to prevent clumping. |
| Eyelash Curler | An optional tool for curling your lashes before applying mascara. | Instantly opens up the eyes and makes lashes appear longer and more voluminous. | Always curl your lashes before applying mascara to avoid damaging them. |
| Brow Pencil or Powder | A product to fill in and define your eyebrows. | Frames the face and adds structure. Choose a shade that matches your natural brow color. | Use light, feathery strokes to mimic the look of natural brow hairs. |
| Concealer (optional) | A concealer to brighten the under-eye area and cover any imperfections. | Helps to create a brighter, more awake appearance. | Choose a concealer that is one or two shades lighter than your skin tone. |
3. Prepping for Perfection: The Crucial Steps Before You Even Touch the Eyeshadow 🧴
Just like a painter needs a primed canvas, your eyelids need to be prepped before you start applying eyeshadow. This ensures that your eyeshadow goes on smoothly, blends easily, and lasts all day.
Here’s the prep routine:
- Cleanse: Start with a clean, dry face. Remove any makeup or oils from your eyelids using a gentle cleanser or makeup remover.
- Moisturize: Apply a lightweight moisturizer to your face, avoiding the immediate eye area. A well-hydrated face will help your makeup blend more seamlessly.
- Prime: This is the most important step! Apply a thin layer of eyeshadow primer to your eyelids, from lash line to brow bone. Let it dry for a minute or two before moving on to the next step. Think of primer as the "sticky note" that keeps your eyeshadow in place.
4. The "One-and-Done" Eyeshadow Technique: For the Ultimate Beginner 🥇
Okay, let’s get real. Sometimes, you just don’t have the time or energy to deal with multiple eyeshadows. That’s where the "one-and-done" technique comes in.
This technique involves using a single eyeshadow shade all over your eyelid. It’s quick, easy, and surprisingly effective.
Here’s how to do it:
- Choose your shade: Select a neutral eyeshadow shade with a subtle shimmer or satin finish. Think champagne, rose gold, or light bronze.
- Apply: Using a fluffy eyeshadow brush, apply the eyeshadow all over your eyelid, from lash line to crease.
- Blend: Blend the edges of the eyeshadow upwards towards your brow bone, ensuring there are no harsh lines.
- Finish: Apply eyeliner and mascara to complete the look.
Pro Tip: For an extra touch of luminosity, apply a small amount of the same eyeshadow to the inner corner of your eye.
5. The "Two-Step Tango": Adding Dimension Without the Drama 💃
Ready to level up your eyeshadow game? The "two-step tango" is a simple technique that adds dimension to your eyes without requiring advanced blending skills.
This technique involves using two eyeshadow shades: a lighter shade for the eyelid and a darker shade for the crease.
Here’s how to do it:
- Choose your shades: Select a light, shimmery eyeshadow shade for your eyelid and a slightly darker, matte shade for your crease. For example, you could use a champagne shimmer on the lid and a light brown matte in the crease.
- Apply the light shade: Using a fluffy eyeshadow brush, apply the light eyeshadow all over your eyelid, from lash line to crease.
- Apply the dark shade: Using the same brush (or a slightly smaller one), apply the dark eyeshadow to your crease, blending it outwards towards the outer corner of your eye.
- Blend, blend, blend!: This is the key! Use a clean, fluffy brush to blend the two shades together, ensuring there are no harsh lines. The goal is to create a seamless transition between the light and dark shades.
- Finish: Apply eyeliner and mascara to complete the look.
Pro Tip: Use a windshield wiper motion when blending the eyeshadow in your crease. This helps to create a more diffused and natural look.
6. Highlighting Heaven: Where to Place That Shimmer for Maximum Impact 🌟
6. Highlighting Heaven: Where to Place That Shimmer for Maximum Impact 🌟
Highlighting is the secret weapon for achieving a truly luminous eye look. By strategically placing shimmer on certain areas of your eye, you can instantly brighten and open up your eyes.
Here are the key areas to highlight:
- Inner corner: Applying a small amount of shimmer to the inner corner of your eye instantly brightens the eyes and makes you look more awake.
- Brow bone: Applying a small amount of shimmer to your brow bone (just below your eyebrow) helps to lift the brow and create a more youthful appearance.
- Center of the eyelid: Applying a small amount of shimmer to the center of your eyelid can add dimension and make your eyes appear larger.
Pro Tip: Use a small, detail brush to apply the highlighter to these areas. Be sure to blend the highlighter well to avoid any harsh lines.
7. Liner Lowdown: Simple Strategies for Defining Your Eyes ✍️
Eyeliner can be intimidating, but it doesn’t have to be. Here are a few simple strategies for defining your eyes without the stress:
- Pencil eyeliner: This is the easiest type of eyeliner to use for beginners. Simply line your upper and/or lower lash line with a pencil eyeliner, and then smudge it with a cotton swab or your finger for a softer look.
- Gel eyeliner: Gel eyeliner provides more intensity and precision than pencil eyeliner. Use a small, angled brush to apply the gel eyeliner to your upper lash line, starting from the inner corner and working your way outwards.
- Tightlining: This technique involves lining the upper waterline (the area between your eyelashes and your eyeball) with a pencil eyeliner. This creates a subtle definition without making it look like you’re wearing eyeliner.
Pro Tip: If you’re struggling to draw a straight line, try dotting the eyeliner along your lash line and then connecting the dots.
8. Mascara Magic: The Secret to Luscious Lashes (Without Clumps!) 🪄
Mascara is the final touch that completes your eye look. It opens up your eyes, adds volume and length to your lashes, and makes you look instantly more awake.
Here are a few tips for achieving luscious lashes without the clumps:
- Curl your lashes: Always curl your lashes before applying mascara.
- Wiggle the wand: When applying mascara, wiggle the wand at the base of your lashes to coat them evenly.
- Apply multiple thin coats: Apply multiple thin coats of mascara, allowing each coat to dry slightly before applying the next.
- Use a lash comb: If your lashes are clumping, use a lash comb to separate them.
Pro Tip: If you accidentally get mascara on your eyelid, wait for it to dry completely and then use a cotton swab to gently flick it off.
9. Brow Power: Framing Your Face for a Polished Finish 眉
Don’t underestimate the power of well-groomed eyebrows! They frame your face and add structure to your overall look.
Here’s a simple brow routine:
- Brush: Brush your eyebrows upwards with a spoolie brush.
- Fill: Use a brow pencil or powder to fill in any sparse areas, using light, feathery strokes.
- Set: Set your eyebrows with a brow gel to keep them in place.
Pro Tip: Choose a brow product that matches your natural brow color.
10. Troubleshooting & Tips: Because Life (and Makeup) Isn’t Always Perfect ⚠️
Even with the best techniques and products, things can sometimes go wrong. Here are a few common makeup mishaps and how to fix them:
- Eyeshadow fallout: Place a tissue under your eyes while applying eyeshadow to catch any fallout.
- Creasing eyeshadow: Apply a thin layer of eyeshadow primer before applying eyeshadow.
- Clumpy mascara: Use a lash comb to separate your lashes.
- Uneven eyeliner: Use a cotton swab to clean up any mistakes.
- Over-plucked eyebrows: Use a brow pencil or powder to fill in the sparse areas.
General Tips for Success:
- Start small: Don’t try to do too much at once. Start with a simple look and gradually build from there.
- Practice makes perfect: The more you practice, the better you’ll become.
- Don’t be afraid to experiment: Try different techniques and products to find what works best for you.
- Have fun! Makeup should be enjoyable, so relax and don’t take yourself too seriously.
11. Practice Makes Perfect (and Pictures!): Your Homework Assignment 📸
Now that you’ve learned the theory, it’s time to put it into practice!
Your homework assignment is to recreate the luminous eye look using the techniques and products we discussed today.
Take a before and after picture and share it with me (or just admire your own gorgeousness in the mirror, that works too!).
Bonus points if you:
- Try a different color combination.
- Experiment with different eyeliner styles.
- Share your experience in the comments below.
Congratulations, my luminous lovelies! You are now equipped to create a stunning, effortless eye look that will make you feel confident and radiant. Go forth and glow! ✨💖
For detailed product specifications and purchases, please go to :https://zenamakeup.com/products/liquid-dual-end-easyglow-eyeshadow-set-double-your-eye-sparkles-day-night
Leave a Reply