Achieving a Truly Traceless Finish with Matte Foundation Repair Stick: The Art of Invisible Mending
(Lecture Hall doors swing open with a dramatic creak. A spotlight hits a figure in a lab coat, holding a suspiciously pristine-looking Matte Foundation Repair Stick. This is Professor Visage, your guide on this journey to flawless skin.)
Professor Visage: Greetings, future skin alchemists! Welcome, one and all, to Foundation Repair 101: The Invisible Art of Matte Perfection. I see a lot of hopeful faces, eager to banish those pesky imperfections, those makeup misdemeanors, those… shudders …foundation faux pas that plague us all.
(Professor Visage dramatically clutches their chest.)
Fear not, my students! Today, we embark on a quest. A quest for the holy grail of makeup: a truly traceless finish with our trusty Matte Foundation Repair Stick! Forget heavy layers, forget that telltale "I’m wearing makeup" mask. We’re aiming for undetectable perfection. Think secret agent, but instead of gadgets, our weapon of choice is… well, you know.
(Professor Visage winks, holding up the Matte Foundation Repair Stick.)
So, buckle up, grab your notebooks (or your iPads, I’m not judging), and let’s dive into the secrets of achieving that coveted, completely natural, "I woke up like this" (even if you didn’t) look.
I. The Anatomy of a Foundation Fiasco: Understanding the Problem
(A slide appears on the screen: a cartoon face riddled with common makeup woes.)
Before we can conquer our enemy (imperfections, not actual enemies… unless your blemishes are sentient, then we have bigger problems), we need to understand it. What are the common pitfalls that lead to a less-than-flawless finish?
-
The Dreaded Cake Face: Too much product, applied too heavily. This is the cardinal sin of makeup. It screams "I’m wearing makeup!" and ages you faster than a bad Tinder date.
-
The Obvious Patch Job: Concealing blemishes with a contrasting shade or neglecting to blend properly. This results in little islands of color that draw more attention to the imperfection than if you’d just left it alone.
-
The Unnatural Texture: Uneven application, emphasizing pores, or settling into fine lines. This makes your skin look rough and… well, unnatural. Nobody wants to look like they’ve aged overnight.
-
The Shade Mismatch Mayhem: Using the wrong shade of foundation, creating a visible line of demarcation at the jawline. This is a classic mistake that makes you look like you’re wearing someone else’s face.
-
The Oxidation Oopsy: Foundation changing color throughout the day, turning orange or muddy. This is a chemical reaction between the foundation and your skin’s oils.
(Professor Visage sighs dramatically.)
These are the demons we must exorcise! But fear not, my disciples, for the Matte Foundation Repair Stick is our weapon of choice!
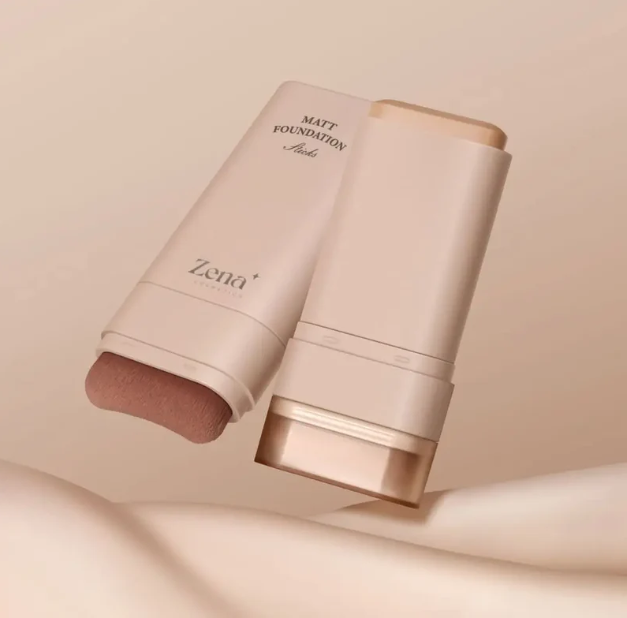
II. The Matte Foundation Repair Stick: A Superhero in Disguise
(The slide changes to a close-up of the Matte Foundation Repair Stick, glowing heroically.)
Let’s talk about our star player. What is a Matte Foundation Repair Stick, and why is it so darn good at achieving a traceless finish?
Essentially, it’s a concentrated, portable version of your foundation, designed for targeted correction and touch-ups. Think of it as a superhero sidekick, always ready to swoop in and save the day!
Key Features & Benefits:
| Feature | Benefit | Why It Matters for a Traceless Finish |
|---|---|---|
| Matte Finish | Controls shine, minimizes the appearance of pores and imperfections. | Prevents the repaired area from looking greasy or unnatural. |
| Targeted Use | Precise application for blemishes, redness, and dark spots. | Avoids applying product to areas that don’t need it, preventing caking. |
| Blendable Formula | Seamlessly blends into the surrounding skin. | Eliminates harsh lines and visible edges. |
| Portable & Convenient | Easy to carry and use for on-the-go touch-ups. | Allows for quick and discreet correction throughout the day. |
| Long-Wearing | Resists fading and transfer, maintaining coverage throughout the day. | Prevents the repaired area from disappearing or oxidizing. |
| Variety of Shades | Allows for a precise match to your skin tone. | Ensures seamless blending and a natural-looking result. |
(Professor Visage points to the table with a laser pointer.)
See? It’s a powerhouse of perfection! But a powerful tool is only as good as the artist wielding it.
III. Mastering the Art of Traceless Application: Techniques and Tips
(The slide changes to a step-by-step demonstration of application techniques.)
Now, let’s get down to the nitty-gritty. How do we actually use this magical stick to achieve a finish so flawless, it’ll make even professional makeup artists weep with envy?
A. Prep is Key: The Foundation for Success (Literally!)
-
Cleanse and Moisturize: A clean, hydrated canvas is essential. Think of your skin as an artist’s canvas – you wouldn’t paint on a dirty, cracked surface, would you? Use a gentle cleanser and a moisturizer appropriate for your skin type.
-
Prime Time: A primer creates a smooth surface, minimizes pores, and helps your makeup last longer. Choose a primer that addresses your specific concerns, such as oil control, hydration, or pore minimization.
(Professor Visage pulls out a selection of primers and examines them dramatically.)
B. Shade Selection: Finding Your Perfect Match
-
The Jawline Test: Swatch the repair stick on your jawline in natural light. The shade should disappear into your skin.
-
Consider Your Undertones: Are you warm (golden), cool (pink), or neutral? Understanding your undertones will help you choose a shade that complements your complexion.
-
Don’t Be Afraid to Mix: If you can’t find an exact match, you can mix two shades of the repair stick to create your perfect color.
(Professor Visage holds up a magnifying glass and examines a student’s skin tone with exaggerated intensity.)
C. Application Techniques: The Devil’s in the Detail (and the Blending!)
-
Less is More: Start with a tiny amount of product. You can always add more, but it’s much harder to take away.
-
Targeted Application: Apply the repair stick directly to the imperfection, such as a blemish, redness, or dark spot. Avoid applying it to the surrounding skin if it doesn’t need coverage.
-
Blending is Your Best Friend: Use a small, dense brush, a makeup sponge, or your fingertip to gently blend the repair stick into the surrounding skin. The goal is to create a seamless transition between the repaired area and the rest of your complexion.
-
Blending is Your Best Friend: Use a small, dense brush, a makeup sponge, or your fingertip to gently blend the repair stick into the surrounding skin. The goal is to create a seamless transition between the repaired area and the rest of your complexion.
-
Stipple, Don’t Swipe: Use a stippling motion (gentle tapping) rather than swiping, which can disturb the product and create streaks.
-
The Power of Patting: Gently pat the edges of the repaired area with your fingertip or a damp sponge to soften any harsh lines.
(Professor Visage demonstrates the stippling and patting techniques on a volunteer student, who nervously smiles.)
D. Setting the Stage: Ensuring Long-Lasting Perfection
-
Translucent Powder: A light dusting of translucent powder will set the repair stick and prevent it from creasing or transferring.
-
Setting Spray: A setting spray will further lock in your makeup and create a natural, skin-like finish.
(Professor Visage dramatically spritzes setting spray into the air, creating a shimmering cloud.)
IV. Troubleshooting Traceless Triumph: Common Mistakes and How to Fix Them
(The slide changes to a list of common mistakes and their solutions.)
Even with the best techniques, mistakes can happen. Here’s how to troubleshoot some common problems:
| Problem | Solution |
|---|---|
| Cakey Finish | Use less product, blend more thoroughly, and exfoliate regularly to remove dead skin cells. |
| Visible Edges | Blend the repair stick further into the surrounding skin, using a damp sponge or your fingertip. |
| Shade Mismatch | Reassess your skin tone and choose a more appropriate shade, or mix two shades to create a custom blend. |
| Product Settling into Fine Lines | Use a hydrating primer and avoid applying too much product around the eyes and mouth. |
| Repair Stick Oxidizing | Choose a shade that’s slightly lighter than your skin tone, and use an oil-absorbing primer and setting spray. |
| Foundation Looking Patchy | Exfoliate, moisturize, and use a primer to create a smooth canvas. Ensure the repair stick is thoroughly blended. |
(Professor Visage taps the table with a pointer, emphasizing each solution.)
V. Advanced Techniques: Taking Your Traceless Game to the Next Level
(The slide changes to a graphic of advanced makeup techniques.)
Once you’ve mastered the basics, you can explore these advanced techniques to achieve an even more flawless finish:
-
Color Correction: Use a color-correcting concealer under the repair stick to neutralize redness, dark circles, or other discoloration. Green cancels out redness, peach or orange cancels out dark circles on deeper skin tones, and yellow cancels out purple tones.
-
Highlighting and Contouring: Use a highlighting stick to accentuate your features and a contour stick to add dimension. Remember to blend, blend, blend!
-
Baking: Apply a thick layer of translucent powder to the repaired area, let it sit for 5-10 minutes, and then dust off the excess. This will set the makeup and create a long-lasting, flawless finish. (Use with caution – baking can be drying!)
-
Airbrushing Effect: Dampen your makeup sponge with setting spray before blending the repair stick. This will create a smoother, more airbrushed finish.
(Professor Visage winks.)
These are techniques for the true makeup masters!
VI. Case Studies: Real-Life Examples of Traceless Transformations
(The slide changes to before-and-after photos of individuals using the Matte Foundation Repair Stick.)
Let’s look at some real-life examples of how the Matte Foundation Repair Stick can transform your skin:
-
Case Study 1: Acne Blemishes: A young woman with acne blemishes achieved a flawless complexion by using the repair stick to conceal the blemishes and redness.
-
Case Study 2: Dark Circles: A busy mom with dark circles under her eyes used the repair stick to brighten her under-eye area and look more awake.
-
Case Study 3: Redness: A man with rosacea used the repair stick to neutralize the redness on his cheeks and achieve a more even skin tone.
(Professor Visage points to the photos with pride.)
These are just a few examples of the transformative power of the Matte Foundation Repair Stick!
VII. Q&A: Ask the Expert (That’s Me!)
(The slide changes to a "Q&A" graphic.)
Now, it’s your turn! Ask me anything about achieving a traceless finish with the Matte Foundation Repair Stick. No question is too silly (except maybe "Can I use this to repair my car?" The answer is no. Definitely no).
(Professor Visage opens the floor to questions, fielding them with expertise and humor.)
VIII. Conclusion: The Journey to Flawless Starts Now
(The slide changes to a final message: "Go Forth and Be Flawless!")
Congratulations, my students! You have now been initiated into the sacred art of achieving a truly traceless finish with the Matte Foundation Repair Stick. Remember the principles we’ve discussed today:
- Prep your skin.
- Choose the right shade.
- Apply sparingly and blend thoroughly.
- Set your makeup.
- Don’t be afraid to experiment and find what works best for you.
(Professor Visage raises the Matte Foundation Repair Stick in the air, like a triumphant warrior.)
Now go forth and create your own flawless masterpieces! Remember, perfection isn’t about covering up your flaws; it’s about enhancing your natural beauty. And with the Matte Foundation Repair Stick, you have the power to do just that.
(The lecture hall lights dim as Professor Visage exits, leaving the students inspired and ready to conquer their imperfections. The sound of frantic makeup application can be heard as the doors close.)
For detailed product specifications and purchases, please go to :https://zenamakeup.com/products/traceless-matte-foundation-repair-stick
Leave a Reply