Lecture: Eyeshadow Alchemy: From No-Crease Canvas to Flawless Finish (with a dash of sass!)
Alright, darlings, gather ’round! Today, we’re diving headfirst into the glorious, sometimes terrifying, world of eyeshadow application. Forget those patchy, muddy messes we’ve all endured. We’re going from zero to eyeshadow hero, and the secret weapon? A fantastic eyeshadow primer. Specifically, we’re focusing on achieving flawless application on top of our beloved "No-Crease Eyeshadow Primer – Long-Wear Liquid Base." Think of it as building a magnificent art gallery dedicated solely to your peepers! 🖼️
This isn’t just about slapping on some color, oh no! This is about technique, understanding your tools, and a healthy dose of self-love (because you deserve perfectly blended eyeshadow!).
Lecture Outline:
- Primer Praise: Why This Step is Non-Negotiable
- The Pre-Shadow Ritual: Setting the Stage for Success
- Brush Up Your Skills: A Tool for Every Task
- Eyeshadow 101: Formulations, Pigmentation, and Playtime!
- The Application Masterclass: Techniques for a Flawless Finish
- Troubleshooting Terrors: Common Mistakes and How to Conquer Them
- Beyond the Basics: Advanced Techniques for Eyeshadow Artists
- Sealing the Deal: Making Your Masterpiece Last
- Practice Makes Perfect (and Prevents Patchiness!)
1. Primer Praise: Why This Step is Non-Negotiable
Let’s be honest, skipping primer is like going to a fancy gala in your pajamas. Sure, you could do it, but you’re not setting yourself up for success (or a standing ovation). Your eyelids are delicate, oil-prone canvases. Without primer, eyeshadow will:
- Crease: Settle into those fine lines like a grumpy cat finding the perfect sunbeam. 😼
- Fade: Disappear faster than your patience in a long checkout line. 💨
- Look Patchy: Cling to dry spots and skip over others, creating a Jackson Pollock painting… but not in a good way. 🎨
- Lack Vibrancy: Dull colors that look sadder than a wilted daisy. 🌼
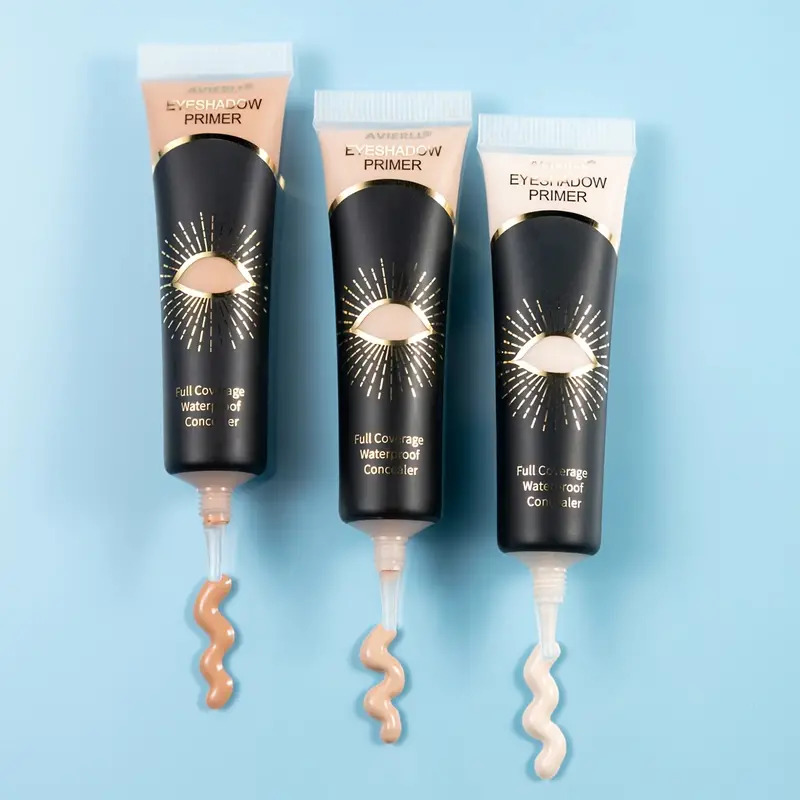
Our "No-Crease Eyeshadow Primer – Long-Wear Liquid Base" is the superhero we need! It creates a smooth, even surface, neutralizes discoloration, amplifies color payoff, and, most importantly, locks that eyeshadow in place. Think of it as the glue that holds your eyeshadow dreams together. ✨
Why is a long-wear liquid base so important?
- Long-Lasting Power: Liquid formulas tend to adhere better to the skin, providing superior staying power compared to powder primers.
- Crease Prevention: The "no-crease" claim isn’t just marketing fluff. These formulas are designed to prevent eyeshadow from settling into fine lines.
- Color Payoff: They create a tacky base that eyeshadow pigments can grip onto, resulting in more vibrant and true-to-pan color.
- Smooth Canvas: Liquid primers fill in imperfections and create a smooth surface for seamless blending.
2. The Pre-Shadow Ritual: Setting the Stage for Success
Now that we’re all aboard the primer train, let’s talk application. This isn’t just slapping it on and hoping for the best. We’re aiming for precision and perfection!
Here’s the routine:
- Cleanse and Hydrate: Start with a clean, moisturized face. Avoid applying heavy creams or oils to the eye area, as this can interfere with primer adhesion. Think of it as preparing a clean, dry canvas.
- Prime Time: Apply a tiny amount of your "No-Crease Eyeshadow Primer – Long-Wear Liquid Base" to your fingertip. Seriously, a little goes a long way. You don’t want to overload your lid and cause creasing. Think pea-sized! 🫛
- Gentle Application: Using your fingertip, gently tap the primer onto your entire eyelid, from lash line to brow bone (or wherever you plan to apply eyeshadow). Avoid rubbing or dragging, as this can irritate the delicate skin around your eyes.
- Even Distribution: Make sure you’ve covered every nook and cranny. Pay special attention to the inner corner of your eye, where eyeshadow tends to crease most.
- Set the Stage (Optional): This is where the magic really happens. After the primer has dried (usually a minute or two), lightly set it with a translucent setting powder. This creates an even more smooth and grip-able surface for your eyeshadow. It’s like adding a layer of primer to your primer! Use a fluffy brush and a light hand. We’re not baking a cake here, just setting the stage for greatness. 🎭
Troubleshooting:
- Primer feels sticky: You’ve probably used too much. Gently blot with a clean tissue.
- Primer pills up: This can happen if you apply it over a heavy moisturizer or if you rub it in too vigorously. Try using a lighter moisturizer or dabbing the primer on instead of rubbing.
- Eyeshadow still creases: Make sure you’re using a long-wear, crease-resistant primer. Also, consider setting the primer with powder.
3. Brush Up Your Skills: A Tool for Every Task
Using the right brushes is like having the right tools in your toolbox. You wouldn’t use a hammer to paint a picture, would you? (Okay, maybe you would, but I wouldn’t recommend it!)
Here’s a breakdown of essential eyeshadow brushes:
| Brush Type | Description | Use | Icon |
|---|---|---|---|
| Flat Shader Brush | Dense, flat bristles | Packing color onto the lid, applying shimmer shadows, creating a base color. | 🖌️ |
| Blending Brush | Fluffy, tapered bristles | Blending eyeshadows together seamlessly, diffusing harsh lines, creating a soft, diffused look. | ☁️ |
| Pencil Brush | Small, dense, pointed bristles | Applying color to the crease, inner corner, or along the lower lash line, creating precise lines. | ✏️ |
| Crease Brush | Angled or tapered bristles | Defining the crease, creating depth and dimension. | 📐 |
| Smudge Brush | Short, dense bristles | Smudging eyeliner or eyeshadow along the lash line for a smoky effect. | 💨 |
| Angled Brush | Firm, angled bristles | Filling in brows, applying gel eyeliner, creating a sharp wing. | 🔪 |
| Detail Brush | Very small, precise bristles | Applying highlight to the inner corner of the eye, cleaning up edges. | ✨ |
Brush Maintenance is Key!
Clean your brushes regularly with a gentle brush cleaner or soap and water. Dirty brushes harbor bacteria and can lead to breakouts. Plus, clean brushes blend better! Think of it as giving your brushes a spa day. 🧖♀️
4. Eyeshadow 101: Formulations, Pigmentation, and Playtime!
Eyeshadows come in a dizzying array of formulations, each with its own unique characteristics. Understanding these differences will help you choose the right eyeshadows for your desired look and skill level.
Eyeshadow Formulations:
- Powder: The most common type. Comes in matte, satin, shimmer, and metallic finishes. Easy to blend and buildable. Great for beginners.
- Cream: Creamy texture that glides on smoothly. Can be more pigmented than powder shadows. Best applied with fingers or a synthetic brush. Can crease on oily lids if not set properly.
- Liquid: Highly pigmented and long-lasting. Dries quickly, so blending needs to be done quickly. Best for experienced users.
- Loose Pigment: Highly concentrated powder that can be used wet or dry. Requires a sticky base for optimal adhesion. Can be messy!
- Baked: Created by baking a liquid or cream formula into a solid. Often has a shimmery or marbled effect.
Pigmentation Power:
Pigmentation refers to the intensity of the color. Highly pigmented eyeshadows pack a punch with minimal product, while less pigmented shadows require more building. Start with less pigmented shadows if you’re a beginner, as they’re more forgiving.
Pigmentation refers to the intensity of the color. Highly pigmented eyeshadows pack a punch with minimal product, while less pigmented shadows require more building. Start with less pigmented shadows if you’re a beginner, as they’re more forgiving.
Playing with Colors:
Understanding color theory can take your eyeshadow game to the next level.
- Neutral Colors: Beige, brown, gray, black. These are your everyday staples and are great for creating a natural look or as a base for bolder colors.
- Warm Colors: Red, orange, yellow. These colors can make your eyes pop and are great for creating a vibrant, summery look.
- Cool Colors: Blue, green, purple. These colors can create a smoky, dramatic look.
- Complementary Colors: Colors that are opposite each other on the color wheel (e.g., blue and orange, purple and yellow, green and red). These colors create a striking contrast and can make your eyes look brighter.
Pro Tip: Experiment! Don’t be afraid to try new colors and combinations. Eyeshadow is meant to be fun!
5. The Application Masterclass: Techniques for a Flawless Finish
Okay, class, pencils down! It’s time for the practical exam. We’re going to break down the application process step-by-step.
The Basic Eyeshadow Application Technique:
- Transition Shade: Using a fluffy blending brush, apply a light, neutral shade to your crease. This will act as a transition between your lid color and your brow bone highlight. Think of it as the foundation for your masterpiece. 🏠
- Lid Color: Using a flat shader brush, pack your desired color onto your eyelid. Apply it in a patting motion, rather than sweeping, to avoid fallout.
- Crease Color: Using a crease brush, apply a slightly darker shade to your crease. This will add depth and dimension to your eyes. Start with a small amount of product and build up the intensity gradually.
- Blending is Key! Using a clean blending brush, blend the crease color into the transition shade. The goal is to create a seamless transition between the two colors.
- Highlight: Apply a light, shimmery shade to your brow bone and inner corner of your eye. This will brighten your eyes and create a more awake look.
- Lower Lash Line (Optional): Apply a small amount of eyeshadow along your lower lash line using a pencil brush or a small angled brush. This will balance out the look and create a more dramatic effect.
- Eyeliner and Mascara: Finish off the look with eyeliner and mascara.
Different Eyeshadow Looks:
- Natural Look: Use neutral shades and a light hand. Focus on blending and creating a soft, diffused look.
- Smoky Eye: Use darker shades and focus on blending and smudging. Start with a light application and build up the intensity gradually.
- Cut Crease: A more advanced technique that involves defining the crease with a sharp line. Requires a steady hand and a good crease brush.
- Halo Eye: A technique that involves placing a shimmery shade in the center of the lid and surrounding it with darker shades. This creates a halo effect that makes your eyes look bigger and brighter.
Pro Tip: Use tape as a guide for creating a sharp wing or cut crease.
6. Troubleshooting Terrors: Common Mistakes and How to Conquer Them
Even the most seasoned makeup artists make mistakes. It’s part of the learning process! Here are some common eyeshadow blunders and how to fix them:
| Problem | Solution |
|---|---|
| Patchy Eyeshadow | Make sure you’re using a good eyeshadow primer and that you’re blending your eyeshadow properly. Also, exfoliate your eyelids regularly to remove dead skin cells. |
| Muddy Colors | Avoid using too many colors at once. Start with a few basic shades and build up the intensity gradually. Also, clean your brushes between colors. |
| Too Much Fallout | Tap off the excess eyeshadow from your brush before applying it to your lid. You can also apply your eyeshadow before your foundation to avoid messing up your base. |
| Creasing Eyeshadow | Make sure you’re using a long-wear, crease-resistant eyeshadow primer and that you’re setting it with powder. Avoid applying too much eyeshadow to your eyelids. |
| Eyeshadow Fades Quickly | Use a good eyeshadow primer and set your eyeshadow with a setting spray. |
| Uneven Application | Take your time and focus on blending. Use a light hand and build up the intensity gradually. |
| Color Doesn’t Show Up Well | Make sure you’re using highly pigmented eyeshadows. You can also wet your brush with setting spray before applying the eyeshadow to increase the color payoff. |
7. Beyond the Basics: Advanced Techniques for Eyeshadow Artists
Ready to take your eyeshadow skills to the next level? Here are some advanced techniques to try:
- Wet/Dry Application: Applying eyeshadow with a wet brush can intensify the color payoff and create a more dramatic look.
- Color Blocking: Creating graphic eyeshadow looks with bold, contrasting colors.
- Reverse Cat Eye: Creating a cat eye on the lower lash line instead of the upper lash line.
- Duochrome Shadows: Using eyeshadows that shift colors depending on the angle of the light.
- Glitter Application: Applying glitter to the eyelids for a sparkly, glamorous look.
Remember: Practice makes perfect! Don’t be afraid to experiment and try new things.
8. Sealing the Deal: Making Your Masterpiece Last
You’ve spent all this time creating a stunning eyeshadow look. Now, you want to make sure it lasts all day (or all night!). Here’s how to seal the deal:
- Setting Spray: A setting spray will lock your eyeshadow in place and prevent it from creasing or fading. Choose a setting spray that is specifically designed for long wear.
- Eyeshadow Primer (Again!): Yes, even after applying eyeshadow, a light dusting of primer can add a layer of security.
- Avoid Touching Your Eyes: This seems obvious, but it’s important. Touching your eyes can transfer oils and break down your eyeshadow.
9. Practice Makes Perfect (and Prevents Patchiness!)
The most important thing to remember is that practice makes perfect. Don’t get discouraged if your first few attempts aren’t flawless. Keep experimenting, keep learning, and keep having fun!
Homework Assignment:
- Choose one of the eyeshadow looks discussed in this lecture.
- Gather your eyeshadows, brushes, and "No-Crease Eyeshadow Primer – Long-Wear Liquid Base."
- Follow the steps outlined in the lecture and create your masterpiece!
- Take a picture and share it with the class (or at least with yourself!).
- Repeat steps 1-4 as many times as needed until you achieve eyeshadow mastery!
Congratulations, you’ve officially completed Eyeshadow Alchemy 101! Go forth and create eyeshadow magic! 🧙♀️✨ Now go, my pretties, and blend like the wind! You’ve got this! 😉
For detailed product specifications and purchases, please go to :https://zenamakeup.com/products/no-crease-eyeshadow-primer-long-wear-liquid-base
Leave a Reply