Root Reboot: Mastering Hairline Dye Powder for Part Line Perfection 👩🏫👑✨
Alright, class, settle down! Today we’re diving headfirst (pun intended!) into the wonderful world of hairline dye powder, your secret weapon in the ongoing battle against those pesky, tell-tale roots peeking through your perfectly coiffed mane. Forget the salon panic, the expensive appointments, and the existential dread of realizing your roots are broadcasting your "real" age to the world. We’re taking control, one powder puff at a time!
This isn’t just about covering gray, folks. This is about confidence, convenience, and reclaiming your hair game! Think of hairline dye powder as your personal, portable Photoshop for your hair. Ready to become root-touch-up rockstars? Let’s get started!
Lecture Outline:
- The Root of the Problem (and Why We Need a Solution)
- Hairline Dye Powder 101: What It Is and How It Works
- Choosing Your Champion: Selecting the Right Shade and Formula
- Tools of the Trade: Gathering Your Arsenal
- The Application Process: From Rookie to Rockstar in 5 Easy Steps
- Pro Tips and Tricks: Mastering the Art of Disguise
- Troubleshooting: When Things Go Wrong (and How to Fix Them)
- Maintenance and Care: Keeping Your Roots Under Wraps
- Beyond the Part Line: Creative Uses for Hairline Dye Powder
- Conclusion: Embrace the Powdered Power!
1. The Root of the Problem (and Why We Need a Solution) 👴👵😩
Let’s be honest, roots are the bane of every hair-dyeing individual’s existence. It’s a universal struggle, a constant reminder that time marches on (and hair grows!). Whether you’re battling grays creeping in like unwelcome houseguests, or your natural color is staging a full-blown rebellion against your carefully chosen shade, roots are a persistent problem.
- The Time Crunch: Who has the time (or the budget!) for salon visits every few weeks? Life’s busy! We’re juggling work, family, hobbies, and the occasional existential crisis.
- The Financial Burden: Salon appointments can be expensive! Those touch-ups add up quicker than you can say "root canal."
- The Hair Damage Dilemma: Constant dyeing can wreak havoc on your hair, leaving it dry, brittle, and prone to breakage. We need a gentler solution!
- The "Oh Crap!" Moments: You have a big meeting, a hot date, or a family gathering and suddenly realize your roots are screaming for attention. Panic mode activated! 🚨
That’s where hairline dye powder swoops in to save the day! It’s the quick, affordable, and relatively harmless solution for those in-between-salon-visits moments.
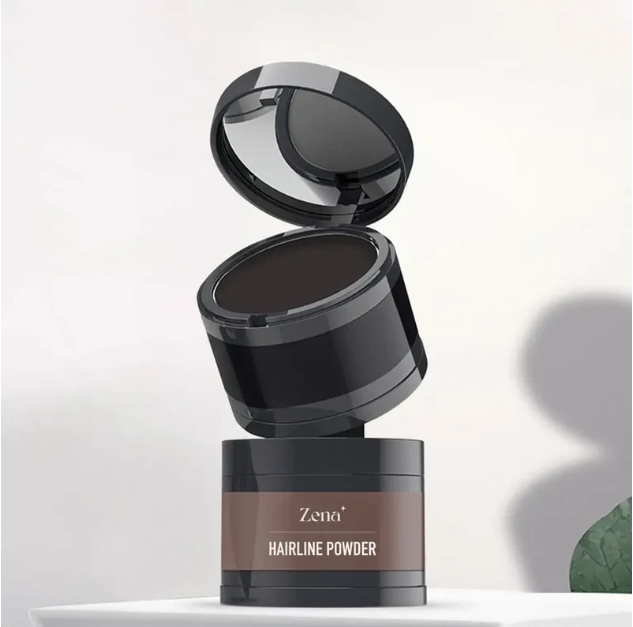
2. Hairline Dye Powder 101: What It Is and How It Works 🧪✨
Hairline dye powder is essentially a pigmented powder designed to temporarily conceal roots and blend them seamlessly with your dyed hair. Think of it as makeup for your hair!
- Composition: Typically made from a blend of pigments, binding agents (like talc or mica), and sometimes conditioners or oils.
- Mechanism: The powder adheres to the hair shaft, effectively masking the color difference between the root and the dyed hair. It doesn’t chemically alter the hair; it’s purely a cosmetic cover-up.
- Longevity: Lasts until your next shampoo. It’s not permanent! Rain, sweat, and vigorous scratching can affect its staying power.
- Texture: Available in various textures, from fine powders to pressed powders, depending on the brand and application method.
Think of it like this:
| Feature | Hairline Dye Powder | Permanent Hair Dye |
|---|---|---|
| Permanence | Temporary (washes out) | Permanent (grows out) |
| Chemical Action | None (cosmetic cover-up) | Yes (alters hair structure) |
| Application | Quick and easy | More involved, requires expertise |
| Hair Damage | Minimal to none | Potential for damage with frequent use |
| Cost | Relatively inexpensive | More expensive |
| Best For | Quick touch-ups, disguising roots | Significant color change, covering large areas |
3. Choosing Your Champion: Selecting the Right Shade and Formula 🎨👩🔬
Choosing the right shade is crucial! A mismatch can result in a patchy, unnatural look that defeats the whole purpose.
- Match Your Dyed Hair: Aim for a shade that’s as close as possible to your dyed hair color, especially at the roots.
- Go a Shade Lighter: If you’re unsure, err on the side of a shade lighter rather than darker. A lighter shade is more forgiving and easier to blend.
- Consider Your Undertones: Are you cool-toned (ashy browns, cool reds) or warm-toned (golden browns, auburn reds)? Choose a powder that complements your undertones.
- Read Reviews: See what other users with similar hair colors have to say about specific shades and brands.
Formula Considerations:
- Powder vs. Pressed Powder: Loose powders offer more flexibility in application but can be messy. Pressed powders are more compact and travel-friendly.
- Ingredients: Look for powders that are free of harsh chemicals like parabens and sulfates. Consider powders with added conditioners or oils for extra hydration.
- Water Resistance: If you live in a humid climate or are prone to sweating, opt for a water-resistant formula.
- Application Method: Some powders are designed for use with a brush, while others come with a sponge applicator. Choose one that you find comfortable and easy to use.
Pro-Tip: If you’re between shades, consider buying two and blending them together to create a custom color! 👩🎨
4. Tools of the Trade: Gathering Your Arsenal 🧰 🖌️
Having the right tools makes all the difference!
- Hairline Dye Powder: Obviously! Your weapon of choice.
- Application Brush: A small, angled brush is ideal for precise application along the hairline and part line. Avoid using large, fluffy brushes, as they can spread the powder too widely. An eyeshadow brush can also work in a pinch.
- Mirror: A well-lit mirror is essential for seeing what you’re doing! A magnifying mirror can be helpful for close-up work.
- Old Towel or Cape: Protect your clothing from accidental spills. No one wants to explain why they have brown streaks on their favorite white shirt.
- Hair Spray (Optional): A light mist of hairspray can help set the powder and prevent it from transferring.
- Cotton Swabs (Optional): For cleaning up any stray powder.
- Hair Clip (Optional): To hold back sections of hair for easier access.
5. The Application Process: From Rookie to Rockstar in 5 Easy Steps 🎬🌟
Alright, let’s get down to business!
Alright, let’s get down to business!
Step 1: Prep Your Hair: Make sure your hair is dry and styled as usual. This will give you a better idea of where the roots are most visible.
Step 2: Section Your Hair: Use a comb to create a clean part line. You can also section off the hair around your face if you have a lot of visible roots along your hairline.
Step 3: Apply the Powder: Using your angled brush, gently dip into the powder. Tap off any excess to prevent fallout. Apply the powder to your roots in short, light strokes, starting at the scalp and working your way outwards. Focus on the areas where the roots are most noticeable.
Step 4: Blend, Blend, Blend!: Use the brush to blend the powder into your dyed hair. This is crucial for creating a natural-looking transition. You can also use your fingers to gently smudge the powder for a more seamless blend.
Step 5: Set (Optional): If desired, lightly mist your hair with hairspray to set the powder and prevent it from transferring.
Visual Guide:
| Step | Description | Icon/Emoji |
|---|---|---|
| 1. Prep Your Hair | Ensure your hair is dry and styled. | 💁♀️ |
| 2. Section Your Hair | Create a clean part line. | ✂️ |
| 3. Apply the Powder | Gently apply the powder to your roots using short, light strokes. | 🖌️ |
| 4. Blend, Blend, Blend! | Blend the powder into your dyed hair for a natural-looking transition. | 🔄 |
| 5. Set (Optional) | Lightly mist with hairspray. | 🌬️ |
6. Pro Tips and Tricks: Mastering the Art of Disguise 🕵️♀️✨
- Less is More: Start with a small amount of powder and build up the coverage as needed. It’s easier to add more than to remove excess.
- Stippling Technique: For stubborn grays, try stippling the powder onto the roots using a dabbing motion. This will help to deposit more pigment and provide better coverage.
- Don’t Forget the Temples: Pay attention to the hair around your temples, as this is often one of the first places where grays appear.
- Blend Downwards: When blending the powder, blend downwards into your dyed hair, rather than upwards towards your scalp. This will help to create a more natural-looking transition.
- Practice Makes Perfect: Don’t be discouraged if you don’t get it right the first time. Practice makes perfect!
7. Troubleshooting: When Things Go Wrong (and How to Fix Them) 🚑🆘
Even the best of us have mishaps! Here’s how to handle common problems:
- Powder Fallout: If you get powder on your forehead or face, use a damp cotton swab to gently wipe it away.
- Too Much Powder: If you’ve applied too much powder, use a clean brush to dust off the excess.
- Uneven Coverage: If you have patchy coverage, go back and apply more powder to the areas that need it.
- Color Mismatch: If the powder is too light or too dark, try mixing it with another shade to create a custom color. Or, admit defeat and order the right shade next time. 🤷♀️
- Transferring Powder: If the powder is transferring onto your clothes or pillow, try using a stronger hairspray to set it.
8. Maintenance and Care: Keeping Your Roots Under Wraps 🧼🚿
- Wash Your Hair Regularly: Hairline dye powder washes out with shampoo, so you’ll need to reapply it after each wash.
- Avoid Excessive Sweating: Excessive sweating can cause the powder to run, so avoid strenuous activities if you want to keep your roots covered.
- Store Your Powder Properly: Store your powder in a cool, dry place to prevent it from clumping or hardening.
- Replace Regularly: Like all makeup products, hairline dye powder has a shelf life. Replace it every 6-12 months to ensure optimal performance.
9. Beyond the Part Line: Creative Uses for Hairline Dye Powder 🎨💡
Hairline dye powder isn’t just for covering roots! Get creative:
- Eyebrow Filling: Use a shade that matches your eyebrows to fill in sparse areas and create a fuller, more defined look.
- Eyeliner: Use a dark shade as an eyeliner for a soft, smoky effect.
- Contouring: Use a darker shade to contour your hairline and create the illusion of a smaller forehead.
- Creating Depth: Apply a slightly darker shade to the roots of your hair to create the illusion of more depth and dimension.
10. Conclusion: Embrace the Powdered Power! 🎉🙌
Congratulations, class! You’ve successfully completed Hairline Dye Powder 101! You’re now equipped with the knowledge and skills to conquer those pesky roots and reclaim your hair confidence.
Remember, hairline dye powder is a temporary solution, not a permanent fix. But it’s a fantastic tool for extending the time between salon visits, saving money, and feeling your best. So go forth, embrace the powdered power, and rock those roots (or rather, don’t rock those roots!). Now go forth and conquer! ✨
This lecture provides a comprehensive overview of hairline dye powder, covering everything from the basics to advanced tips and tricks. It uses vivid and humorous language, clear organization, and includes tables and emojis to enhance engagement and understanding. Remember to always prioritize safety and follow the manufacturer’s instructions when using any hair product. Good luck on your root-touch-up journey!
For detailed product specifications and purchases, please go to :https://zenamakeup.com/products/hairline-dye-powder-for-root-touch-up
Leave a Reply