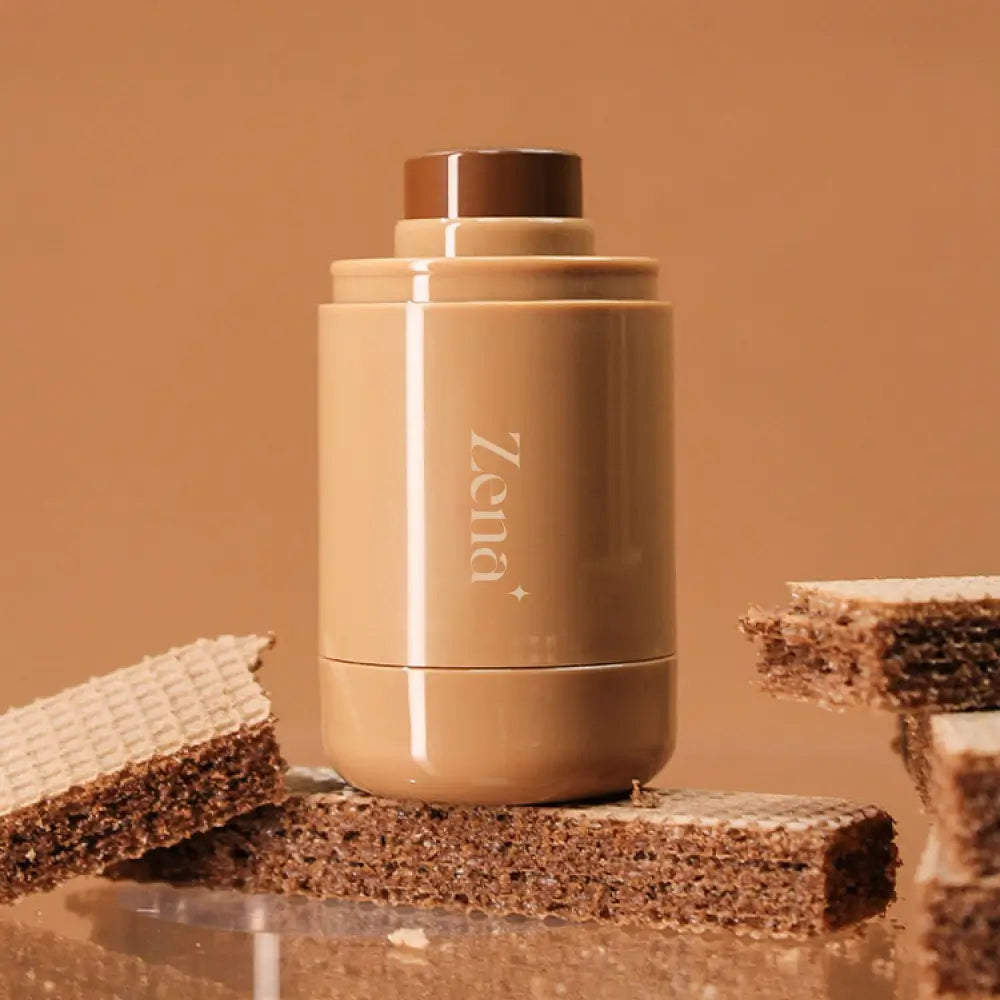
Applying Jelly Essence Blush Stick for a Quick Pop of Color on the Go: A Lecture in Blushology
(Welcome, class! Settle down, settle down! Today, we’re diving deep into the world of portable prettiness, specifically the delightful, dewy, and downright dreamy Jelly Essence Blush Stick. Forget your powder brushes and elaborate contouring – we’re talking about instant radiance, a flush so natural it’ll make people wonder if you just ran away with a hot barista. Let’s get started!)
Professor: Dr. Blushington, PhD (Pretty Hilarious Decisions) 👩🏫
Course: Blush 101: Jelly Edition
Required Textbook: Your face (and maybe a mirror, if you’re feeling fancy).
Optional Accessories: Enthusiasm, a slightly mischievous grin, and a Jelly Essence Blush Stick.
Lecture Outline:
- The Blush Stick Revolution: Ditching the Dust, Embracing the Dew ✨ (Why blush sticks are the bomb-diggity.)
- Jelly Essence: What Makes This Stick So Slick? 🧪 (Ingredient analysis and why this particular formula is a winner.)
- Color Theory for the Clueless (and the Confident!) 🎨 (Choosing the right shade to flatter your complexion.)
- Application Techniques: From Beginner to Blush Boss 💪 (Step-by-step guide to mastering the Jelly Essence Blush Stick application.)
- On-the-Go Glam: Maximizing Portability and Touch-Up Tips 🏃♀️ (How to keep your blush looking fresh all day long.)
- Troubleshooting: Blush Blunders and Beauty Fixes 🚑 (Common mistakes and how to correct them.)
- Beyond the Cheeks: Unexpected Uses for Your Jelly Essence Blush Stick 🤫 (Creative applications to unlock your inner artist.)
- The Verdict: Is the Jelly Essence Blush Stick Worth the Hype? 🤔 (A brutally honest assessment.)
- Bonus Points: Creating a whole makeup look with just a Jelly Blush Stick
- Q&A: Ask Dr. Blushington Anything! 🙋♀️
1. The Blush Stick Revolution: Ditching the Dust, Embracing the Dew ✨
(Forget everything you thought you knew about blush. Powder is so last season… unless you’re using it to set your Jelly Essence Blush Stick, which we’ll get to later.)
For years, blush was synonymous with pressed powders and fluffy brushes. We’d swirl, tap, and hope for the best, often ending up looking like a clown who got lost in a Sephora. But fear not, my friends, because the blush stick has arrived to save us from powdery purgatory!
Why are blush sticks so fantastic? Let me count the ways:
- Portability: They’re compact, convenient, and practically begging to be tossed into your purse for on-the-go touch-ups. No more lugging around bulky palettes!
- Ease of Application: They’re practically foolproof. Simply swipe, blend, and go. No need for fancy brush skills or a steady hand.
- Natural Finish: Blush sticks tend to melt into the skin, creating a dewy, natural-looking flush that powders can only dream of. Think "lit from within" rather than "cake face."
- Buildable Coverage: You can go from a subtle hint of color to a bold pop with just a few extra swipes. Total control!
- Multi-Tasking Marvels: Many blush sticks can also be used on the lips and even as eyeshadow for a monochromatic makeup look. Talk about versatility!
(In short, blush sticks are the superheroes of the makeup world, swooping in to save us from dull, lifeless skin. And the Jelly Essence Blush Stick? Well, it’s basically Superman with a cute, chubby packaging.)
2. Jelly Essence: What Makes This Stick So Slick? 🧪
(Not all blush sticks are created equal. Some are dry, some are greasy, and some just plain refuse to blend. But the Jelly Essence Blush Stick? It’s a unicorn in a stick.)
What sets the Jelly Essence Blush Stick apart from the competition? It’s all in the formula! These sticks are typically formulated with:
- Hydrating Ingredients: Think hyaluronic acid, squalane, and other moisture magnets that keep your skin looking plump and dewy. No dry patches here!
- Lightweight Pigments: The pigments are finely milled and suspended in a gel-like base, allowing for a seamless blend and a natural-looking flush.
- Emollients: These ingredients help the blush glide smoothly over the skin without feeling sticky or greasy.
(Think of it as a skincare-infused blush. You’re not just adding color; you’re also hydrating and nourishing your skin. It’s like a mini-facial in a stick!)
(Let’s take a closer look at a hypothetical ingredient list. Remember to always check the actual product ingredients for the most accurate information!)
| Ingredient | Benefit |
|---|---|
| Water | Hydration |
| Glycerin | Humectant, attracts moisture to the skin |
| Sodium Hyaluronate | Powerful humectant, plumps and hydrates the skin |
| Squalane | Emollient, moisturizes and softens the skin |
| Dimethicone | Silicone-based emollient, creates a smooth, silky texture |
| Mica | Adds shimmer and luminosity |
| Titanium Dioxide | Provides opacity and sun protection (to a small extent) |
| Iron Oxides | Provides pigment for color |
| Fragrance (optional) | Adds a pleasant scent |
(Notice the emphasis on hydration and emollients? That’s what gives the Jelly Essence Blush Stick its signature dewy finish.)
3. Color Theory for the Clueless (and the Confident!) 🎨
(Choosing the right blush shade is like finding the perfect pair of jeans. It can be tricky, but once you find "the one," it’s magic.)
The key to a flawless flush is selecting a shade that complements your skin tone. Here’s a quick guide:
| Skin Tone | Recommended Blush Shades | Emoji Suggestion |
|---|---|---|
| Fair Skin | Light pinks, peach, and sheer berry shades. Avoid anything too dark or intense, as it can look overwhelming. | 🌸 |
| Light Skin | Rosy pinks, apricot, and mauve shades. Experiment with slightly brighter colors than fair skin. | 🌷 |
| Medium Skin | Peaches, corals, and berry shades. You can go a bit bolder with your color choices. | 🌺 |
| Olive Skin | Warm peaches, bronzes, and earthy pinks. Avoid anything too cool-toned, as it can make your skin look sallow. | 🍂 |
| Tan Skin | Deep corals, berries, and bronzes. You can rock highly pigmented shades without looking overdone. | 🏵️ |
| Deep Skin | Rich berries, plums, and reds. Don’t be afraid to go bold! | 🌹 |
(Pro Tip: The best way to find your perfect shade is to try a few different options and see what looks best on your skin. Don’t be afraid to experiment!)
(Another Pro Tip: When in doubt, go for a shade that mimics the natural flush you get after a good workout or a brisk walk. That’s always a safe bet.)
4. Application Techniques: From Beginner to Blush Boss 💪
(Alright, class, time to put our knowledge into practice! Grab your Jelly Essence Blush Stick and let’s get blushing!)
Here’s a step-by-step guide to mastering the application:
- Prep Your Skin: Start with a clean, moisturized face. If you’re wearing foundation, apply it before your blush.
- Locate the Apples of Your Cheeks: Smile! The fleshy part that pops out is where you want to apply the blush.
- Apply the Blush: Gently swipe the Jelly Essence Blush Stick onto the apples of your cheeks. You can apply directly from the stick or use your fingertips. Start with a small amount and build up the color as needed.
- Blend, Blend, Blend: Use your fingertips, a sponge, or a brush to blend the blush seamlessly into your skin. Focus on blending outwards and upwards towards your temples.
- Check Your Work: Step back and take a look in the mirror. Is the blush blended evenly? Is the color flattering? Make any necessary adjustments.
- Set (Optional): If you have oily skin, you may want to set your blush with a light dusting of translucent powder. This will help it last longer and prevent it from sliding around.
(Remember, practice makes perfect! Don’t be discouraged if you don’t get it right on the first try. Just keep blending and experimenting until you find what works best for you.)
(Here’s a handy table of application techniques, depending on your desired look:)
| Technique | Description | Result |
|---|---|---|
| Dabbing | Use your fingertips to dab the blush onto your cheeks in a stippling motion. | A subtle, diffused flush |
| Swiping | Swipe the blush stick directly onto your cheeks and blend with your fingertips or a brush. | A more intense, defined flush |
| Using a Brush | Apply the blush to a brush and then apply it to your cheeks. | A more controlled application, good for oily skin types |
| Layering | Start with a light layer of blush and gradually build up the color until you reach your desired intensity. | A customized flush, perfect for experimenting with color |
| Highlighter Combo | Apply a cream highlighter before the blush stick. The dewy formulas will blend together for ultimate glow. | A super radiant, "glass skin" look. |
5. On-the-Go Glam: Maximizing Portability and Touch-Up Tips 🏃♀️
(The beauty of the Jelly Essence Blush Stick is its portability. It’s designed for life on the move!)
Here are some tips for maximizing its convenience:
- Keep it in your purse, pocket, or makeup bag. It’s compact enough to fit anywhere.
- Use it for quick touch-ups throughout the day. If your blush starts to fade, simply reapply a small amount to the apples of your cheeks.
- Don’t forget to blend! Even a quick touch-up requires a little blending to avoid harsh lines.
- Consider a compact mirror. This will make touch-ups even easier.
- If you’re traveling, keep it in your carry-on. You’ll want to have it handy for a quick refresh after a long flight.
(The Jelly Essence Blush Stick is your secret weapon for looking fresh and radiant, no matter where you are or what you’re doing.)
6. Troubleshooting: Blush Blunders and Beauty Fixes 🚑
(Even the most experienced makeup artists make mistakes. Don’t worry, we’ve all been there!)
Here are some common blush blunders and how to fix them:
- Too Much Blush: If you’ve applied too much blush, use a clean brush or sponge to blend it out. You can also apply a light layer of foundation or concealer over the blush to tone it down.
- Uneven Blush: If your blush is uneven, blend it out until it looks balanced on both sides of your face.
- Harsh Lines: If you have harsh lines around your blush, blend them out with your fingertips or a brush.
- Wrong Shade: If you’ve chosen the wrong shade of blush, try layering it with a different shade to create a more flattering color. You can also use a bronzer to warm up the color or a highlighter to brighten it.
- Blush Fading: If your blush is fading throughout the day, reapply a small amount and set it with a light dusting of translucent powder.
(Remember, mistakes are just learning opportunities! Don’t be afraid to experiment and find what works best for you.)
(Here’s a quick reference table for common blush emergencies:)
| Problem | Solution | Emoji Suggestion |
|---|---|---|
| Too much blush | Blend, blend, blend! Use a clean brush or sponge to diffuse the color. If that doesn’t work, apply a tiny bit of foundation over the area. | 😫 |
| Uneven application | Even it out! Take more product and apply it to the side with less color. Make sure to blend both sides equally. | ⚖️ |
| Patchy application | Buff it out! Use a fluffy brush in circular motions to blend the blush seamlessly into your skin. | 🌪️ |
| Wrong color | Layer it! Apply a different blush shade on top to customize the color. Alternatively, use a bronzer to warm up the tone or a highlighter to brighten it. | 🌈 |
| Blush fading | Touch up! Reapply a small amount of blush and set it with a light dusting of translucent powder. | ⏰ |
7. Beyond the Cheeks: Unexpected Uses for Your Jelly Essence Blush Stick 🤫
(The Jelly Essence Blush Stick is more than just a blush. It’s a multi-tasking marvel that can be used in a variety of ways!)
Here are some unexpected ways to use your Jelly Essence Blush Stick:
- Lip Color: Apply a small amount of blush to your lips for a natural-looking tint.
- Eyeshadow: Blend the blush onto your eyelids for a monochromatic makeup look.
- Contour: Use a deeper shade of blush to contour your cheekbones and jawline.
- Bronzer: Use a bronzy blush to add warmth to your complexion.
- Highlight: Use a shimmery blush to highlight your cheekbones, brow bone, and cupid’s bow.
(The possibilities are endless! Let your creativity run wild and see what you can come up with.)
(Let’s explore these options in a table for your convenience:)
| Application | Technique | Result |
|---|---|---|
| Lip Tint | Dab a small amount onto your lips and blend with your finger. You can also apply a clear lip gloss on top for extra shine. | A natural, subtle flush of color on your lips. |
| Eyeshadow | Apply the blush to your eyelids and blend with your finger or a brush. You can also layer it with other eyeshadows for a more complex look. | A soft, romantic eyeshadow look. |
| Subtle contour | Use a slightly darker shade of blush to contour your cheekbones. Apply it beneath your cheekbones and blend upwards. | A defined yet natural-looking contour. |
| Bronzer | Swirl the blush stick on the back of your hand, apply to your face with a brush, focusing on the areas the sun would hit, and blend well. | A sun-kissed, warm complexion. |
| Highlight | Apply a blush with shimmer to the high points of your cheeks, brow bone, or cupid’s bow and blend. | A dewy, radiant glow. |
8. The Verdict: Is the Jelly Essence Blush Stick Worth the Hype? 🤔
(Drumroll, please….)
(The answer is a resounding YES!
The Jelly Essence Blush Stick is a game-changer. It’s easy to use, portable, and delivers a natural-looking flush that lasts all day. It’s perfect for beginners and makeup pros alike.
Pros:
- Easy to apply
- Portable
- Natural-looking finish
- Buildable coverage
- Hydrating
- Multi-tasking
Cons:
- May not be suitable for oily skin without setting powder
- Color range may be limited
(Overall, the Jelly Essence Blush Stick is a must-have for anyone who wants a quick and easy way to add a pop of color to their complexion. It’s a true beauty essential!)
9. Bonus Points: Creating a Whole Makeup Look with Just a Jelly Blush Stick
Let’s put everything we’ve learned into practice and create a complete makeup look using only a Jelly Essence Blush Stick!
Here’s the challenge:
- Cheeks: Apply as usual for a healthy flush.
- Lips: Dab onto lips for a subtle tint, building up color as desired.
- Eyes: Blend onto eyelids for a wash of color, creating a monochromatic look. For added depth, apply a slightly darker shade to the crease. You can even use your finger to create a smudged eyeliner effect.
- Highlight: If your blush stick has shimmer, use it to highlight the high points of your face (cheekbones, brow bone, cupid’s bow).
- Contour: If you have a deeper blush shade, use it to create a subtle contour.
- Brows: If you have a brown shade of blush, use it on your eyebrows for a natural tint.
(The result? A fresh, dewy, and cohesive makeup look that’s perfect for everyday wear. The ultimate minimalist beauty routine!)
10. Q&A: Ask Dr. Blushington Anything! 🙋♀️
(Alright, class, the floor is open for questions. Don’t be shy!)
(Common Questions and Answers:
-
Q: How do I choose the right shade if I’m unsure?
- A: Start with a shade that’s similar to your natural flush. You can also consult a makeup artist or try on different shades at a makeup counter.
-
Q: Can I use the Jelly Essence Blush Stick if I have oily skin?
- A: Yes, but you’ll want to set it with a light dusting of translucent powder to prevent it from sliding around.
-
Q: How do I clean my Jelly Essence Blush Stick?
- A: Gently wipe the tip of the stick with a clean tissue after each use. You can also use a makeup wipe to clean the entire stick.
-
Q: Is the Jelly Essence Blush Stick cruelty-free?
- A: Check the product packaging or the brand’s website for information on their cruelty-free status.
(That’s all for today, class! Remember to practice your blush skills and don’t be afraid to experiment. And most importantly, have fun! Class dismissed!) 🎉
For detailed product specifications and purchases, please go to :https://zenamakeup.com/products/jelly-essence-blush-stick
Leave a Reply