Lecture Hall: Operation Sparkle! Mastering the Glitter, Lash, and Liner Trifecta for All-Day Eye Drama 💥
(Professor enters the lecture hall, wearing oversized glasses and a lab coat slightly dusted with glitter. She adjusts the microphone with a dramatic flourish.)
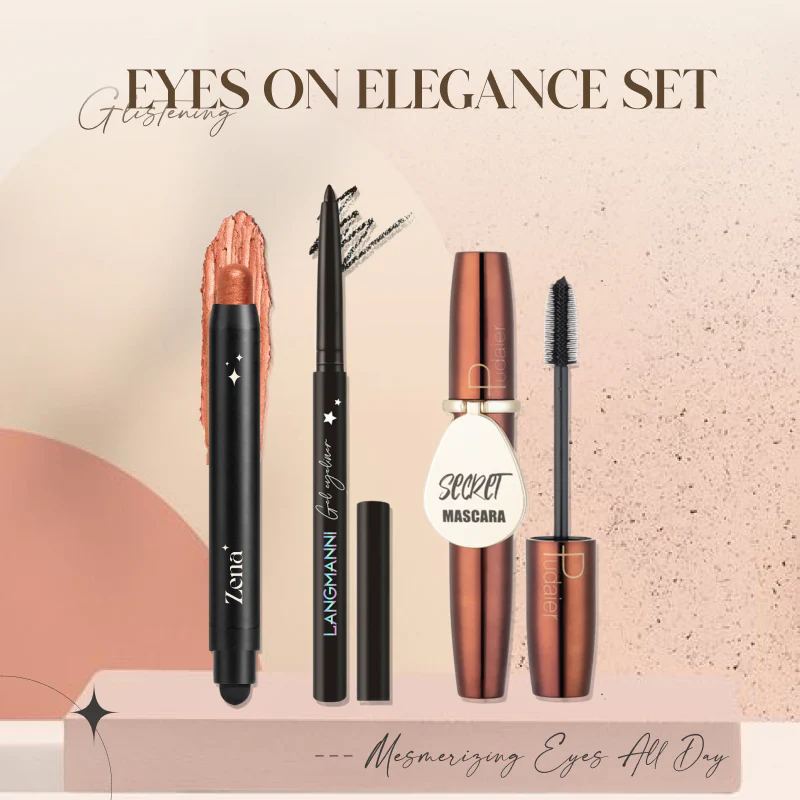
Alright, settle down, settle down, you beautiful future makeup mavens! Today, we delve into the sacred art of the high-impact eye – the kind that stops traffic, inspires poetry, and maybe, just maybe, gets you bumped up to first class. We’re talking about the glorious trinity of Glitter Cream Eyeshadow, Mascara, and Eyeliner.
Forget subtly! We’re here to learn how to wield these tools like the shimmering, inky-black, lash-boosting weapons they are.
(Professor clicks to the next slide. A picture of a gloriously made-up eye, sparkling intensely, fills the screen.)
Slide 1: The Destination – Eye Candy That Sings!
This isn’t just about slapping on some makeup. This is about crafting a look that lasts, that tells a story, and that makes you feel like the absolute boss you are! We’re talking all-day impact, through meetings, dates, and even (dare I say it?) trips to the DMV.
Lecture Outline:
- I. Glitter Cream Eyeshadow: The Foundation of Fabulousness (And How to Tame the Sparkle Beast!)
- A. Understanding Glitter Cream vs. Powder: The Showdown!
- B. Application Techniques: Finger Painting for Grown-Ups (and Brushes, too!)
- C. Priming is Key: Avoiding the Crease Monster
- D. Glitter Glue: Your Secret Weapon for Longevity
- E. Troubleshooting: Fallout Fears and Blending Blues
- II. Mascara: Lash Lift to Lunar Orbit!
- A. Mascara Types: Decoding the Lash Lexicon (Volumizing, Lengthening, Curling, Oh My!)
- B. Application Techniques: The Zig-Zag Method and Beyond
- C. Priming Your Lashes: The Forgotten Step to Epic Lashes
- D. Layering Like a Pro: Building Volume Without the Clumps
- E. Troubleshooting: Spider Lashes, Smudging, and the Terror of the Wand
- III. Eyeliner: The Winged Warrior (or the Subtle Smoke Show!)
- A. Eyeliner Types: Pencil, Gel, Liquid – Choosing Your Weapon
- B. Application Techniques: From Tightlining to Winged Perfection
- C. Stencils and Tools: Cheating Your Way to Symmetry (We Won’t Judge!)
- D. Smudging for Drama: Unleashing Your Inner Rock Star
- E. Troubleshooting: The Wobbly Line, the Uneven Wing, and the Smudge Nightmare
- IV. The Grand Finale: Putting It All Together! (Creating Cohesion and Lasting Power)
- A. Color Harmony: Choosing a Palette That Pops
- B. Setting Sprays: Your Armor Against the Elements
- C. Touch-Up Tactics: Battling the Mid-Day Fade
- D. The Ultimate Look: Examples and Inspiration
(Professor adjusts her glasses again, a mischievous glint in her eye.)
Alright, let’s dive in, shall we?
I. Glitter Cream Eyeshadow: The Foundation of Fabulousness (And How to Tame the Sparkle Beast!) ✨
(Slide 2: A comparison of glitter cream eyeshadow and powder eyeshadow is displayed. The cream version looks smooth and pigmented, while the powder version shows noticeable fallout.)
A. Understanding Glitter Cream vs. Powder: The Showdown!
Think of glitter cream eyeshadow as the sophisticated older sibling of glitter powder. Powder glitter is fun, yes, but it’s also messy, unpredictable, and has a tendency to end up… everywhere. Like a glitter bomb exploded in a craft store.
Glitter cream eyeshadow, on the other hand, is formulated with a creamy base that binds the glitter particles together. This means:
- Less Fallout: Glory hallelujah! 🎉
- Better Pigmentation: More sparkle for your buck! 💰
- Easier Application: Smoother, more controlled application.
- Increased Longevity: Stays put longer, so you can sparkle all day.
(Table: Glitter Cream vs. Glitter Powder)
| Feature | Glitter Cream Eyeshadow | Glitter Powder Eyeshadow |
|---|---|---|
| Fallout | Minimal to none | Significant |
| Pigmentation | High, vibrant | Can be sheer, requires layering |
| Application | Smooth, easy to blend | Can be tricky, requires a sticky base |
| Longevity | Long-lasting, less prone to creasing | Shorter lasting, more prone to creasing |
| Mess Factor | Low | High |
| Overall | User-friendly, high impact, less hassle | Fun, but requires more skill and patience |
B. Application Techniques: Finger Painting for Grown-Ups (and Brushes, too!)
(Slide 3: Demonstrations of different application techniques: finger, brush, and sponge applicator.)
Listen, I’m not going to lie. Sometimes, the best way to apply glitter cream eyeshadow is with your finger. The warmth of your finger helps to melt the product and blend it seamlessly into your skin.
- Finger: Gently dab the product onto your eyelid, building up the intensity as desired. Use a patting motion rather than swiping to avoid dragging the glitter.
- Brush: A flat, synthetic brush works wonders for packing on the glitter. A fluffy blending brush can be used to soften the edges.
- Sponge Applicator: These are great for precise application, especially in the inner corner of the eye.
C. Priming is Key: Avoiding the Crease Monster 👹
(Slide 4: A picture of a perfectly primed eyelid versus a creased, unprimed eyelid.)
Let me tell you a secret: eyeshadow primer is your BFF. It’s the superhero that prevents your eyeshadow from creasing, fading, and disappearing into the abyss.
Apply a thin layer of eyeshadow primer to your entire eyelid, from lash line to brow bone. Let it dry completely before applying your glitter cream eyeshadow.
D. Glitter Glue: Your Secret Weapon for Longevity 🛡️
(Slide 5: A close-up of a glitter glue product and its application.)
Want to take your glitter game to the next level? Enter: glitter glue. This sticky substance acts like a magnet for glitter, ensuring that it stays put all day and night.
Apply a thin layer of glitter glue to your eyelid and let it become slightly tacky before applying your glitter cream eyeshadow. This will create a super-adhesive base for maximum sparkle power.
E. Troubleshooting: Fallout Fears and Blending Blues 😥
(Slide 6: Common glitter eyeshadow problems and solutions.)
- Fallout: Use a damp eyeshadow brush to pick up the fallen glitter and gently pat it away. You can also use a piece of tape to lift away any stray sparkles.
- Blending Blues: Use a fluffy blending brush to soften the edges of your glitter cream eyeshadow. Remember, patience is key! Don’t try to blend too much at once.
- Creasing: Make sure you’re using a good eyeshadow primer and that you’re not applying too much product.
II. Mascara: Lash Lift to Lunar Orbit! 🚀
(Slide 7: A visual representation of different mascara wand shapes and their corresponding effects.)
A. Mascara Types: Decoding the Lash Lexicon (Volumizing, Lengthening, Curling, Oh My!)
Choosing the right mascara is like finding the perfect pair of jeans. It takes time, experimentation, and a little bit of luck. But once you find the one, it’s a game-changer.
- Volumizing: These mascaras are designed to thicken your lashes, making them appear fuller and more dramatic. Look for formulas with thick, bristled wands.
- Lengthening: These mascaras are formulated to extend the length of your lashes, creating a longer, more fluttery look. Look for formulas with thin, comb-like wands.
- Curling: These mascaras are designed to lift and curl your lashes, opening up your eyes and creating a more wide-awake look. Look for formulas with curved wands.
- Waterproof: These mascaras are designed to withstand water, sweat, and tears. Perfect for weddings, rainy days, and emotional movie nights. 😭
(Table: Mascara Types and Their Effects)
| Mascara Type | Wand Shape | Effect | Best For |
|---|---|---|---|
| Volumizing | Thick, bristled | Fuller lashes | Thin, sparse lashes |
| Lengthening | Thin, comb-like | Longer lashes | Short lashes |
| Curling | Curved | Lifted, curled | Straight lashes |
| Waterproof | Varies, often synthetic | Smudge-proof | All lash types, special occasions |
B. Application Techniques: The Zig-Zag Method and Beyond
(Slide 8: A step-by-step guide to applying mascara using the zig-zag method.)
The key to applying mascara like a pro is to start at the base of your lashes and wiggle the wand back and forth as you move upwards. This helps to coat each lash evenly and prevent clumping.
- The Zig-Zag Method: Start at the base of your lashes and wiggle the wand back and forth as you move upwards.
- Targeting the Roots: Focus on coating the roots of your lashes to create the illusion of thicker lashes.
- Separating the Lashes: Use a lash comb to separate any clumps and create a more defined look.
- Bottom Lashes: Gently apply mascara to your bottom lashes, being careful not to apply too much.
C. Priming Your Lashes: The Forgotten Step to Epic Lashes 👀
(Slide 9: A before-and-after picture showing the difference between lashes with and without mascara primer.)
Just like eyeshadow primer, lash primer is a game-changer. It helps to:
- Lengthen Your Lashes: Creates a base for your mascara to grip onto, resulting in longer lashes.
- Volumize Your Lashes: Adds thickness and fullness to your lashes.
- Condition Your Lashes: Helps to nourish and protect your lashes.
Apply a thin layer of lash primer to your lashes before applying your mascara. Let it dry completely before applying your mascara.
D. Layering Like a Pro: Building Volume Without the Clumps 🧱
(Slide 10: Demonstrations of layering mascara for maximum volume without clumping.)
The key to layering mascara without clumping is to apply thin, even coats and let each coat dry completely before applying the next.
- First Coat: Apply a thin coat of mascara to your lashes, focusing on the roots.
- Second Coat: Let the first coat dry completely before applying the second coat. Focus on the tips of your lashes to add length.
- Third Coat (Optional): If you want even more volume, apply a third coat, focusing on the outer corners of your lashes.
E. Troubleshooting: Spider Lashes, Smudging, and the Terror of the Wand 🕷️
(Slide 11: Common mascara problems and solutions.)
- Spider Lashes: Use a lash comb to separate the clumps. You can also try using a mascara with a thinner formula.
- Smudging: Use a waterproof mascara or set your under-eye area with powder.
- The Terror of the Wand: Practice makes perfect! Experiment with different wands and application techniques until you find what works best for you.
III. Eyeliner: The Winged Warrior (or the Subtle Smoke Show!) ⚔️
(Slide 12: A visual guide to different eyeliner styles: winged, tightlined, smudged, etc.)
A. Eyeliner Types: Pencil, Gel, Liquid – Choosing Your Weapon
Eyeliner is the unsung hero of the makeup world. It can define your eyes, create drama, and even change the shape of your eyes. But with so many different types of eyeliner available, how do you choose the right one?
- Pencil: The most beginner-friendly option. Easy to apply and blend, perfect for creating a soft, smoky look.
- Gel: Offers more precision and control than pencil. Great for creating a crisp, defined line or a dramatic winged liner. Requires a brush.
- Liquid: The most dramatic option. Creates a bold, graphic line. Requires a steady hand.
(Table: Eyeliner Types and Their Effects)
| Eyeliner Type | Application | Finish | Best For |
|---|---|---|---|
| Pencil | Easy, forgiving | Soft, smudged | Beginners, smoky eyes, tightlining |
| Gel | Precise, requires brush | Bold, defined | Winged liner, dramatic looks |
| Liquid | Requires steady hand | Graphic, sharp | Bold statements, precise lines |
B. Application Techniques: From Tightlining to Winged Perfection ✍️
(Slide 13: Step-by-step tutorials for tightlining and creating a winged eyeliner.)
- Tightlining: Apply eyeliner to the upper waterline of your eye. This will create a subtle definition and make your lashes appear thicker.
- Winged Liner: Start by drawing a thin line along your upper lash line. Extend the line outwards and upwards, creating a wing. Fill in the wing with eyeliner.
- Smudged Liner: Apply eyeliner to your upper and lower lash lines. Use a smudging brush to soften the lines and create a smoky effect.
C. Stencils and Tools: Cheating Your Way to Symmetry (We Won’t Judge!) 📐
(Slide 14: Examples of eyeliner stencils and other helpful tools.)
Let’s be honest, achieving perfect symmetry with winged liner can be a challenge. That’s where stencils and other tools come in handy.
- Eyeliner Stencils: These pre-cut shapes help you create a perfectly symmetrical winged liner.
- Tape: Use a piece of tape as a guide to create a sharp, clean line.
- Business Card: Use a business card as a guide to create a straight wing.
D. Smudging for Drama: Unleashing Your Inner Rock Star 🎸
(Slide 15: Demonstrations of how to create a smudged eyeliner look.)
Want to add a touch of rock and roll to your look? Smudge your eyeliner.
- Apply eyeliner to your upper and lower lash lines.
- Use a smudging brush to soften the lines.
- Add a touch of eyeshadow to the crease of your eye for a more dramatic effect.
E. Troubleshooting: The Wobbly Line, the Uneven Wing, and the Smudge Nightmare 😱
(Slide 16: Common eyeliner problems and solutions.)
- The Wobbly Line: Practice makes perfect! Use short, controlled strokes and rest your elbow on a stable surface.
- The Uneven Wing: Use a stencil or tape to create a symmetrical wing. You can also use a cotton swab dipped in makeup remover to clean up any mistakes.
- The Smudge Nightmare: Use a waterproof eyeliner or set your eyeliner with eyeshadow.
IV. The Grand Finale: Putting It All Together! (Creating Cohesion and Lasting Power) 🎨
(Slide 17: Examples of complete eye looks incorporating glitter cream eyeshadow, mascara, and eyeliner.)
A. Color Harmony: Choosing a Palette That Pops
When combining glitter, liner, and mascara, think about color harmony.
- Warm Tones: Golds, bronzes, coppers, paired with brown or bronze liner and brown mascara.
- Cool Tones: Silvers, blues, purples, paired with black or navy liner and black mascara.
- Neutrals: Champagne, taupe, greys, can be paired with black, brown, or grey liner and mascara.
(Table: Color Harmony Guide)
| Eyeshadow | Eyeliner | Mascara | Overall Look |
|---|---|---|---|
| Gold | Brown | Brown | Warm, Glamorous |
| Silver | Black | Black | Cool, Edgy |
| Champagne | Grey | Black | Neutral, Chic |
| Bronze | Bronze | Brown | Sun-Kissed |
| Purple | Navy | Black | Dramatic, Sultry |
| Blue | Navy | Black | Bold, Fashion-Forward |
B. Setting Sprays: Your Armor Against the Elements 🛡️💧
(Slide 18: Different types of setting sprays and their benefits.)
Setting spray is the final step in your makeup routine. It helps to:
- Lock in Your Makeup: Prevents your makeup from fading, creasing, or smudging.
- Hydrate Your Skin: Keeps your skin looking fresh and dewy.
- Control Oil: Prevents your skin from looking shiny.
Spray setting spray evenly over your face after you’ve finished applying your makeup.
C. Touch-Up Tactics: Battling the Mid-Day Fade 💪
(Slide 19: Tips and tricks for touch-ups throughout the day.)
Even with the best products and techniques, your makeup may need a little touch-up throughout the day.
- Blotting Papers: Use blotting papers to absorb excess oil.
- Concealer: Use concealer to touch up any blemishes or dark circles.
- Mascara: Reapply a coat of mascara to freshen up your lashes.
- Lipstick: Reapply your lipstick after eating or drinking.
D. The Ultimate Look: Examples and Inspiration ✨
(Slide 20: A gallery of stunning eye looks incorporating all the techniques discussed.)
(Professor beams at the class, glitter catching the light on her lab coat.)
And there you have it! The secrets to mastering the glitter, lash, and liner trifecta. Go forth and create eye looks that are out of this world! Remember, practice makes perfect, and don’t be afraid to experiment. Now, go forth and sparkle!
(Professor bows dramatically as the class applauds.)
(End of Lecture)
For detailed product specifications and purchases, please go to :https://zenamakeup.com/products/glam-essentials-glitter-cream-eyeshadow-mascara-eyeliner-set
Leave a Reply