Applying the Sexy Stained Lip Marker Tint for a Quick and Effortless Pop of Long-Lasting Color: A Lecture on Luscious Lips
(Professor Lipstick, D.Lit, PhD in Pout, takes the stage. She adjusts her oversized glasses, her own lips perfectly stained with a vibrant berry hue. A single spotlight illuminates her. Dramatic music fades.)
Alright, settle down, settle down, my little lipstick lovers! Welcome to Lip Stain 101: The Art of the All-Day Allure. Today, we’re diving deep into the world of lip marker tints – those magical wands that promise a quick, effortless, and sexy pop of long-lasting color. We’re not talking about your grandma’s lipstick here, people. This is the modern age of minimal effort, maximum impact. This is lip stain, baby!
(Professor Lipstick winks, eliciting giggles from the audience.)
So, grab your notebooks, sharpen your pencils (or, you know, open your tablets and get ready to screenshot), because class is officially in session!
I. Introduction: The Stain Game is Strong 💪
Let’s face it, we’ve all been there. You meticulously apply your lipstick, you feel like a million bucks, and then… BAM! An hour later, it’s clinging to the edges of your lips like a desperate ex, leaving you with that dreaded "lipstick ring of doom." Not cute. Not cute at all.
Lip stains, especially the marker tint variety, offer a solution. They’re like the cool, low-maintenance friend who always looks effortlessly put-together. They’re not fussy, they’re not high-maintenance, and they definitely don’t require constant touch-ups.
Why choose a lip marker tint? Let’s break it down:
| Feature | Lip Marker Tint | Traditional Lipstick | Lip Gloss | Tinted Balm |
|---|---|---|---|---|
| Longevity | 🥇 Champion! (All-day wear) | 🥈 Runner-up (Requires touch-ups) | 🥉 Not even on the podium | 🏅 Honorable Mention (But subtle) |
| Application | 🖌️ Precise and easy | 💄 Can be messy | 💧 Can be sticky | 💋 Easy, but less precise |
| Finish | 🌸 Natural, stained look | ✨ Creamy, matte, or glossy | 🌟 Glossy | 💧 Sheer and moisturizing |
| Transfer | 🚫 Minimal to none | 💋 Transfers easily | 💋 Transfers easily | 🤏 Some transfer |
| Hydration | 💧 Varies (Some can be drying) | 💧 Varies (Some are moisturizing) | 💧 Can be moisturizing | 💧 Usually moisturizing |
| Pigmentation | 🎨 Buildable color | 🎨 High pigmentation | 🎨 Sheer to medium pigmentation | 🎨 Sheer pigmentation |
(Professor Lipstick gestures dramatically.)
As you can see, the lip marker tint boasts some serious advantages! Long-lasting color, precise application, and minimal transfer? It’s a triple threat!
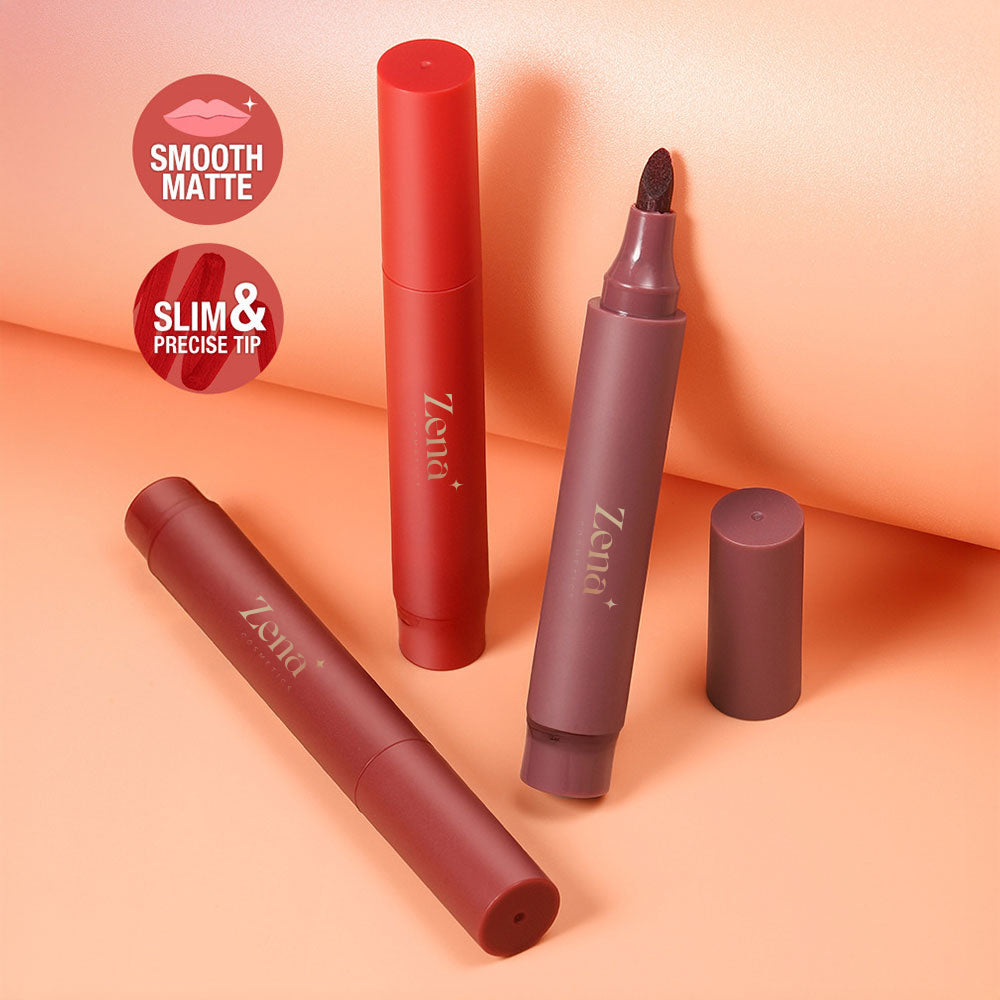
II. The Anatomy of a Lip Marker Tint 🔬
So, what is this magical instrument of lip perfection? Let’s dissect it, shall we?
- The Marker Tip: This is the key. It’s usually a felt-tip applicator that allows for precise and controlled application. Think of it as your personal lip artist, ready to create a masterpiece.
- The Formula: This is where the magic happens. The formula is typically a water-based or gel-based solution containing pigments and dyes that stain the lips. The staining action is what gives you that long-lasting color.
- The Reservoir: This is the chamber that holds the liquid stain. It’s usually designed to dispense the perfect amount of product onto the marker tip.
Key Ingredients to Look For (and Avoid):
| Ingredient | Benefit | Potential Drawback |
|---|---|---|
| Hyaluronic Acid | Hydration, plumping effect | None (Generally well-tolerated) |
| Vitamin E | Antioxidant, moisturizing | None (Generally well-tolerated) |
| Glycerin | Humectant, attracts moisture | Can be sticky in high concentrations |
| Aloe Vera | Soothing, anti-inflammatory | Possible allergy for sensitive individuals |
| Alcohol | Solvent, helps with quick drying | Can be drying for some individuals |
| Parabens | Preservative (Controversial) | Potential hormone disruptor (Consider paraben-free options) |
| Artificial Fragrances | Adds scent (Can be irritating) | Potential allergen, especially for sensitive lips |
(Professor Lipstick taps a manicured finger on the table.)
Pay attention to those ingredients, people! Your lips will thank you.
III. The Prep Work: Priming Your Pout 💋
Before you unleash the lip marker magic, you need to prepare your canvas. A smooth, hydrated base is essential for optimal stain application and longevity.
Step 1: Exfoliate!
Dead skin cells are the enemy of a flawless lip stain. Use a gentle lip scrub (sugar and honey work wonders!) to slough off any flakes. You can also use a soft toothbrush.
(Professor Lipstick mimes scrubbing her lips with a toothbrush, making a silly face.)
Don’t overdo it! We’re not trying to sandblast your lips here. Gentle is key.
Step 2: Hydrate!
Apply a generous layer of your favorite lip balm. Let it sink in for a few minutes before blotting off any excess. Hydrated lips absorb the stain more evenly and prevent that dreaded "cracked" look.
(Professor Lipstick pulls out a tube of lip balm and applies it with a flourish.)
Pro Tip: Apply lip balm before you start your makeup routine. This gives it plenty of time to work its magic.
Step 3: Prime (Optional but Recommended)
A lip primer can create a smooth, even base for your lip stain. It also helps to prevent the stain from bleeding or feathering. Think of it as the foundation for your lip look.
IV. The Application: Mastering the Marker Magic 🖌️
IV. The Application: Mastering the Marker Magic 🖌️
Now for the fun part! Let’s get staining!
Technique 1: The Natural Flush
This is perfect for everyday wear or for achieving that "just bitten" look.
- Outline: Lightly outline your lips with the marker tip. This will create a subtle definition.
- Fill: Fill in the center of your lips with the stain.
- Blend: Use your finger or a lip brush to blend the stain outwards towards the edges of your lips.
- Blot: Blot your lips with a tissue to remove any excess product. This will create a more natural, stained effect.
(Professor Lipstick demonstrates the technique on a volunteer from the audience, making sure to provide clear instructions.)
Technique 2: The Bold Statement
This is for those days when you want to make a statement.
- Outline: Carefully outline your lips with the marker tip, creating a precise and defined shape.
- Fill: Fill in your entire lips with the stain, applying even pressure for consistent color.
- Layer: Apply a second layer of stain for more intense color.
- Clean Up: Use a cotton swab dipped in makeup remover to clean up any mistakes or stray lines.
(Professor Lipstick emphasizes the importance of precision when creating a bold lip look.)
Pro Tips for Application Success:
- Start Light: Remember, you can always add more color, but it’s harder to take it away. Start with a light layer and build up the intensity as needed.
- Use Short Strokes: This will give you more control over the application and prevent streaking.
- Don’t Press Too Hard: Applying too much pressure can cause the marker tip to fray or break.
- Work Quickly: Lip stains dry quickly, so work efficiently to avoid uneven application.
- Smile! Smiling while applying your lip stain can help you see the natural shape of your lips and ensure even coverage.
(Professor Lipstick flashes a dazzling smile, revealing her perfectly stained lips.)
Common Mistakes to Avoid (and How to Fix Them):
| Mistake | Solution |
|---|---|
| Uneven Application | Use a lip brush or your finger to blend the stain evenly. |
| Patchy Color | Apply another layer of stain to the lighter areas. |
| Bleeding or Feathering | Use a lip liner to create a barrier around your lips. |
| Too Much Color | Blot your lips with a tissue to remove excess product. You can also apply a light balm. |
| Dry or Cracked Lips | Exfoliate and hydrate your lips regularly. |
V. The Aftercare: Preserving Your Perfect Pout ⏳
Congratulations! You’ve successfully applied your lip marker tint. But the journey doesn’t end there. Proper aftercare is essential for maintaining your gorgeous stained lips.
- Avoid Oily Foods: Oily foods can break down the stain and cause it to fade faster.
- Reapply Balm: Keep your lips hydrated by reapplying lip balm throughout the day.
- Don’t Pick or Bite: Resist the urge to pick or bite your lips. This can damage the stain and irritate your skin.
- Remove at Night: Although lip stains are long-lasting, it’s important to remove them at night with a gentle makeup remover.
(Professor Lipstick stresses the importance of removing makeup before bed, even if it’s a "no-budge" lip stain.)
VI. Choosing the Right Shade: Finding Your Perfect Match 🌈
The world of lip stains is a rainbow of possibilities! But with so many shades to choose from, how do you find the perfect match for your skin tone?
General Guidelines:
- Fair Skin: Light pinks, nudes, corals, and light berries will complement your complexion.
- Medium Skin: Mauves, roses, berries, and peachy nudes will enhance your natural glow.
- Olive Skin: Terracotta, browns, deep berries, and reds with warm undertones will look stunning.
- Dark Skin: Deep reds, plums, wines, and chocolate browns will create a dramatic and beautiful look.
(Professor Lipstick provides visual examples of different shades on models with varying skin tones.)
Don’t be afraid to experiment! The best way to find your perfect shade is to try different colors and see what you love.
VII. The Trend Report: Hot Lip Stain Looks of the Season 🔥
Stay ahead of the curve with these trendy lip stain looks:
- The "Just Bitten" Berry Stain: A subtle flush of berry color that’s perfect for everyday wear.
- The Bold Red Statement: A classic red lip that’s always in style.
- The Ombre Lip: A gradient effect created by blending two different shades of lip stain.
- The Glossy Stain: Layer a clear gloss over your lip stain for a touch of shine.
(Professor Lipstick showcases photos of celebrities rocking these trendy lip stain looks.)
VIII. Conclusion: Embrace the Effortless Allure ✨
Lip marker tints are a game-changer for anyone who wants a quick, effortless, and long-lasting pop of color. They’re perfect for busy bees, low-maintenance beauties, and anyone who wants to look effortlessly chic. So, embrace the stain game, experiment with different shades, and unleash your inner lip goddess!
(Professor Lipstick strikes a final pose, her perfectly stained lips gleaming under the spotlight. The audience erupts in applause.)
And that, my dear students, concludes our lecture on applying the sexy stained lip marker tint. Now go forth and conquer the world, one perfectly stained lip at a time! Class dismissed!
(Professor Lipstick exits the stage as the dramatic music swells.)
For detailed product specifications and purchases, please go to :https://zenamakeup.com/products/sexy-stained-lip-marker-tint
Leave a Reply