Lecture: From Drab to Dazzle: Mastering the 5-Piece Stick Set for a Festive, Glamorous, and (Crucially) Long-Lasting Eye Look! ✨
Welcome, students, to Eyeshadow Alchemy 101! Forget potions and incantations; today, we’re conjuring magic with something far more practical (and less likely to explode in your face): the humble, yet mighty, 5-Piece Stick Eyeshadow Set. 🧙♀️
(Sound of applause. A single, enthusiastic "Woohoo!" from the back of the lecture hall.)
Thank you, thank you! Settle down, settle down. Today’s lecture is crucial because let’s be honest, who hasn’t dreamed of a stunning, glamorous eye look that lasts all night? We’ve all been there: spending hours meticulously crafting the perfect smoky eye, only to have it resemble a muddy raccoon by the time the clock strikes midnight. 🐼 No more!
This isn’t just about applying eyeshadow; it’s about understanding the science of stick shadows, the art of blending, and the magic of making it all last. We’re going beyond the basics. We’re becoming Eye Look Architects! 👷♀️
Course Outline:
- Part 1: Demystifying the 5-Piece Stick Set – What, Why, and How It’s Your New Best Friend
- Part 2: Essential Tools & Techniques – The Arsenal for Eye Domination!
- Part 3: Crafting the Festive & Glamorous Look – Step-by-Step Guide & Pro Tips
- Part 4: The Long-Lasting Secret Sauce – Priming, Setting, and Preservation
- Part 5: Troubleshooting & Common Mistakes – Avoiding the Raccoon Eye Apocalypse!
- Part 6: Advanced Techniques & Creative Explorations – Level Up Your Eye Game!
Part 1: Demystifying the 5-Piece Stick Set – What, Why, and How It’s Your New Best Friend
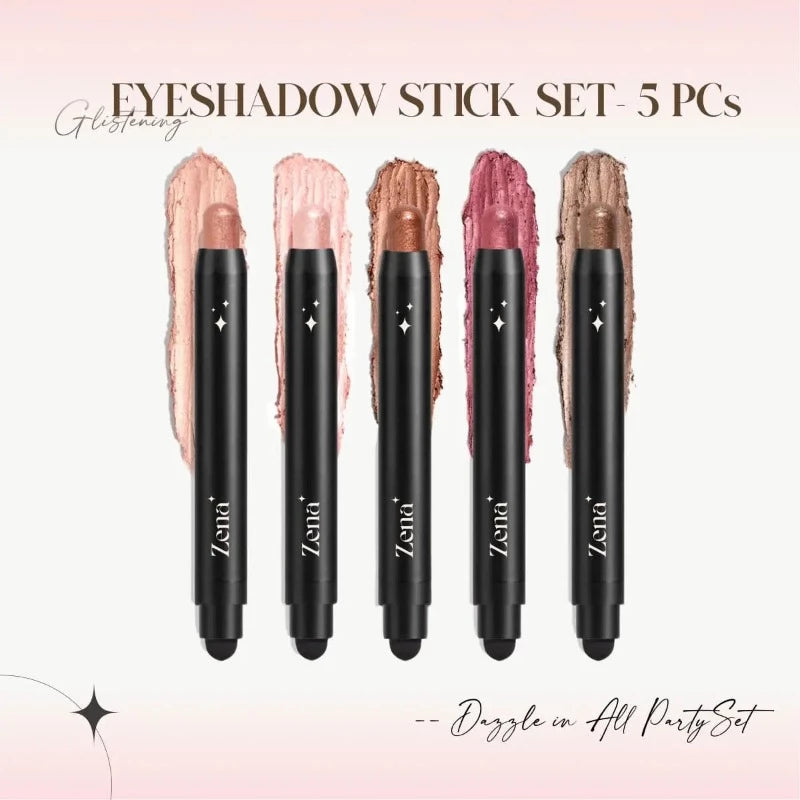
(A slide appears, showcasing a beautifully arranged 5-piece eyeshadow stick set. Gasps of admiration ripple through the audience.)
Alright, let’s talk sticks. Eyeshadow sticks have rapidly gained popularity, and for good reason. They’re the lazy girl’s dream come true, the makeup minimalist’s holy grail, and the busy bee’s best buddy. But what makes them so special?
Why Sticks? The Advantages:
| Feature | Benefit |
|---|---|
| Ease of Use | Think of them as crayons for your eyelids! Direct application eliminates the need for brushes (initially), making them perfect for on-the-go touch-ups or quick looks. No more fumbling with palettes and brushes in the back of a taxi! 🚕 |
| Blendability | Most stick formulas are creamy and blendable, allowing for seamless transitions and diffused edges. This is key for achieving that coveted "effortlessly glamorous" look. (Even if it took you an hour… shhh! 🤫) |
| Pigmentation | High-quality stick shadows often boast intense color payoff, meaning a little goes a long way. No need to layer on product endlessly! 🎉 |
| Versatility | Use them as a base for powder shadows, as eyeliner, or as a standalone wash of color. The possibilities are endless! Think of them as the Swiss Army Knife of your makeup bag. 🔪 |
| Travel-Friendly | Compact and mess-free, eyeshadow sticks are perfect for travel. No more worrying about shattered powder palettes in your suitcase! ✈️ |
The Anatomy of a 5-Piece Set:
While every set is unique, a typical 5-piece set will often include a range of finishes and shades designed to complement each other:
- A Light, Shimmery Shade: Perfect for highlighting the inner corner of the eye and the brow bone, adding that instant brightening effect. Think champagne, ivory, or a light rose gold. ✨
- A Medium, Matte Shade: Ideal for defining the crease and adding depth. Think taupe, warm brown, or a soft plum. 🤎
- A Dark, Matte Shade: For creating a smoky effect and defining the outer corner of the eye. Think deep brown, charcoal grey, or a rich burgundy. 🖤
- A Metallic or Shimmer Shade: This is where the glam comes in! Perfect for the lid, adding a pop of sparkle and dimension. Think gold, bronze, copper, or jewel tones. 💎
- A Versatile Shade (Bonus!): Often a neutral color that can be used as a base, a transition shade, or even as a subtle eyeliner. Think a light bronze, a taupe with shimmer, or a muted rose. 🌹
Choosing the Right Set:
When selecting a 5-piece stick set, consider:
- Your Skin Tone: Warm tones (golden, peachy) generally look best with warm eyeshadows (golds, browns, coppers), while cool tones (pink, blue) are often flattered by cooler shades (silvers, purples, greys).
- Your Eye Color: Certain eyeshadow colors can enhance your eye color. Brown eyes pop with blues and purples, blue eyes look stunning with golds and bronzes, green eyes are emphasized by reds and purples, and hazel eyes can rock almost any color!
- Your Personal Style: Do you prefer natural looks, bold looks, or something in between? Choose a set that reflects your personal style and comfort zone.
- Formula & Reviews: Read reviews and research the brand to ensure the sticks are creamy, blendable, pigmented, and long-lasting. No one wants a patchy, crumbly mess! 🙅♀️
Part 2: Essential Tools & Techniques – The Arsenal for Eye Domination!
(A new slide appears, showcasing an array of makeup brushes and other tools. A collective "Ooh!" escapes the audience.)
While eyeshadow sticks are incredibly user-friendly, having the right tools can elevate your look from "pretty good" to "drop-dead gorgeous." Think of them as your trusty sidekicks in the quest for eye perfection!
The Must-Have Tools:
- Eyeshadow Brushes:
- Blending Brush: Fluffy and tapered, essential for seamless transitions and diffusing harsh lines. This is your best friend for achieving a professional-looking blend.
- Crease Brush: Small and precise, for defining the crease and adding depth.
- Flat Shader Brush: For packing color onto the lid.
- Pencil Brush: For smudging eyeliner and applying color to the lower lash line.
- Eyelash Curler: To open up the eyes and make your lashes look longer and more voluminous.
- Mascara: The finishing touch! Adds volume, length, and definition to your lashes.
- Makeup Remover & Cotton Swabs: For cleaning up any mistakes and creating crisp lines. Essential for a flawless finish!
- Eyeshadow Primer (Crucial!): More on this later, but it’s the foundation for a long-lasting look.
Essential Techniques:
- Blending is Key: The secret to a professional-looking eye look is seamless blending. Use a light hand and small, circular motions to blend the edges of your eyeshadow. Think of it like painting a masterpiece, not slapping on paint. 🎨
- Building Color: Start with a light base and gradually build up the intensity of the color. It’s easier to add more color than to remove it!
- Layering Finishes: Experiment with layering different finishes, such as matte and shimmer, to create dimension and interest.
- Using the Right Brush: Each brush is designed for a specific purpose. Use the right brush for the right job to achieve the best results.
- Practice, Practice, Practice!: The more you practice, the better you’ll become at applying eyeshadow. Don’t be afraid to experiment and try new things!
(A student raises their hand timidly.)
Student: Excuse me, Professor, but what if I don’t have all those brushes?
Professor: Excellent question! While having a full set of brushes is ideal, you can definitely get by with a few essentials. A good blending brush, a flat shader brush, and a pencil brush are a great starting point. And remember, you can always use your fingers in a pinch! (Just make sure they’re clean!) 🖐️
Part 3: Crafting the Festive & Glamorous Look – Step-by-Step Guide & Pro Tips
(The screen illuminates with a stunning, festive eye look. The audience gasps again, louder this time.)
Okay, people, this is where the magic happens! We’re going to walk through creating a show-stopping, festive and glamorous eye look using our 5-piece stick set. Get your sticks ready!
The Look: "Golden Goddess Glam" ✨
This look features a shimmering gold lid, a defined crease, and a smoky outer corner, perfect for a night out or a special occasion.
Step-by-Step Guide:
- Prime Your Lids: This is non-negotiable! Apply a thin layer of eyeshadow primer to your entire eyelid, from lash line to brow bone. This will create a smooth canvas and prevent creasing. Think of it as the foundation for your eyeshadow masterpiece. 🧱
- Apply the Base Shade: Using the medium, matte shade (e.g., taupe or warm brown), apply it to your crease with a crease brush. Blend well to create a soft transition. This will add depth and dimension to your eyes.
- Add the Lid Color: Apply the metallic or shimmer shade (e.g., gold) to your entire eyelid with a flat shader brush or your finger. Pat the color on for maximum pigmentation. This is where the glam comes in! ✨
- Define the Outer Corner: Using the dark, matte shade (e.g., deep brown or charcoal grey), apply it to the outer corner of your eye with a pencil brush. Blend it into the crease to create a smoky effect. Start small and build up the intensity gradually.
- Highlight the Inner Corner & Brow Bone: Using the light, shimmery shade (e.g., champagne or ivory), apply it to the inner corner of your eye and under your brow bone with a small brush. This will brighten your eyes and create a lifted effect.
- Line Your Eyes (Optional): Apply eyeliner to your upper lash line for added definition. You can use a liquid liner, gel liner, or even a dark eyeshadow stick smudged along the lash line.
- Apply Mascara: Apply several coats of mascara to your upper and lower lashes. Consider using false lashes for extra drama! 👑
- Clean Up & Perfect: Use a cotton swab dipped in makeup remover to clean up any mistakes and create crisp lines.
Pro Tips for Extra Glam:
- Wet Your Brush: Dampening your eyeshadow brush before applying shimmer shades can intensify the color payoff and make it last longer.
- Use a Setting Spray: After you’ve finished your eye look, spritz a setting spray over your face to lock everything in place.
- Apply Glitter (If You Dare!): For an extra touch of sparkle, apply a glitter eyeshadow or eyeliner to your lids. But be warned: glitter can be messy! ✨
- Blend, Blend, Blend!: I can’t stress this enough! Seamless blending is the key to a professional-looking eye look.
(A slide appears showcasing the Golden Goddess Glam look on various eye shapes and skin tones. The audience is visibly impressed.)
Part 4: The Long-Lasting Secret Sauce – Priming, Setting, and Preservation
(The screen displays a series of icons: a shield, a lock, and a time clock. The tension in the room is palpable.)
Alright, listen up, because this is where we separate the amateurs from the pros. Creating a stunning eye look is only half the battle. The real challenge is making it last all night, through sweat, tears, and dance floor shenanigans. 💃
The Holy Trinity of Longevity:
- Priming: As we discussed earlier, eyeshadow primer is the foundation for a long-lasting eye look. It creates a smooth canvas, prevents creasing, and helps the eyeshadow adhere to your lids. Choose a primer that is specifically designed for oily eyelids if that’s your concern.
- Setting: Setting your eyeshadow with a translucent powder can help lock it in place and prevent it from fading or smudging. Use a light hand and a fluffy brush to apply the powder to your eyelids.
- Setting Spray: A setting spray is the final step in locking your makeup in place. Choose a setting spray that is designed for your skin type (e.g., oily, dry, or combination).
Beyond the Basics: Advanced Techniques for Longevity:
- Cream Shadows as a Base: Using a cream shadow in a similar shade as your powder eyeshadow can help intensify the color and make it last longer. The stick shadows work perfectly here!
- Waterproof Mascara: A must-have for preventing raccoon eyes! Choose a waterproof mascara that is long-lasting and smudge-proof.
- Blotting Papers: Keep blotting papers on hand to absorb excess oil throughout the day or night.
- Avoid Touching Your Eyes: This is a big one! Avoid touching your eyes as much as possible, as this can transfer oils and break down your makeup.
- Hydrate! Drinking plenty of water can help keep your skin hydrated and prevent your makeup from drying out and cracking. 💧
(A student raises their hand, looking slightly panicked.)
Student: But Professor, what if I have oily eyelids? Nothing ever stays on!
Professor: Ah, the oily eyelid conundrum! Fear not, my friend. Oily eyelids require a little extra TLC. Look for oil-free primers specifically designed for oily skin. Set your eyeshadow with a mattifying powder, and consider using a setting spray designed for oily skin. And blotting papers will be your best friend!
Part 5: Troubleshooting & Common Mistakes – Avoiding the Raccoon Eye Apocalypse!
(The screen displays a picture of a sad, muddy-eyed raccoon. A collective shudder runs through the audience.)
Okay, let’s talk about the things that can go wrong. Because let’s face it, even the most skilled makeup artists have their off days. Knowing how to troubleshoot common mistakes can save you from a makeup meltdown.
Common Mistakes & How to Fix Them:
| Mistake | Solution |
|---|---|
| Creasing Eyeshadow | Use an eyeshadow primer! Set your eyeshadow with a translucent powder. Avoid applying too much product to the crease. |
| Fading Eyeshadow | Use an eyeshadow primer! Apply a cream shadow as a base. Wet your eyeshadow brush before applying shimmer shades. Use a setting spray. |
| Smudging Eyeliner | Use a waterproof eyeliner. Set your eyeliner with a dark eyeshadow. Avoid touching your eyes. |
| Fallout | Apply your eye makeup before your foundation. Use a tissue to catch any fallout. Use a damp sponge to clean up any fallout. |
| Uneven Application | Take your time and blend carefully. Use a light hand and build up the color gradually. Use a clean brush to blend away any harsh lines. |
| Too Much Product | Start with a small amount of product and build up the intensity gradually. Use a clean brush to blend away any excess product. |
| Choosing the Wrong Colors | Consider your skin tone and eye color when choosing eyeshadow colors. Experiment with different colors to find what works best for you. |
| Raccoon Eyes | Use waterproof mascara. Avoid applying mascara to your lower lashes if you are prone to smudging. Set your undereye area with a powder. |
The Emergency Kit:
Every makeup enthusiast should have an emergency kit on hand for quick fixes:
- Cotton Swabs: For cleaning up mistakes and creating crisp lines.
- Makeup Remover: For removing unwanted makeup.
- Blotting Papers: For absorbing excess oil.
- Translucent Powder: For setting your makeup and preventing creasing.
- Mascara Wand: For separating lashes and removing clumps.
(A student raises their hand, looking relieved.)
Student: Thank you, Professor! I feel so much better prepared now.
Professor: Excellent! Remember, makeup is all about experimentation and having fun. Don’t be afraid to try new things and make mistakes. That’s how you learn!
Part 6: Advanced Techniques & Creative Explorations – Level Up Your Eye Game!
(The screen displays a montage of intricate and artistic eye looks. The audience is buzzing with excitement.)
Okay, you’ve mastered the basics. Now it’s time to push your boundaries and explore the endless possibilities of eye makeup!
Advanced Techniques:
- Cut Crease: A technique that involves creating a sharp line across the crease of the eye to define it and create a dramatic effect.
- Halo Eye: A technique that involves placing a bright shimmer shade in the center of the lid to create a halo effect.
- Reverse Smoky Eye: A technique that involves creating a smoky effect on the lower lash line instead of the upper lash line.
- Graphic Eyeliner: A technique that involves creating bold and geometric eyeliner designs.
- Color Blocking: A technique that involves using contrasting colors to create a bold and eye-catching look.
Creative Explorations:
- Experiment with Different Textures: Try layering different textures, such as matte, shimmer, and glitter, to create dimension and interest.
- Use Unexpected Colors: Don’t be afraid to experiment with unconventional colors, such as blues, greens, and purples.
- Incorporate Embellishments: Add embellishments, such as rhinestones, sequins, and feathers, to your eye look for extra glam.
- Draw Inspiration from Art & Nature: Look to art and nature for inspiration when creating your eye looks.
- Create Your Own Signature Look: Develop a signature eye look that reflects your personal style and personality.
Final Thoughts:
(The screen displays a message: "The only limit is your imagination!")
Congratulations, students! You have now completed Eyeshadow Alchemy 101. You are armed with the knowledge and skills to create stunning, festive, glamorous, and long-lasting eye looks using your 5-piece stick set.
Remember, makeup is a form of self-expression. Don’t be afraid to experiment, have fun, and let your creativity shine!
(The Professor takes a bow to thunderous applause. Confetti rains down from the ceiling. The lecture hall erupts in cheers.)
Now go forth and conquer the world, one fabulous eye look at a time! 💖
For detailed product specifications and purchases, please go to :https://zenamakeup.com/products/glimmer-glow-5-piece-glitter-cream-eyeshadow-stick-set
Leave a Reply