Lecture: The Art of Finger Painting with Sparkles: Mastering Pigmented Glitter Eyeshadow Cream Application
(Welcome, glitterati! Prepare to embark on a journey of shimmering success! 💖)
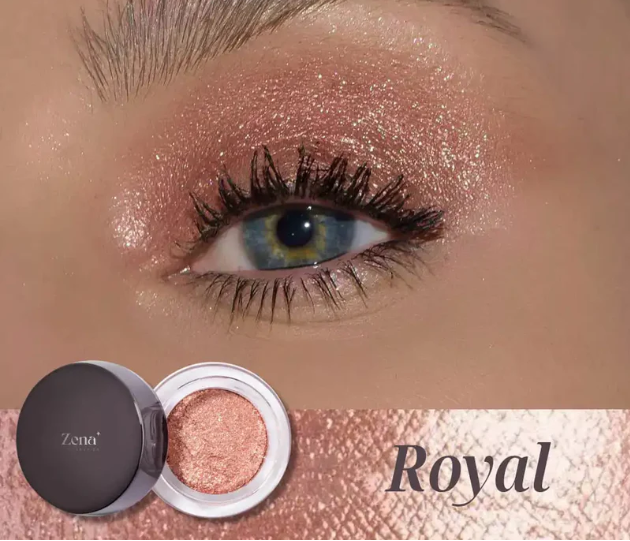
Today, we’re diving into a topic near and dear to the hearts of all who love a little (or a lot!) of sparkle: applying pigmented glitter eyeshadow cream with your finger. Yes, you heard right – ditch the brushes (for now!), unleash your inner artist, and prepare to transform your eyelids into dazzling masterpieces using the most primal and effective applicator of all: your fingertip!
Forget the stuffy makeup counter intimidation. This is a judgement-free zone where we celebrate the joy of glitter, the freedom of finger painting, and the absolute audacity of looking fabulous.
(Why Fingers, You Ask? 🧐)
You might be thinking, "But…brushes! Blending! Precision!" And you’re not wrong. Brushes certainly have their place in the makeup world. However, when it comes to pigmented glitter eyeshadow creams, your finger offers some unique advantages that can lead to a truly spectacular result:
- Heat Activation: The warmth from your finger gently warms the cream, making it more pliable and easier to spread. This is especially important for creams that tend to be a bit stiff or chunky. 🌡️
- Maximum Pigment Payoff: Your finger allows you to pack on the glitter and pigment directly onto the lid, resulting in more intense color and sparkle. Brushes can sometimes diffuse the glitter, leaving you with a less impactful look. ✨
- Controlled Placement: With practice, your finger offers surprisingly precise application. You can easily tap and blend the product exactly where you want it, creating targeted shimmer and avoiding fallout.🎯
- Sensory Experience: Let’s be honest, there’s something undeniably satisfying about applying makeup with your fingers. It’s a more tactile and intuitive experience that connects you with the product on a deeper level. (Plus, it’s kinda fun! 😜)
(The Glitterati’s Toolkit: Essentials for Sparkling Success 🧰)
Before we dive into the application techniques, let’s gather our supplies. Think of this as your glitter-fueled arsenal.
| Item | Description | Why You Need It |
|---|---|---|
| Pigmented Glitter Eyeshadow Cream | The star of the show! Choose a color and finish that speaks to your inner sparkle. | Duh! This is the whole point! |
| Eyeshadow Primer | A crucial base for preventing creasing and ensuring long-lasting glitter application. | Prevents glitter migration and ensures your look lasts from sunrise to…well, whenever you decide to take it off! 🕒 |
| Concealer (Optional) | For concealing any darkness or discoloration on the eyelids. | Creates a clean canvas for your glittery masterpiece. |
| Translucent Setting Powder | To set the concealer (if used) and prevent creasing. | Locks everything in place and keeps the glitter from wandering. |
| Cotton Swabs (Q-Tips) | For cleaning up any stray glitter or smudges. | Your glitter cleanup crew! 🧹 |
| Makeup Remover Wipes | For removing any major mistakes or fallout. | For those "oops!" moments. 😅 |
| Mirror | A well-lit mirror is essential for precise application. | So you can actually see what you’re doing! 🪞 |
| Your Finger (Ring Finger Preferred) | The magical applicator! The ring finger has a lighter touch, making it ideal for delicate eyeshadow application. | The star of this particular show! ✨ |
(Choosing Your Glitter Weapon: Navigating the Pigmented Glitter Eyeshadow Cream Jungle 🌿)
Not all glitter eyeshadow creams are created equal. Some are densely packed with pigment and sparkle, while others are more subtle and sheer. Consider these factors when choosing your glittery companion:
- Pigmentation: How much color do you want? Do you want a bold, vibrant look or a more subtle wash of shimmer?
- Glitter Size and Type: Glitter comes in various sizes and textures. Some glitters are fine and iridescent, while others are chunky and holographic. Choose a glitter that you find comfortable and visually appealing.
- Cream Texture: Some creams are thicker and more emollient, while others are lighter and more gel-like. Experiment to find a texture that you enjoy working with.
- Shade Range: Does the brand offer a range of colors that suit your skin tone and personal style?
- Longevity: Does the glitter eyeshadow cream last throughout the day without creasing or fading? Read reviews and test it out yourself to see how it performs.
(The Finger Painting Masterclass: Application Techniques Demystified 🎨)
Alright, class, let’s get down to the nitty-gritty! Here’s a step-by-step guide to applying pigmented glitter eyeshadow cream with your finger like a pro:
Step 1: Prep Your Canvas (aka Your Eyelids)
- Cleanse and Moisturize: Start with a clean, hydrated eyelid.
- Apply Eyeshadow Primer: This is non-negotiable! Primer creates a smooth base and helps the glitter adhere better. Apply a thin, even layer of primer to your entire eyelid.
- Conceal (Optional): If you have any darkness or discoloration on your eyelids, apply a small amount of concealer and blend it out with your finger or a brush.
- Set with Powder (Optional): If you used concealer, lightly set it with translucent setting powder to prevent creasing.
Step 2: Load Your Finger (But Don’t Overdo It!)
- Dip your ring finger (or whichever finger you prefer) into the glitter eyeshadow cream.
- Less is more! Start with a small amount of product. You can always add more later. Overloading your finger can lead to a messy application and excessive fallout.
- Tap off any excess glitter onto the back of your hand or a clean tissue. This will prevent clumps and ensure a smoother application.
Step 3: The Application Process: Tap, Tap, Tap! (Don’t Smear!)
- The Tapping Technique: This is the key to success! Instead of swiping or smearing the glitter eyeshadow cream across your eyelid, use a gentle tapping motion to press the product onto your skin.
- Start in the Center: Begin applying the glitter eyeshadow cream in the center of your eyelid, where you want the most intensity.
- Work Outwards: Gradually tap the product outwards towards the inner and outer corners of your eye.
- Layer for Intensity: If you want a more intense look, add another layer of glitter eyeshadow cream using the same tapping technique.
Step 4: Blending (Gentle Does It!)
- Softening the Edges: Once you’ve applied the glitter eyeshadow cream to your desired areas, use your finger to gently soften the edges and blend the product into your crease or transition shade (if you’re using one).
- Avoid Harsh Lines: The goal is to create a seamless transition between the glitter eyeshadow cream and your surrounding eyeshadow.
- Remember: Less is More! Over-blending can cause the glitter to fade or disappear.
Step 5: Clean Up Crew to the Rescue!
- Cotton Swabs to the Rescue: Use a clean cotton swab dipped in makeup remover to clean up any stray glitter or smudges around your eyes.
- Sharp Lines: For a more defined look, use a clean, angled brush dipped in makeup remover to create a sharp line along your lower lash line.
- Makeup Remover Wipes: For bigger mistakes, use a makeup remover wipe to gently remove the glitter eyeshadow cream and start over.
Step 6: Finishing Touches: The Glamorous Grand Finale!
- Eyeliner (Optional): If you want to add more definition to your eyes, apply eyeliner along your upper lash line.
- Mascara: Apply mascara to your upper and lower lashes to complete the look.
- Highlighter (Optional): Add a touch of highlighter to your inner corner and brow bone to brighten your eyes.
(Troubleshooting: Conquering Common Glitter Grievances 🛠️)
Even the most experienced glitterati encounter occasional hiccups. Here’s how to troubleshoot some common problems:
| Problem | Solution |
|---|---|
| Glitter Fallout | Use a glitter glue or eyeshadow primer specifically designed for glitter. Apply the glitter eyeshadow cream in thin layers. Tap off any excess product before applying. Use a setting spray to help lock the glitter in place.* Clean up any fallout with a piece of tape or a damp cotton swab. |
| Creasing | Make sure your eyelids are properly primed and set with powder. Apply the glitter eyeshadow cream in thin layers. Avoid applying too much product in the crease. Use a long-wearing glitter eyeshadow cream. |
| Uneven Application | Use the tapping technique to apply the glitter eyeshadow cream evenly. Start with a small amount of product and build up the intensity as needed.* Use your finger to gently blend the edges of the glitter eyeshadow cream. |
| Glitter Looks Dull/Flat | Use a glitter eyeshadow cream with a high concentration of glitter. Apply the glitter eyeshadow cream over a base of a similar color. Use a glitter glue or eyeshadow primer to help the glitter adhere better and reflect more light. Experiment with different glitter finishes, such as holographic or iridescent glitters. |
| Cream is Dry and Difficult to Apply | Warm the cream slightly with your fingertip before applying. Mix a tiny drop of eye-safe mixing medium into the cream to thin it out.* Store the cream in a cool, dry place to prevent it from drying out. (And maybe consider a different brand in the future!) |
(Advanced Glitter Wizardry: Level Up Your Sparkle Game 🧙♀️)
Once you’ve mastered the basics, you can start experimenting with more advanced techniques to create truly dazzling looks:
- Glitter Cut Crease: Create a sharp, defined cut crease and fill it in with glitter eyeshadow cream.
- Halo Eye with Glitter: Place a pop of glitter in the center of your eyelid to create a halo effect.
- Glitter Eyeliner: Use a thin brush to apply glitter eyeshadow cream along your upper or lower lash line.
- Ombre Glitter: Blend different shades of glitter eyeshadow cream together to create a gradient effect.
- Combine with Matte Shadows: Use matte eyeshadows to define your crease and add depth, then layer glitter eyeshadow cream on your lid for a stunning contrast.
(Ethical Sparkle: Choosing Cruelty-Free and Eco-Friendly Glitter ✨🌱)
As responsible glitter enthusiasts, it’s important to consider the ethical and environmental impact of our sparkle choices.
- Cruelty-Free: Choose glitter eyeshadow creams from brands that are cruelty-free and do not test on animals.
- Eco-Friendly Glitter: Traditional glitter is made from plastic and can contribute to microplastic pollution. Look for biodegradable or plant-based glitter options.
(The Final Flourish: Embrace the Glitter! 🎉)
Applying pigmented glitter eyeshadow cream with your finger is an art form, a journey of self-expression, and a celebration of all things sparkly. Don’t be afraid to experiment, have fun, and embrace the glitter! With practice and patience, you’ll be creating dazzling looks that turn heads and leave a trail of sparkle wherever you go.
Now go forth and glitter! ✨💖🥳
For detailed product specifications and purchases, please go to :https://zenamakeup.com/products/pigmented-glitter-eyeshadow-cream
Leave a Reply