Crystal Jelly Blush: Your Secret Weapon for the "I Woke Up Like This" Glow 🌟
(A Lecture on Achieving Radiant No-Makeup Makeup with a Jelly Twist)
Alright, settle in, beauty buffs! Today, we’re diving headfirst into the shimmering, jiggly world of Crystal Jelly Blush. Forget that cakey, powdery stuff that screams "I spent an hour in front of the mirror!" We’re talking about effortless radiance, a natural flush that says, "Yes, I drink eight glasses of water a day and frolic in fields of wildflowers. No big deal."
This isn’t just a blush; it’s a vibe. It’s a testament to the "no-makeup makeup" philosophy – enhancing your natural beauty without looking like you’re even trying. And let’s be honest, who doesn’t want that?
(Professor [Your Name Here], Chair of Glow-Getting Studies, at your service!)
Lecture Outline:
- What IS Crystal Jelly Blush, Anyway? 🤔 (The Science & Sensibility)
- Why Jelly? The Benefits Breakdown 🏆 (It’s More Than Just a Trend)
- Choosing Your Perfect Jelly Shade: A Color Theory Crash Course 🎨 (Don’t Be a Clown!)
- Application 101: From Dab to Delight 👩🎨 (Techniques for Every Skill Level)
- The No-Makeup Makeup Routine: Jelly Blush as the Star ✨ (Step-by-Step Guide)
- Jelly Blush Troubleshooting: Common Issues & Clever Fixes 🛠️ (Don’t Panic!)
- Beyond the Cheeks: Unexpected Uses for Jelly Blush 🤯 (Get Creative!)
- Jelly Blush Recommendations: My Top Picks 🛍️ (Tested & Approved!)
- Jelly Blush DIY: For the Adventurous Souls 🧪 (Proceed with Caution!)
- Conclusion: Embrace the Jelly Glow! 💖 (Your Radiant Future Awaits!)
1. What IS Crystal Jelly Blush, Anyway? 🤔 (The Science & Sensibility)
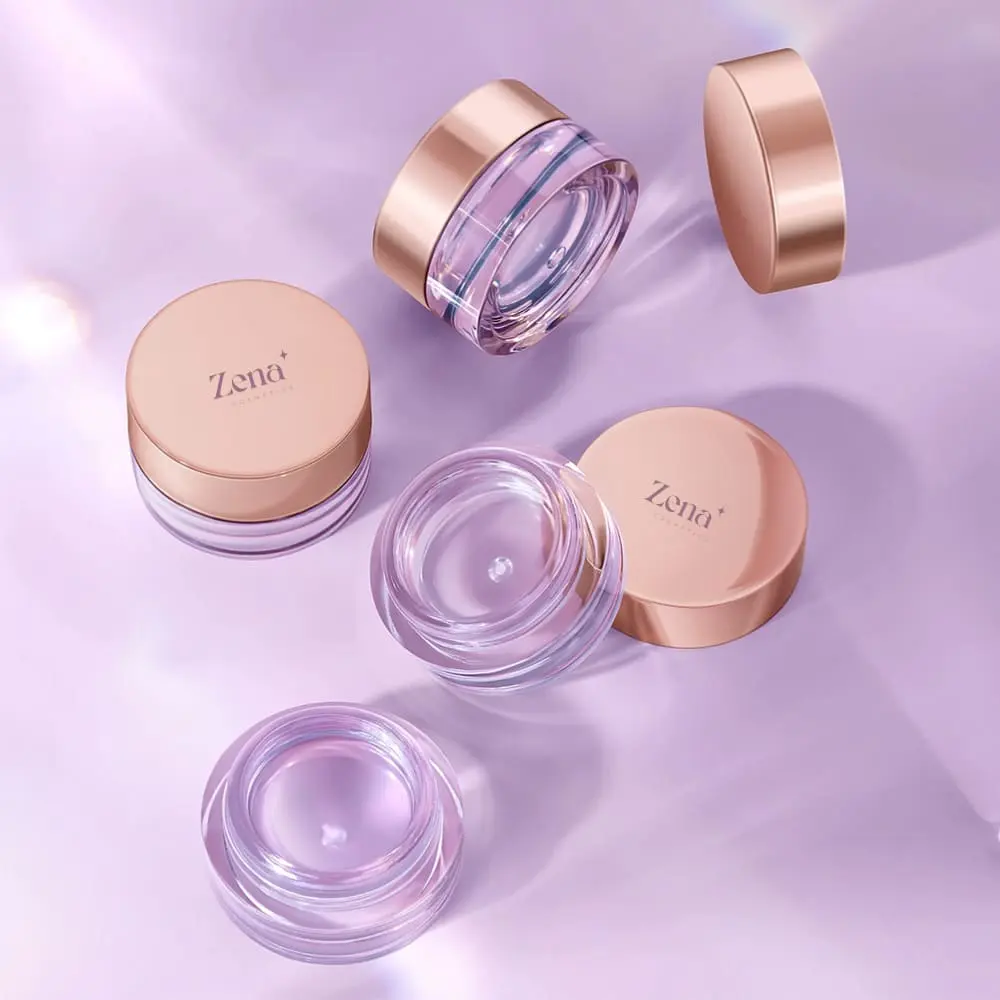
Imagine a blush that’s as fun to touch as it is to wear. That’s Crystal Jelly Blush in a nutshell. It’s a blush formulated with a gel-like, bouncy texture that’s often infused with hydrating ingredients. Think of it as skincare meets color cosmetics.
Instead of the dry, chalky consistency of traditional powder blushes, jelly blush boasts a water-based formula that melts seamlessly into the skin. This creates a dewy, radiant finish that looks incredibly natural.
The "Crystal" factor? Often refers to the sheer, translucent quality of the formula, allowing your natural skin tone to shine through. It’s like a watercolor painting for your cheeks!
In simpler terms: It’s like a grown-up version of that gelatin you used to poke as a kid, but instead of eating it, you’re making your face gorgeous!
| Feature | Powder Blush | Crystal Jelly Blush |
|---|---|---|
| Texture | Dry, powdery | Gel-like, bouncy, hydrating |
| Finish | Matte, satin, or shimmer | Dewy, radiant, natural |
| Blendability | Can be patchy if not blended properly | Blends seamlessly, forgiving |
| Hydration | Can be drying | Often contains hydrating ingredients |
| Longevity | Can fade throughout the day | Varies, but often good, especially with primer |
| Overall Look | Can look more "made-up" | More natural, "lit-from-within" look |
2. Why Jelly? The Benefits Breakdown 🏆 (It’s More Than Just a Trend)
Okay, so it’s jiggly and fun, but is it actually good for your skin? The answer is a resounding YES! Here’s why jelly blush is more than just a fleeting trend:
- Hydration Hero: Many jelly blushes are packed with humectants like hyaluronic acid and glycerin, which draw moisture into the skin, keeping it plump and hydrated throughout the day. Say goodbye to dry, flaky cheeks! 👋
- Seamless Blendability: The gel texture makes it incredibly easy to blend, even for makeup newbies. No more harsh lines or obvious blush placement. It’s practically foolproof! 😇
- Natural-Looking Finish: The sheer, dewy finish mimics the natural flush of healthy skin. It’s like you just finished a brisk walk in the park, but without the actual exercise. 🏃♀️
- Lightweight & Comfortable: You’ll barely feel it on your skin! Unlike heavy powder blushes, jelly blush feels weightless and breathable. Perfect for those hot summer days. ☀️
- Versatile Application: You can apply it with your fingers, a brush, or a sponge. It’s adaptable to your preferred method. 🖌️
- Suitable for Most Skin Types: While always patch test, generally jelly blush works well on dry, normal, and combination skin. Oily skin types might want to set it with a light dusting of powder.
Think of it this way: Powder blush is like a heavy winter coat, while jelly blush is like a light, breathable summer dress.
3. Choosing Your Perfect Jelly Shade: A Color Theory Crash Course 🎨 (Don’t Be a Clown!)
Choosing the right shade of jelly blush is crucial to achieving that natural, radiant glow. You don’t want to look like you raided a clown’s makeup bag! 🤡
Here’s a quick and dirty guide to color theory for blush:
- Fair Skin: Opt for light pinks, peaches, and corals. These shades will add a subtle flush without overpowering your complexion. Think delicate rose petals. 🌹
- Light-Medium Skin: You can rock a wider range of colors, including rosy pinks, mauves, and berry shades. Experiment with different intensities to find what you love. 🌸
- Medium Skin: Warm corals, peachy nudes, and rosy browns will look stunning on medium skin tones. These shades add warmth and dimension. 🍑
- Olive Skin: Terracotta, bronze, and berry shades are your best friends. They complement the warm undertones of olive skin beautifully. 🍂
- Deep Skin: Rich berries, plums, and reds will pop against deep skin tones. Don’t be afraid to go bold! 🍇
The Undertone Rule: Pay attention to your skin’s undertones (warm, cool, or neutral).
- Warm Undertones: Look for blushes with warm undertones (peaches, corals, golds).
- Cool Undertones: Look for blushes with cool undertones (pinks, plums, berries).
- Neutral Undertones: You can wear almost any shade! Lucky you! 🍀
Pro Tip: When in doubt, swatch the blush on the inside of your wrist. This area has similar undertones to your face, so it will give you a good idea of how the color will look on your skin.
Avoid: Shades that are too cool or too pale for your skin tone, as they can make you look washed out or ashy.
4. Application 101: From Dab to Delight 👩🎨 (Techniques for Every Skill Level)
Now for the fun part: applying the jelly blush! Here are a few techniques to help you achieve that perfect flush:
- Finger Application (Beginner-Friendly): This is the easiest and most intuitive method. Simply dab a small amount of jelly blush onto your fingertips and gently press it onto the apples of your cheeks. Blend outwards towards your temples. The warmth of your fingers will help the blush melt seamlessly into your skin. 👍
- Brush Application (Intermediate): Use a stippling brush or a duo-fiber brush for a more diffused and airbrushed look. Dip the brush lightly into the jelly blush and tap off any excess. Apply to the apples of your cheeks and blend outwards in a circular motion. 🖌️
- Sponge Application (Advanced): Use a damp beauty sponge for a super-natural and seamless finish. Dab the sponge into the jelly blush and bounce it onto your cheeks. This technique is great for building up the color gradually. 🧽
Placement is Key:
- Apples of the Cheeks: This is the classic blush placement. Smile to find the apples of your cheeks, and apply the blush there. This will give you a youthful and healthy-looking flush. 😊
- Cheekbones: Applying blush slightly higher on your cheekbones can help to sculpt and define your face. Be careful not to apply it too close to your nose, as this can make you look tired. 😴
- Across the Nose: For a sun-kissed look, lightly dust some jelly blush across the bridge of your nose. ☀️
Less is More: Start with a small amount of product and build up the color gradually. It’s always easier to add more than to take away!
5. The No-Makeup Makeup Routine: Jelly Blush as the Star ✨ (Step-by-Step Guide)
Here’s a step-by-step guide to achieving that coveted "no-makeup makeup" look, with jelly blush taking center stage:
- Prep Your Skin: Start with a clean, moisturized face. Apply a lightweight serum and moisturizer to hydrate your skin and create a smooth base for your makeup. 💧
- Spot Concealing (Optional): If you have any blemishes or dark circles, use a lightweight concealer to spot conceal them. Don’t go overboard! We want to keep it natural. 🤫
- Tinted Moisturizer or BB Cream: Apply a sheer layer of tinted moisturizer or BB cream to even out your skin tone. This will provide light coverage without looking cakey. 🧴
- Jelly Blush Time!: Apply your chosen jelly blush using your preferred method (fingers, brush, or sponge). Blend it seamlessly into your cheeks for a natural flush. 💖
- Mascara: Curl your lashes and apply a coat or two of mascara to define your eyes. Opt for a brown mascara for a softer look. 👀
- Lip Balm or Lip Stain: Finish with a moisturizing lip balm or a sheer lip stain to add a touch of color to your lips. 💋
- Optional: Brow Gel: Groom your eyebrows with a clear brow gel to keep them in place. ✏️
And voilà! You’ve achieved a radiant and natural "no-makeup makeup" look with the help of your trusty jelly blush.
6. Jelly Blush Troubleshooting: Common Issues & Clever Fixes 🛠️ (Don’t Panic!)
Even with the best techniques, you might encounter some issues with your jelly blush. Don’t worry, I’ve got you covered!
- Problem: Blush is too pigmented.
- Solution: Use a damp beauty sponge to sheer out the color. You can also apply a translucent powder on top to tone it down.
- Problem: Blush is fading throughout the day.
- Solution: Use a primer underneath your makeup to help the blush last longer. You can also set the blush with a light dusting of translucent powder.
- Problem: Blush is making my skin look oily.
- Solution: Opt for a jelly blush that has a more matte finish. You can also set the blush with a powder.
- Problem: Blush is clinging to dry patches.
- Solution: Exfoliate your skin regularly to remove dead skin cells. Make sure to moisturize your skin well before applying the blush.
- Problem: Blush is emphasizing my pores.
- Solution: Use a pore-filling primer before applying your makeup. Apply the blush with a light hand and avoid applying it directly over your pores.
Remember: Practice makes perfect! Don’t be afraid to experiment and find what works best for you.
7. Beyond the Cheeks: Unexpected Uses for Jelly Blush 🤯 (Get Creative!)
Jelly blush is more versatile than you think! Here are a few unexpected ways to use it:
- Lip Stain: Dab a small amount of jelly blush onto your lips for a sheer, natural-looking lip stain. 👄
- Eyeshadow: Apply jelly blush to your eyelids for a wash of color. This is a great way to create a monochromatic look. 👁️
- Highlighter: Choose a jelly blush with a shimmery finish and apply it to the high points of your face for a subtle glow. ✨
- Body Highlighter: Mix a small amount of jelly blush with your body lotion for a subtle shimmer on your arms and legs. 🦵
Warning: Always patch test before applying jelly blush to areas other than your cheeks.
8. Jelly Blush Recommendations: My Top Picks 🛍️ (Tested & Approved!)
Alright, time for my personal favorites! These are the jelly blushes that have earned a permanent spot in my makeup bag:
| Product | Description | Pros | Cons | Price Range |
|---|---|---|---|---|
| [Brand Name] [Blush Name] | [Describe the texture, color, and finish. Mention any key ingredients.] For example: A lightweight, bouncy jelly blush with a dewy finish. Infused with hyaluronic acid for extra hydration. The shade "[Shade Name]" is a perfect rosy pink. | Hydrating, easy to blend, natural-looking finish, long-lasting. | Limited shade range, may not be suitable for oily skin without setting. | $[Price] |
| [Brand Name] [Blush Name] | [Describe the texture, color, and finish. Mention any key ingredients.] For example: A highly pigmented jelly blush with a subtle shimmer. Contains vitamin E to nourish the skin. The shade "[Shade Name]" is a gorgeous coral. | Highly pigmented, buildable color, beautiful shimmer, nourishing ingredients. | Can be a bit tricky to blend if you’re not careful, may be too shimmery for some. | $[Price] |
| [Brand Name] [Blush Name] | [Describe the texture, color, and finish. Mention any key ingredients.] For example: A lightweight, water-based jelly blush with a matte finish. Perfect for oily skin. The shade "[Shade Name]" is a natural terracotta. | Matte finish, long-lasting, suitable for oily skin, natural-looking color. | Can be a bit drying if you have dry skin, may not be as dewy as other jelly blushes. | $[Price] |
| [Affordable Brand] [Blush Name] | A more budget-friendly option that still delivers a beautiful jelly blush experience. | Affordable, good color payoff, easy to find. | May not be as long-lasting as higher-end options, limited shade range. | $[Price] |
(Note: Replace the bracketed information with actual product details.)
9. Jelly Blush DIY: For the Adventurous Souls 🧪 (Proceed with Caution!)
Feeling crafty? You can actually make your own jelly blush at home! This is a fun project, but proceed with caution and always research ingredients thoroughly.
Disclaimer: I am not responsible for any mishaps that occur during your DIY adventures!
Basic Recipe:
- Aloe Vera Gel: The base of your jelly blush.
- Liquid Food Coloring or Mica Powder: For color.
- Glycerin: For extra hydration.
- Essential Oil (Optional): For fragrance.
Instructions:
- Mix aloe vera gel, food coloring/mica powder, glycerin, and essential oil (if using) in a bowl.
- Stir well until all ingredients are combined.
- Pour the mixture into a clean container.
- Let it set in the refrigerator for a few hours until it becomes firm.
Important Notes:
- Use food-grade ingredients.
- Start with a small amount of food coloring/mica powder and add more gradually until you achieve your desired color.
- Test the mixture on a small area of your skin before applying it to your face.
- This DIY jelly blush will have a shorter shelf life than store-bought versions, so use it within a few weeks.
This is an ADVANCED technique. If you are unsure, stick to buying a pre-made product.
10. Conclusion: Embrace the Jelly Glow! 💖 (Your Radiant Future Awaits!)
And there you have it! Everything you need to know about Crystal Jelly Blush. From the science behind the formula to the application techniques and the unexpected uses, you are now officially jelly blush experts! 🎉
So, go forth and embrace the jelly glow! Experiment with different shades and techniques to find what works best for you. And remember, the goal is to enhance your natural beauty and have fun while doing it.
Class dismissed! ✨
For detailed product specifications and purchases, please go to :https://zenamakeup.com/products/crystal-jelly-clear-blush
Leave a Reply