Lecture Hall: Glitter Without the Glare – Mastering the Subtle Everyday Look with Cream Eyeshadow Sticks ✨
(Professor Glitterati, clad in a lab coat bedazzled with tiny iridescent sequins, strides confidently to the podium. A single spotlight illuminates her face, highlighting her impeccably blended, subtly shimmering eyelids.)
Alright, settle down, settle down! Class is in session! Today, we’re diving headfirst into a topic near and dear to my sparkly heart: Creating a natural everyday look using a subtle glitter cream eyeshadow stick.
(Professor Glitterati taps the podium with a glitter-encrusted pointer.)
Yes, you heard me right! Glitter! But before you faint from visions of 80s hair metal bands and sequin-induced blindness, let me assure you: we’re talking sophisticated shimmer, not blinding brilliance. We’re aiming for that “lit-from-within” glow, that “I woke up like this, but actually, I spent 5 minutes applying this amazing product” effect.
(Professor Glitterati winks, and a collective murmur of excitement ripples through the audience.)
So, grab your notebooks, your caffeine, and prepare to be enlightened. Because, let’s face it, who doesn’t want a little sparkle in their day?
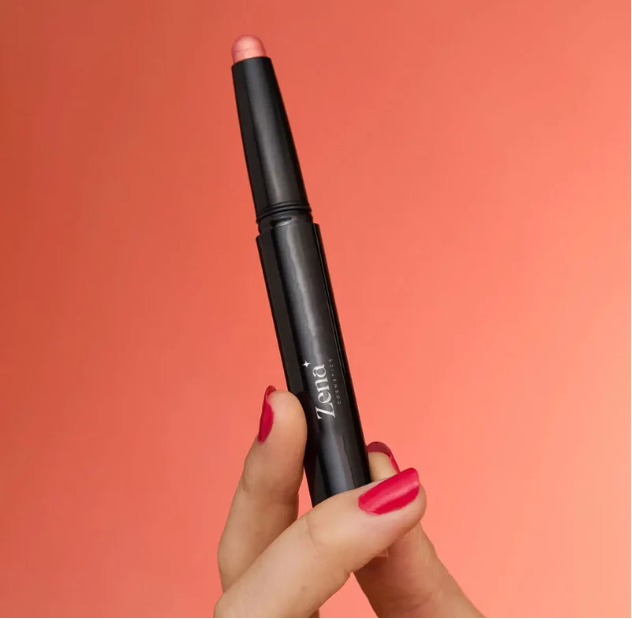
I. The Cream Eyeshadow Stick: Your New Best Friend 💄
(Professor Glitterati projects a slide showing various cream eyeshadow sticks in a rainbow of colors.)
First things first: let’s talk about the hero of our story: the cream eyeshadow stick. Forget fiddling with brushes and palettes that end up looking like a Jackson Pollock painting gone wrong. These babies are the epitome of easy application and effortless chic.
Why Cream? Why Stick?
| Feature | Cream Eyeshadow Stick Advantage |
|---|---|
| Texture | Blendable, buildable, forgiving, and less likely to crease than powder. |
| Application | Quick, direct, and minimal mess. Perfect for on-the-go touch-ups. |
| Finish | Often more natural and luminous than powder shadows. |
| Glitter Delivery | Suspends glitter particles evenly for a subtle, diffused shimmer. |
Think of it this way: powder eyeshadow is like trying to herd cats – it gets everywhere! Cream eyeshadow sticks, on the other hand, are like well-behaved kittens. They stay where you put them and blend seamlessly.
Choosing the Right Shade: Navigating the Glitter Galaxy 🌌
Now, not all cream eyeshadow sticks are created equal. Especially when it comes to finding that "subtle glitter" sweet spot. Here’s your roadmap to glitter galaxy navigation:
- Consider Your Skin Tone: What works for your fair-skinned friend might make you look like a disco ball if you have deeper skin.
- Fair Skin: Opt for champagne, rose gold, and light bronze shades.
- Medium Skin: Experiment with bronze, copper, and taupe shades.
- Olive Skin: Explore gold, olive green, and berry tones.
- Dark Skin: Go bold with gold, bronze, and rich jewel tones.
- Glitter Particle Size Matters: We’re aiming for subtle, remember? Look for finely milled glitter or shimmer particles. Avoid anything that looks like chunky glitter, unless you’re going for a full-on rave look. 🕺 (Which, by the way, is perfectly acceptable on the right occasion!)
- Finish: Consider the overall finish of the eyeshadow. A satin or shimmer finish will be more natural than a metallic or glitter bomb finish.
- Test, Test, Test! The best way to find your perfect shade is to swatch it on your hand and see how it looks in natural light.
(Professor Glitterati displays a slide showing swatch examples on different skin tones.)
Pro Tip: Don’t be afraid to mix and match! You can use different shades of cream eyeshadow stick to create a more complex and dimensional look. Think of it as eyeshadow layering 101.
II. The Application Process: A Step-by-Step Guide 🪜
(Professor Glitterati unveils a whiteboard with a meticulously drawn diagram of an eye, complete with arrows and helpful labels.)
Alright, let’s get down to the nitty-gritty. Here’s how to apply that cream eyeshadow stick like a pro:
Step 1: Prime Time! (Optional, But Recommended) ⏳
An eyeshadow primer is like the foundation of your eye makeup. It creates a smooth base, helps the eyeshadow adhere better, and prevents creasing. If you have oily eyelids, this step is non-negotiable! Otherwise, consider it an added bonus for extended wear.
Step 2: Apply the Eyeshadow Stick 🎨
There are a few ways to apply the eyeshadow stick:
- Direct Application: Swipe the stick directly onto your eyelid, starting at the lash line and working your way up to the crease. This is the fastest and easiest method.
- Finger Application: Dab the eyeshadow stick onto your fingertip and then gently pat it onto your eyelid. This gives you more control over the placement and intensity of the color.
- Brush Application: Use a synthetic eyeshadow brush to pick up the product from the stick and apply it to your eyelid. This is a good option if you want a more precise application.
(Professor Glitterati demonstrates each application method on a volunteer from the audience, much to the amusement of the class.)
Step 3: Blend, Blend, Blend! 🔄
Blending is the key to a natural-looking eyeshadow application. Use your fingertip, a blending brush, or a sponge to blend the edges of the eyeshadow until there are no harsh lines.
Blending is the key to a natural-looking eyeshadow application. Use your fingertip, a blending brush, or a sponge to blend the edges of the eyeshadow until there are no harsh lines.
Pro Tip: Start with a small amount of product and build up the intensity as needed. It’s always easier to add more than to take away.
Step 4: Highlight (Optional) ✨
To brighten your eyes and create a more awake look, apply a light, shimmery eyeshadow to the inner corner of your eye and under your brow bone. This step is optional, but it can make a big difference.
Step 5: Eyeliner and Mascara (Essential!) ✍️
A touch of eyeliner and mascara will complete the look and make your eyes pop. Choose a brown or black eyeliner, depending on your preference. Apply one or two coats of mascara to your upper lashes.
(Professor Glitterati models the final look, batting her subtly shimmering eyelashes at the audience.)
III. Troubleshooting Common Glitter Mishaps 🛠️
(Professor Glitterati projects a slide titled "Glitter Gone Wrong: Avoid These Pitfalls!")
Let’s be honest, even the most seasoned makeup artists have glitter fails. Here’s how to avoid some common glitter mishaps:
- Creasing: If your eyeshadow is creasing, try using an eyeshadow primer or setting it with a translucent powder. Also, avoid applying too much product at once.
- Fallout: Glitter fallout can be a nightmare. To minimize fallout, tap off any excess product from your brush before applying it to your eyelid. You can also use an eyeshadow base to help the glitter adhere better.
- Too Much Glitter: Remember, we’re aiming for subtle! If you accidentally apply too much glitter, use a clean brush to blend it out or remove some of the excess product.
- Uneven Application: If your eyeshadow looks uneven, use a blending brush to blend it out until it looks smooth and seamless.
- Looking Tired: Dark or muddy shades can sometimes make you look more tired. Combat this with a brightening concealer under the eyes and a pop of highlight in the inner corner.
(Professor Glitterati provides a live demonstration of how to fix each of these problems, much to the relief of the audience.)
IV. Level Up: Taking Your Subtle Glitter Game to the Next Level 🚀
(Professor Glitterati’s eyes sparkle with enthusiasm.)
So, you’ve mastered the basic application. Now, let’s explore some ways to elevate your subtle glitter game:
- Layering Shadows: Don’t be afraid to layer different shades of cream eyeshadow stick to create a more complex and dimensional look. You can also layer powder eyeshadow on top of cream eyeshadow for a more intense effect.
- Creating a Gradient: Use a lighter shade of cream eyeshadow stick on the inner corner of your eye and a darker shade on the outer corner to create a gradient effect. This will make your eyes look bigger and more defined.
- Using as a Base: A cream eyeshadow stick can be a fantastic base for powder eyeshadows, especially if you want to enhance their shimmer or color payoff.
- The "Halo" Eye: Apply a medium-toned cream eyeshadow stick all over the lid, then apply a lighter, brighter shade in the center of the lid to create a halo effect.
- Experiment with Color! Don’t limit yourself to neutral shades. Try experimenting with different colors to find what works best for you. Emerald green, sapphire blue, and amethyst purple can all be surprisingly wearable.
(Professor Glitterati displays a series of inspirational looks, ranging from subtly shimmery to playfully colorful.)
V. Product Recommendations: My Glitterati Approved List ✅
(Professor Glitterati presents a curated list of her favorite cream eyeshadow sticks, complete with pros and cons.)
Alright, here are a few of my personal favorites that I can confidently recommend:
| Product | Description | Pros | Cons |
|---|---|---|---|
| Laura Mercier Caviar Stick Eye Colour | Long-wearing, crease-resistant cream eyeshadow stick with a variety of shimmer shades. | Highly pigmented, blendable, long-lasting, wide range of colors. | Can be a bit pricey. |
| Bobbi Brown Long-Wear Cream Shadow Stick | Creamy, blendable eyeshadow stick that provides long-lasting color. | Easy to apply, long-wearing, crease-resistant, buildable coverage. | Limited shade range compared to Laura Mercier. |
| Maybelline Color Tattoo Eye Stix | Affordable cream eyeshadow stick with a variety of matte and shimmer shades. | Very affordable, easy to find, good color payoff for the price. | Not as long-wearing as higher-end options. Some shades can be patchy. |
| KIKO Milano Long Lasting Stick Eyeshadow | Smooth, creamy eyeshadow stick with vibrant colors and a long-lasting formula. | Great color selection, affordable, easy to blend, good staying power. | May not be as widely available as other brands. |
| Charlotte Tilbury Colour Chameleon Eyeshadow Pencil | Formulated to enhance your eye colour and create a naturally flattering look. | Formulated to enhance specific eye colours, easy to use, blendable, can be used as a liner or shadow. | Limited shade range, can be expensive. |
(Professor Glitterati emphasizes the importance of finding products that work best for individual needs and budgets.)
VI. Conclusion: Embrace the Subtle Sparkle! ✨
(Professor Glitterati beams at the audience.)
So, there you have it! Your comprehensive guide to creating a natural everyday look using a subtle glitter cream eyeshadow stick. Remember, the key is to embrace the sparkle without going overboard. Aim for that "effortless chic" vibe, that "I just woke up looking this fabulous" illusion.
Don’t be afraid to experiment, play around with different shades and techniques, and most importantly, have fun! Because, at the end of the day, makeup is all about expressing yourself and feeling confident.
(Professor Glitterati gives a final wink, a shower of iridescent confetti rains down from the ceiling, and the lecture hall erupts in applause.)
Now go forth and sparkle, my little glitterati! Class dismissed! 💖
For detailed product specifications and purchases, please go to :https://zenamakeup.com/products/glitter-cream-eyeshadow-stick-shimmer-for-all-eyes-colors
Leave a Reply