From Sunrise to Starlight: Mastering the Dual-End Liquid Eyeshadow for a Quick Day-to-Night Eye Transformation 🌟
Alright, beauty aficionados! Welcome to my humble lecture hall (aka, my slightly cluttered but charmingly decorated office). Today, we’re tackling a topic near and dear to my heart: the magical, the magnificent, the oh-so-convenient Dual-End Liquid Eyeshadow! 🤩
Forget lugging around a makeup bag the size of a small suitcase. Ditch the stress of blending a million different powders. We’re going minimal, maximal, and utterly fabulous, all with one glorious product.
(Disclaimer: May cause excessive compliments and envious glances. Use with caution.) 😉
Lecture Outline:
- Part 1: The Dual-End Liquid Eyeshadow Decoded (What is this sorcery?)
- Part 2: Prepping the Canvas: Priming for Perfection (No, seriously, don’t skip this!)
- Part 3: The Daytime Drama: A Simple & Chic Eye Look (Effortless elegance, guaranteed.)
- Part 4: The Nighttime Nirvana: Amping Up the Glamour (From desk to dance floor in a flash!)
- Part 5: Pro Tips & Troubleshooting (Because we’ve all been there…)
- Part 6: Product Recommendations (My personal holy grails!)
- Part 7: The Grand Finale: Q&A (Ask away, my pretties!)
Part 1: The Dual-End Liquid Eyeshadow Decoded (What is this sorcery?) 🧙♀️
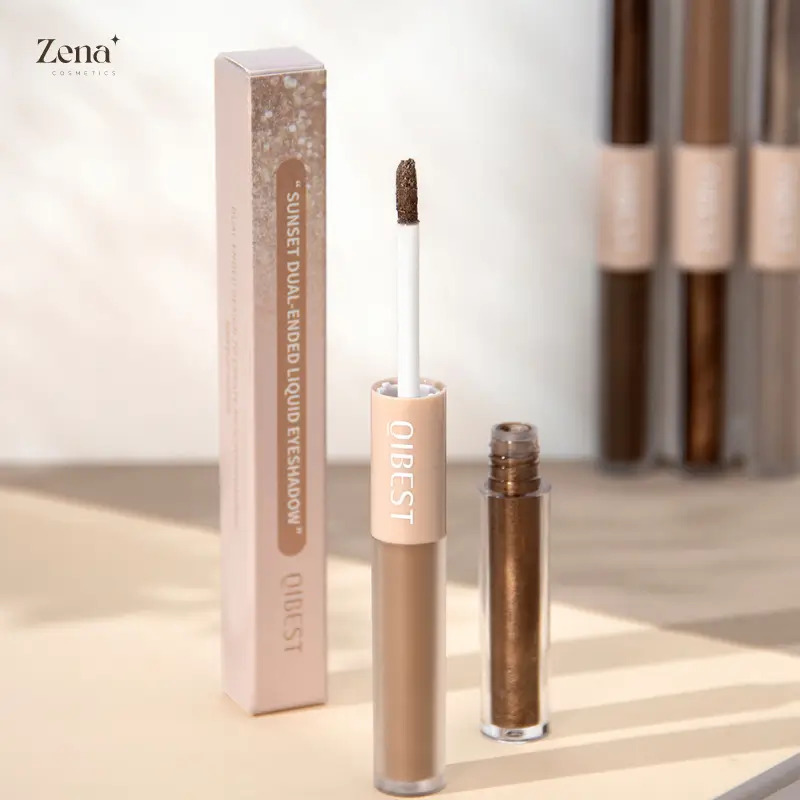
Okay, let’s get down to brass tacks. What exactly is a dual-end liquid eyeshadow? Simply put, it’s a makeup game-changer! It’s typically a product with two separate liquid eyeshadow formulas in one convenient tube.
Think of it as a makeup transformer! One end might be a subtle shimmer, perfect for daytime. The other could be a bolder, more pigmented shade with glitter or a deeper color for evening.
Here’s a breakdown of what to look for:
| Feature | Description | Possible Variations |
|---|---|---|
| Formula | Liquid, obviously! But the texture can vary from watery to creamy. Consider what feels best on your lids. | Matte, shimmer, glitter, metallic, satin. |
| Pigmentation | The level of color payoff. Some are sheer and buildable, others are intensely pigmented from the get-go. | Sheer, medium, opaque. |
| Finish | The final look on your lids. | Dewy, matte, shimmery, glittery. |
| Applicator | Usually a doe-foot applicator (like lip gloss). This helps with precise application. | Some have thinner applicators for liner, others are thicker for all-over lid color. |
| Longevity | How long it lasts without creasing, fading, or transferring. This is CRITICAL! Nobody wants raccoon eyes halfway through the day. | Claims of "all day wear" should be taken with a grain of salt (and a good primer!). |
| Shade Range | The variety of colors available. Look for a range that complements your skin tone and eye color. | Some brands offer neutral shades, others are all about bold and bright colors. |
| Price Point | From drugstore steals to high-end splurges, there’s a dual-end liquid eyeshadow for every budget. | Just remember, price doesn’t always equal quality! Research is key! |
Why choose a dual-end liquid eyeshadow?
- Convenience: Two shades, one product. Need I say more? 🧳
- Speed: Quick application. Perfect for busy mornings or last-minute events. 🏃♀️
- Versatility: Create a multitude of looks with just one product. 🎭
- Travel-Friendly: Saves space in your makeup bag. ✈️
- Beginner-Friendly: Easier to apply than powder eyeshadow for some. 👍
Part 2: Prepping the Canvas: Priming for Perfection (No, seriously, don’t skip this!) 🎨
Listen up! This is the MOST IMPORTANT STEP. I can’t stress this enough. If you skip the primer, your eyeshadow will crease faster than you can say "beauty disaster." Trust me, I’ve been there. 😩
Why is primer so crucial?
- Creates a Smooth Base: It fills in any fine lines or imperfections on your eyelids, providing a smooth canvas for the eyeshadow.
- Enhances Pigment: It helps the eyeshadow adhere better to your lids, making the colors appear more vibrant and true to shade.
- Prolongs Wear: It prevents creasing, fading, and transferring, ensuring your eyeshadow looks fresh all day (or night) long.
Types of Eyeshadow Primers:
- Cream Primers: These are typically applied with your fingertips or a brush. They’re great for dry or mature skin.
- Tinted Primers: These have a slight tint to them, which can help to even out your skin tone and conceal any discoloration.
- Glitter Primers: These are specifically designed to hold glitter in place. (If you’re going full glam, this is your best friend!) ✨
How to Apply Eyeshadow Primer:
- Cleanse and Moisturize: Start with a clean, moisturized eyelid.
- Apply a Small Amount: A little goes a long way! Use a tiny amount of primer on your fingertip or a brush.
- Blend Evenly: Gently blend the primer all over your eyelid, from your lash line to your brow bone.
- Wait a Minute: Allow the primer to set for a minute or two before applying your eyeshadow.
Pro Tip: If you don’t have eyeshadow primer, you can use a concealer as a substitute. Just make sure to set it with a translucent powder to prevent creasing.
Part 3: The Daytime Drama: A Simple & Chic Eye Look (Effortless elegance, guaranteed.) ☀️
Alright, let’s create a simple, chic daytime look that will have you looking effortlessly put-together. We’re going for subtle, sophisticated, and "I woke up like this" (even if you didn’t). 😉
Step-by-Step Guide:
- Prep Your Lids: Apply eyeshadow primer to your eyelids and let it set. (You know the drill!)
- Apply the Lighter Shade: Using the doe-foot applicator, apply the lighter shade of your dual-end liquid eyeshadow all over your eyelid, from your lash line to your crease.
- Blend (Gently!): Use your fingertip or a blending brush to gently blend the edges of the eyeshadow. We want a seamless transition, not harsh lines.
- Optional: Line Your Lower Lash Line: Use a small brush to apply a tiny amount of the lighter shade to your lower lash line. This will brighten your eyes and make you look more awake.
- Mascara: Apply a coat or two of your favorite mascara to your top and bottom lashes.
- Done! That’s it! You’re ready to conquer the day. 🎉
Tips for a Perfect Daytime Look:
- Choose Neutral Shades: Opt for shades like champagne, rose gold, bronze, or taupe. These are universally flattering and perfect for daytime.
- Keep it Simple: Avoid using too much product. A little goes a long way with liquid eyeshadow.
- Blend, Blend, Blend: Blending is key to creating a seamless, natural look.
- Don’t Forget Mascara: Mascara is essential for making your eyes look more awake and defined.
- Experiment with Different Finishes: Try a shimmer shade for a subtle glow or a matte shade for a more understated look.
Example Look:
Let’s say you have a dual-end liquid eyeshadow with a champagne shimmer on one end and a light bronze on the other.
- Apply the champagne shimmer all over your eyelid.
- Blend the edges with your fingertip.
- Apply a light coat of mascara.
- Voila! You have a beautiful, natural daytime look.
Part 4: The Nighttime Nirvana: Amping Up the Glamour (From desk to dance floor in a flash!) 💃
Now, let’s transform that daytime look into a glamorous nighttime masterpiece! We’re talking smoky eyes, glitter, and all things fabulous. Get ready to turn heads! ✨
Step-by-Step Guide:
- Prep Your Lids (Again!): If you’re going straight from day to night, you might want to touch up your primer. Oily lids will need this step.
- Add Depth with the Darker Shade: Using the doe-foot applicator, apply the darker shade of your dual-end liquid eyeshadow to your outer corner and crease.
- Blend, Blend, Blend (Seriously!): Use a blending brush to blend the darker shade into your crease, creating a smoky effect.
- Layer the Lighter Shade (Optional): If you want to add more dimension, you can layer the lighter shade on the center of your eyelid.
- Line Your Eyes: Use an eyeliner pencil or liquid liner to line your upper lash line. You can create a subtle line or a dramatic cat-eye.
- Add Glitter (If You Dare!): If your darker shade has glitter, great! If not, you can add a touch of glitter to the inner corner of your eyes for extra sparkle.
- Mascara (Lots of It!): Apply several coats of mascara to your top and bottom lashes. You can also use false lashes for extra drama.
- Done! You’re ready to hit the town! 🌃
Tips for a Glamorous Nighttime Look:
- Choose Bold Shades: Opt for shades like deep browns, plums, greens, or blues. These will make your eyes stand out.
- Don’t Be Afraid of Glitter: Glitter is your friend! It adds a touch of sparkle and glamour to your look.
- Line Your Eyes: Eyeliner is essential for defining your eyes and creating a dramatic look.
- Use False Lashes: False lashes will instantly make your eyes look bigger and more glamorous.
- Don’t Overdo It: While you want to look glamorous, you don’t want to look overdone. Keep the rest of your makeup simple and let your eyes be the focus.
Example Look:
Using the same dual-end liquid eyeshadow (champagne shimmer and light bronze):
- Apply the light bronze to your outer corner and crease.
- Blend, blend, blend!
- Line your upper lash line with black eyeliner.
- Apply several coats of mascara.
- Add a touch of glitter to the inner corner of your eyes.
- Slay the night!
Part 5: Pro Tips & Troubleshooting (Because we’ve all been there…) 🛠️
Okay, let’s address some common issues and share some insider tips:
| Problem | Solution |
|---|---|
| Creasing | 1. Primer is key! (I told you!) 2. Set with a translucent powder. 3. Avoid applying too much product. 4. Use a blotting paper throughout the day to absorb excess oil. |
| Fading | 1. Use a long-wearing formula. 2. Apply a second coat of eyeshadow for extra intensity. 3. Carry your eyeshadow with you for touch-ups throughout the day. |
| Uneven Application | 1. Use a light hand when applying the eyeshadow. 2. Blend, blend, blend! 3. Use a small brush to apply the eyeshadow to hard-to-reach areas. 4. Build the shadow up instead of applying a thick layer at once. |
| Too Much Product | 1. Use a cotton swab to remove excess product. 2. Start with a small amount and build up the intensity as needed. 3. Use your ring finger to gently dab and remove excess product. It’s the weakest finger and will apply the least pressure. |
| Shade Doesn’t Suit Me | 1. Experiment with different shades to find what complements your skin tone and eye color. 2. Mix and match different shades to create custom colors. 3. Don’t be afraid to try something new! |
Pro Tips:
- Use Your Fingers: Your fingers can be your best blending tool! The warmth of your fingers helps to melt the eyeshadow into your skin for a seamless finish.
- Layering is Key: Don’t be afraid to layer different shades and textures to create dimension and depth.
- Practice Makes Perfect: The more you practice, the better you’ll become at applying liquid eyeshadow.
- Have Fun! Makeup is all about expressing yourself and having fun. Don’t be afraid to experiment and try new things!
Part 6: Product Recommendations (My personal holy grails!) 🙏
Okay, time for the juicy part! Here are a few of my favorite dual-end liquid eyeshadows (in no particular order):
- [Brand Name] Dual-End Liquid Eyeshadow: (Insert link and brief description – highlighting formula, shades, price point, and why you like it.)
- [Brand Name] Dual-End Liquid Eyeshadow: (Insert link and brief description – highlighting formula, shades, price point, and why you like it.)
- [Brand Name] Dual-End Liquid Eyeshadow: (Insert link and brief description – highlighting formula, shades, price point, and why you like it.)
Important Note: This is just a starting point! There are tons of amazing dual-end liquid eyeshadows on the market. Do your research and find what works best for you. Read reviews, watch tutorials, and experiment with different brands and shades.
Part 7: The Grand Finale: Q&A (Ask away, my pretties!) ❓
Alright, my darlings, the stage is yours! Any questions? Don’t be shy! I’m here to help you on your journey to liquid eyeshadow mastery.
(End Lecture)
For detailed product specifications and purchases, please go to :https://zenamakeup.com/products/liquid-dual-end-matte-glitter-fusion-eyeshadow
Leave a Reply